
How Long Should Paint Dry Before Applying Polyurethane: The Complete Guide
Getting the timing right between painting and applying polyurethane can make a huge difference in your results. If you rush it, the finish might peel, bubble, or look patchy. Waiting just long enough keeps your work looking smooth and protected—trust me, it’s worth the patience.
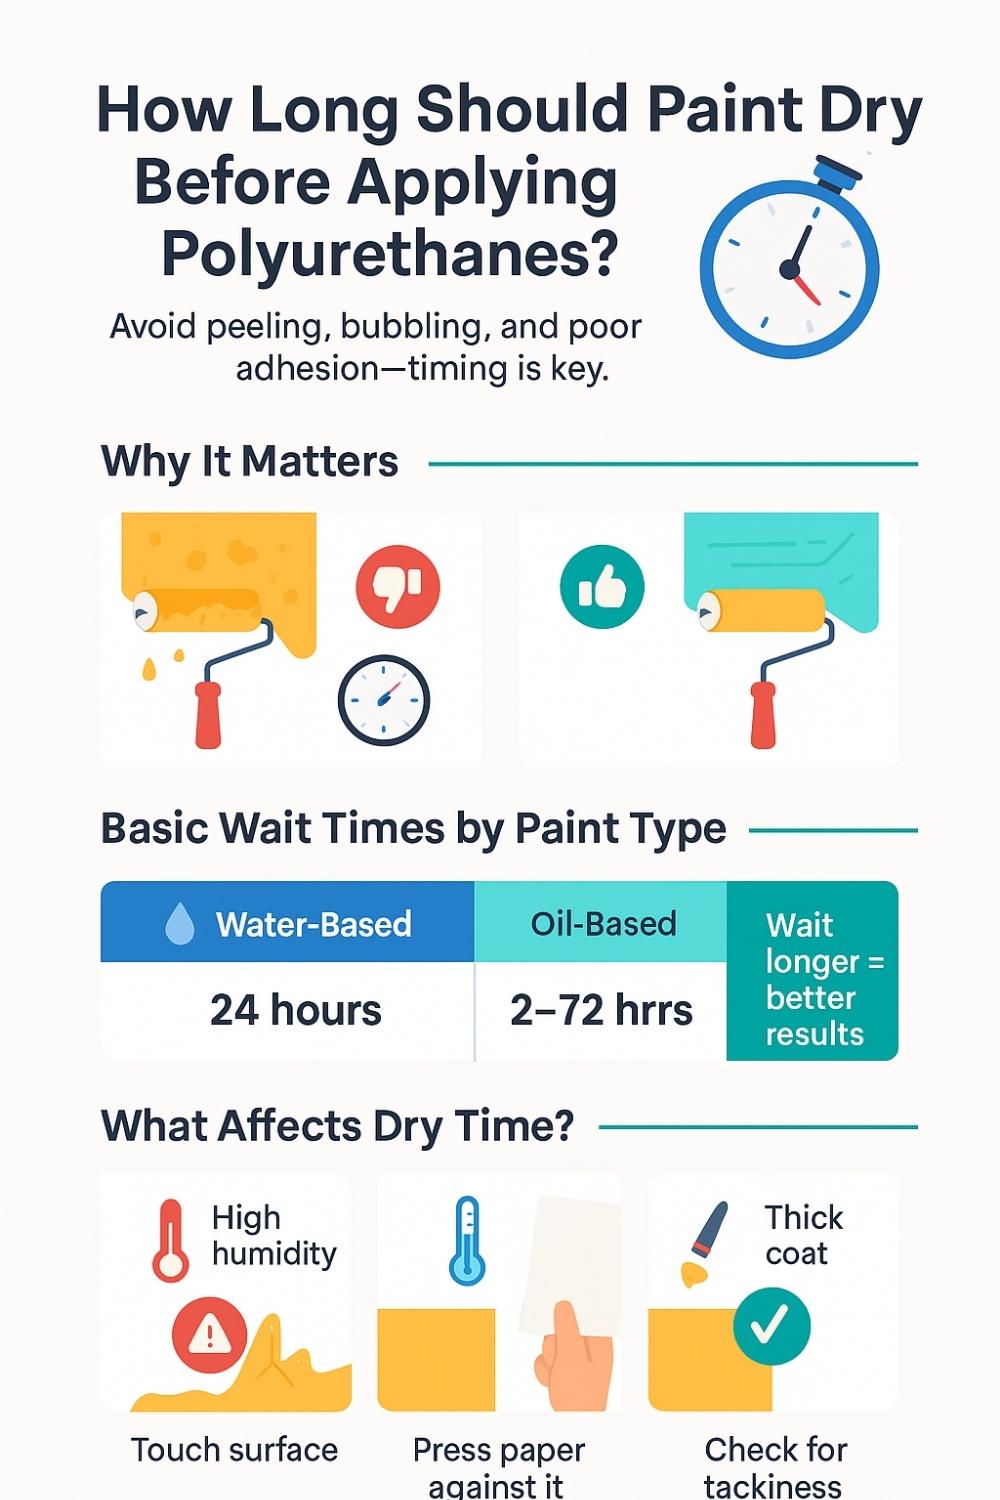
For most water-based paints, you should wait at least 24 hours before applying polyurethane. Oil-based paints usually need about 2 to 4 hours to dry, but many experts recommend waiting up to 72 hours to be safe. These times help ensure the paint is fully dry and ready for a strong, lasting polyurethane topcoat.
Get the Fail-Safe Paint Color Playbook (Free PDF)
36 proven colors • 8 ready palettes • trim & sheen guide • printable testing cards.
Different paints and conditions can change drying times, so it’s important to pay attention to what kind you’re using and the environment around your project. Let’s dig into how to tell when your paint’s really ready and how to get the best results with polyurethane.
Understanding Paint Drying Before Polyurethane
Knowing when paint’s ready for polyurethane is a big deal if you want a smooth, lasting finish. Paint goes through different drying stages, and putting polyurethane on too soon just leads to trouble. So, what does dry paint really mean, and why does it matter?
Difference Between Dry and Cured Paint
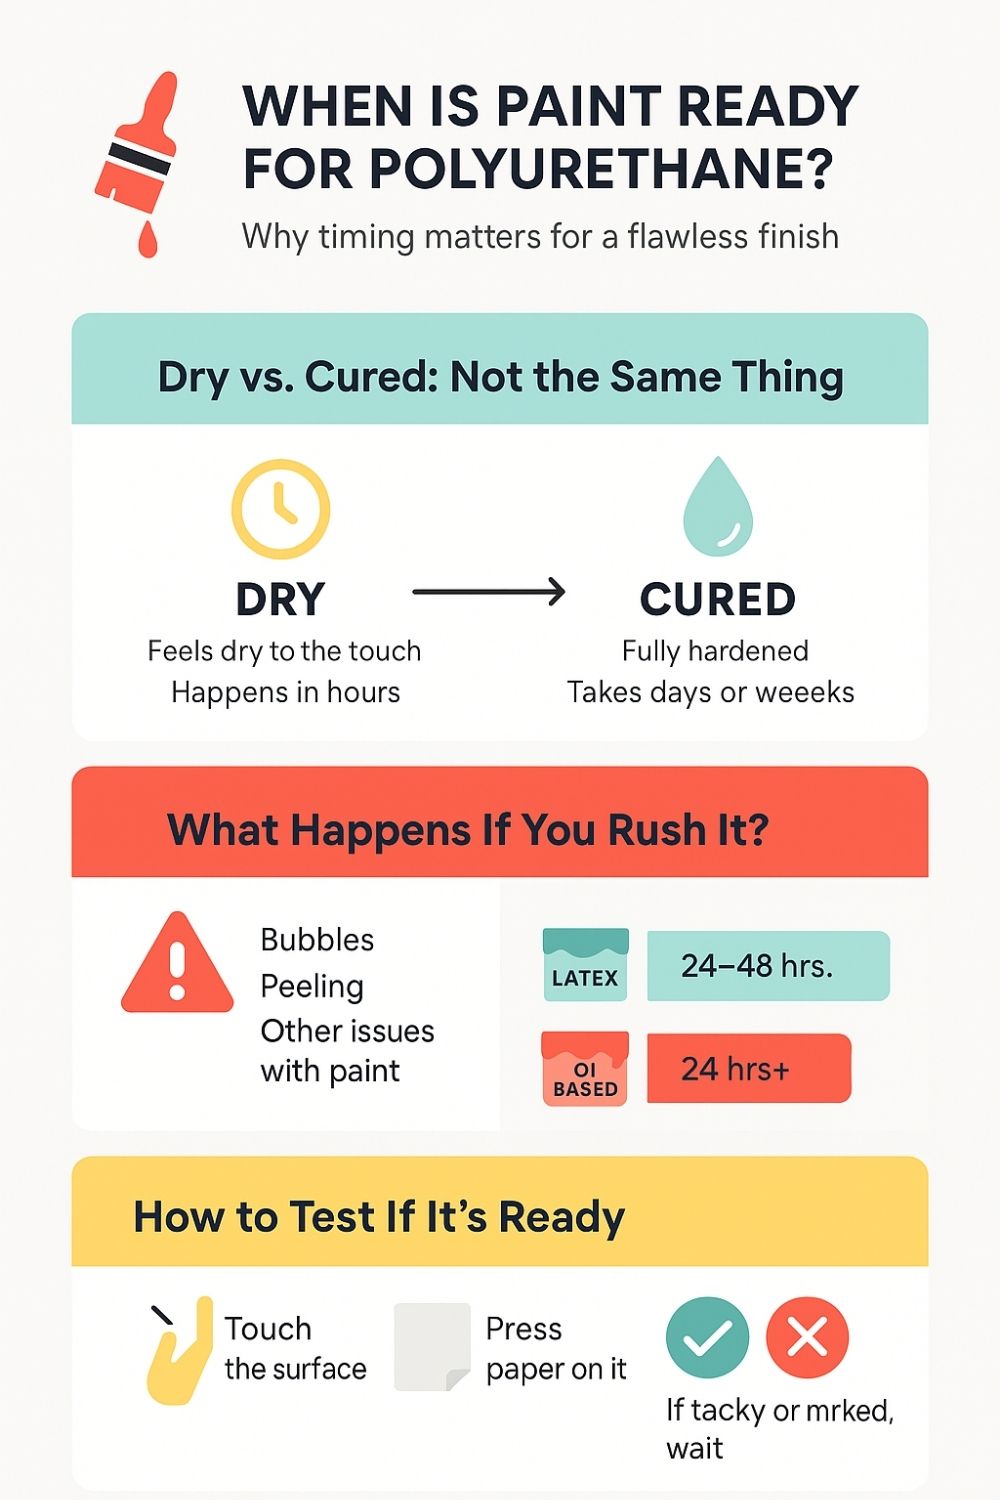
Dry paint feels dry to the touch and looks matte or not shiny anymore. That usually happens within a few hours for water-based paints, but oil-based ones take longer. But “dry” doesn’t mean it’s totally ready.
Cured paint has fully hardened through a chemical process. This can take days or even weeks. Once cured, the paint’s tough enough to handle wear and the chemicals in polyurethane.
If you put polyurethane on before the paint cures, the paint underneath can stay soft. That’s when you get peeling or bubbles, since polyurethane forms a hard layer that can trap moisture or leftover solvents from uncured paint.
How Paint Drying Affects Polyurethane Application
It’s best to wait until your paint is fully dry—and ideally cured—before you go in with polyurethane. If you rush it, the solvents in the poly can react with wet paint, causing bubbles, rough spots, or peeling.
Latex paint usually needs 24 to 48 hours. Oil-based paint? Give it at least 24 hours, sometimes a few days. Good drying helps polyurethane stick and gives you a tough, protective barrier over your paint.
Want to check if your paint’s ready? Gently touch the surface or press a clean piece of paper on it. If it feels tacky or leaves a mark, it needs more time. Don’t rush—your finish will thank you.
Recommended Drying Times for Paint Types
Paint drying times really depend on the paint and your work environment. Getting this right helps you dodge issues like bubbling or peeling—nobody wants that.
Drying Times for Latex and Water-Based Paints
Latex and water-based paints dry way faster than oil-based. Usually, you should wait at least 24 hours before putting polyurethane on top.
In a typical room—about 70°F (21°C), low humidity—latex paint might feel dry in an hour but still needs more time to really set.
If you rush, polyurethane won’t stick well and you’ll get bubbles or cracks. Water-based polyurethanes pair best with these paints since they dry quickly and stay clear, so your paint color stays true.

Drying Times for Oil-Based Paints
Oil-based paints take their sweet time. Wait between 24 and 48 hours before going over them with polyurethane.
Get the Fail-Safe Paint Color Playbook (Free PDF)
36 proven colors • 8 ready palettes • trim & sheen guide • printable testing cards.
These paints use solvents that need time to evaporate. Thicker coats, cooler rooms, or high humidity will slow things down even more.
Oil-based polyurethane and oil-based paint make a tough combo, great for heavy-use surfaces. But heads up—the smell is strong, and the polyurethane can take up to 72 hours to dry, so plan for that.
Specialty Paints and Their Drying Characteristics
Specialty paints like spray paint, enamel, or primers have their own quirks. Spray paint often dries to the touch in a few hours, but you should still wait at least 24 hours before adding polyurethane.
Enamel paints sometimes need more than 48 hours, depending on the brand. For primers, check the instructions, but most need 24 to 48 hours for best results.
If you’re working with something unusual, always read the label or manufacturer’s advice to avoid ruining your hard work.
Selecting the Right Polyurethane for Your Painted Surface
Picking the right polyurethane changes everything—the look, the feel, and how long your paint job lasts. The best choice depends on your project, the paint you used, and where it’ll live.
Water-Based Polyurethane Advantages and Usage
Water-based polyurethane dries fast, so you can finish your project sooner. It barely smells, making it much nicer for indoor work, especially if you don’t have great ventilation.
This stuff dries clear, so your paint color stays the same. It’s perfect for lighter paints or spots where you want the original look to show through.
Cleanup’s a breeze—just soap and water. It’s maybe not as tough as oil-based, but it’s plenty for painted furniture, cabinets, or walls that don’t get beat up too much.
Oil-Based Polyurethane Pros and Cons
Oil-based polyurethane dries slowly—expect to wait over 24 hours between coats. It’s got a strong smell, so make sure you’re working in a space with good airflow.
The big draw of oil-based polyurethane is how tough it is. It shrugs off scratches and wear, so it’s awesome for floors or furniture that get a lot of action.
Get the Fail-Safe Paint Color Playbook (Free PDF)
36 proven colors • 8 ready palettes • trim & sheen guide • printable testing cards.
Downsides? It can yellow over time, especially over light colors, so your surface might change a bit. Cleanup needs mineral spirits or similar, so it’s messier. Still, if you want durability and can handle the wait and the smell, oil-based is a solid pick for heavy-traffic spots.
Environmental and Surface Factors Impacting Dry Time
Lots of things affect how long your paint takes to dry before you can use polyurethane. Temperature, humidity, ventilation, and even the surface itself all play a part. Knowing this stuff helps you dodge finish problems.
Temperature and Humidity Effects
Temperature and humidity might be the biggest factors. Warm air speeds up solvent evaporation, so paint dries faster. But if it’s too hot, paint can dry too quickly and crack or not stick right.
Get the Fail-Safe Paint Color Playbook (Free PDF)
36 proven colors • 8 ready palettes • trim & sheen guide • printable testing cards.
High humidity slows everything down—moist air keeps solvents from evaporating. If you’re painting on a muggy day, expect drying to take longer, sometimes twice as long. Aim for 50°F to 85°F and humidity under 70% for best results, but honestly, real life isn’t always perfect.
Ventilation and Airflow Considerations
Good airflow helps paint dry by moving solvents away faster. Paint in a closed, stuffy room and it’ll take forever to dry.
Open a window, use a fan, or at least get some air moving. Don’t go overboard—strong wind or dust can mess up your finish. A gentle, steady breeze is what you want.
Material and Surface Porosity
The surface you’re painting changes drying time too. Porous stuff like raw wood or plaster soaks up paint and moisture, which can slow things down since the paint seeps in and traps moisture.
Non-porous materials like metal or plastic don’t absorb much, so paint dries quicker. If you’re working with a porous surface, using a primer first can help seal it and make paint dry more evenly before you add polyurethane.
Tips for Proper Polyurethane Application
Getting polyurethane right means timing, the right tools, and a clean, smooth surface. Make sure your paint’s dry, pick the best method, and sidestep common mistakes for a finish that lasts.
Get the Fail-Safe Paint Color Playbook (Free PDF)
36 proven colors • 8 ready palettes • trim & sheen guide • printable testing cards.
How to Test If Paint Is Ready for Polyurethane
Before you start, check if your paint’s really dry. Touch a hidden spot—if it’s tacky or sticky, it’s not ready.
Try the “nail test” too. Lightly press your fingernail into the paint. If you leave a mark or it feels soft, wait longer.
Consider the paint type and things like humidity. Most paints need at least 24 hours, but oil-based can take longer. Waiting the right amount of time helps prevent bubbling and peeling when you go to finish.
Best Methods for Applying Polyurethane
The right tool makes all the difference. For small spots or details, sponge applicators are great—they spread polyurethane evenly and help avoid brush marks.
If you like brushes, go for a high-quality synthetic one for water-based poly, or a natural bristle brush for oil-based. Use thin coats and long, smooth strokes that follow the grain or painted surface.
Work in a dust-free, well-ventilated area. Let each coat dry before adding the next, and lightly sand with fine-grit sandpaper between coats to keep things smooth.
Common Mistakes to Avoid
Biggest mistake? Rushing the drying. If you put polyurethane on wet paint, you’ll get bubbles, peeling, or a rough finish.
Don’t shake the can—stir it gently instead. Shaking creates air bubbles that’ll mess up your finish.
Go with thin coats. Thick layers dry poorly and are more likely to drip or run. Too much at once just leads to a mess.
And keep your tools clean. Dirty brushes or applicators ruin your finish, so clean them after every use for the best results.
Maintaining and Protecting Painted Surfaces
Keeping your painted surfaces looking good after polyurethane isn’t rocket science, but it does take a bit of care. Handle them gently and know when to recoat or touch up. A little attention goes a long way toward a smooth, long-lasting finish.
Care Instructions After Application
Once the polyurethane dries, don’t rush to put heavy or sharp stuff on top—give it at least 48 hours. The finish needs that time to really harden up, or you’ll risk scratches and dents you can’t just wipe away.
For cleaning, grab a soft cloth and some mild soap. Skip the harsh chemicals and forget about abrasive scrubbers—they’ll just chew through the polyurethane. Usually, a damp cloth does the trick for dust and dirt.
Get the Fail-Safe Paint Color Playbook (Free PDF)
36 proven colors • 8 ready palettes • trim & sheen guide • printable testing cards.
Try to keep the area out of direct sunlight and away from extreme moisture. Sun and water can both mess with the finish, causing discoloration or even bubbling over time. Oil-based polyurethane seems especially sensitive to that.
Re-Coating and Touch-Up Guidelines
Notice some dull spots or maybe a scratch here and there? Give it at least 24 hours after your first coat, then grab some fine 220-grit sandpaper and gently smooth things out. That bit of sanding really helps the next layer stick.
Before you start recoating, wipe away all the dust and any stray bits. Go for thin, even coats of polyurethane—thick patches or drips just make things messy. Two or three coats usually do the trick for solid protection.
For those tiny touch-ups, a small brush works best. Stick to the same drying and sanding routine as before. It might feel a bit tedious, but taking it slow here pays off with a finish that actually blends in, not sticks out.