
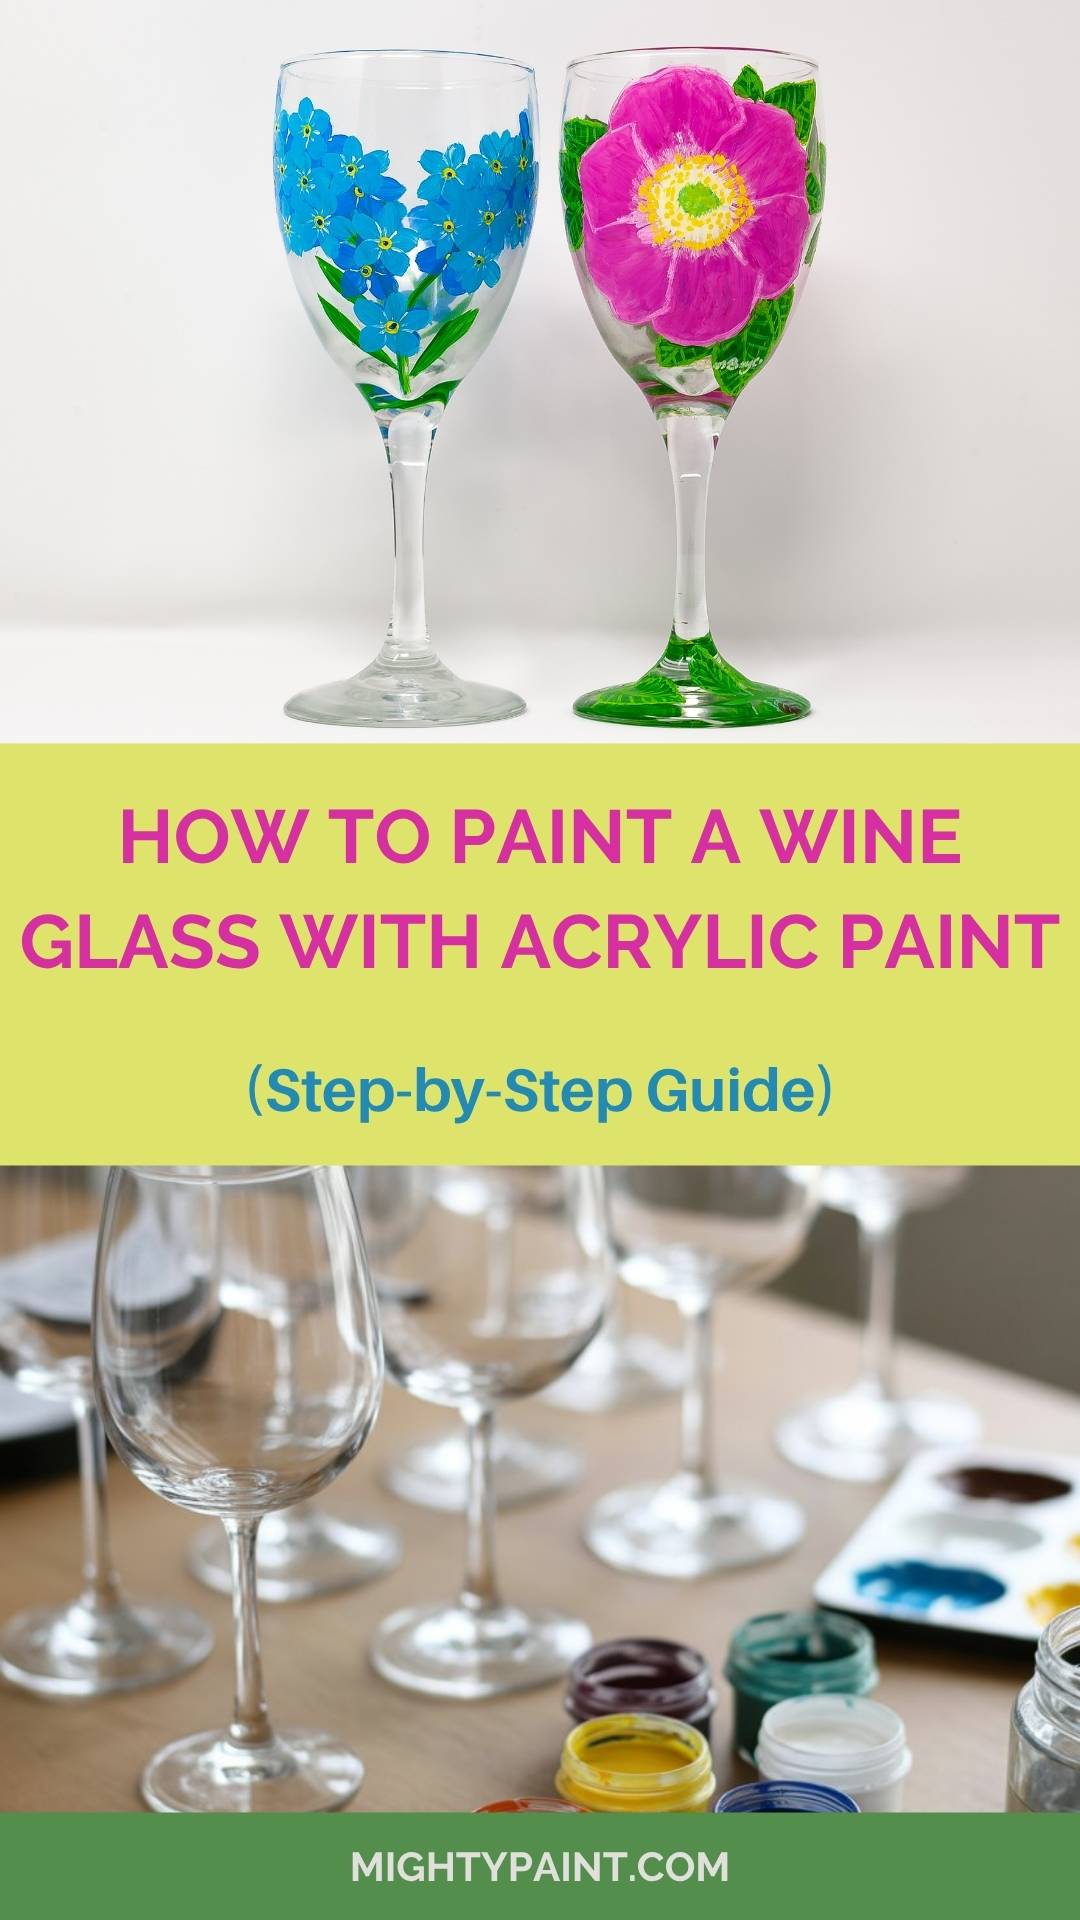
How To Paint A Wine Glass With Acrylic Paint: Step-by-Step Guide
Painting wine glasses with acrylic paint is a fun way to turn ordinary glassware into personalized pieces—perfect for gifts or just to jazz up your own kitchen. You get to play with color, patterns, and your own style using supplies you can grab at most craft stores.
The key to successful wine glass painting is using the right acrylic paint made for glass, and prepping your workspace before you dive in. Regular acrylic paint works okay, but acrylic enamel paint sticks better and holds up longer.
Get the Fail-Safe Paint Color Playbook (Free PDF)
36 proven colors • 8 ready palettes • trim & sheen guide • printable testing cards.
This guide covers everything you need: picking supplies, prepping your glass, painting techniques, and sealing your design so it lasts.
Gathering Materials for Painting Wine Glasses
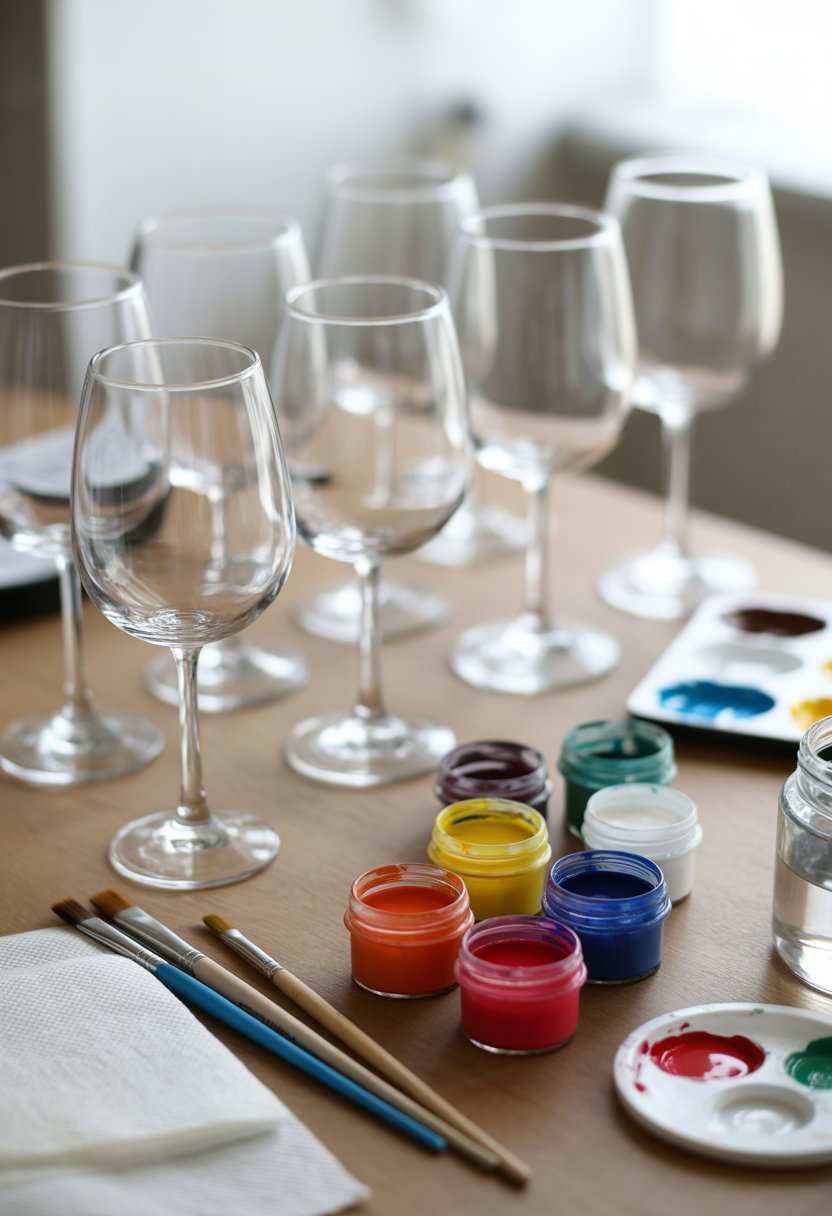
Having the right supplies makes painting wine glasses way easier. You’ll want smooth wine glasses, acrylic paints for glass, and a few good brushes.
Selecting the Right Wine Glasses
Pick wine glasses with a smooth, clean surface. Skip anything with raised patterns—they’re just a pain to paint on.
Plain stemmed glasses are great for beginners. Check out dollar stores or thrift shops if you want to practice before painting your favorites.
Best glass types for painting:
- Clear glass wine glasses
- Smooth surface stemware
- Goblets with wide bowls
- Champagne flutes for narrow designs
Wash your glasses with warm soapy water first. Dry them well and try to only touch them by the stem so you don’t leave fingerprints where you’ll paint.
Think about the size of your glass before you sketch out your design. Bigger bowls give you more room for details.
Choosing Suitable Acrylic Paints
Regular acrylic paint works, but acrylic enamel paint is the real MVP for glass. It just lasts longer and doesn’t peel off as easily.
Recommended paint types:
- Acrylic enamel paint (best choice)
- Glass-specific acrylic paint
- Multi-surface acrylic paint
- Ceramic and glass paint
Grab a few colors you really like. White and black are handy for mixing lighter or darker shades.
Honestly, a couple of good paints are better than a pile of cheap ones that flake off. If you want to wash your glasses later, look for paints that say “dishwasher safe.”
Essential Paintbrushes and Tools
Different brush sizes let you play around with effects. Small detail brushes are awesome for fine lines and dots.
Must-have brushes:
- Fine detail brush (size 0-2)
- Medium flat brush (size 6-8)
- Small round brush (size 4-6)
- Liner brush for thin lines
You’ll want a palette or even a paper plate for mixing colors. Plastic plates work and they’re quick to clean.
Keep water and paper towels close for cleaning brushes between colors. Otherwise, your colors get muddy fast.
Additional helpful tools:
- Painter’s tape for straight lines
- Cotton swabs for quick fixes
- Toothpicks for tiny details
- Clear sealant spray for protection
Synthetic brushes are a better bet than natural bristles—they last longer with acrylic paint and are easier to clean.
Preparing the Wine Glass Surface
If you want your paint to stick and last, prepping the glass is a must. Clean glass, maybe a little sanding, and some careful masking can make all the difference.
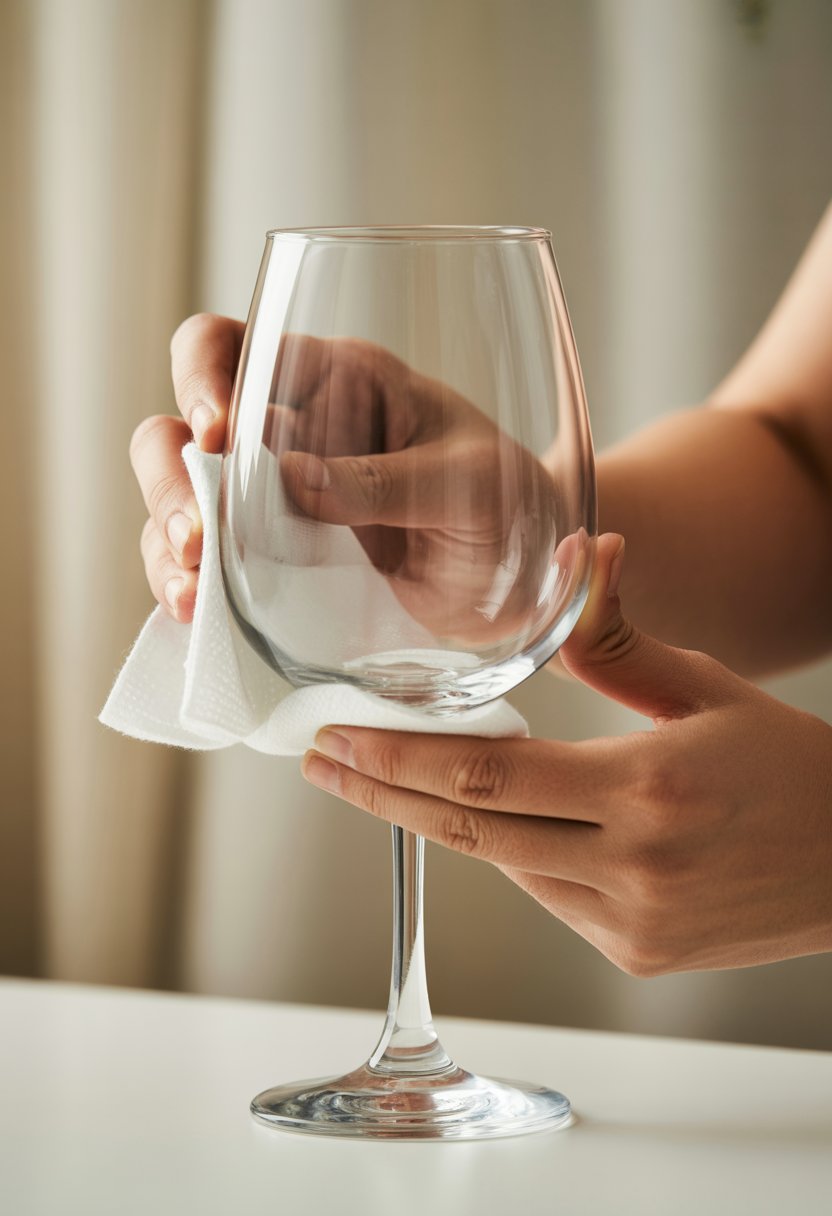
Cleaning and Drying the Glass
Wash your wine glasses with warm soapy water. This gets rid of fingerprints and oils that mess with paint adhesion.
Rinse them well—leftover soap can mess up your paint job.
Wipe them down with rubbing alcohol on a clean cloth. This strips off any last bits of oil and helps everything dry fast.
Let the glasses air dry for at least 10 minutes. Check for water spots or lint before you start painting.
Only handle the glasses by the stem or base from here on out. Your skin leaves oils that paint hates.
Give them a final look for smudges or spots before you move on. Clean glass is crucial for good results.
Sanding or Priming the Surface
Light sanding helps the paint grip. Use fine-grit sandpaper (like 220-grit) and gently rub where you plan to paint.
Use small circles and a light touch. You want to rough it up just a bit, not scratch it deep.
Wipe off all the dust with a clean, damp cloth. Let the glass dry before you paint.
Glass primer is another option. Brush on a thin coat made for glass, then let it dry as the package says—usually a few hours.
Primer helps paint stick and makes colors pop more on clear glass.
Masking Areas Not to Be Painted
Use painter’s tape to block off areas you want to keep paint-free. Usually, you’ll want to leave the rim unpainted for safety.
Press tape edges down tight so paint doesn’t sneak underneath. Smooth out bubbles or loose spots.
Masking tape is fine for straight lines. For curves, stencils made for glass painting are handy.
Stuff the inside of the glass with newspaper or plastic wrap to shield it from splatters.
Peel off the tape while the paint is still a bit wet for the sharpest lines. If you wait too long, the paint might peel up with the tape.
Sketch your design ideas before taping. If you need, mark light pencil lines on the glass to guide your masking.
Picking and Mixing Paints for Glass
Your paint choice really matters for decorating wine glasses. Acrylic enamel paint bonds well and gives a tough finish.
Types of Acrylic Paint Ideal for Glass
Acrylic enamel paint is the top pick for glass. It cleans up like regular acrylic but sticks and lasts like enamel.
Regular acrylic paint just doesn’t hold up on glass by itself—it chips and peels. Acrylic enamels are made for this.
If you want, you can mix regular acrylic with a glass medium to help it stick better.
Glass paint markers are good for detail work and thin lines. They dry fast and you don’t need brushes for them.
Best paint options for glass:
- Acrylic enamel paint – Super durable
- Regular acrylic + glass medium – Budget-friendly
- Glass paint markers – Great for details
Color Choices and Mixing Tips
Start with a handful of basic colors and mix your own shades. It saves money and you get more variety.
Primary colors (red, blue, yellow) plus black and white give you endless mixing options. Go slow when adding color—it’s easy to make something too dark or too light.
Mix your colors on a palette or plate before painting the glass. Test on a scrap glass if you can.
Transparent colors let light shine through; opaque colors block it. Mixing them can give you cool effects.
Mix up enough paint for your whole project. Matching a color later is just… not fun.
Creative Painting Techniques for Wine Glasses
Painting wine glasses is all about mastering a few techniques: brushwork, layering, and adding details that really make your design pop. These skills help you create painted glasses that look amazing and last.
Basic Brushstrokes and Application Methods
Use clean, smooth brushstrokes on glass. Hold your brush at about a 45-degree angle—it’s just easier to control that way.
Flat brushes cover big areas quickly. Round brushes are your friends for details and curves. Go easy with the pressure—no need to press hard.
Paint in thin coats. Thick paint tends to drip or look lumpy. Let each layer dry before adding another.
Some basic strokes:
- Straight lines for geometric looks
- Dots by dabbing the brush tip
- Curved strokes for flowing patterns
- Cross-hatching for texture
Try out your strokes on paper before you touch the glass. It helps you get a feel for it.
Layering and Blending on Glass
Start with lighter colors as your base and build up with thin layers. Add darker shades on top for depth.
Blend colors while they’re still wet—acrylic dries fast on glass, so don’t wait around. Use a clean, damp brush to soften where colors meet.
Layering tips:
- Wait 15-20 minutes between coats
- Use a hair dryer on cool if you’re impatient
- Go lighter with pressure on top layers
Gradients look great—start light and slowly add darker paint as you move across the glass.
Wet-on-wet blending gives you soft transitions, while wet-on-dry blending lets you control exactly where colors mix.
Painting Intricate Designs and Details
Grab a fine detail brush or even a toothpick for those tiny design elements. Size 0 or 00 brushes are great for painting thin lines and little dots—honestly, anything smaller and you might as well be painting with a strand of hair.
Tools for detailed work:
- Liner brushes for steady, continuous lines
- Detail brushes for those fiddly little shapes
- Toothpicks for making dots or adding texture
- Cotton swabs for blending in small spots
Start with the bigger design elements and save the fine details for last, once everything else is dry. That way, you won’t risk smudging your hard work.
If you want super straight lines, painter’s tape can help as a guide. Press it down well—paint loves to sneak underneath if you don’t. Peel the tape away when the paint’s still a bit tacky, not totally dry.
Detail techniques:
- Stippling with the brush tip for texture
- Dry brushing for a weathered, artsy look
- Outlining to make your design pop
- Adding highlights with white paint for some extra dimension
Let sections dry before moving on. Taking breaks helps you avoid accidentally smearing wet paint with your hand or brush—trust me, it happens to everyone.
Drying, Sealing, and Curing Painted Wine Glasses
After you finish painting your wine glasses with acrylic paint, you’ll want to let the paint set. You can go with air drying or try oven curing. Adding a sealant will help your painted glasses last way longer.
Air Drying vs Oven Curing
Air drying is the easiest option. Just leave your glasses somewhere safe for 24 hours—no dust, no pets. The paint will feel dry, but it won’t be totally set yet.
Air Drying Benefits:
- No fancy equipment required
- Works with any paint
- Beginner-friendly
If you want a tougher finish, oven curing is the way to go. Put your painted glasses in a cold oven, set it to 350°F, and bake for 30 minutes. Turn off the oven and let the glasses cool down inside—don’t rush it.
Oven Curing Steps:
- Wait at least 24 hours after painting
- Place glasses in a cold oven
- Heat to 350°F
- Bake for 30 minutes
- Let them cool all the way in the oven
Oven curing gives your glass painting a more durable, dishwasher-safe finish. I mean, who doesn’t want that?
Applying Sealants for Durability
Sealants keep your acrylic paint from chipping or fading. Pick a glass-specific sealant or a clear varnish made for painted wine glasses.
Wipe your finished glasses with a damp cloth before sealing. Use a soft brush to apply the sealant in thin, even coats. Let each coat dry all the way before adding another—patience pays off here.
Sealant Application Tips:
- Apply 2-3 thin coats instead of one thick one
- Wait 2-4 hours between coats
- Skip the drinking rim—nobody wants to taste sealant
- Work somewhere dust won’t ruin your finish
If you actually want to use your painted wine glasses, go for food-safe sealants. They won’t mess with the taste of your drinks and give solid protection for your project.
Care and Maintenance of Painted Wine Glasses
If you want your painted wine glasses to last, a little care goes a long way. The right washing and storage habits will keep the paint looking fresh.
Safe Washing and Storage Tips
Always hand wash painted wine glasses. Dishwashers blast them with heat and harsh soap, which can ruin the paint—trust me, it’s not worth the risk.
Stick to lukewarm water and mild dish soap. Don’t use abrasive sponges or scrub brushes on the painted areas. A soft cloth or sponge is all you need.
Be gentle on the painted parts. Scrub the unpainted sections if you have to, but just pat the painted areas dry—rubbing can wear them down.
Give your glasses some space when storing them. Stacking can scratch the paint, so if you’re short on shelf space, put a paper towel or shelf liner between each glass.
Try to keep painted glasses out of direct sunlight. Too much UV can fade some paint colors over time, and nobody wants dull designs.
Handling Wear and Touch-Ups
Chips or scratches happen—it’s just part of using glassware. Most little dings can be fixed up with the same acrylic paint you started with.
Get the Fail-Safe Paint Color Playbook (Free PDF)
36 proven colors • 8 ready palettes • trim & sheen guide • printable testing cards.
Clean the damaged area first. Flick away any loose paint chips with your fingernail or a soft brush. Give the spot a wash and let it dry fully before you grab the paint.
Paint on thin layers when you touch up. Let each one dry before adding the next. That way, the repair blends in better and doesn’t stand out.
Try not to handle painted spots too much. Grab glasses by the stem or an unpainted edge. Finger oils? They can make the paint peel sooner than you’d think.
Keep your touch-up paint somewhere cool and dry. Jot down the color names on the containers—trust me, you’ll thank yourself if you ever need to match them later.