
How to Paint Teak Wood: A Step-by-Step Guide for Durable Results
Teak wood is globally celebrated for its unmatched natural beauty, exceptional durability, and rich history, making it a favorite material for everything from luxurious outdoor furniture to structural decking. Its natural oils provide inherent resistance to moisture and decay, granting it a patina that matures into a magnificent silver-gray over time.
However, even the most robust teak surfaces, when exposed to the elements, require periodic rejuvenation. While many owners are tempted to simply apply a layer of paint, achieving a professional, long-lasting, and aesthetically pleasing paint job on teak is a multi-stage process that demands meticulous preparation and the correct material choices. This guide will walk you through every expert-level step required to transform your weathered teak into a durable, beautiful masterpiece.
Get the Fail-Safe Paint Color Playbook (Free PDF)
36 proven colors • 8 ready palettes • trim & sheen guide • printable testing cards.
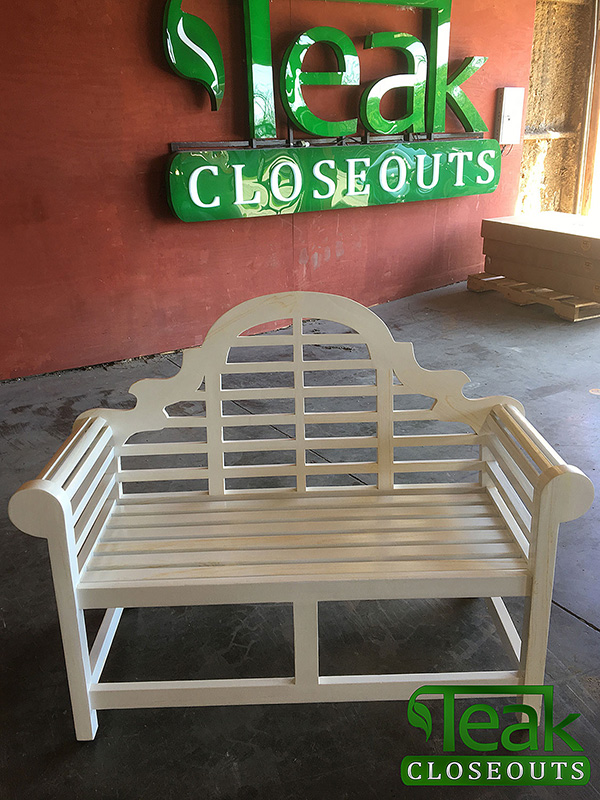
Quick answer: To Paint Teak Wood, start with the safest first step for the material involved, test a small area when needed, and follow the process in thin, controlled stages. Use proper ventilation and protective gear when chemicals, sanding, spraying, or solvents are involved.
Planning Your Teak Project: Paint vs. Stain vs. Oil
Before purchasing a single can of paint or sandpaper, the most critical step is defining your desired outcome and assessing the scope of the project. Teak is a porous, dense wood, and the choice between painting, staining, or oiling dramatically affects the final look, maintenance commitment, and required labor. You must decide if you want to mask the wood’s natural character or enhance it.
Scope and Environment Assessment: Take inventory of the area. Is this a high-traffic, exposed deck (high moisture, intense UV)? Or is it a sheltered, low-traffic indoor patio set? These factors dictate the required durability of the paint finish and the necessary UV protection. For very large, complex structures like entire decks or fences, consider if the sheer scale and required drying time make calling a professional contractor a more economical and safer choice.
Making the Finish Decision:
- Painting: Provides the highest level of color coverage and protection from elements, ideal if you want a solid, uniform, non-natural color (e.g., deep blue, forest green). Requires the most intensive preparation.
- Staining: Penetrates the wood to enhance its natural tones while providing some protection. It maintains the visible grain and is excellent if you want the wood to look “natural” but require color depth.
- Oiling/Sealing: The least aggressive method. It nourishes the wood and provides moisture resistance without changing the color significantly. Best for pieces that need a natural, matte, low-sheen look and minimal maintenance color change.
A comparative table can help solidify this decision:
- Paint: Pros: Maximum color coverage, highest durability, uniform appearance. Cons: Hides natural wood grain, intensive prep work, can feel heavy.
- Stain: Pros: Highlights natural grain, medium protection, customizable color depth. Cons: Requires multiple coats, less weather-resistant than paint, color varies with wood porosity.
- Oil/Sealant: Pros: Natural look, easy application, simple maintenance. Cons: Minimal color change, requires frequent reapplication (every 1-3 years) for maximum protection.
Step-by-Step Guide to Painting Teak Wood
Once you have chosen paint as your finish, follow these three phases meticulously. Skipping or rushing any step significantly compromises the final result.
Phase 1: The Deep Cleaning and Preparation
The quality of your paint job is 90% preparation. Teak is notorious for holding dirt, fungal spores, and old oil residues that act as barriers to new paint adhesion. Do not simply rinse the wood—you must chemically and physically clean it.
- Initial Cleaning (Grime Removal): Use a dedicated, non-acidic wood cleaner or a mixture of mild detergent and water. Use a soft-bristle brush (like a nylon scrub brush) and a bucket of water to scrub every surface. Pay special attention to seams, joints, and corners where grime collects.
- Mold and Mildew Treatment: If mildew is present, do not paint over it. First, treat the affected areas with a specialized wood bleach or mild bleach solution (following all safety guidelines). Scrub the area thoroughly and rinse until no chemical odor remains.
- Drying Time: This is non-negotiable. The teak must be allowed to dry for a minimum of 3 to 5 days, depending on humidity and temperature. Any residual moisture will cause the paint to blister, peel, or fail prematurely.
- Sanding: Once bone dry, sanding removes old finishes and creates a clean, porous surface for the primer. Start with 80-grit sandpaper to strip off any heavily built-up, flaky, or loose material. Progressing to 120-grit will smooth the surface, and finish with 220-grit to prepare for the primer. Always sand *with* the direction of the grain—going against the grain creates visible, permanent scratches that will show through the paint.
- Filling Imperfections: For deep cracks or gaps, use a high-quality, exterior-grade wood filler. Apply it, allowing it to cure fully, and then lightly sand it flush with the surrounding wood.
Phase 2: Priming and Adhesion
Primer is the single most important step after cleaning. Because teak contains natural tannins (oils that leach out), these tannins react with many types of paint, causing bleeding, yellowing, and poor adhesion. A proper primer blocks this reaction and creates a uniform surface for the paint to bond to.
Primer Selection: Choose a dedicated exterior, tannin-blocking, stain-blocking primer that is compatible with your chosen final paint (e.g., if you are using an acrylic latex paint, use an acrylic primer). Do not use a general-purpose interior primer.
Application: Apply the primer according to the manufacturer’s instructions—usually one even coat. Allow it to dry fully. After the primer cures, perform a final light sanding with 220-grit sandpaper to smooth out any rough spots or uneven primer patches. This pre-treatment ensures the paint has the best possible grip.
Phase 3: Applying the Topcoat
The final paint application must be done in thin, even layers. Think of it less as painting and more as ‘sealing’ the wood with color.
- First Coat Application: Mix the paint according to the manufacturer’s recommendations—sometimes thinning slightly can help achieve better penetration. Apply the first coat using your chosen tool (brush, roller, or sprayer). Maintain a constant, even pressure and always follow the grain. Do not attempt to cover large areas in one go, as this leads to pooling and uneven thickness.
- Drying Time: Allow the first coat to dry completely. The manufacturer’s stated drying time is often the *touch dry* time, not the *recoat* time. Always err on the side of caution, allowing at least 12 to 24 hours, or more, depending on humidity.
- Subsequent Coats: Apply the second coat using the same technique: thin, even, directional strokes. Repeat this process until the desired level of coverage and depth is achieved (typically 2-3 coats).
- Final Curing: Even after the final coat is applied, the paint must cure. This means the chemical process of hardening. This can take weeks, especially in humid climates. Keep the painted pieces protected from heavy moisture and extreme temperature swings during this curing period.
Materials and Tools Checklist
To ensure a professional result, gather the right tools and materials before starting. Do not skimp on quality, especially when it comes to primers and cleaners.
- Cleaning Supplies: Soft-bristle nylon brush, mild detergent/teak cleaner, sponges, buckets, clean water.
- Sanding Materials: A variety of sandpaper grits (80, 120, 220 grit), sanding sponges, dust vacuum or damp cloths.
- Fillers: Exterior-grade wood filler/putty, putty knife.
- Primer: High-quality, exterior, tannin-blocking, stain-blocking primer compatible with your paint type.
- Paint: Premium exterior paint formulated for wood. Consider the sheen (Satin or Semi-Gloss are often best for durability).
- Application Tools:
- Brushes: High-quality synthetic or natural blend brushes (angled sash brushes are best for corners).
- Rollers: Medium-nap roller cover (for large, flat areas).
- Equipment: If using a sprayer, ensure you have proper filtration, air intake, and protective sheeting.
Design and Color Selection Tips
Choosing the right color and sheen is as important as the prep work. The finish should harmonize with the wood’s natural undertones and the environment it lives in.
Understanding Sheen (Finish)
Sheen refers to how much light the paint reflects.
- Matte/Flat: Absorbs light, providing a velvety, non-reflective, rustic look. It is generally the most forgiving finish but is the hardest to clean, as dirt can settle into the flat surface.
- Satin: Offers a subtle, soft glow. This is often the best balance for outdoor teak, providing good durability and easier cleaning than matte finishes without the high glare of glossy paint.
- Semi-Gloss/Gloss: Highly reflective and very durable. It is the easiest finish to clean and resist moisture, making it ideal for high-contact areas like railings or tables, but it can also highlight imperfections and dirt streaks more readily.
Color and Undertones
Teak wood naturally has warm, golden-brown undertones. When selecting a paint color, always consider how the surrounding natural elements—the blue sky, the green foliage, or the warm brick patio—will interact with the paint. Use paint samples and apply them to a piece of scrap teak wood (or the actual piece) and observe them at different times of day (morning, noon, dusk) before committing to the full project. A color that looks perfect indoors might look muted or too bright in direct sunlight.
Common Mistakes to Avoid
Teak is a challenging material. Avoiding these common pitfalls will save you time, materials, and frustration.
- Skipping the Primer: This is the number one mistake. Without a tannin-blocking primer, the natural oils will bleed through the paint, causing discoloration, streaks, and reduced adhesion, ruining the finish.
- Insufficient Drying Time: Applying the second coat while the first is still tacky or damp will cause the paint to mix unevenly, leading to a streaky, gummy, or peeling finish.
- Poor Sanding Technique: Sanding against the grain or using insufficient grit will leave visible scratches that the paint will simply follow, creating permanent flaws.
- Ignoring the Environment: Attempting to paint teak in high humidity or excessive rain is a recipe for failure. The paint will not cure properly, leading to blistering or peeling once the weather shifts.
Safety and Practical Notes
Working with solvents, primers, and paints requires respect for safety protocols. Never underestimate the chemical nature of these materials.
- Personal Protective Equipment (PPE): Always wear appropriate gear, including chemical-resistant gloves, safety glasses, and, crucially, a respirator mask designed for paint fumes and solvents.
- Ventilation: When mixing, applying, or sanding, ensure the area has excellent ventilation. Open windows and use fans to dissipate fumes. Never work in an enclosed, unventilated space.
- Waste Disposal: Follow local municipal guidelines for disposing of paint waste, used solvents, and sanding dust. Many paint stores and hardware stores offer take-back programs for latex paint, but oil-based paint waste must be handled as chemical waste.
- Structural Concerns: If the wood shows signs of deep rot, structural decay, or insect infestation, do not attempt to paint it. These issues require structural repair by a licensed carpenter or contractor.
Frequently Asked Questions
Why is using a tannin-blocking primer so critical when painting teak?
Teak wood naturally contains high concentrations of tannins (natural oils). These tannins are acidic and will react chemically with most paints and stains, leading to a process called “bleeding.” If the primer does not block these tannins, the natural oils will bleed through the topcoat, causing uneven discoloration, streaks, and poor adhesion, which can ruin the entire finish regardless of how good the paint is.
Get the Fail-Safe Paint Color Playbook (Free PDF)
36 proven colors • 8 ready palettes • trim & sheen guide • printable testing cards.
Should I paint my teak, or is oiling/sealing enough?
This depends on your desired look and maintenance commitment. Painting provides the maximum protection and allows you to achieve a solid, uniform color, but it requires the most intensive preparation. Oiling or sealing is the simplest method, maintaining the wood’s natural look and requiring less labor. However, oil/sealants necessitate very frequent reapplication (often every 1-3 years) to maintain protection, while paint offers a more durable, long-term barrier.
How long must the teak dry after cleaning and sanding before priming?
The teak must be bone dry. Depending on local humidity and temperature, this drying process can take anywhere from 3 to 5 days. If any residual moisture remains, the paint, primer, or stain will not adhere properly and will likely blister, peel, or fail prematurely. Use a moisture meter if possible, or wait until the wood feels completely dry to the touch and has no visible dampness or odor.
Is painting an entire deck or large outdoor structure a DIY project?
While manageable for small projects (like a single patio set or furniture pieces), painting very large, complex structures like entire decks or fences is highly labor-intensive and requires specialized equipment and time. If the structure is very large, consider hiring a professional contractor. They have the appropriate equipment for safe, consistent application, and their expertise can save you significant time and material waste.
Conclusion
Painting teak wood is a rewarding project that revitalizes a beautiful, robust material. Success hinges not on the paint itself, but on the dedication to preparation. By treating the process as a multi-stage preservation effort—from the initial deep clean and sanding to the application of a specialized, tannin-blocking primer—you transform the risk of failure into the certainty of a beautiful, durable, and long-lasting finish.
Remember that patience is your most valuable tool. Allow the wood, the primer, and the paint adequate time to dry and cure. By following these expert steps, you can ensure your painted teak surfaces not only look stunning today but remain protected and beautiful for many seasons to come.