
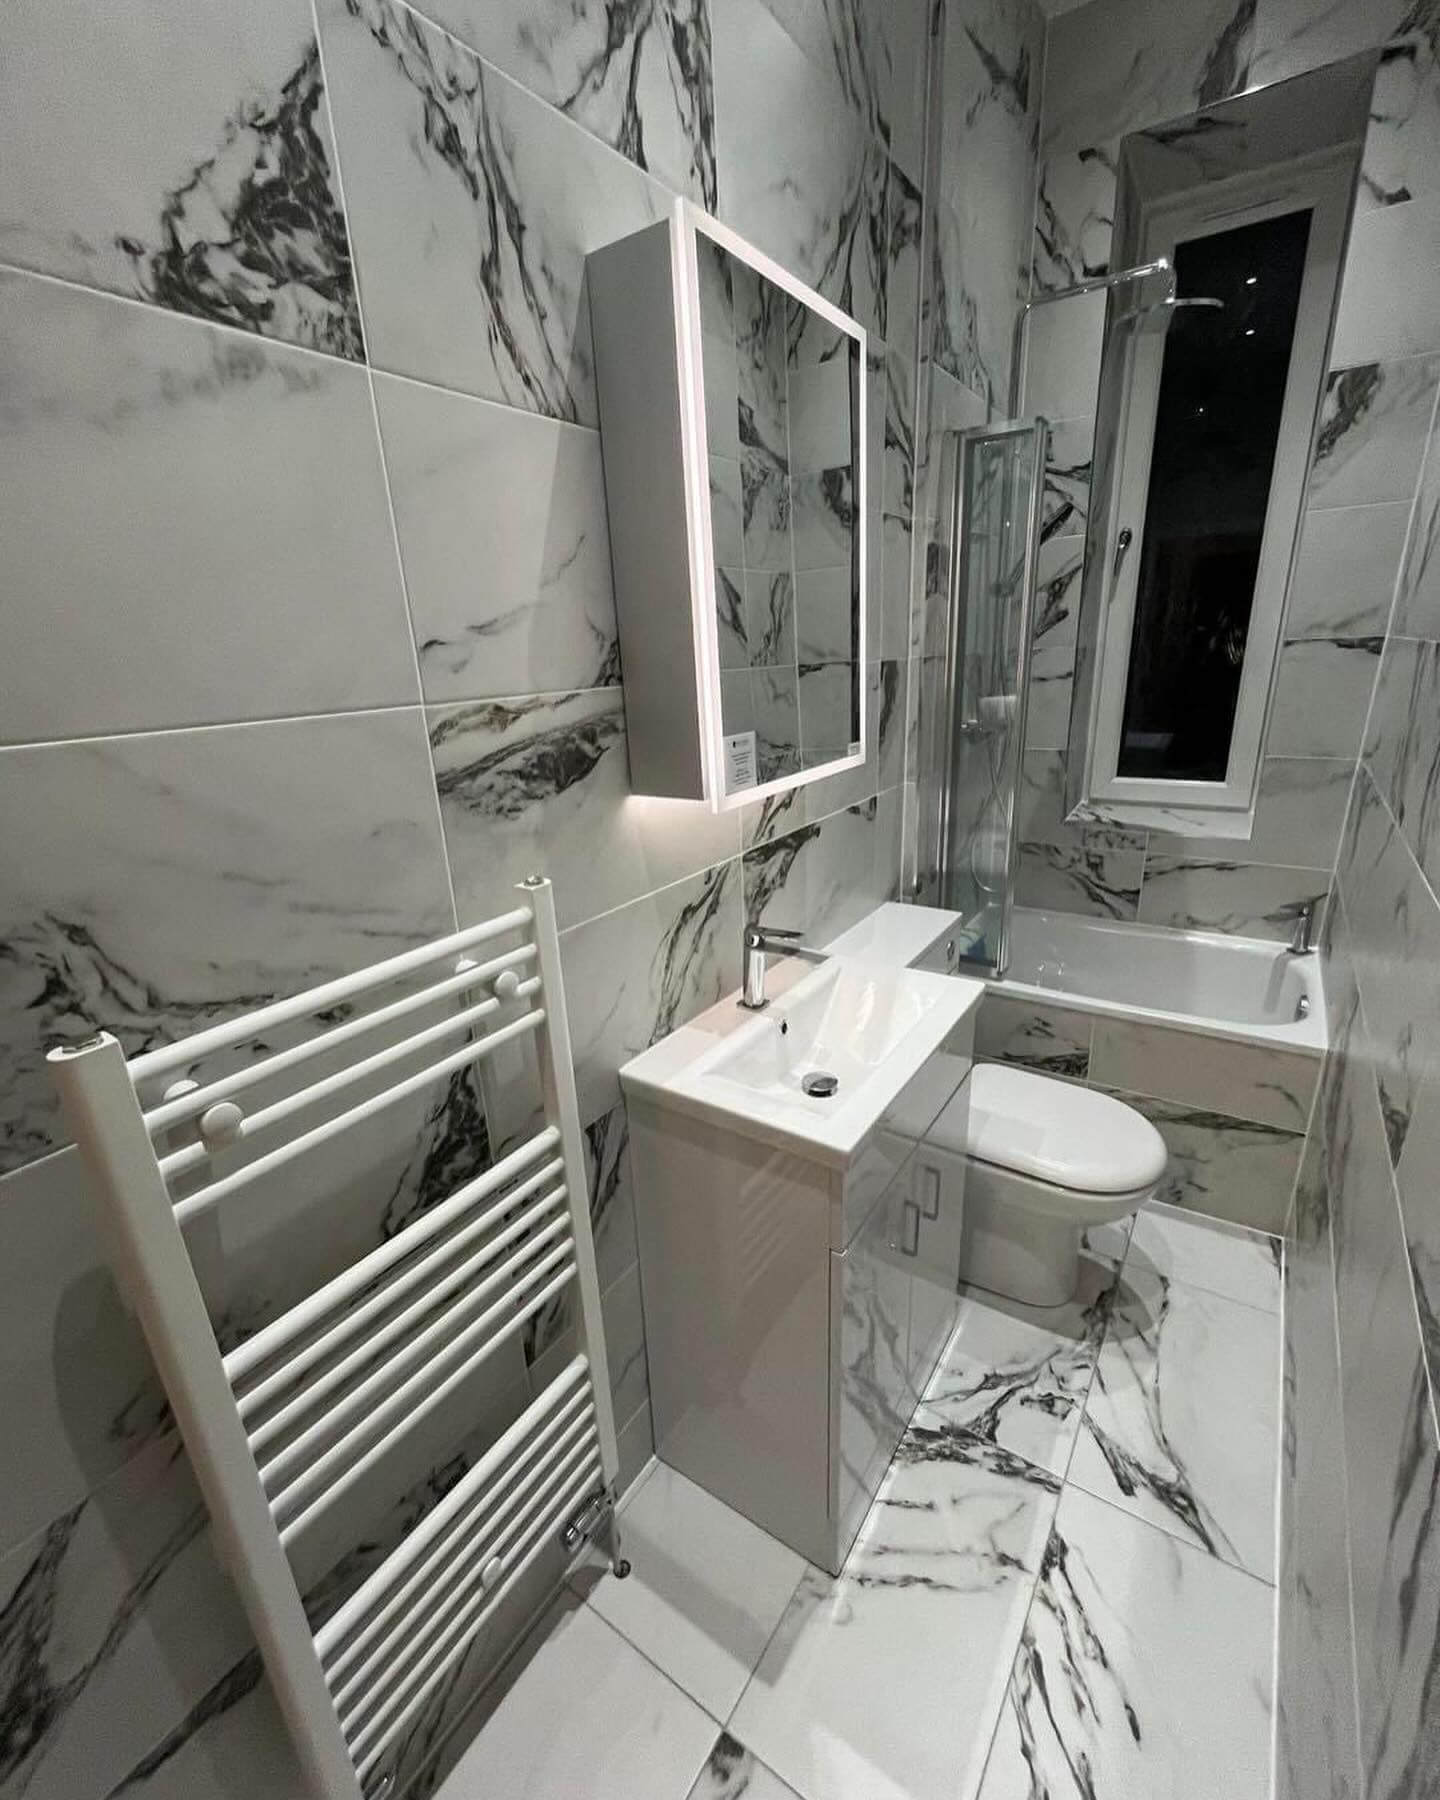
Genius Long and Narrow Bathroom Ideas to Maximize Style, Storage, and Flow
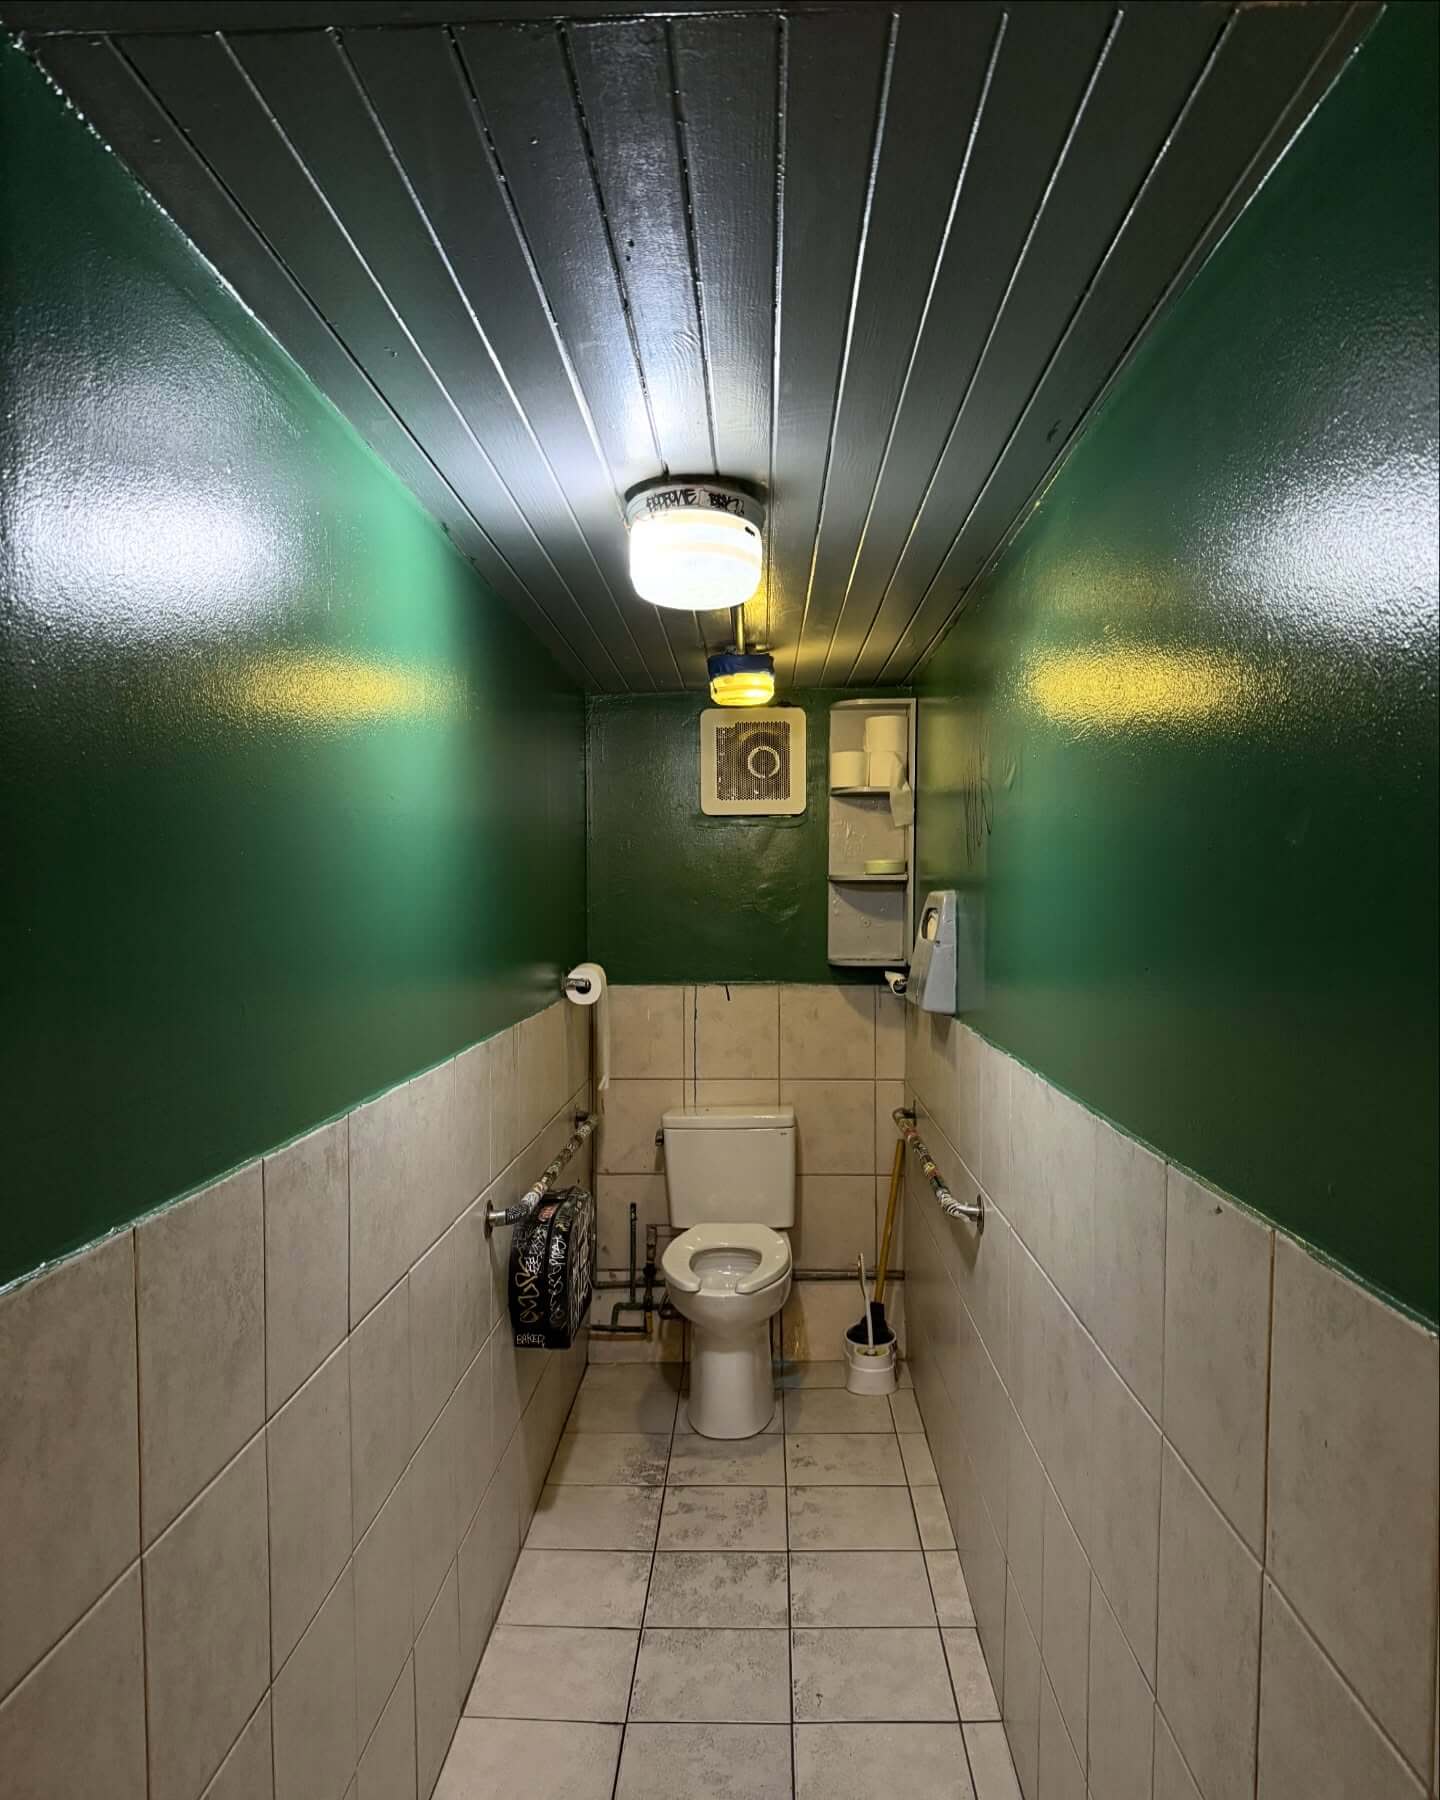
Skinny, tunnel-like bathrooms don’t have to feel cramped. With the right layout, lighting, and finishes, you can visually widen a galley bath, create better circulation, and unlock smart storage—without sacrificing style.
From floating vanities and pocket doors to clear-glass walk-in showers, light-reflecting palettes, and elongated floor tile layouts, the right choices can stretch sightlines and make every inch work harder. Thoughtful layers of light, oversized mirrors, and wall-mounted fixtures keep the footprint airy and clutter-free.
Get the Fail-Safe Paint Color Playbook (Free PDF)
36 proven colors • 8 ready palettes • trim & sheen guide • printable testing cards.
Whether you’re planning a weekend refresh or a full remodel, these long and narrow bathroom ideas will guide you past common mistakes (bulky cabinetry, choppy color breaks, awkward door swings) and toward solutions that suit modern, classic, and renter-friendly spaces alike.
Layout and Flow Optimization: Long and Narrow Bathroom Ideas for Seamless Circulation
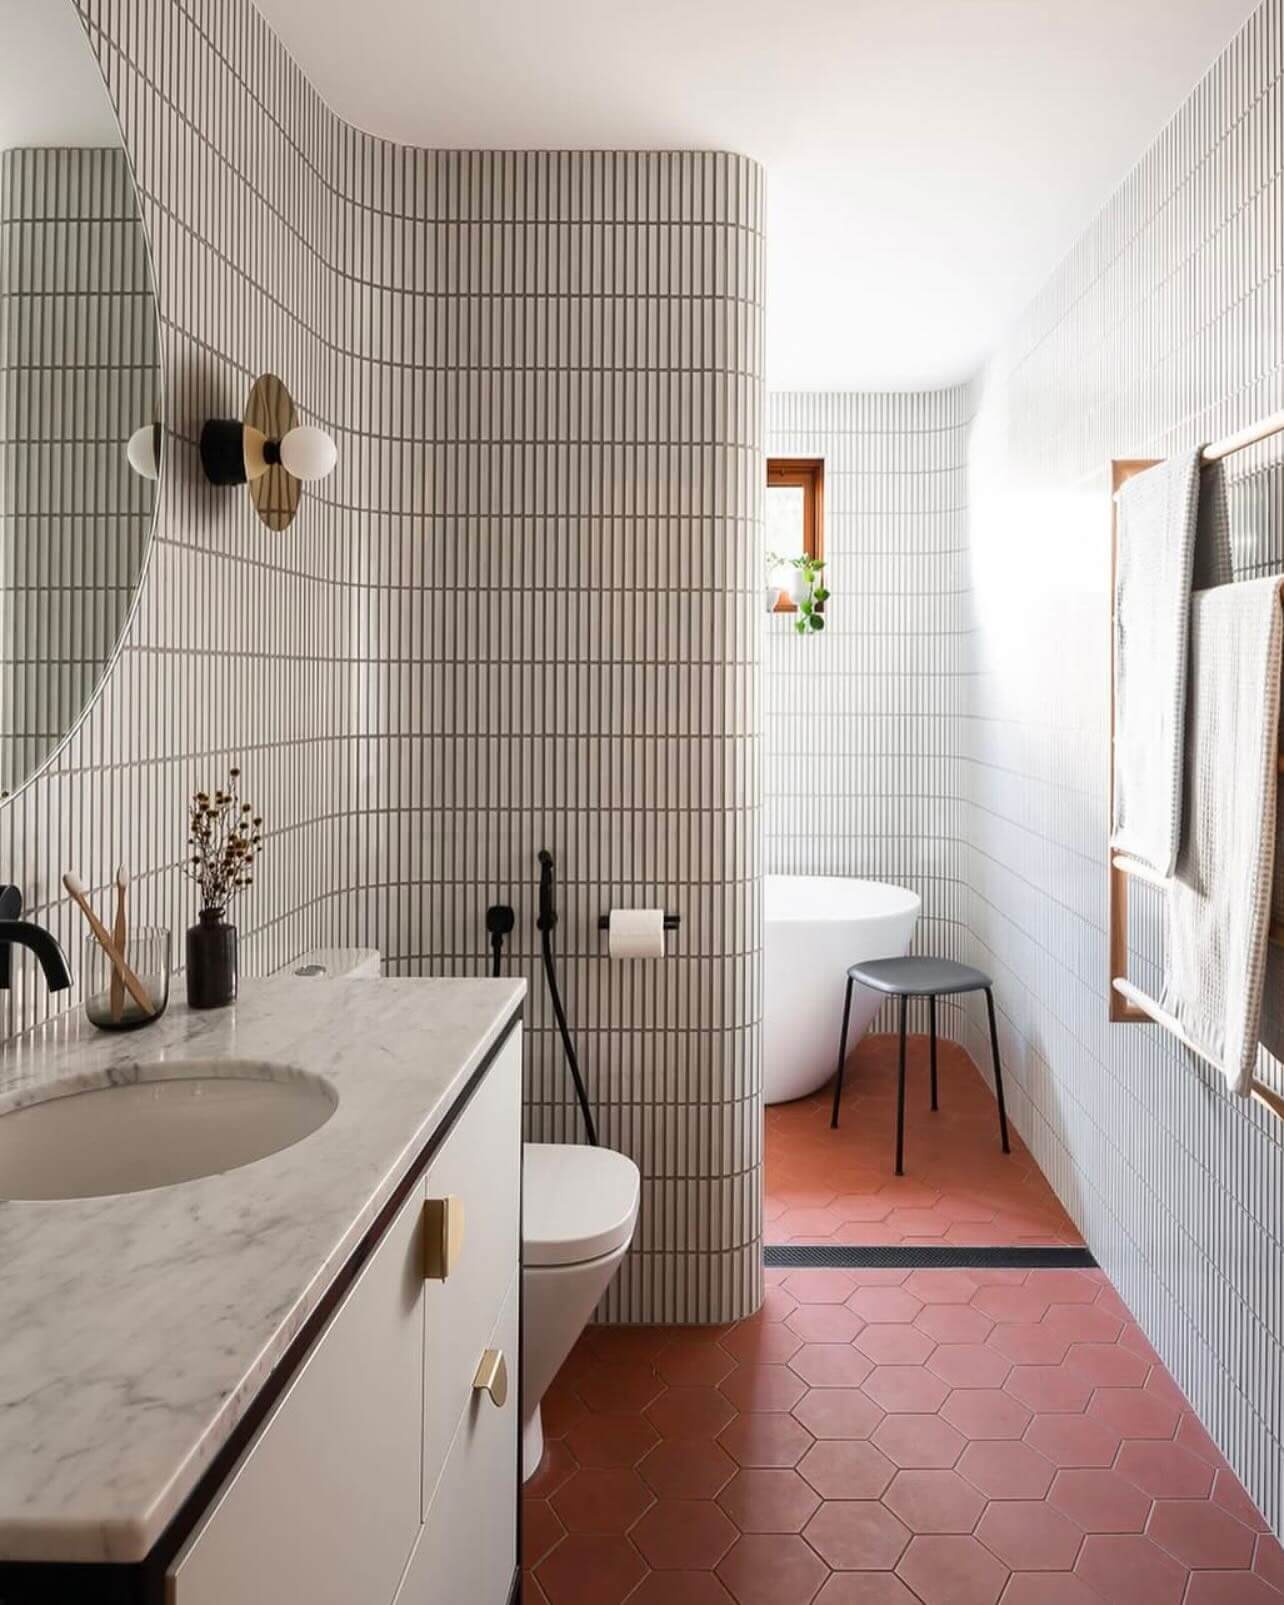
Long and narrow bathrooms succeed when zones are sequenced logically: dry near the entry, wet at the terminus. Start by mapping a clear, uninterrupted aisle and grouping plumbing to one side for efficiency. Favor pocket or barn doors to eliminate swing conflicts that shrink walking space and collide with fixtures. Use continuous flooring and aligned grout lines to lengthen sightlines and reduce visual breaks. Anchor the far wall with a window, glass panel, or feature tile to pull the eye down the corridor.
Smart Floor Plan Configurations
- Single-wall suite: Consolidate vanity, toilet, and a curbless linear-shower along one wall to open the aisle, simplify plumbing, and create a sleek, galley-bathroom rhythm.
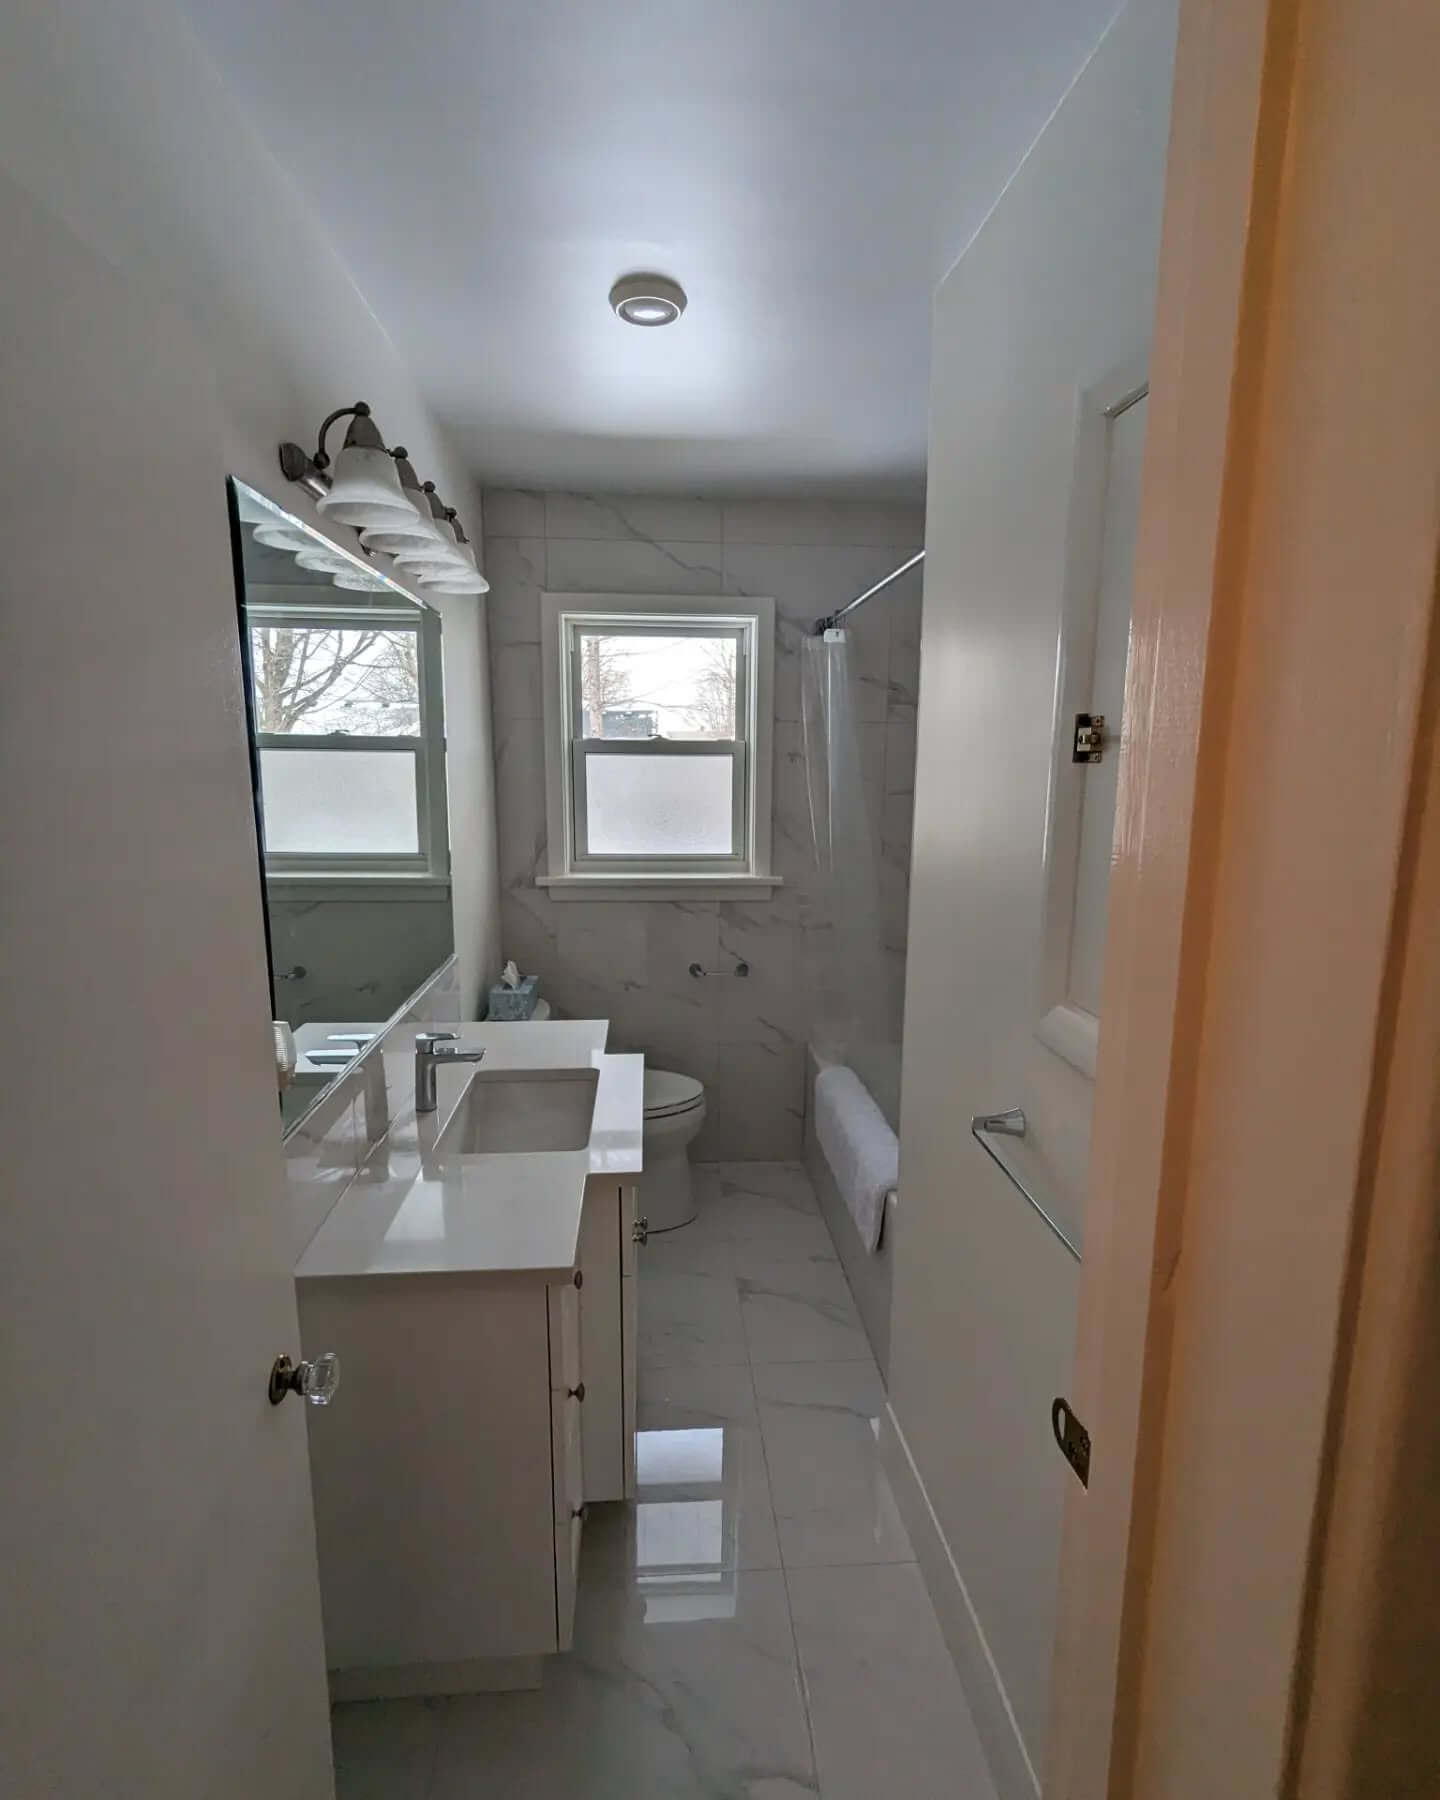
- Opposite-ends strategy: Place the vanity near daylight and the shower at the far end, keeping sightlines clean while balancing moisture zones and giving the narrow room a focal terminus.
- Zoned wet room: Convert the whole back half into a tiled wet zone with glass, enabling a larger walk-in shower, linear drain, and easy cleaning without interrupting circulation.
- Pocket or barn door: Swap a swinging door for a pocket or barn door to reclaim crucial clearance, reduce pinch points, and allow cabinetry or towel bars where door arcs once collided.
- Float and align: Choose wall-hung toilets and vanities, align reveals and grout lines, and keep toe-kicks open to lengthen sightlines and make narrow bathrooms feel lighter and wider.
Traffic Flow and Code Clearances
- Clear aisle target: Aim for a 36-inch walking lane where possible, resisting deep vanities that choke the corridor; a 21–24 inch minimum in front of fixtures preserves comfortable movement.
- Toilet spacing: Keep at least 15 inches from toilet centerline to each side obstruction and 24 inches clear in front, reducing elbow bumps and cramped knees in tight galley baths.
- Shower comfort: A 36-by-36-inch shower feels comfortable in slim rooms; use a linear drain to run tile planks lengthwise, avoid curbs, and keep water contained behind clear glass.
- Door swing safety: If code requires inward swings, narrow leaf widths and offset hinges help; otherwise, outswing or pocket doors prevent fixture collisions and free wall space for storage.
- Ventilation route: Plan an efficient exhaust path at the back of the room to pull steam away from the entry, maintaining clear mirrors and safer, drier flooring along the main corridor.
Detail discipline completes these Long and Narrow Bathroom Ideas. Run a slim ledge shelf the full length of the wall to unify fixtures, catch toiletries, and reduce countertop clutter. Consider a half-height glass panel to contain spray while protecting the corridor’s openness. Specify underfloor heating to remove bulky rugs that visually crowd tight plans. Keep patterns calm along the length and reserve bolder moments for the focal wall to avoid shortening the space.
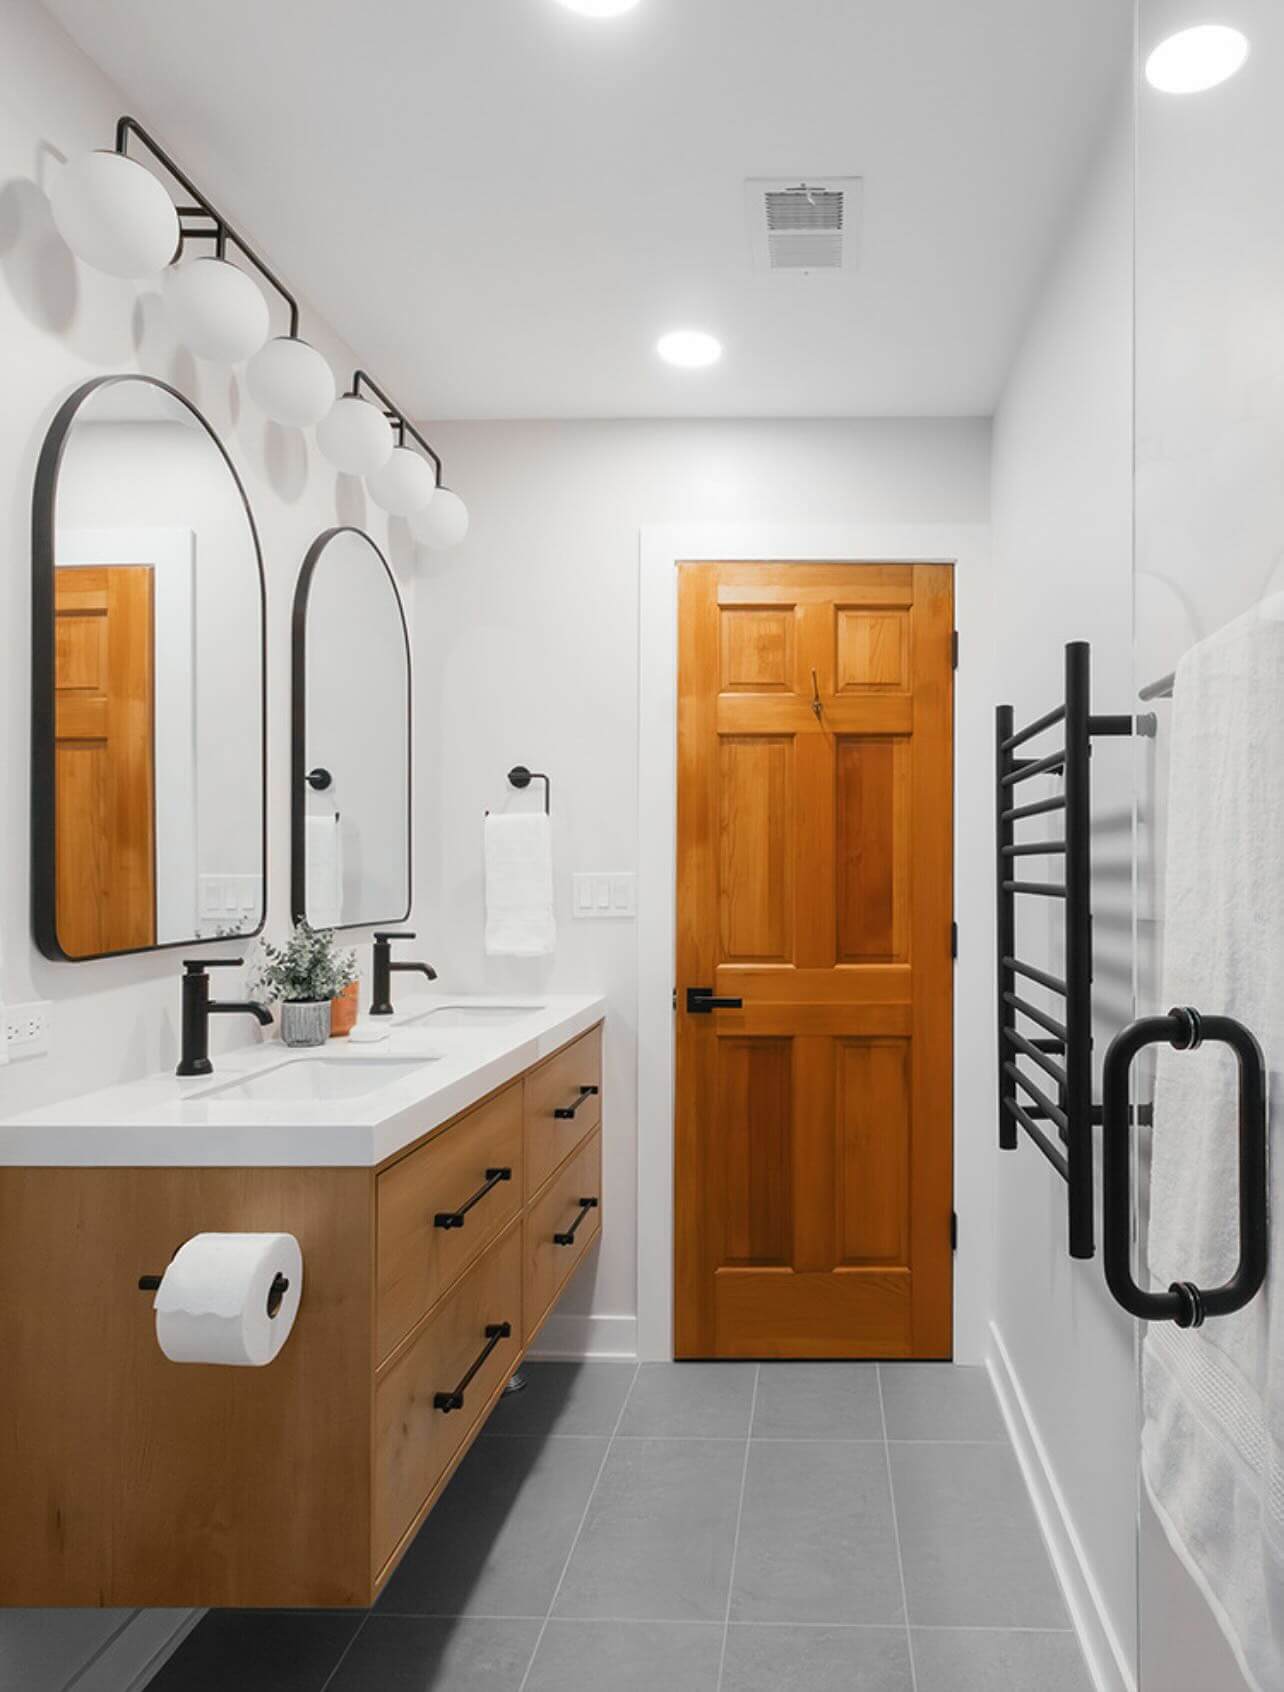
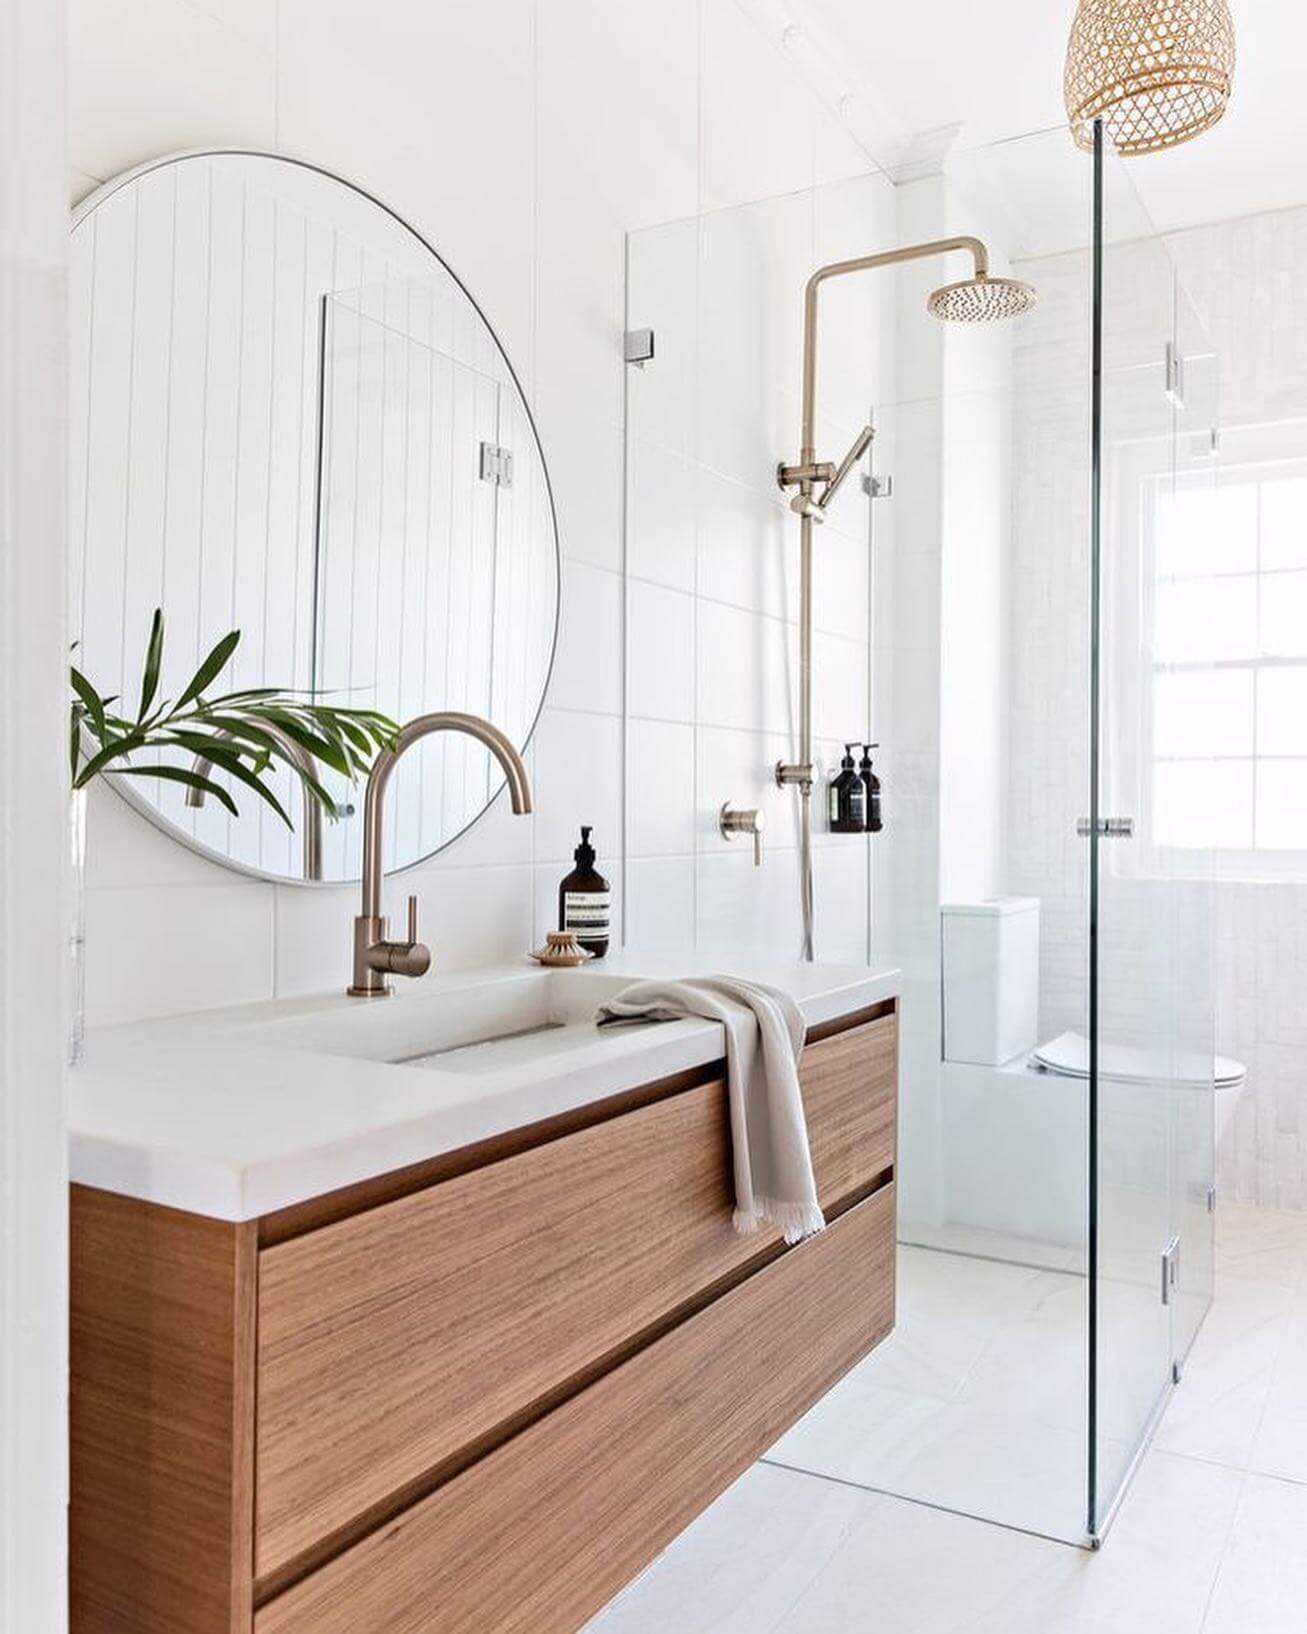
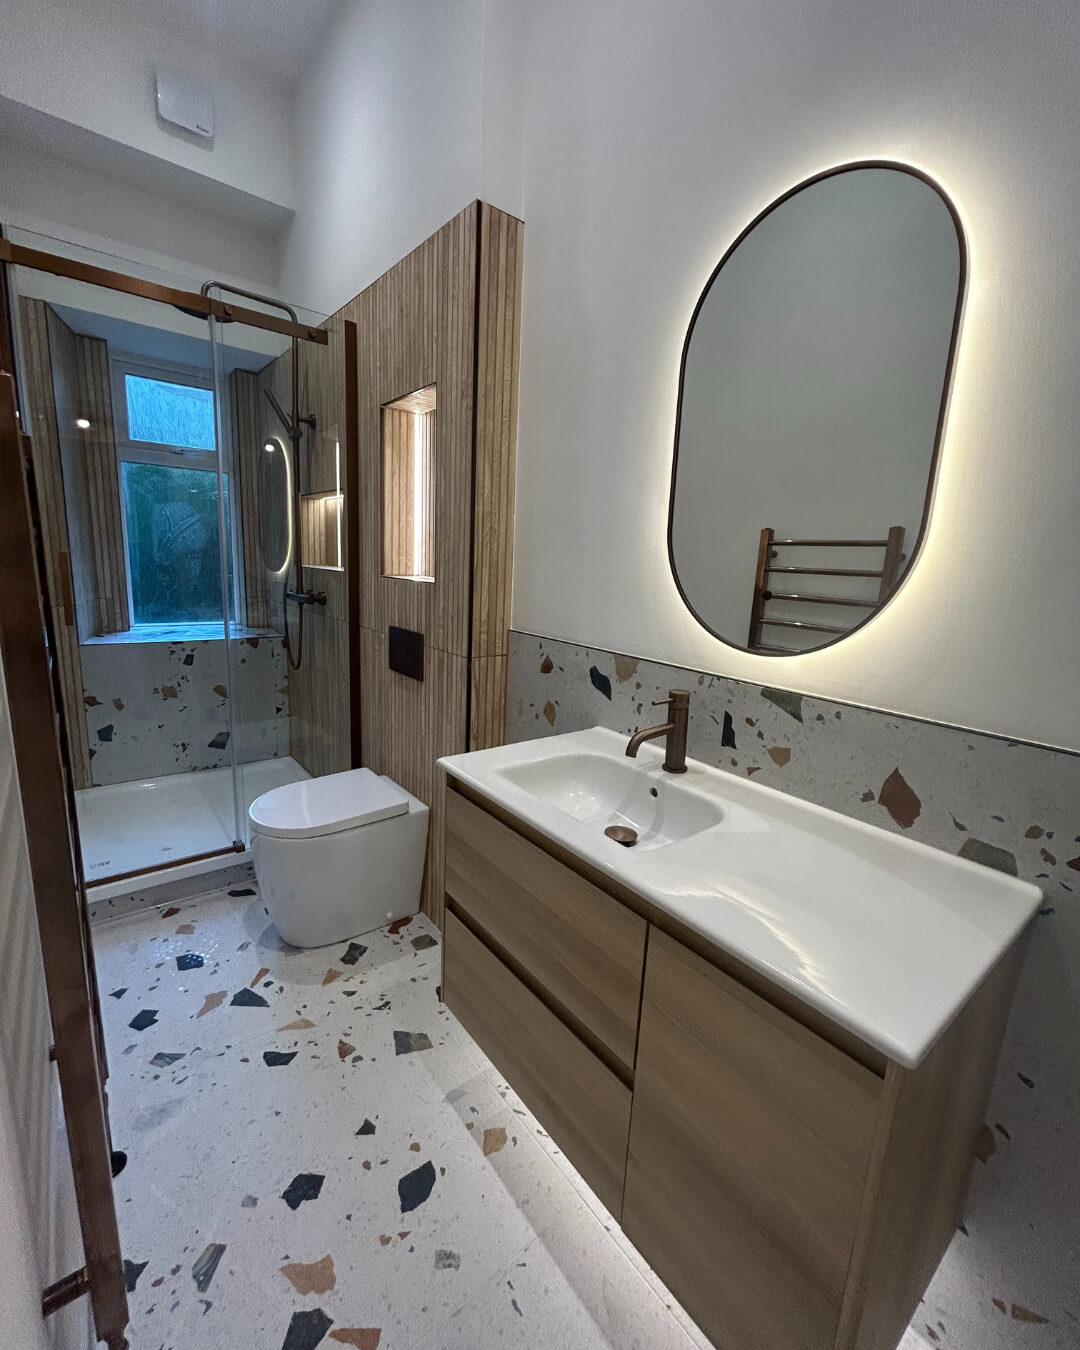
Float the Vanity to Free Floor Space
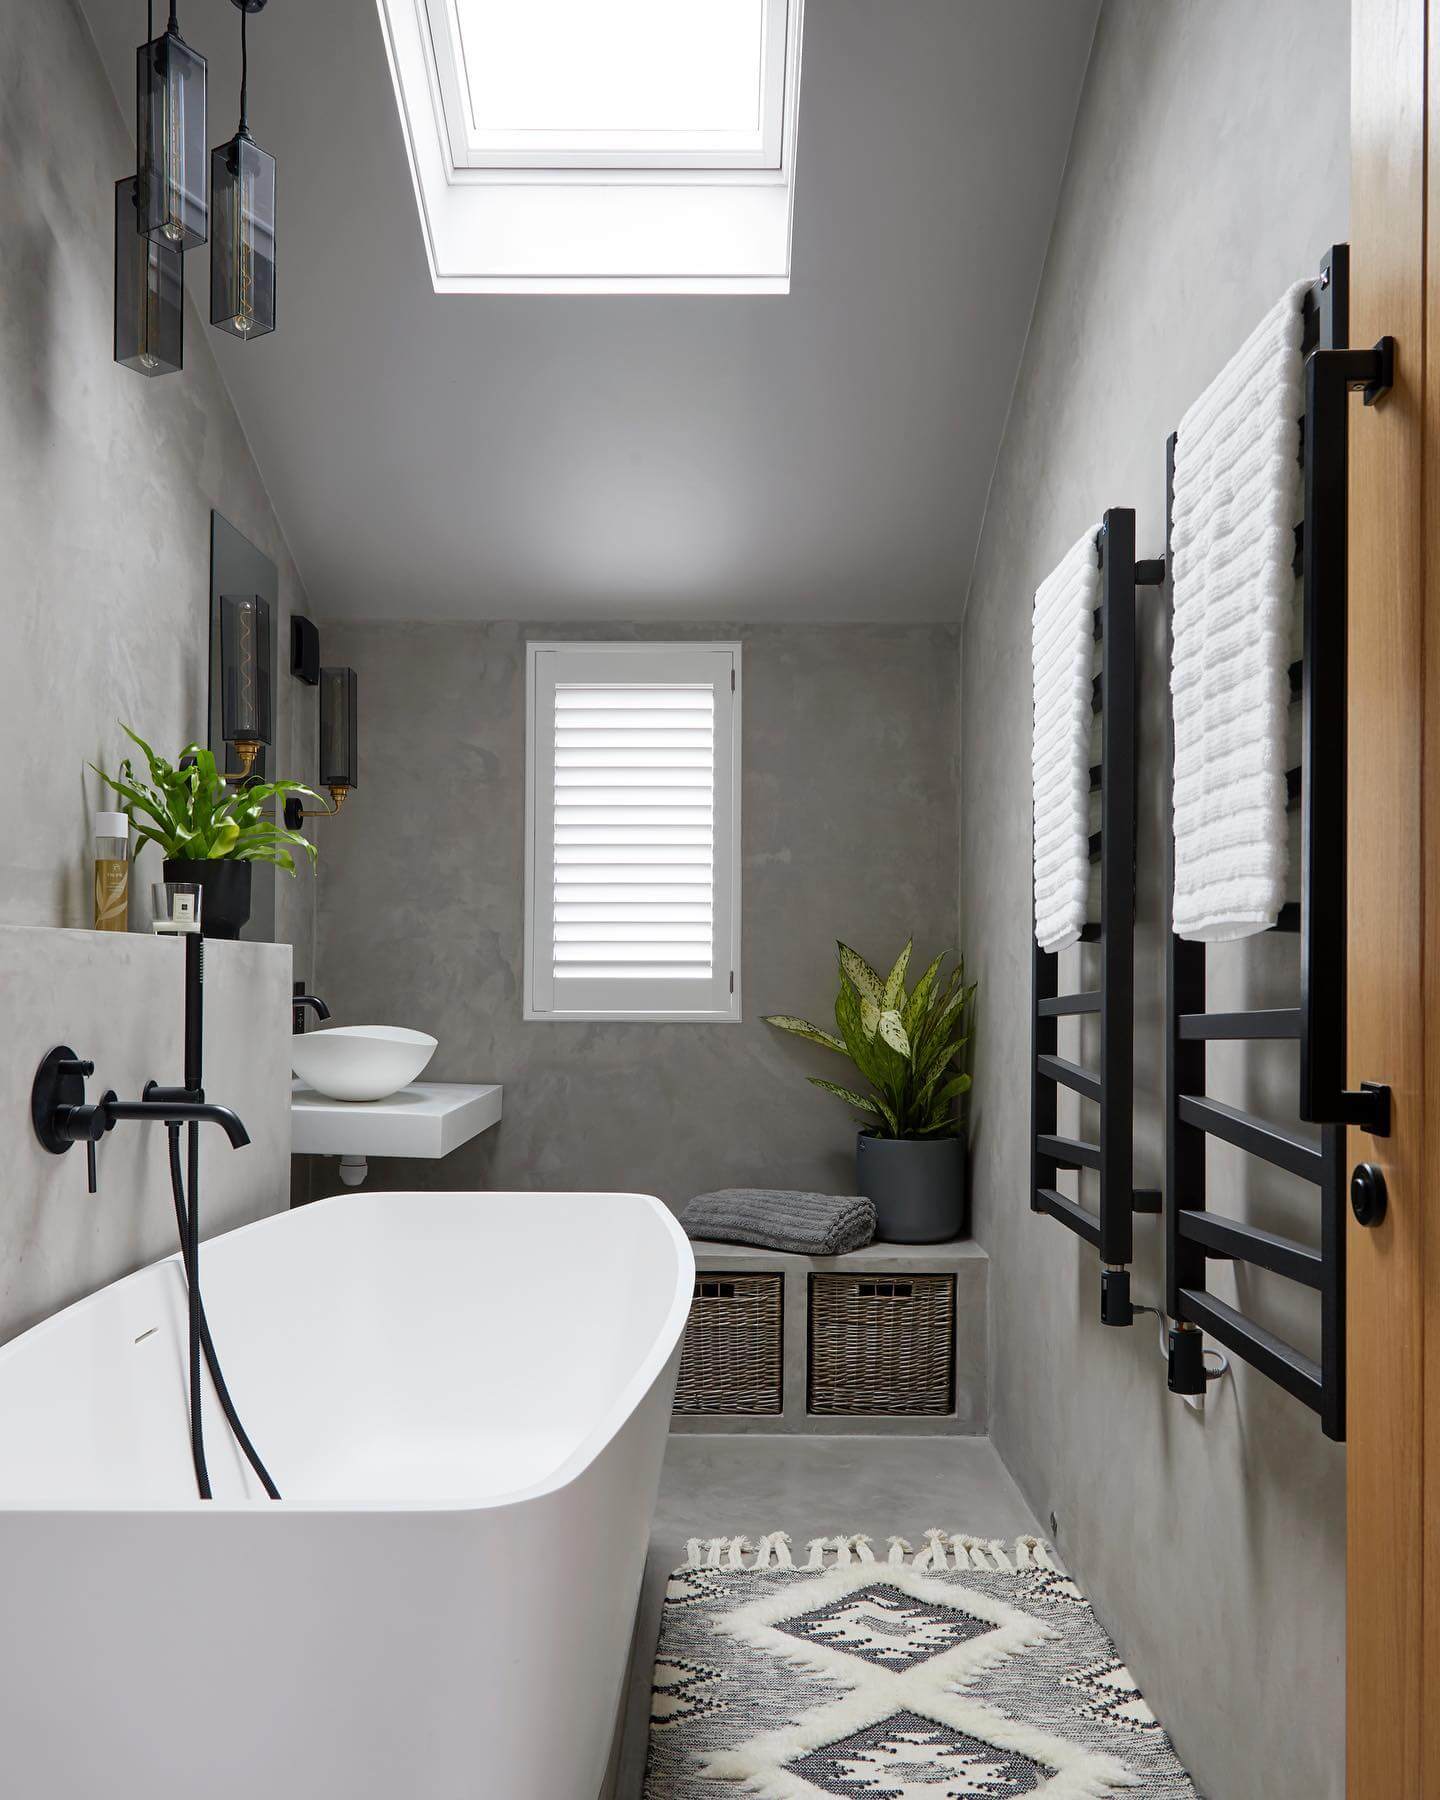
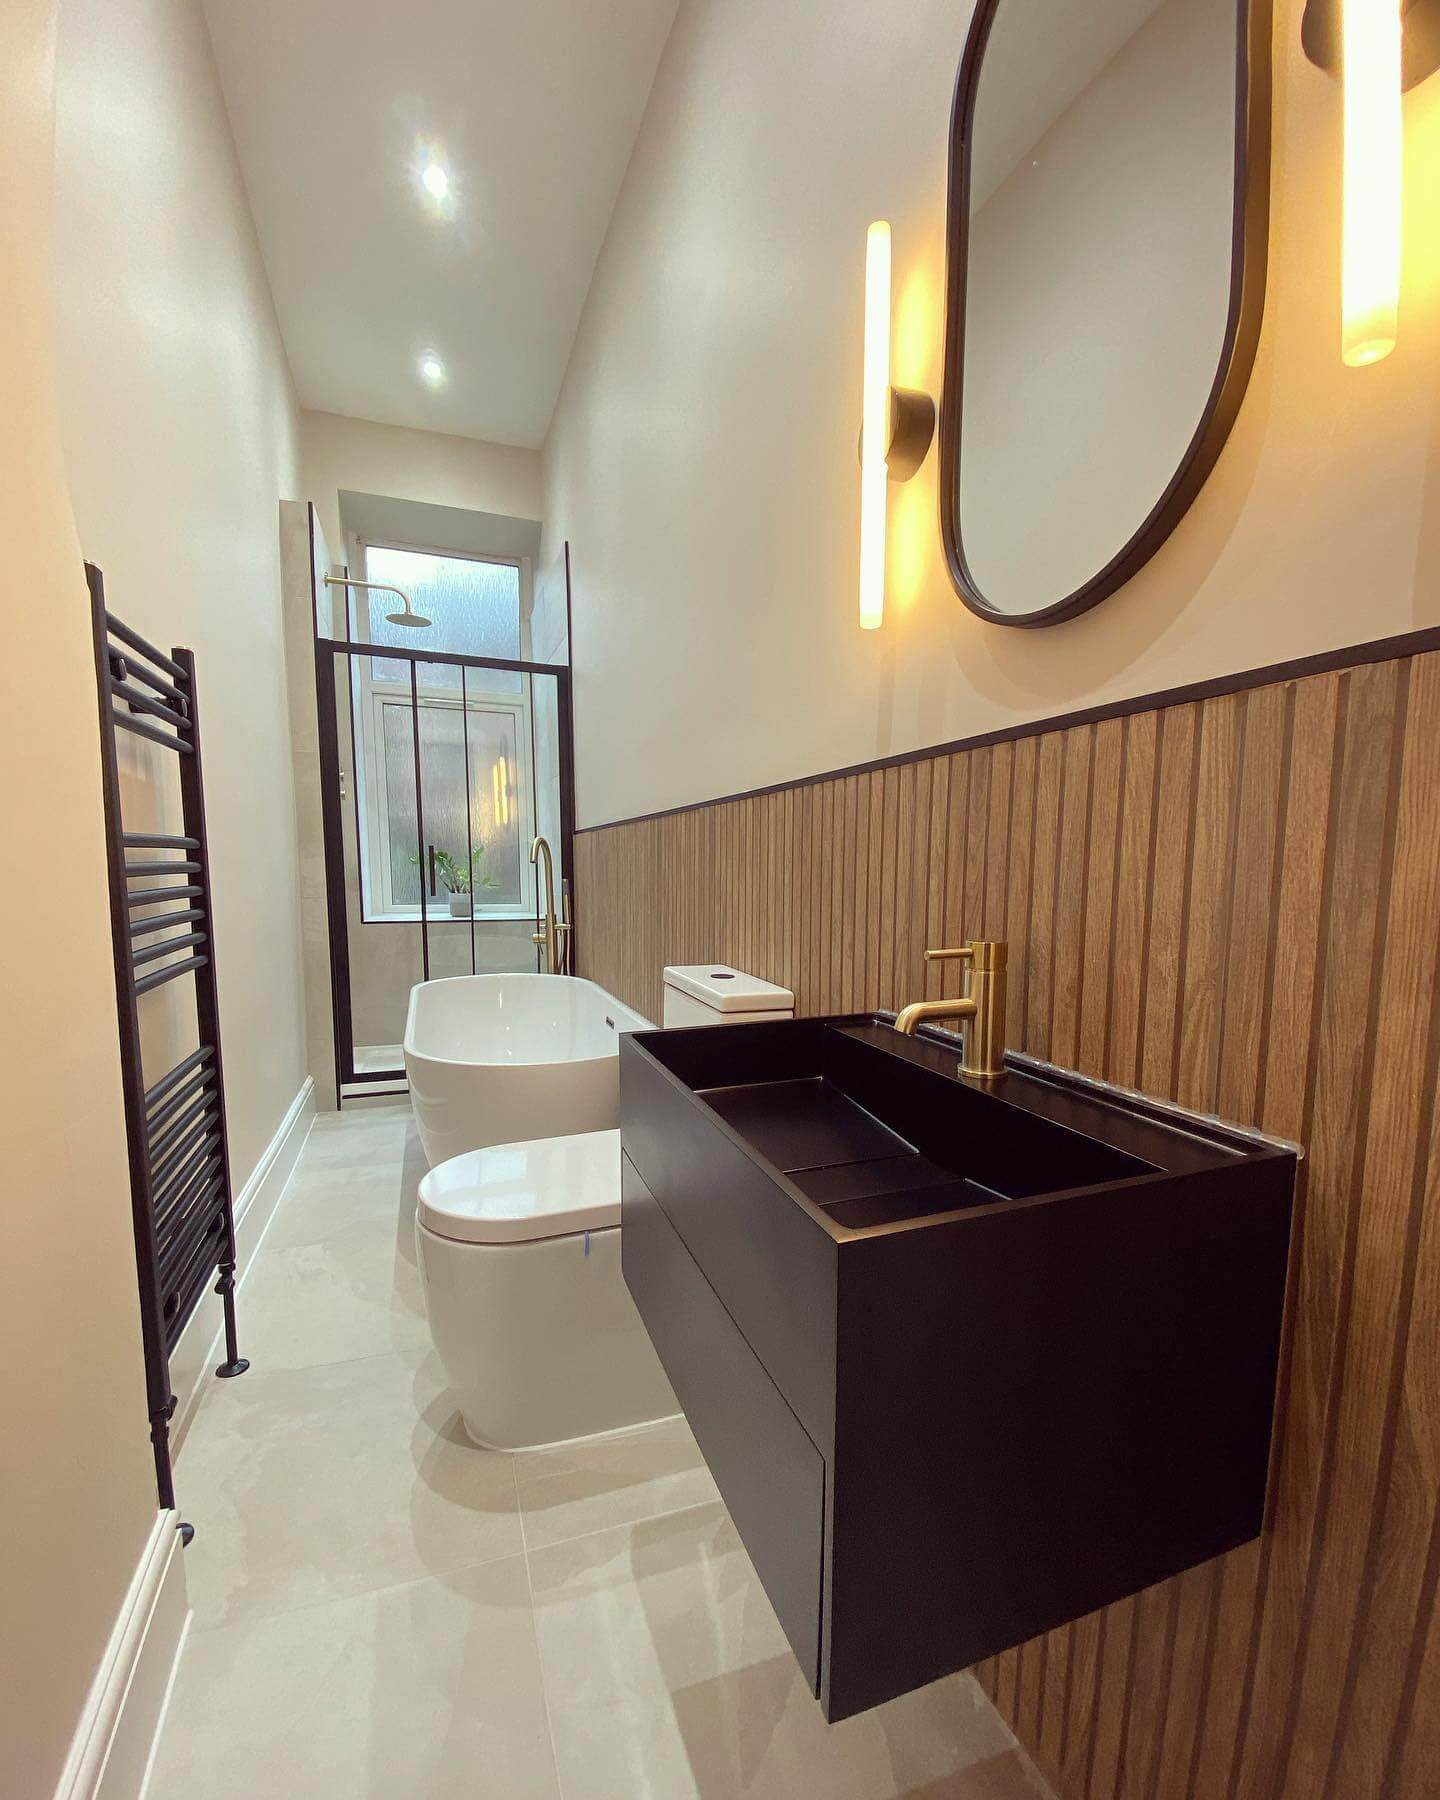
In a long, narrow bathroom, the fastest way to make the room feel wider is to clear the floor. A floating vanity visually lightens the footprint, lets floor tile run uninterrupted beneath, and creates breathing room along the busy center aisle. Opt for a shallow-depth cabinet with full-extension drawers so you gain organized storage without encroaching into the walkway. Pair it with a wall-mounted faucet to shave precious inches off the counter depth and to keep the backsplash clean and uncluttered. An oversized mirror (or mirror-to-wall) above the vanity doubles light and extends sightlines, while a subtle LED under-glow at the toe-kick makes the cabinet appear to hover. Keep finishes low-contrast—think tone-on-tone stone or quartz with slim edges—so the vanity reads as a calm band instead of a bulky block. If your layout allows, extend the counter into a slim makeup perch or landing shelf at one end; continuous horizontals help the eye read the room as wider. Finish with a streamlined drain and minimal hardware to reduce visual noise and maintain easy cleaning in a hard-working, galley-style bath.
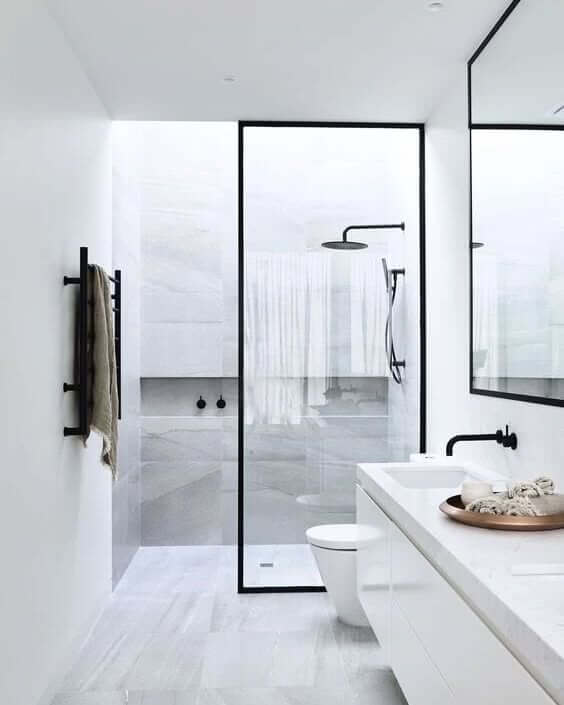
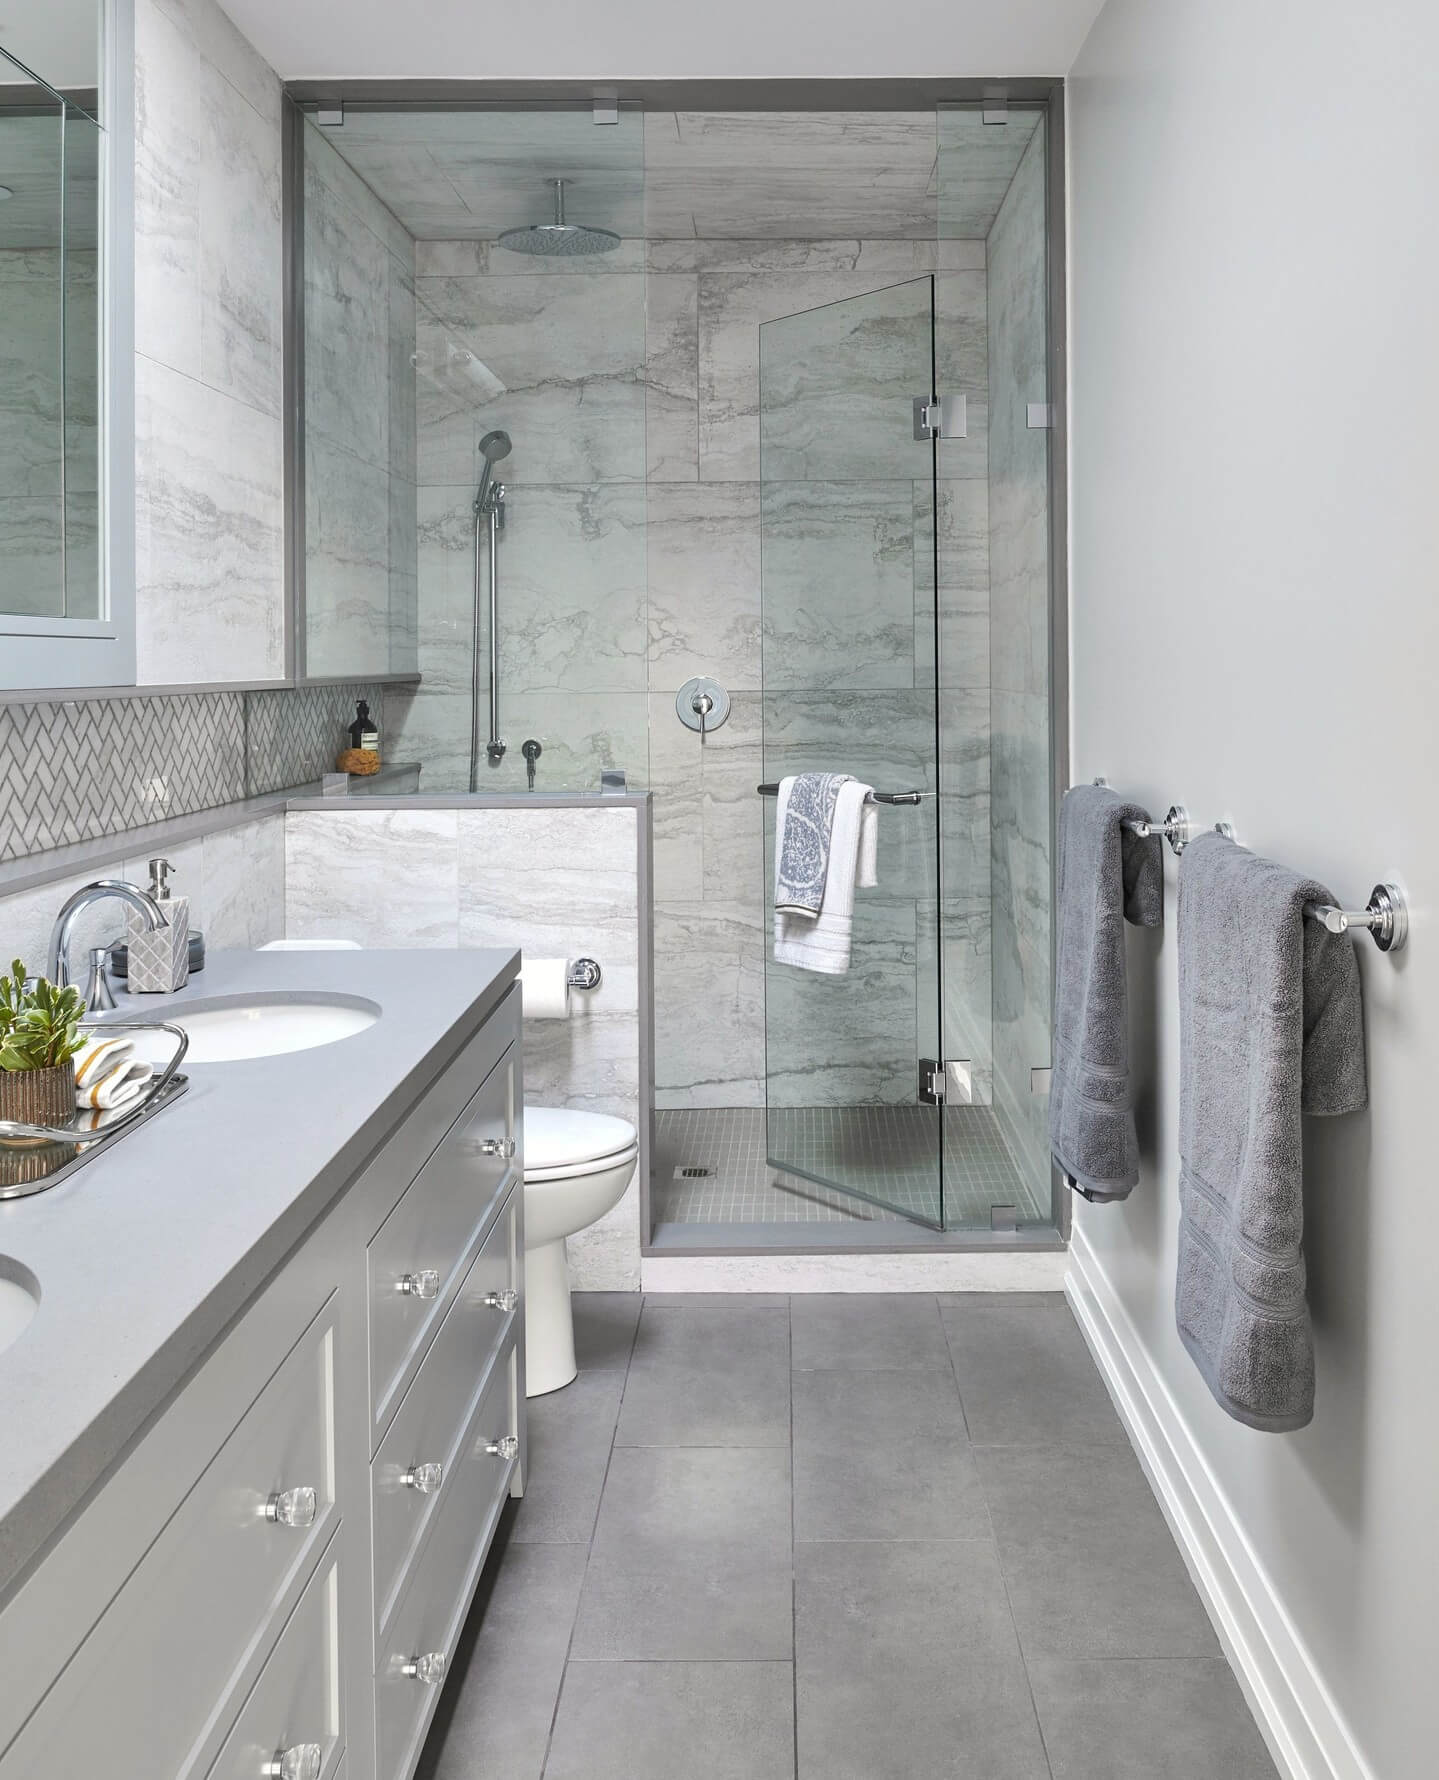
Choose a Frameless, Curbless Walk-In Shower
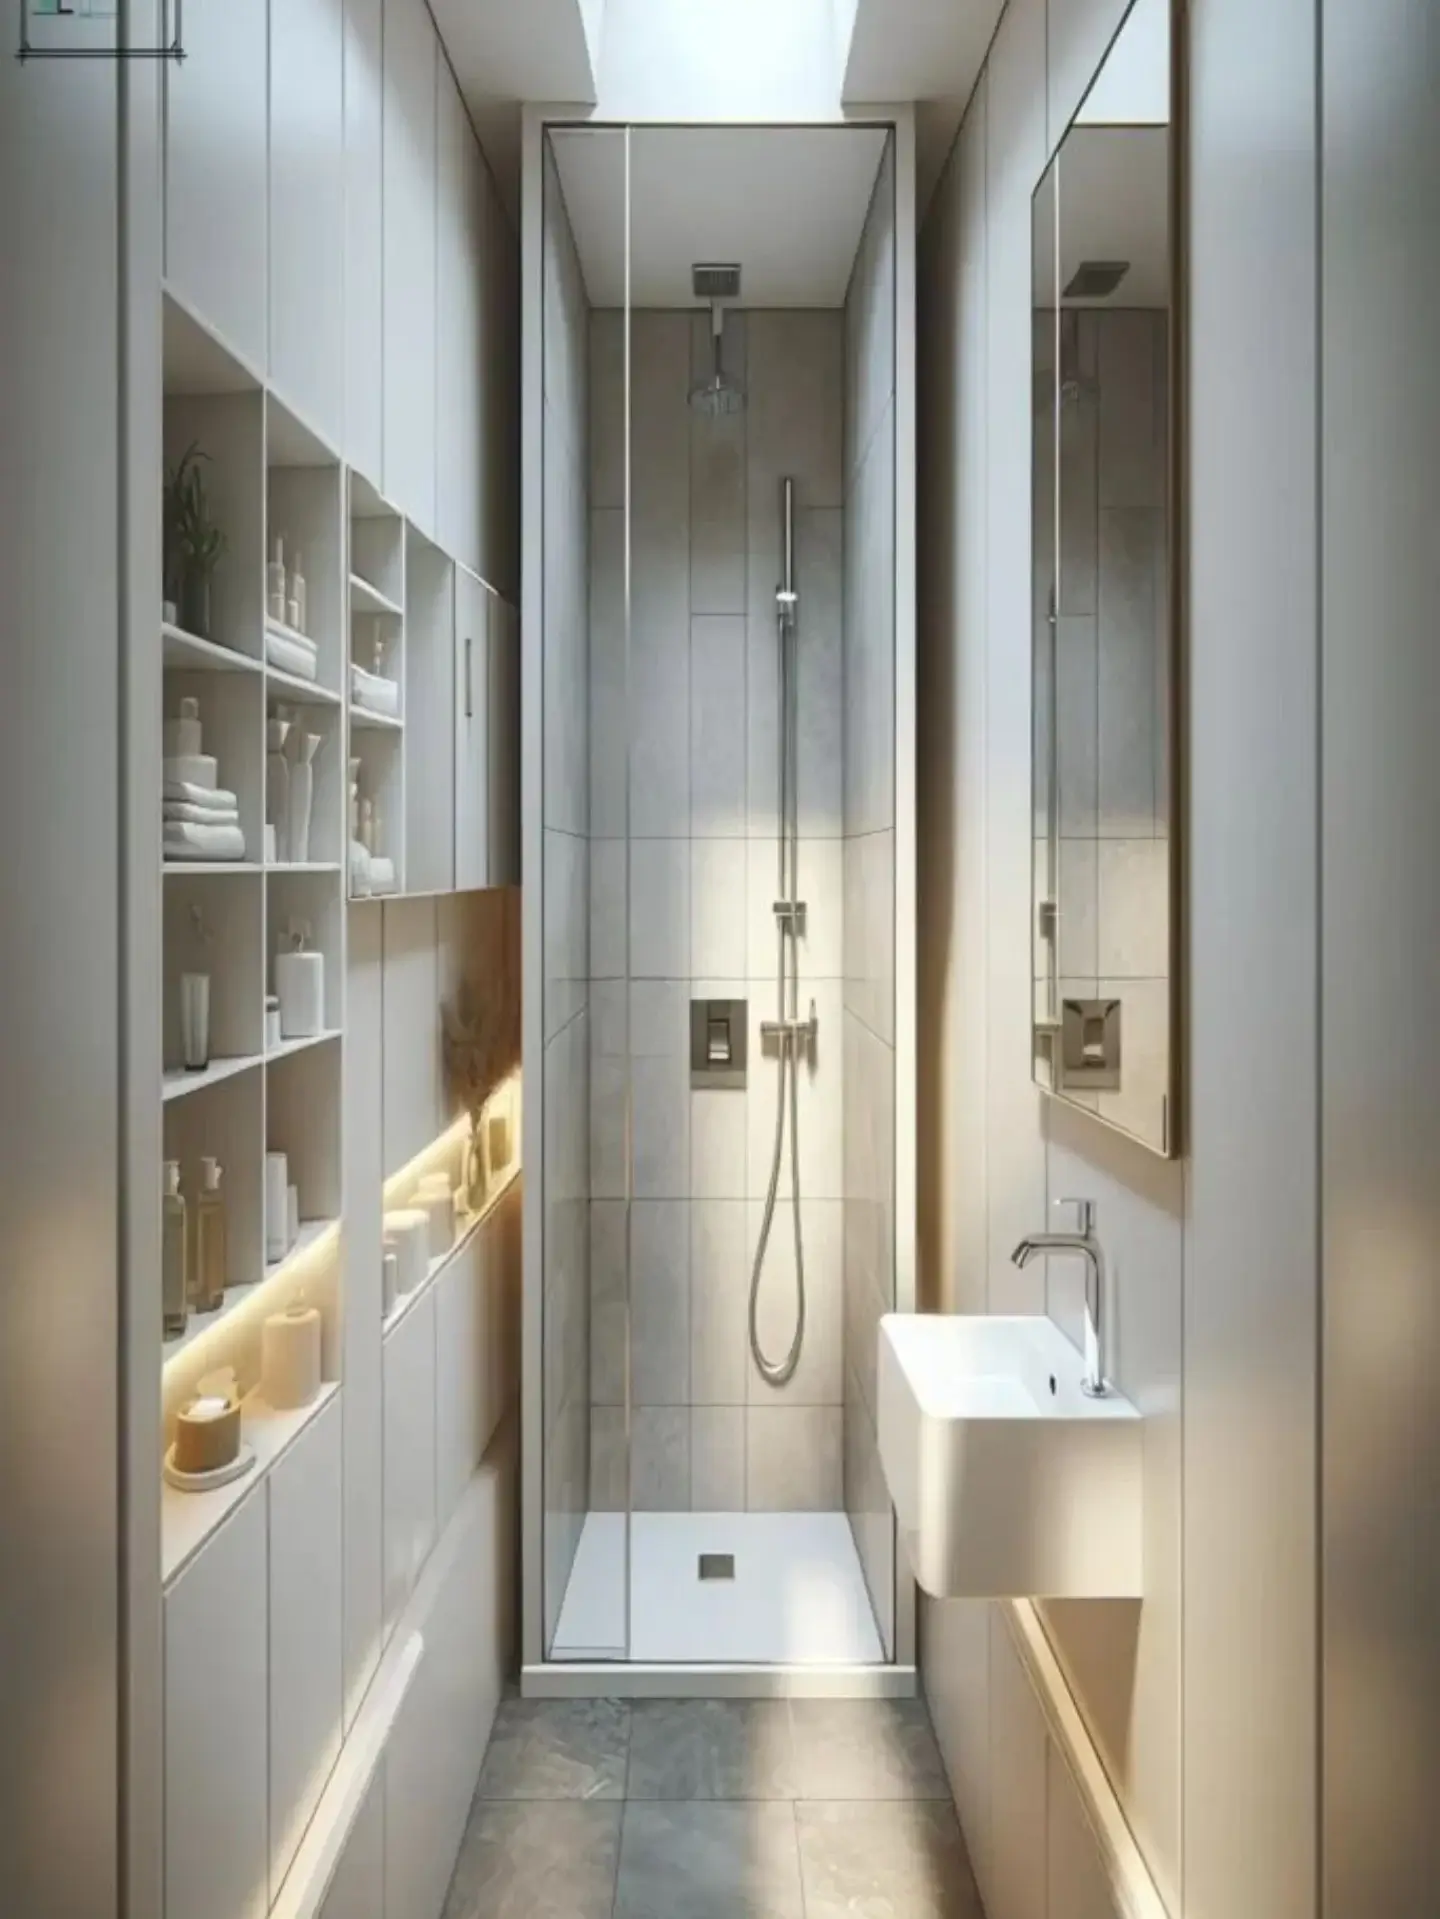
Frameless, curbless showers are MVPs for long, narrow bathrooms because they preserve every sightline. By running the same floor tile straight into the shower and using a linear drain, you get a single, gently sloped plane that feels expansive instead of chopped up. Keep the glass full height with minimal hardware to bounce light and remove visual barriers. Position the shower at a short end wall to create a clear destination and reduce the “bowling alley” effect—your eye lands on a luminous volume rather than a dead end. Inside, specify a handheld on a slide bar plus a compact overhead spray to diversify use without adding bulk. Recessed niches (aligned with grout lines) and a stone-topped foot ledge keep essentials off the floor and away from cluttered corners. Choose slip-resistant tile or micro-texture in the wet zone, and seal edges with clean metal profiles instead of thick trim for a contemporary, streamlined finish. The result is a brighter, safer, and visually wider small bathroom where traffic flows naturally.
Swap Hinged Doors for Space-Saving Pocket Sliders
Traditional swing doors steal valuable clearance in skinny baths. A pocket door (or a top-hung slider where pockets aren’t possible) instantly improves circulation and eliminates awkward clashes with vanities or showers. Choose a solid-core slab for privacy, soft-close hardware, and a narrow stile pull to keep profiles slim. If you want to borrow light while preserving modesty, specify fluted or frosted glass—translucent panels brighten the corridor-like footprint without revealing everything inside. For tight renovations, consider a surface-mount barn-style track with a minimalist header; paint the door to match the wall color so it visually recedes. Inside the bathroom, apply the same thinking to cabinet and shower entries: pivot or sliding glass panels with tight clearances perform better than bulky frames. Keep openings at a comfortable width and align door heads with the top of mirrors and glass for a clean, continuous datum line. This move alone can recover precious inches, reduce door-swing drama, and make a long, narrow bathroom feel custom and calm.
Use Horizontal Tile Strategies to Visually Widen
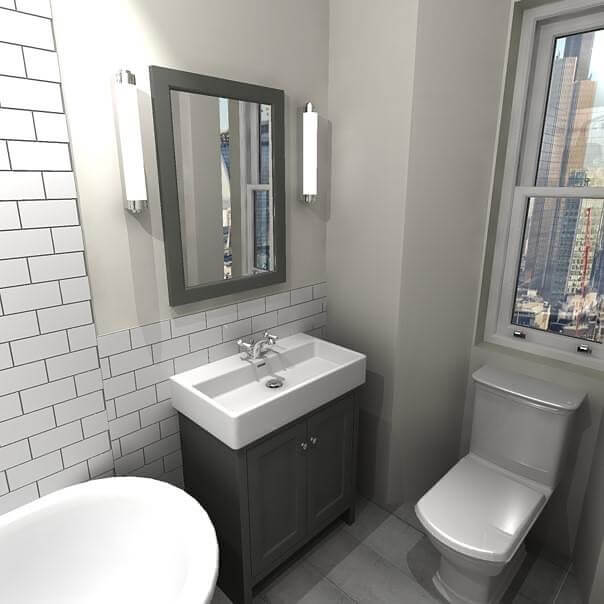
Tile layout is optical design. In a long, narrow bathroom, orient rectangular floor tiles across the short dimension to push the walls outward. Wide-format planks, 12x24s laid in a horizontal stack, or a lateral herringbone can all widen the read. Keep grout lines tight and low-contrast to avoid a busy grid that emphasizes length. On the walls, continue tile to the ceiling in the shower and wrap it partway along the dry zone to minimize choppy paint breaks; cap with a clean metal profile rather than a heavy trim. A subtle band or chair-rail–height accent that runs horizontally can also stretch the room—just keep the palette tone-on-tone for sophistication. If you crave pattern, reserve it for the end wall as a focal moment; maintain quieter fields elsewhere. Finish floors in a matte, slip-resistant surface and choose rectified edges to maintain crisp alignments. These small layout choices add up to a bathroom that looks wider, calmer, and more high-end without expanding the footprint.
Recess, Don’t Project: Built-In Storage that Disappears
Protruding cabinets crowd a narrow bath. Instead, carve storage into the envelope. An in-wall, mirrored medicine cabinet doubles as a light-bouncer while keeping daily essentials at eye level. Between-stud niches in the shower corral bottles off ledges; line them with a single slab or large tile to minimize grout and simplify cleaning. Consider a shallow, recessed linen niche with door panels that match the wall color, or build a full-length vertical cubby at the end wall to anchor the room without pinching the aisle. Over the toilet, a slim recessed shelf or ledge offers a landing spot without jutting out. Where plumbing allows, an in-wall toilet tank frees visual space and creates a clean plane for additional niches. Inside the vanity, add dividers and trays so every inch works harder; smart interiors reduce the urge to add bulky carts. By recessing storage, you protect circulation, keep counters clutter-free, and achieve the serene, streamlined look that flatters any galley bathroom.
Supersize the Mirror and Layer the Light
Light is your best widening tool. A large, wall-to-wall mirror amplifies both daylight and fixtures, dissolving the tunnel effect in a long, narrow bathroom. Pair it with layered lighting: bright, glare-free task illumination at face level (sconces flanking the mirror or a backlit mirror), ambient ceiling light for overall wash, and soft accent lighting—think toe-kick LEDs or cove strips—to define edges and guide movement at night. Choose warm-to-neutral LEDs (around 2700–3000K) with CRI 90+ for flattering skin tones, and put everything on dimmers to shift from wake-up bright to spa calm. If windows are limited, a transom above a pocket door or a frosted panel can pull natural light deeper into the space. Keep finishes semi-matte and light in color so they bounce illumination without glare. Together, these strategies make the room feel significantly wider, safer, and more luxurious—proof that the right lighting plan is as transformative as any layout change.
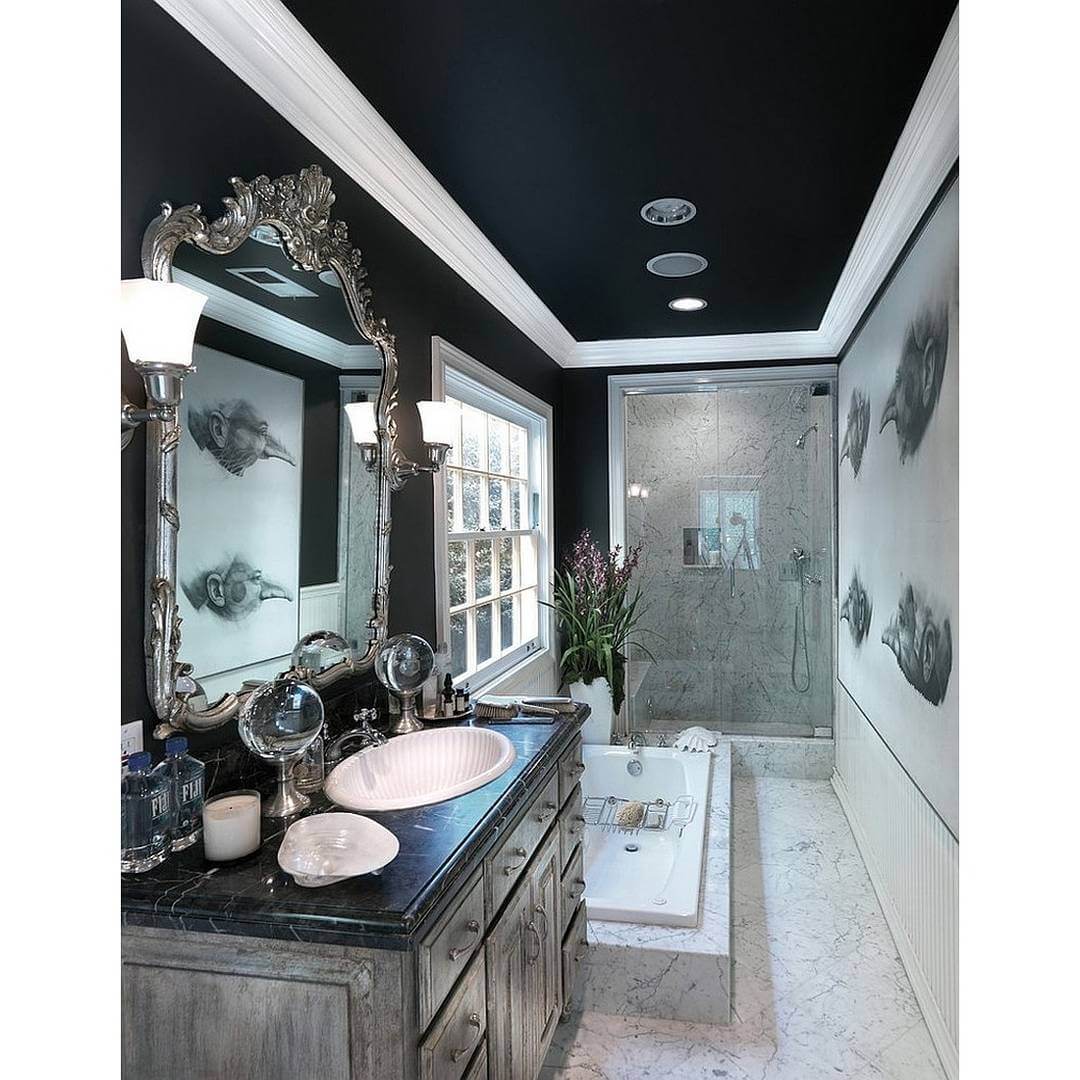
Keep a Light, Low-Contrast Palette—Then Anchor an End Wall
Color can correct proportions. In long, narrow bathrooms, a light, low-contrast palette across floors, walls, and cabinetry removes visual breaks and helps the room read as wider. Soft whites, warm beiges, pale greiges, and natural wood tones create a calm envelope that reflects light. To keep things from feeling flat, introduce texture—microcement, zellige sheen, or subtle wood grain—within the same tonal family. Then, strategically anchor one short wall (often the shower end) with a deeper hue or bolder tile. That focal “full stop” shortens the perceived length, draws the eye forward, and provides satisfying contrast without squeezing the sides. Echo the accent tone in small doses—towel banding, a rug, or cabinet pulls—to knit the palette together. Choose satin or matte sheens to reduce glare, and favor large-format surfaces to minimize grout. This balanced approach yields a bathroom that feels open and cohesive, yet intentionally designed rather than stark.
Consolidate to One Wet Wall and Go Wall-Hung
Streamline the plan by aligning the sink, toilet, and shower on a single plumbing wall. This “one wet wall” strategy frees the opposite side for clear circulation, shortens pipe runs, and creates an elegant, linear composition—ideal for a galley-style bath. Upgrade to wall-hung fixtures where possible: a wall-mounted toilet with an in-wall tank reduces projection and visually opens the floor, while a floating vanity keeps cleaning simple and sightlines long. Keep clearances comfortable around the center aisle, and choose compact fixtures designed for small baths to maintain flow. Route shower controls near the opening so you can turn water on without stepping in; place towel hooks or a slim warmer just outside the wet zone to prevent crowding. Finish the wall with a continuous backsplash or slab ledge for a strong horizontal that grounds the composition. With services concentrated on one side, you gain a calm, functional corridor that feels intentional, not cramped.
Add a Continuous Ledge and Half-Height Partitions
A slim, continuous ledge running the length of the room is a small-space superpower. Built from stone, quartz, or tile and set at vanity height, it provides a landing for soap, plants, and decor in the dry zone, then carries seamlessly into the shower as a secure perch for bottles. This single datum line reduces clutter and unifies the room. Where a full glass wall feels too exposed, pair the ledge with a half-height partition that supports plumbing on the shower side and shields splashes, topped with clear glass to maintain openness. Keep the partition thickness minimal and align all tops—wainscot, ledge, glass—to read as one crisp stripe around the room. The effect is architectural and practical: storage where you need it, privacy where it counts, and uninterrupted sightlines that widen the space. Choose materials with low maintenance and repeat them across zones for a cohesive, high-end finish.
Style for Flow: Slim Fixtures, Smart Hardware, and Airy Extras
The finishing touches can make or break a narrow bathroom’s flow. Choose slim, wall-mounted accessories—floating shelves, compact towel bars, and stacked robe hooks—to keep the center aisle clear. Opt for a narrow-profile faucet and low-slung spout that suits a shallow basin, and use a streamlined trap cover to tidy the under-sink view in floating setups. Corral everyday items into matching containers so the counter reads as one calm surface; stash the rest inside drawers with dividers. A lightweight runner placed crosswise can visually widen the floor, while a single plant (ferns, pothos) adds softness without bulk. Keep textiles light in tone to continue the low-contrast palette, and repeat metal finishes sparingly—two max—for cohesion. Finally, establish easy upkeep: a squeegee at the ready, sealed grout, and fingerprint-resistant hardware. When styling supports circulation and clarity, your long and narrow bathroom feels intentionally edited, not merely small.
Get the Fail-Safe Paint Color Playbook (Free PDF)
36 proven colors • 8 ready palettes • trim & sheen guide • printable testing cards.
Run One Continuous Floor with a Linear Drain
In a long, narrow bathroom, a continuous floor reads like a visual runway—calming the eye and making the footprint feel wider. Extend the same tile straight into a curbless shower and collect water with a linear drain placed along the back or side wall. This single-plane slope (target 1/4 inch per foot) eliminates fussy pitch lines and grout “speed bumps,” so sightlines glide from door to end wall. Choose large-format porcelain or stone with minimal grout joints and a matte, slip-resistant finish (look for R10/R11). A tile-in linear drain cover disappears into the field, while color-matched grout keeps the surface quiet. If you’re pairing with underfloor heat, confirm the mat layout works with the drain placement. To enhance the widening effect, run planks or elongated tiles perpendicular to the room’s length and keep thresholds flush across transitions. The payoff: fewer breaks, better flow, and an honestly easier clean. Paired with frameless glass, the result feels like one generous zone rather than a series of choppy compartments—exactly what a galley bath needs.
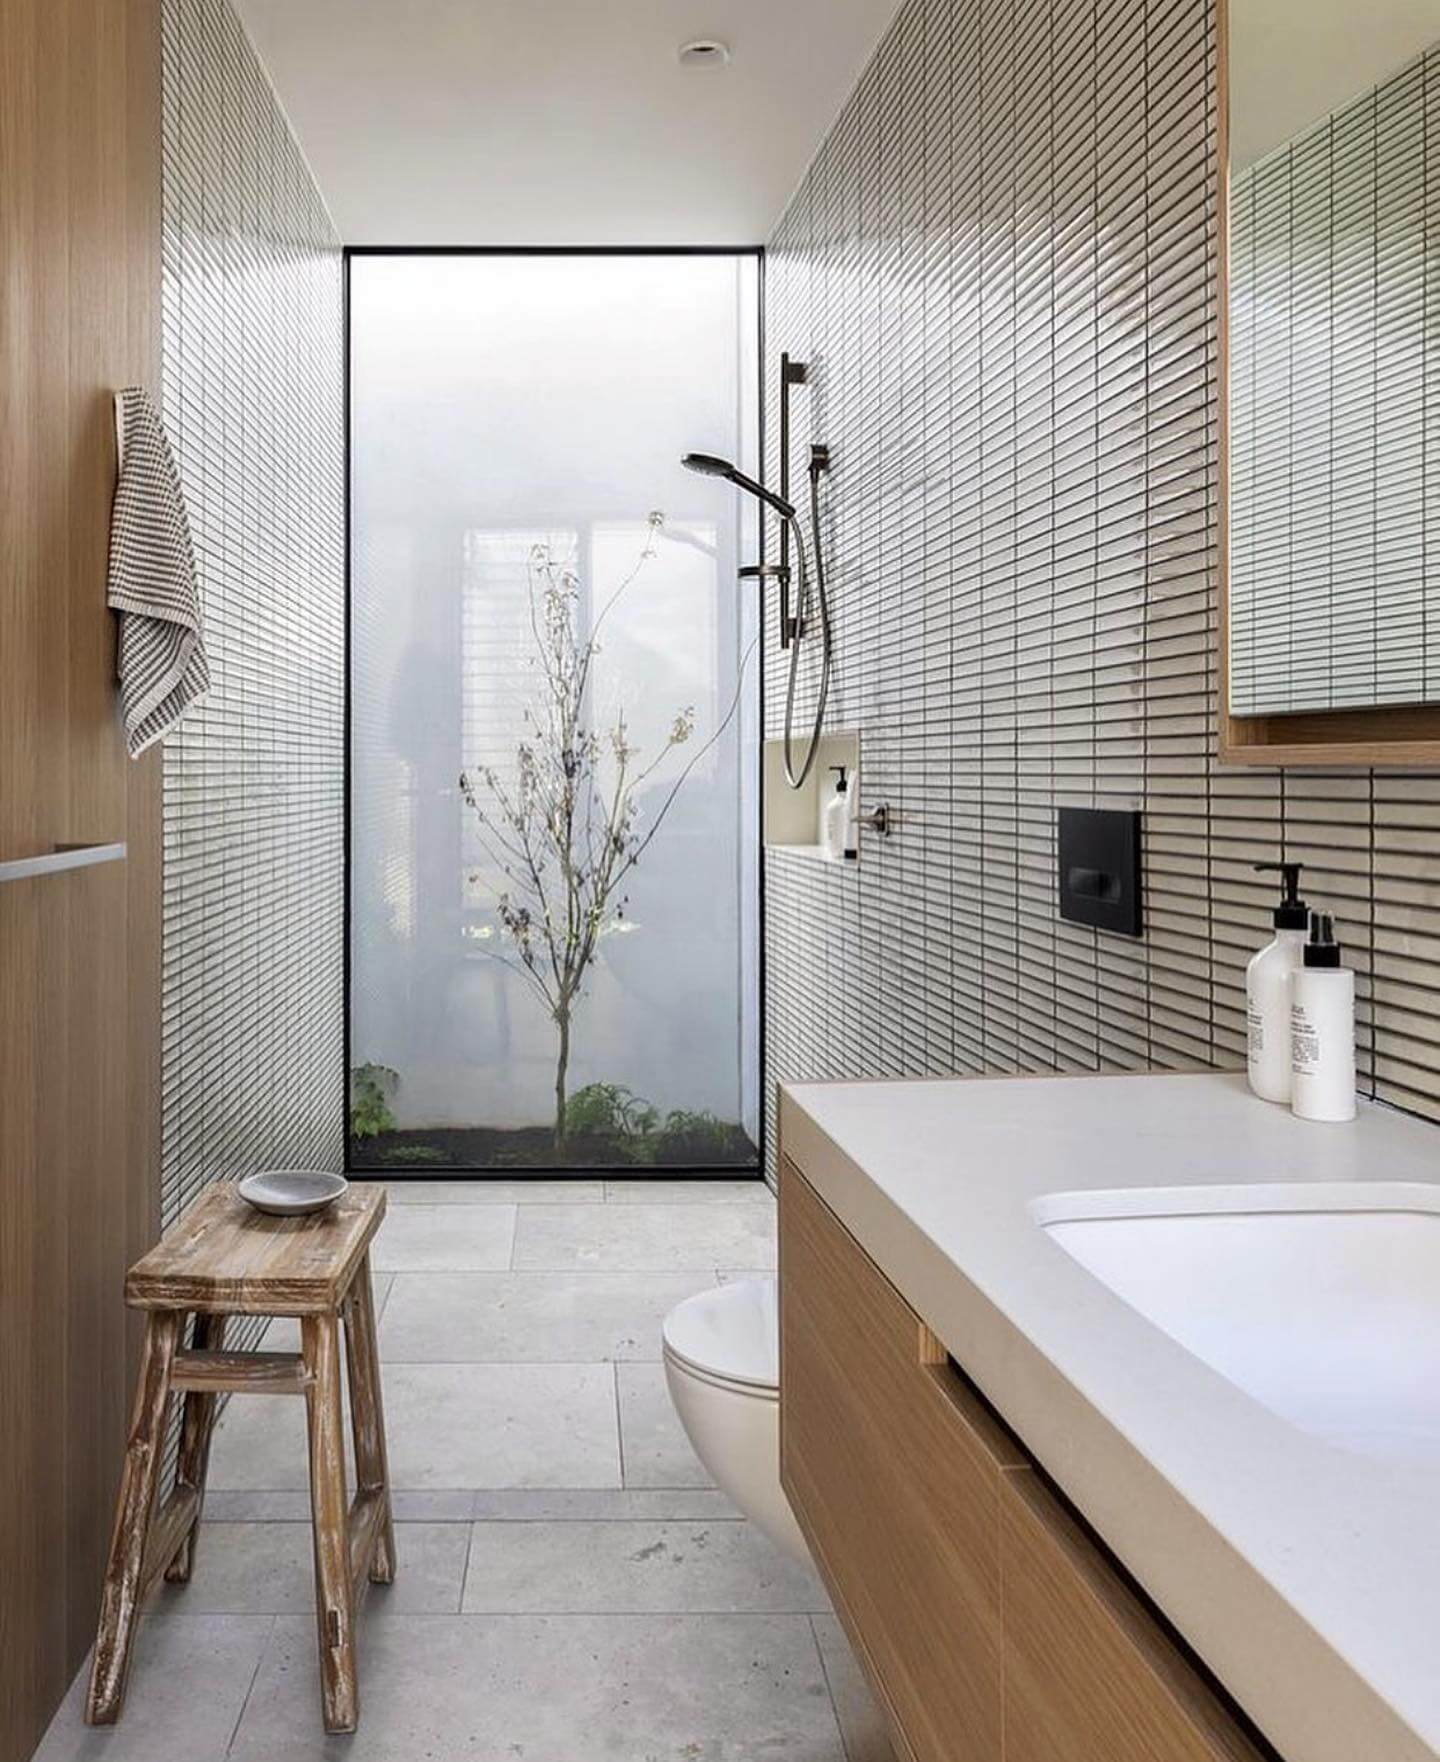
Borrow Light Up High: Clerestories, Transoms, and Diffused Glass
When width is limited, daylight becomes your biggest space-expander. Introduce clerestory windows, interior transoms, or a frosted pocket-door panel to “borrow” light from adjacent rooms without giving up privacy. High glazing pulls brightness deep into a galley bath, washing ceilings and upper walls so edges recede. A narrow skylight or sun tunnel over the wet zone can do the same, especially when paired with a gloss or eggshell ceiling that bounces light down the length of the room. For doors, specify acid-etched or reeded glass to blur silhouettes while keeping the passage bright; adding a transom above a pocket slider keeps the header slim and airflow steady. At night, mimic daylight with layered, dimmable LEDs: linear cove or toe-kick light for soft wash, vertical sconces at mirror height for task, and a low-glare downlight at the end wall to pull the eye forward. The goal isn’t just illumination—it’s longer, wider sightlines, fewer shadows, and a serene, gallery-like rhythm that makes a narrow footprint feel effortless.
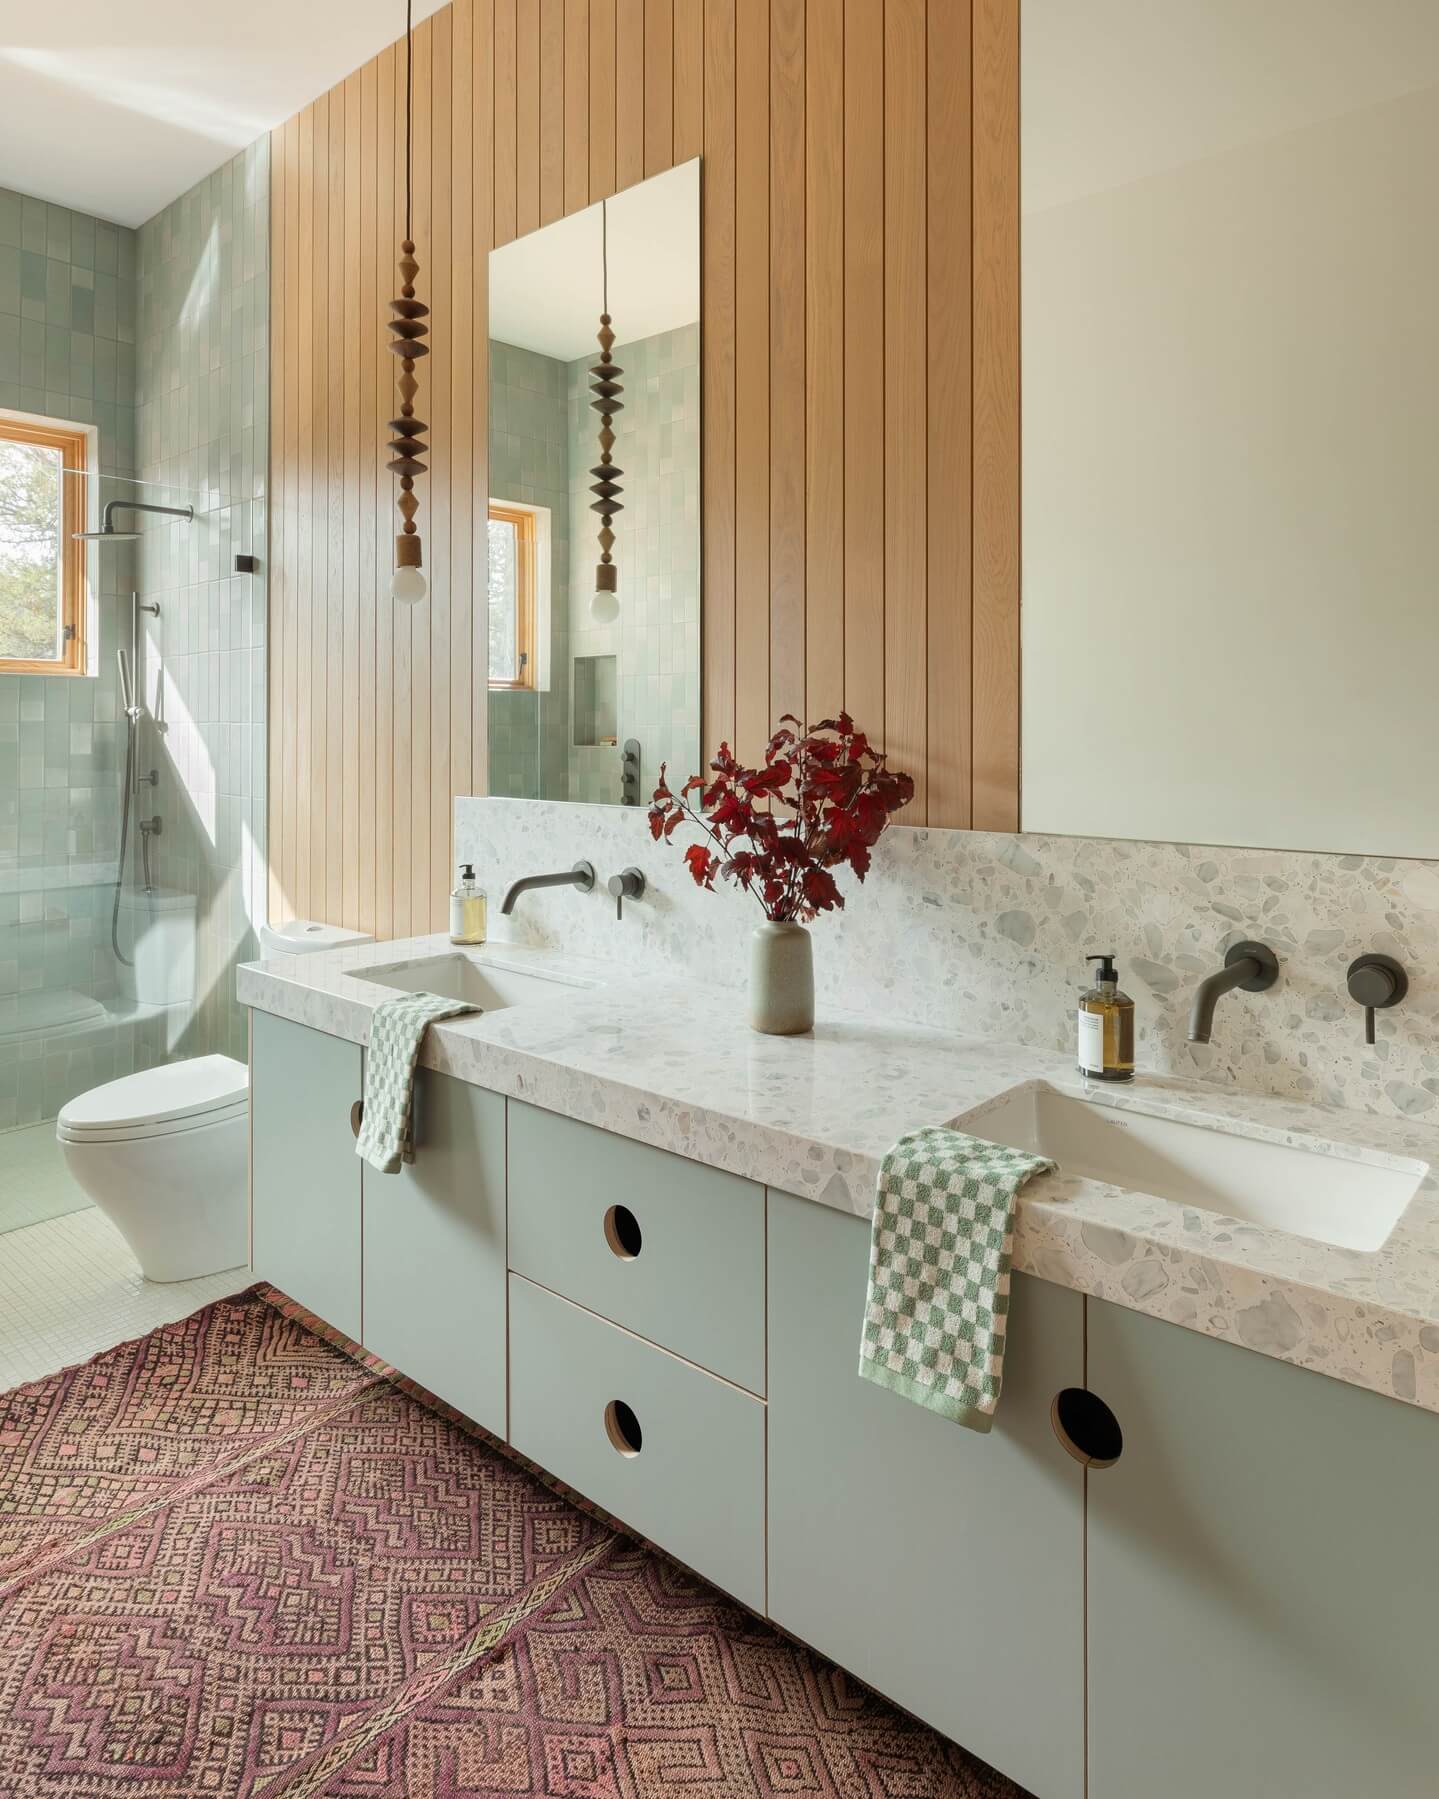
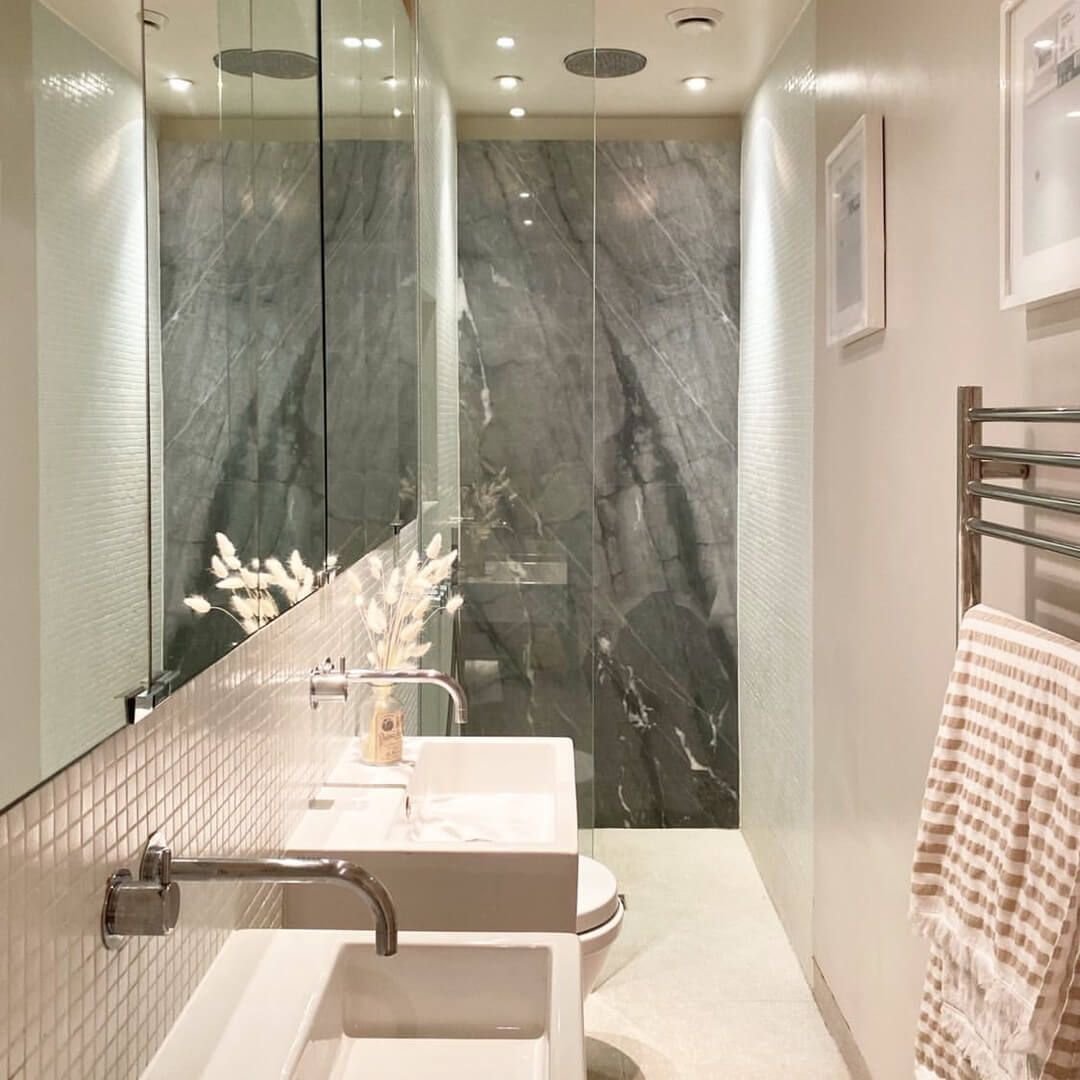
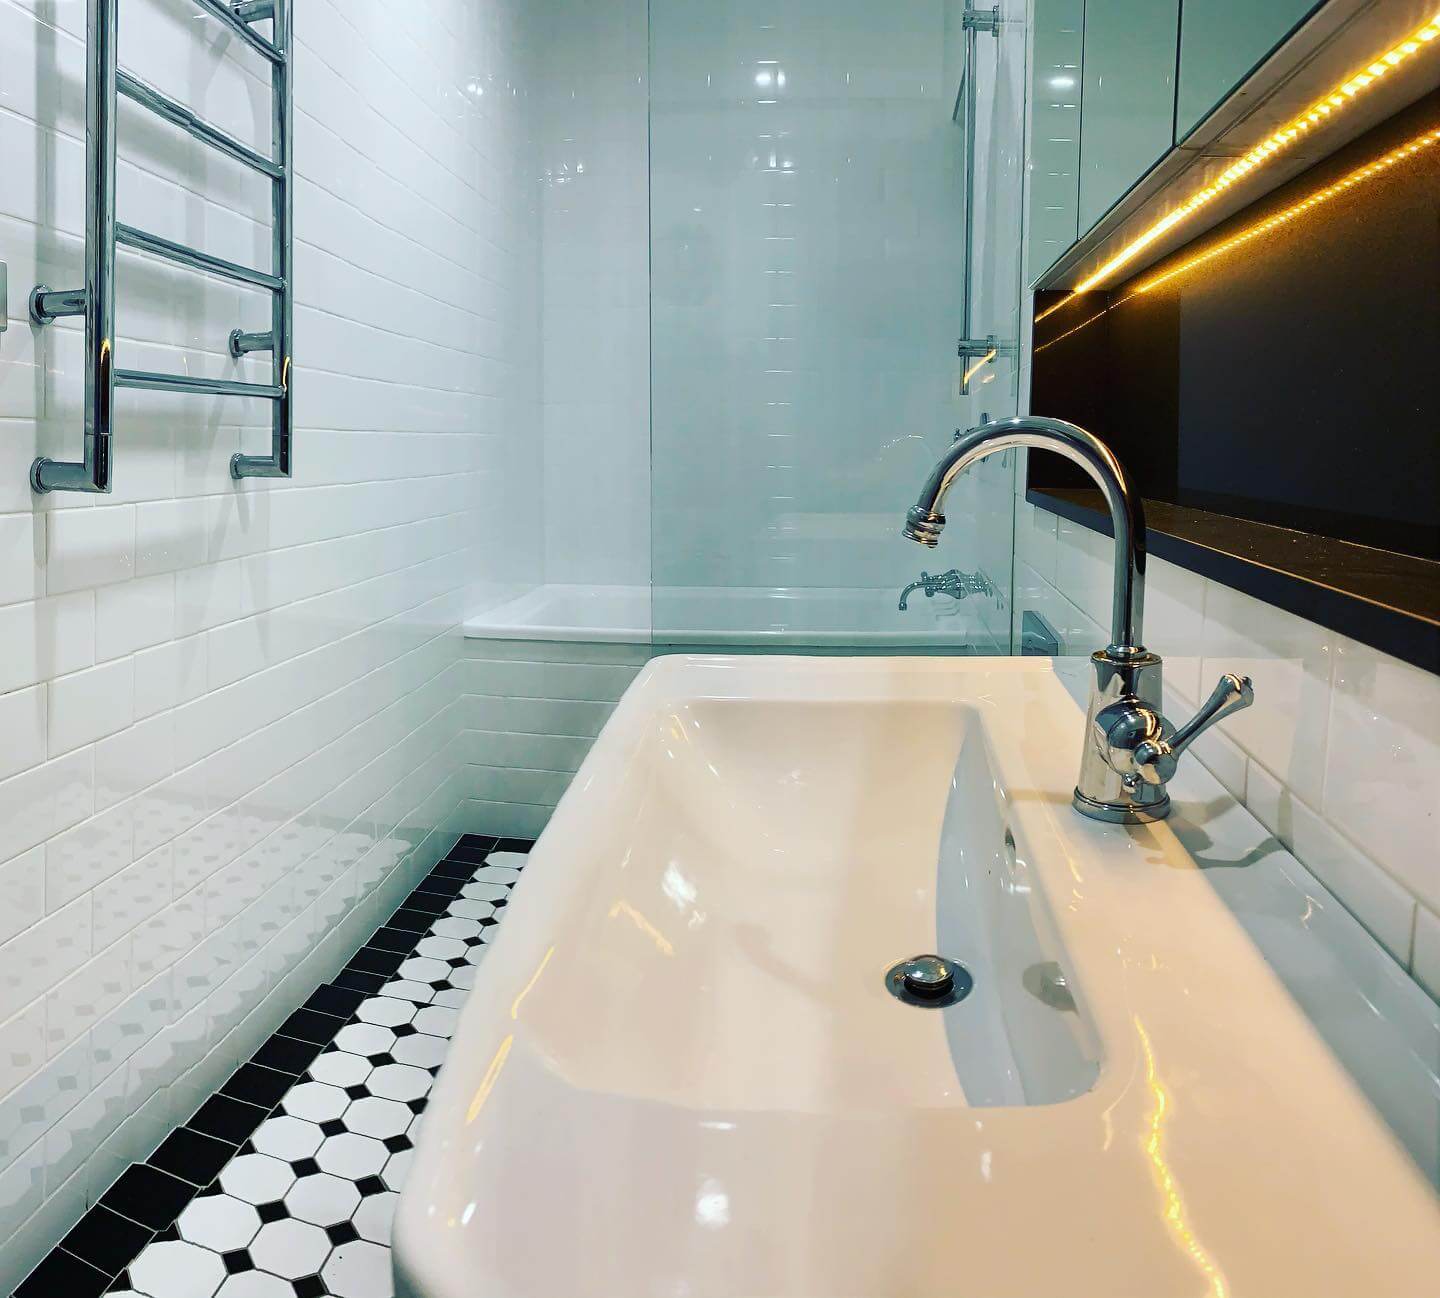
Slimline Trough Sinks Keep the Runway Clear
Depth is precious along a tight circulation path. A slim trough sink—wall-mounted or on a narrow console—delivers multi-user functionality while keeping projection to a minimum. Look for basins in the 12–15 inch depth range with two wall-mount faucets and a single, gently sloped bowl; you’ll free up 3–6 inches of aisle compared to standard vanities and still have ample wash space. Wall valves and a concealed trap maintain a crisp profile, and a shallow open shelf beneath can corral extra rolls or hand towels without boxing in the floor. Set spout projection around 6.5–7 inches to reach the bowl sweet spot, and center faucets 8–12 inches apart for comfortable double use. Because the sink mass hugs the wall, you can run a continuous mirror or micro shelf above it and keep the floor uninterrupted below—both stretch perceived width. In a long, narrow layout, aligning the trough along the straight run and pairing it with a pocket door and frameless glass shower creates a clear, generous walkway that simply works.
Curve the Corners to Soften a Tight Corridor
Sharp edges amplify the “bowling-alley” feeling in a skinny bath and steal comfort from every pass. Rounded profiles—on vanity corners, shelves, mirrors, and even shower screens—ease circulation and visually soften the corridor. Specify a radius or bullnose stone top, choose a console with softened front corners, and ask your fabricator for a pencil or small bevel edge on counters to reduce visual thickness. A curved half-height partition or subtly arched glass panel at the shower invites movement and reduces snag points, while quarter-round or radius-edge tile trims keep corners tidy without chunky profiles. Even hardware matters: pill-shaped pulls and rounded hooks read slimmer and are kinder to hips and towels in narrow clearances. The effect is subtle but powerful—curves quiet the geometry, light flows more evenly across surfaces, and the room feels more inviting. In a space where every inch counts, ergonomic edges turn daily navigation from cautious to confident.
Go Radiant: Heat the Floor and Towels, Not the Room
Bulky baseboards and wall radiators chew up inches you don’t have. Radiant floor heating delivers comfort invisibly, warming large-format tile evenly from end to end so a long bath feels cozy without visual clutter. Electric mats are easy in remodels; hydronic loops pair well with larger projects. Layer in a slim towel warmer (ladder-style models are just 16–20 inches wide) to dry linens and add a touch of spa without a tower cabinet. Put both on timers: preheat the floor for morning and evening routines, and let the warmer finish towels post-shower to keep humidity and mildew down. Because heat is integrated, you can keep walls cleaner for recessed storage, a continuous ledge, or simply more air around a wall-hung toilet and floating vanity. Bonus: warm floors make curbless, linear-drain showers even more inviting, encouraging an open, doorless design that visually widens the footprint. Comfort goes up, bulk goes down—the narrow-bath equation solved.
Choose Light-Transmitting Privacy: Fluted and Frosted Glass
Clear glass maximizes openness, but sometimes you need privacy in a narrow bath that still relies on shared light. Fluted (reeded), frosted, or acid-etched glass offers the best of both worlds—softly diffusing views while transmitting brightness from end to end. Use it for shower panels, internal windows, or the panel of a pocket slider; the texture blurs silhouettes and noise without introducing heavy frames that chop sightlines. Vertical reeding subtly emphasizes height, counterbalancing the room’s length, while a low-iron, satin finish keeps whites crisp and colors true. Pair with a minimal channel or clamp hardware to maintain that uninterrupted, gallery-like feel. For multi-use households, consider switchable privacy glass at the shower or WC zone—clear when you want stretch, opaque when you need separation. Keep the palette low-contrast around these panels so light diffusion feels uniform. The result is a bathroom that functions gracefully at all hours, with privacy where it counts and flow everywhere else.
Get the Fail-Safe Paint Color Playbook (Free PDF)
36 proven colors • 8 ready palettes • trim & sheen guide • printable testing cards.
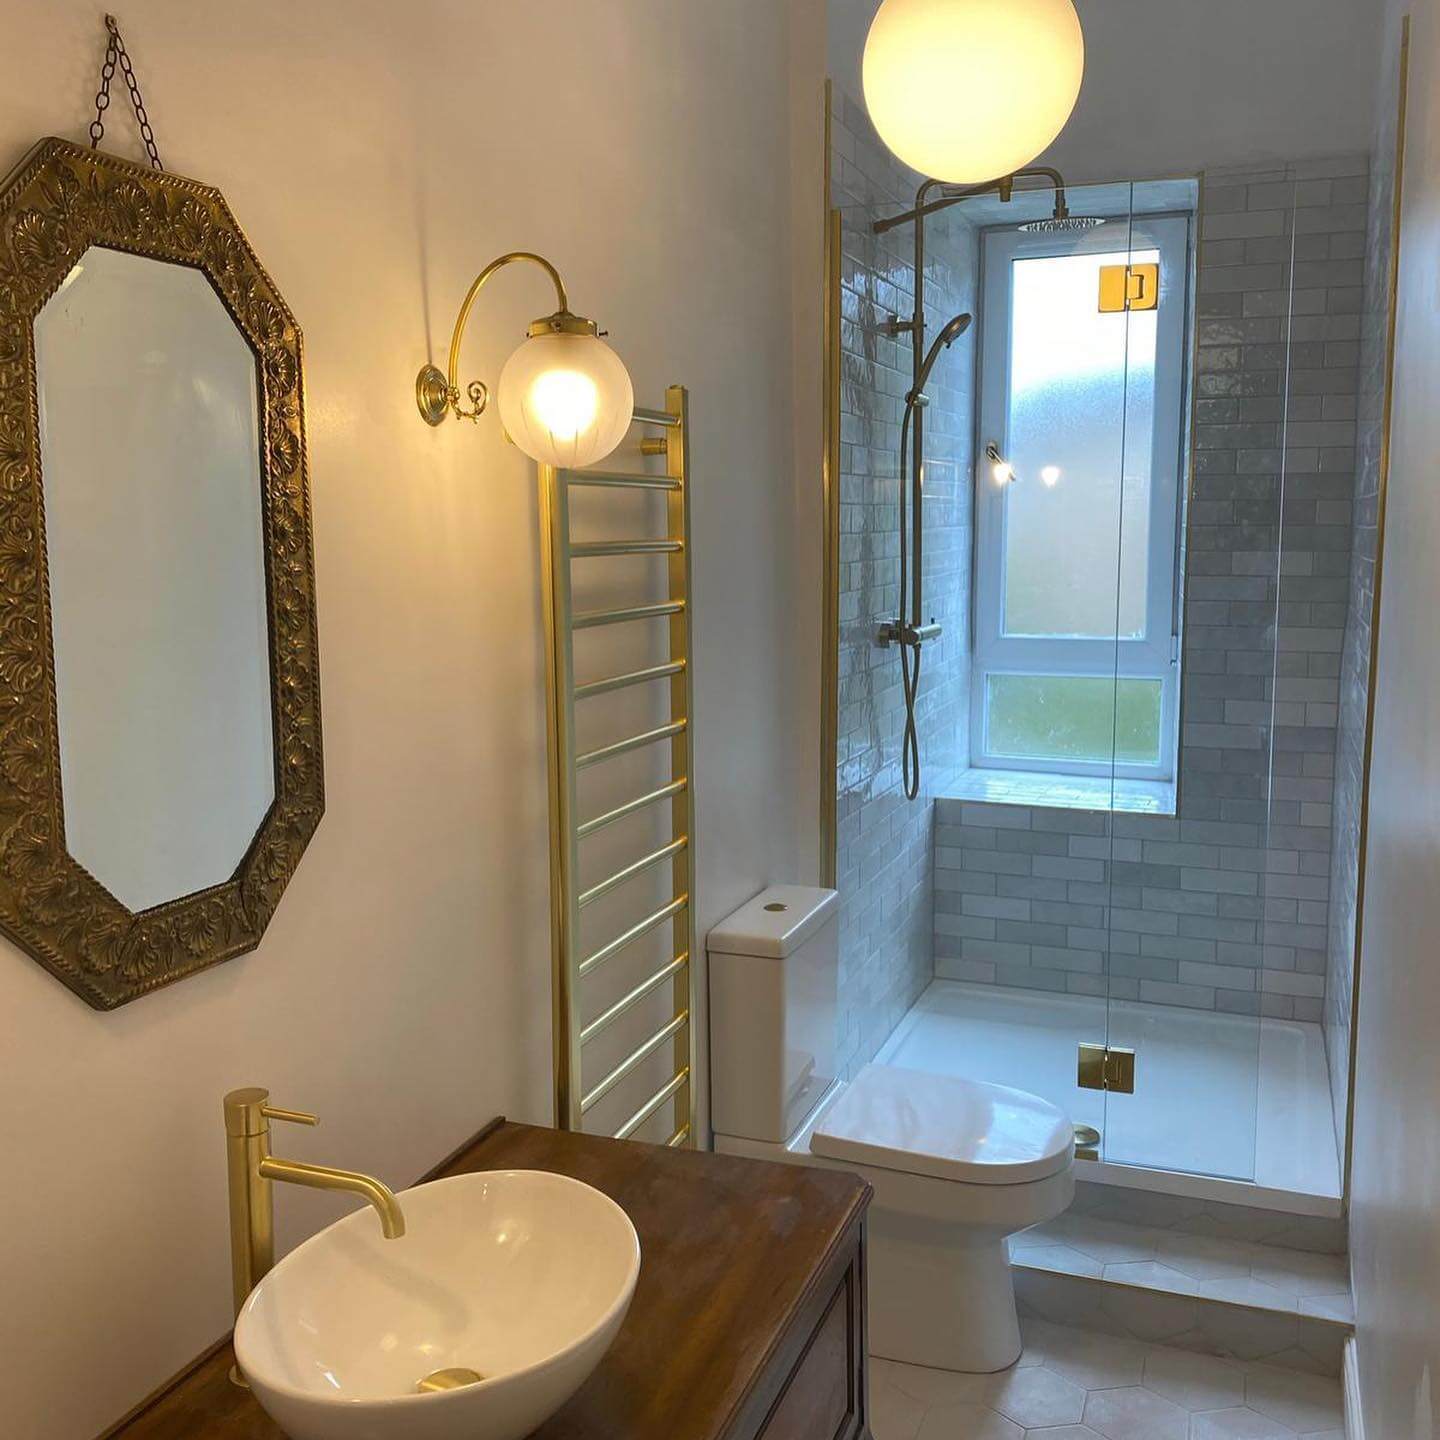
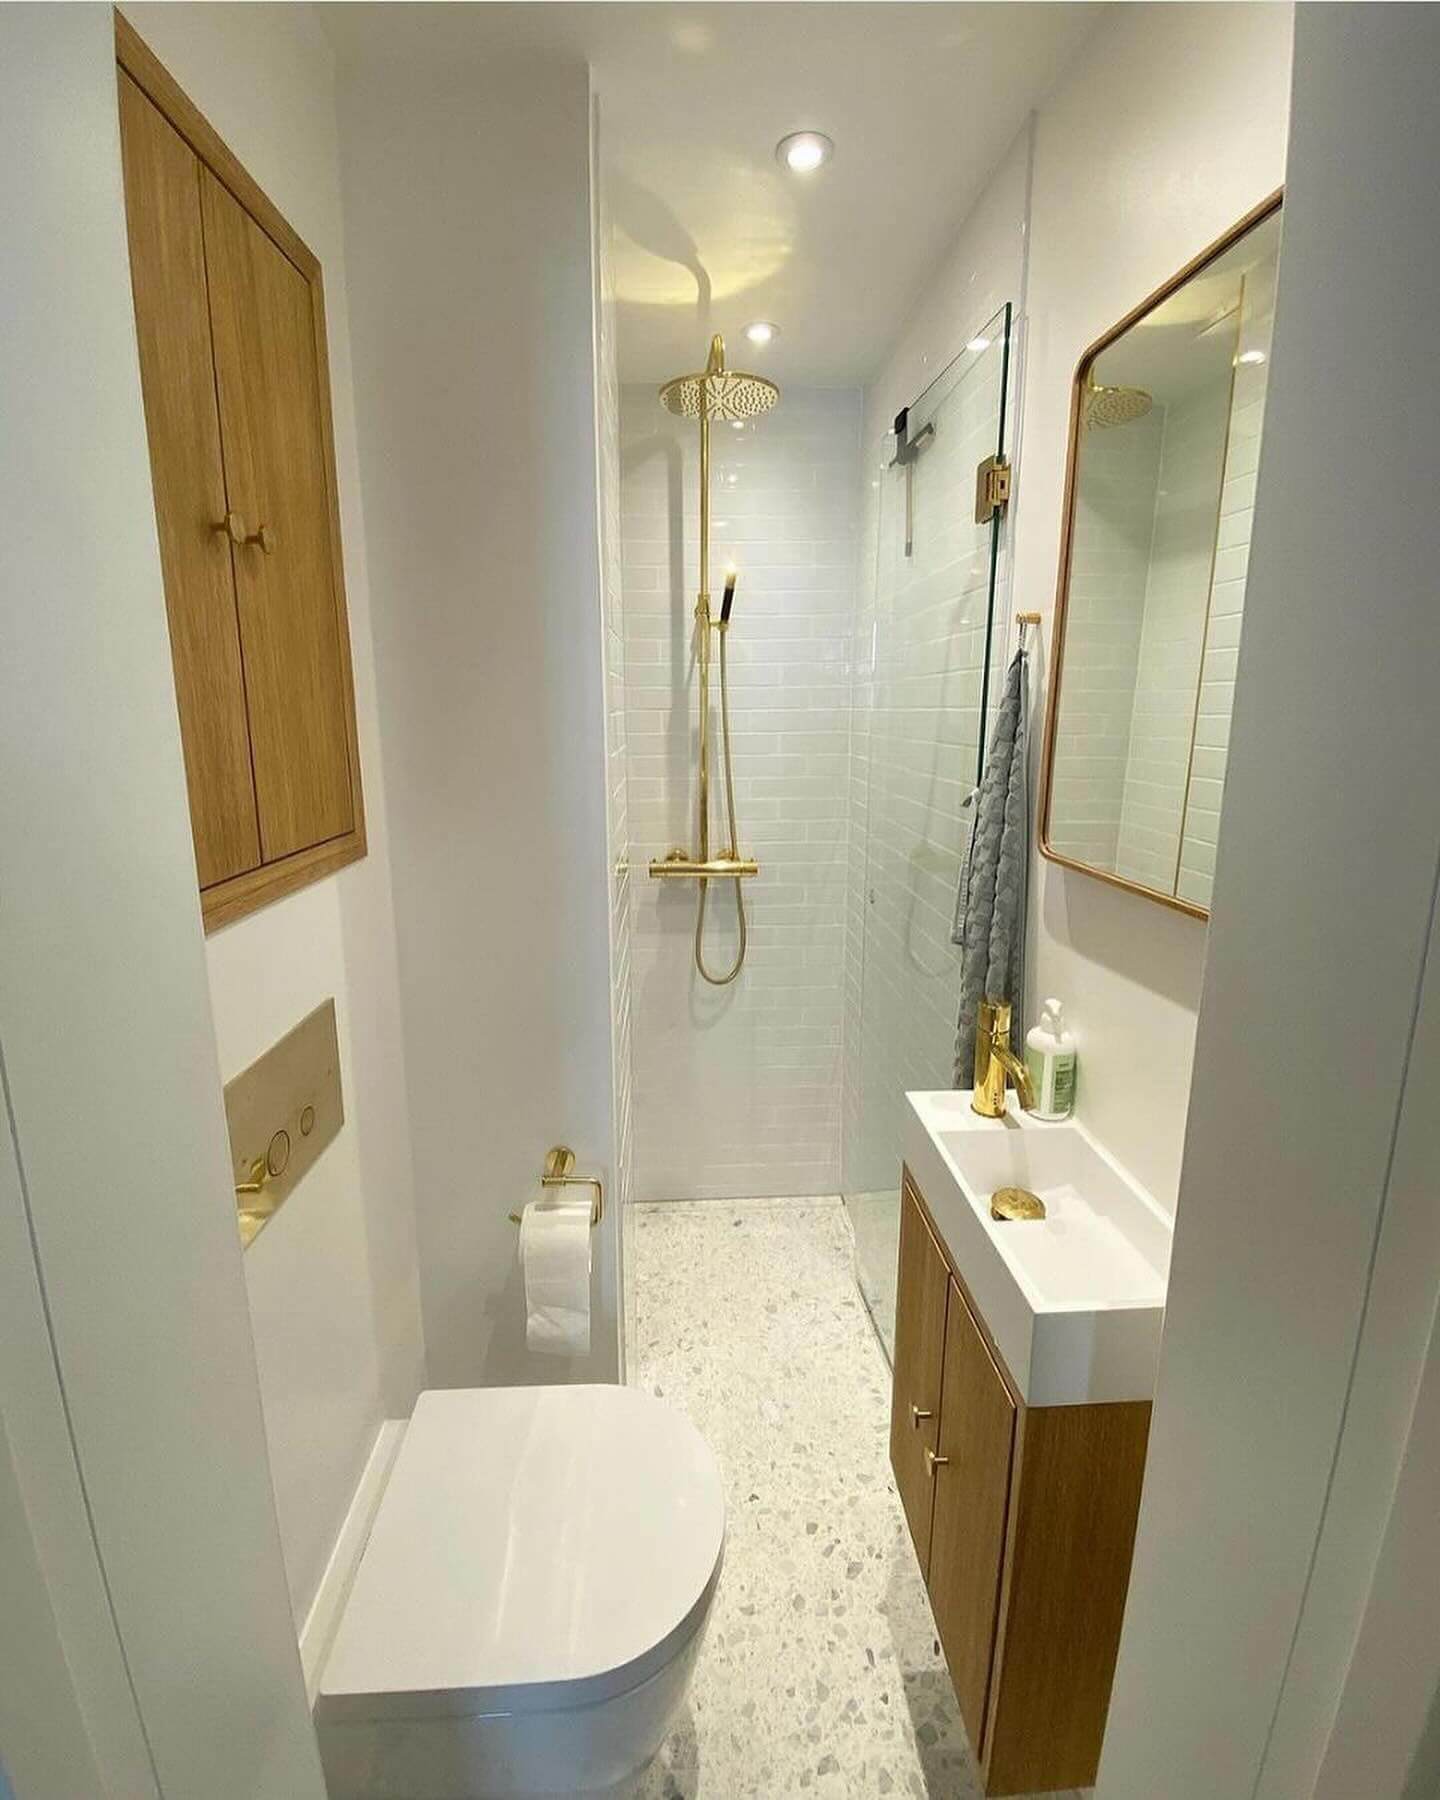
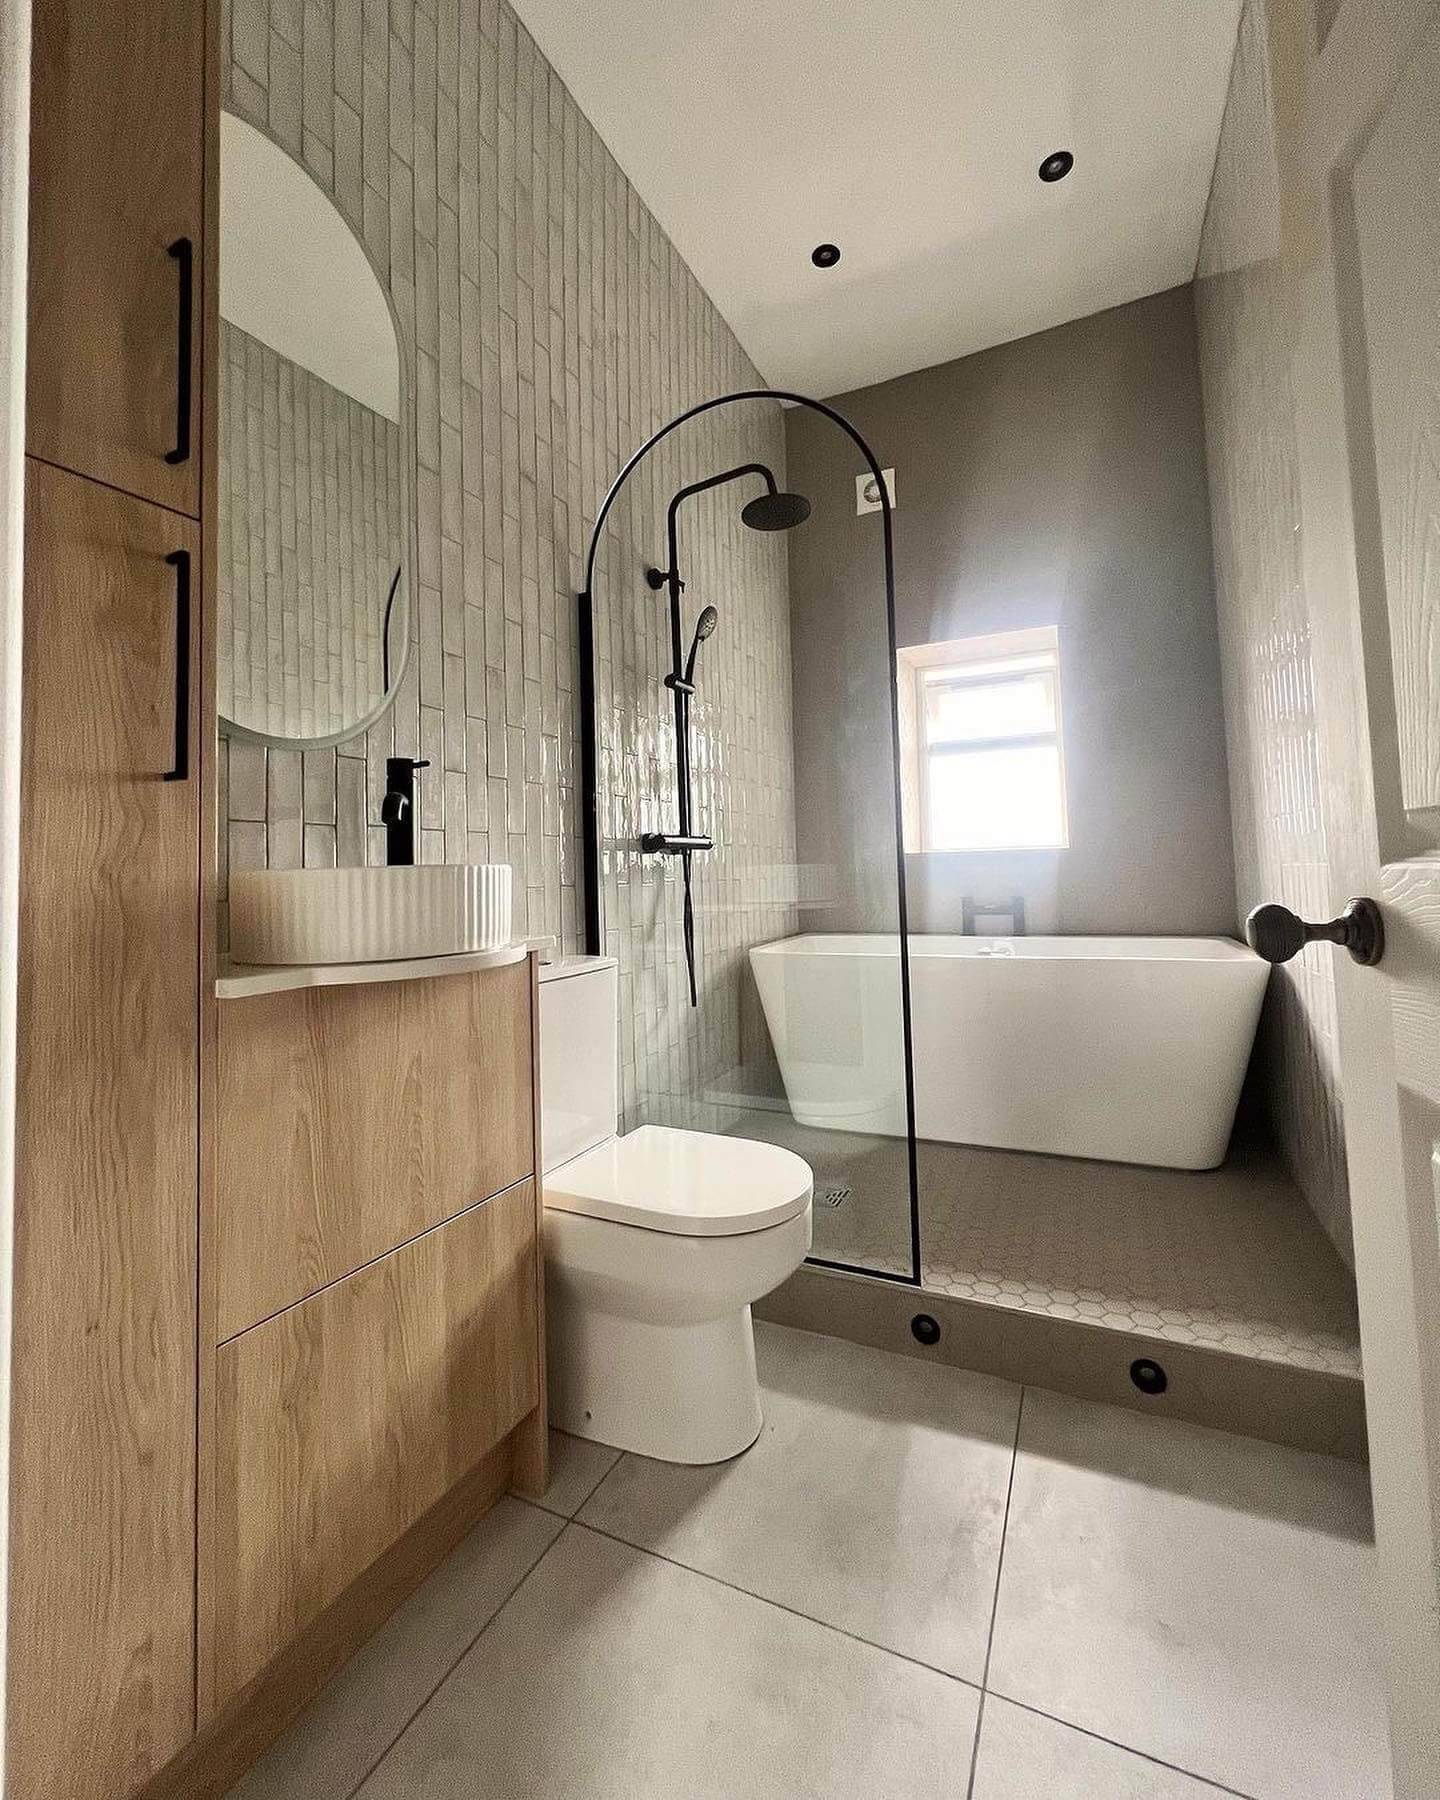
Stage a Destination End Wall with a Walk-In Wet Zone

In a galley bathroom, purposefully “ending” the run creates balance and momentum. Put the wet zone—an open, doorless shower or a tub-shower alcove—at the far end to form a destination that draws the eye forward. Anchor that wall with a linear drain, a bench, a centered niche, or a window framed in a contrasting material. The long approach stays open for circulation, while the activity concentrates at the terminus, making the room feel intentional rather than leftover. Keep glass frameless and full-height to stretch proportions; a half-height partition can guard splash while preserving width. If you’re team bath, recess a soaking tub between walls and run the same tile up and around the surround so it reads like architecture, not an insert. Lighting seals the move: a soft downlight or concealed uplight at the end wall pulls you through, while toe-kick and mirror lights keep the aisle calm. The space gains rhythm—walk, arrive, unwind.
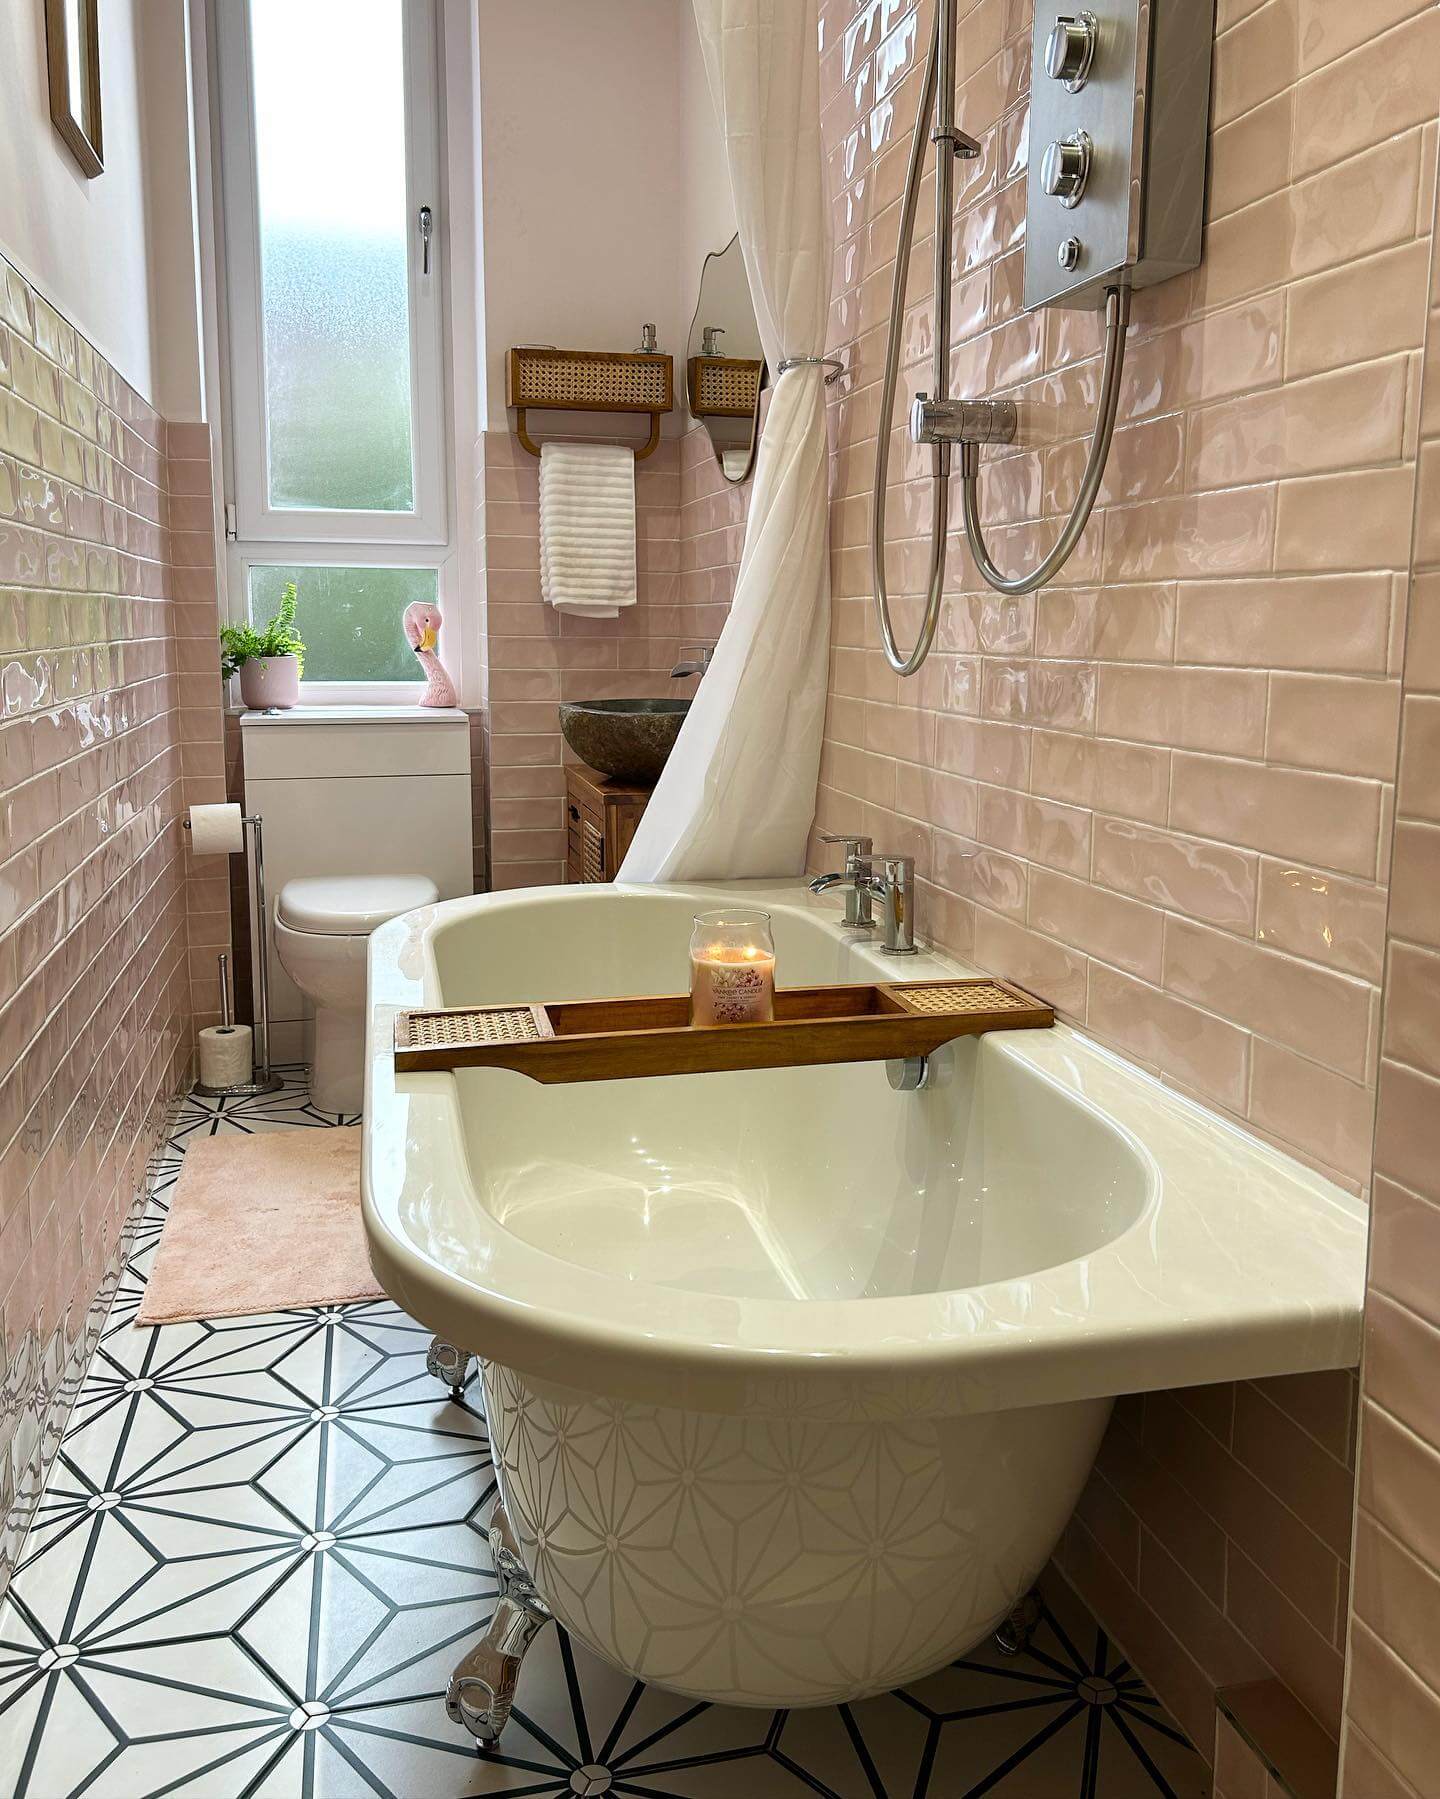
Widen the Room with a Contrasting Floor Runner
Use tile layout to perform optical magic. A perimeter “border” in a light tone with a slightly darker center field creates the effect of a tailored runner—and makes the room read wider at the edges. In a long, narrow bathroom, that subtle contrast breaks up the bowling-alley feel and adds refinement without adding objects. Keep transitions dead flat (curbless if possible) and maintain grout color continuity within each zone so the pattern feels woven, not busy. Porcelain planks or 12x24s work brilliantly: miter borders cleanly at corners, and lay the field tiles perpendicular to the length to push the walls visually apart. If the shower is at the end, carry the center field into the wet zone and kiss it to a linear drain for a seamless continuation. The key is restraint—two tones, low contrast, and matte finishes to avoid glare. Styled with a floating vanity and slim hardware, the floor does the widening so you don’t have to.
Gain Inches with Wall-Mount Faucets and Shallow Counters
Free your aisle by moving hardware off the deck. Wall-mount faucets let you trim vanity depth to 14–16 inches without splashback drama, a game-changer in tight baths. With the spout projecting 6.5–7 inches from the wall and the sink positioned properly beneath, you maintain comfortable reach while reclaiming 2–4 inches of valuable circulation. A slim backsplash or micro-ledge (2–3 inches) doubles as a perch for soap and small essentials, keeping counters clean and the profile lean. Because the valves and trap tuck into the wall, you can opt for an open console, slim drawer base, or even a trough sink to serve two without bulk. Align the faucet centerlines with mirror lighting for crisp symmetry, and run tile or microcement behind for easy wipe-downs. The result is a lighter, more architectural look that preserves the clear “runway” a galley bath needs—proof that a few well-placed inches can change everything.
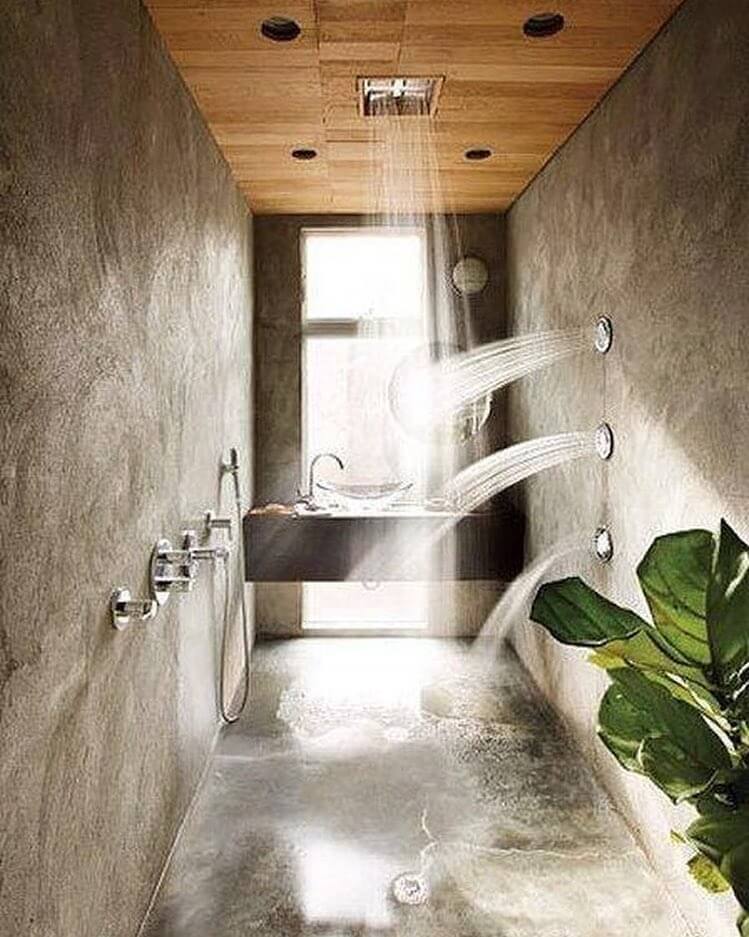
Go Seamless with Microcement or Tadelakt Walls
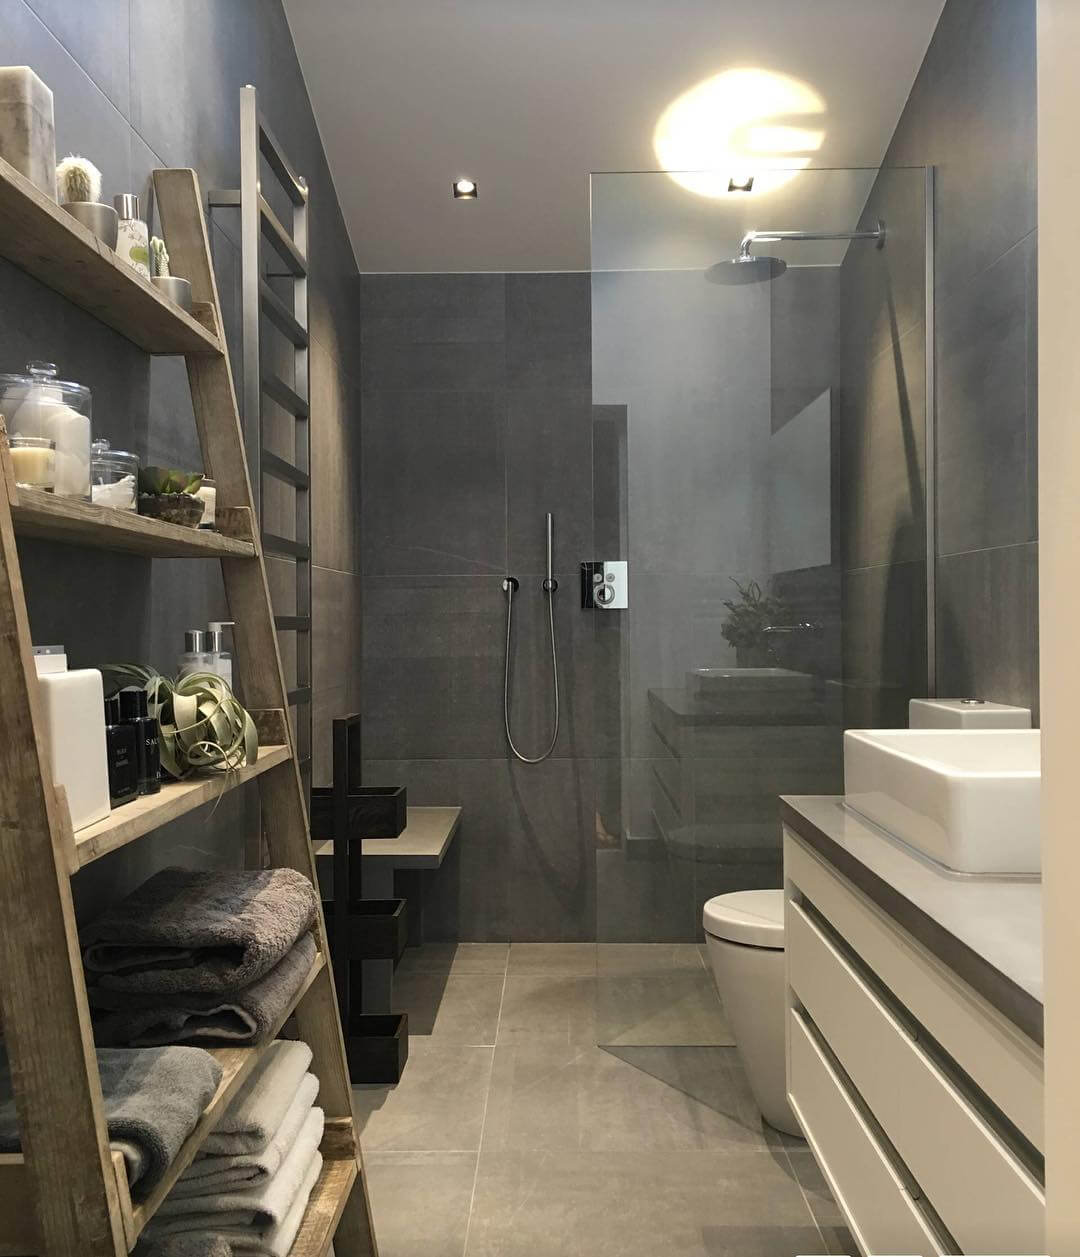
Fewer seams equal calmer, wider-feeling walls. Microcement and tadelakt (a traditional lime plaster) wrap narrow bathrooms in a continuous, waterproof skin that visually pushes boundaries outward. The monolithic finish erases grout grids and corner clutter, allowing light to glide from vanity to wet zone without interruption. Rounded plaster returns at niches and half-height partitions soften edges and boost durability, while a pale, low-contrast tone keeps the envelope airy. Microcement pairs well with electric radiant floors and linear drains; just ensure a stable substrate and pro installation for long-term performance. In showers, tadelakt’s hand-burnished sheen repels water beautifully and feels spa-level under light. Pair these textures with frameless glass, wall-mounted fixtures, and a floating vanity for maximum legroom and minimum visual noise. The payoff is both sensory and spatial: less to see, less to clean, and more perceived width in a footprint that finally breathes.
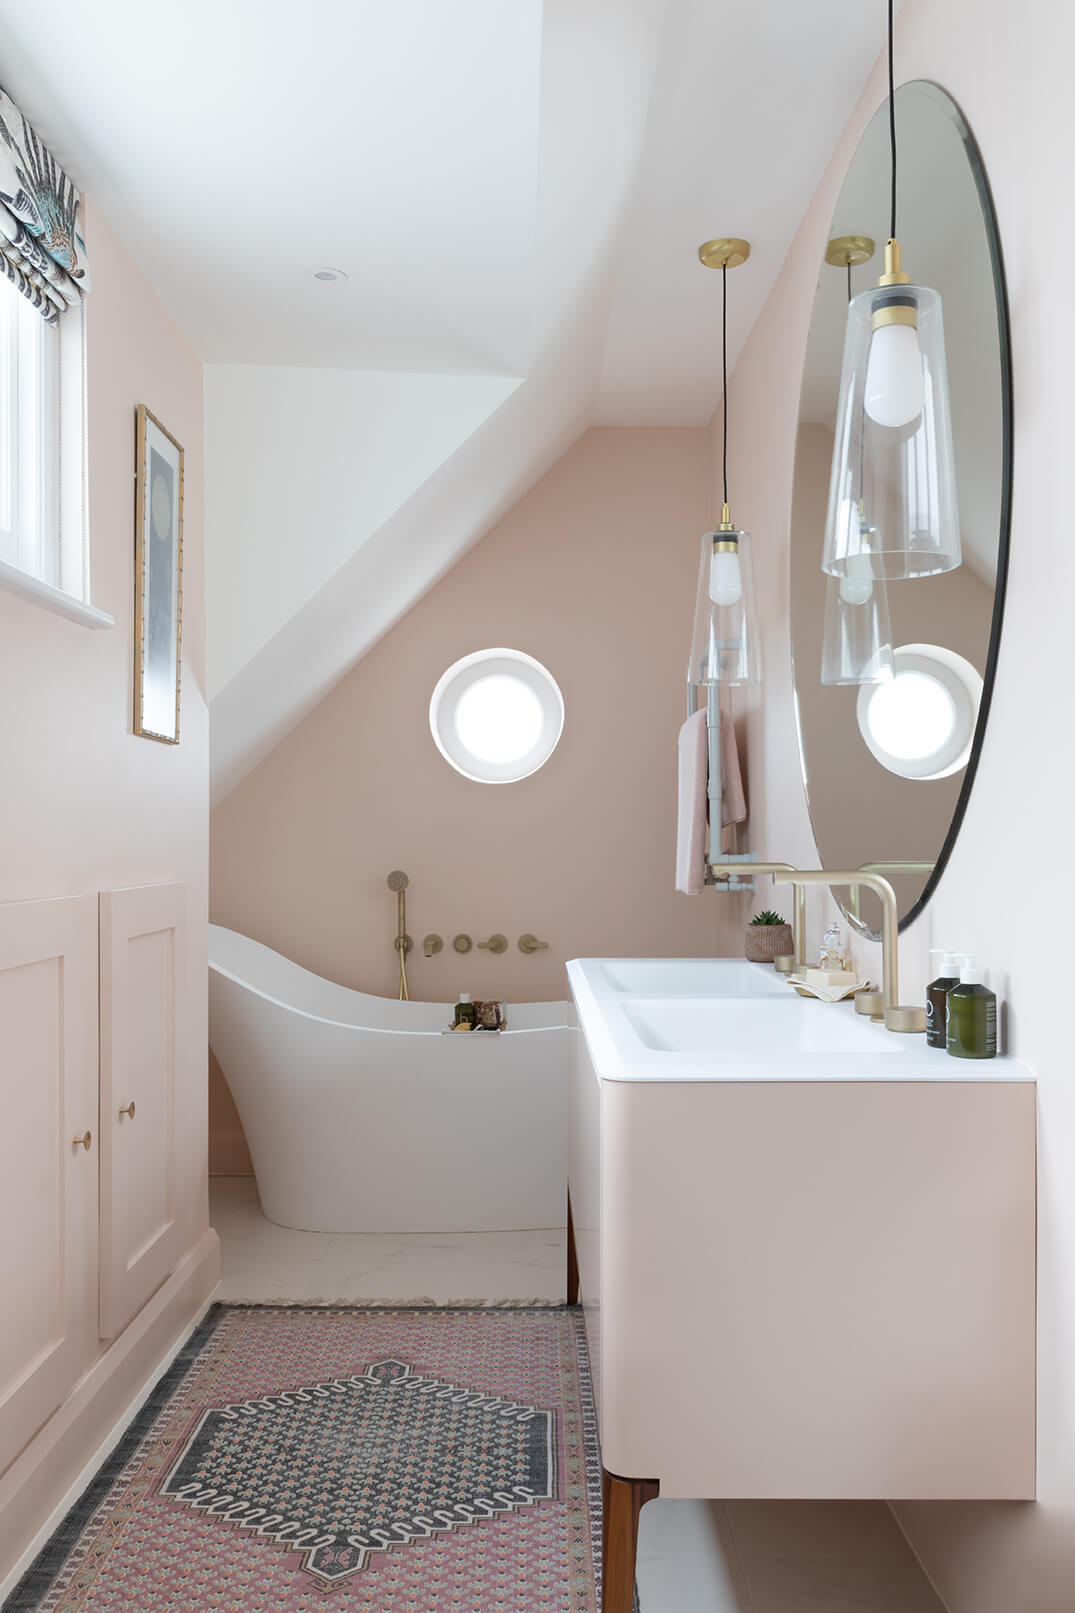
Make the Room Feel Twice as Wide with a Wall-to-Wall Mirror
In a long and narrow bathroom, a wall-to-wall, counter-to-ceiling mirror is the single fastest way to visually double the width and bounce light deeper down the corridor. Specify low-iron glass for truer color and a crisp reflection, and run the mirror edge-to-edge without chunky frames so it reads as architecture, not decor. Flank the reflection with slim vertical sconces or mount fixtures directly on the glass with through-mirror grommets to keep the sightline clean. If you’re worried about steam, add a demister pad behind the mirror so it stays crystal clear after showers. Keep the vanity profile lean—think floating or shallow-depth—with a simple slab backsplash that tucks right behind the mirror for an uninterrupted line. In tight plans, mirrored medicine cabinets can be ganged seamlessly to deliver hidden storage while maintaining the expansive reflection. The result: more daylight reach, better task lighting, and a glamorous, gallery-like feel without physically widening the walls. This simple move supports every other narrowing strategy—light palettes, slim fixtures, and glassy showers—by amplifying them in a single, continuous plane.
Get the Fail-Safe Paint Color Playbook (Free PDF)
36 proven colors • 8 ready palettes • trim & sheen guide • printable testing cards.
Trade Swing Doors for Pocket or Slide-By Panels
Swing doors steal precious aisle space in a galley bath. Swap them for a pocket, barn, or slide-by panel to reclaim 9–12 square feet of clearance and keep your flow uninterrupted from entry to vanity to shower. A quality pocket frame with solid headers and full-height split studs prevents wobble, while soft-close hardware hushes the motion in the early morning. If wall plumbing or wiring blocks a pocket, use a surface-mounted track with a tight-to-wall slab and low-profile floor guide; specify moisture-resistant finishes and privacy latches designed for bathrooms. For tiny ensuites, a bi-parting pocket set can open center-stage without dumping a panel into the aisle. Finish the door in the same tone as the walls to make it disappear, or mirror the panel to multiply light. In wet rooms, a glass slider protects clearances and contains spray without a hinge arc. Bottom line: by eliminating door swing conflicts with vanities, toilets, and towel warmers, you’ll create safer circulation and a calmer, more spacious experience in a long, narrow footprint.
Pick a Wall-Hung Toilet to Open the Floor
A wall-hung toilet with an in-wall carrier is a narrow-bathroom MVP. By tucking the tank into a 2×6 (or even 2×4) stud bay and lifting the bowl off the floor, you gain crucial inches in the walkway and a continuous line of flooring that visually expands the room. Adjustable bowl heights (15–19 inches) improve ergonomics, and the concealed cistern reduces visual clutter. Place the service panel behind the flush plate for easy maintenance. Pair the compact projection (as short as ~20 inches) with a shallow vanity opposite to widen the center aisle. For ultimate calm, wrap the carrier wall as a clean, tiled mass that integrates a recessed niche above the flush plate for extra paper rolls or a small plant. In a wet-room layout, the floating bowl simplifies mopping and keeps radiant floor heat uninterrupted. Finish the look with a slim seat, quiet-close hinges, and a wall-mounted brush set so nothing touches the floor. The result is cleaner lines, better hygiene, and more legroom where long, narrow bathrooms need it most.
Repeat One Warm-Neutral Palette to Calm a Tight Plan
High-contrast palettes can chop up a skinny room. Choose a restrained suite of warm neutrals—think light oak, putty or greige porcelain, and brushed brass or stainless—to create a seamless envelope that feels wider and more serene. Keep undertones consistent across paint, tile, and stone so transitions blur rather than shout. Use matte or satin finishes on walls to soften glare, then introduce controlled reflectivity through the mirror and fixtures to bounce light without visual noise. If you crave pattern, confine it to one plane (for example, an elongated zellige backsplash at the vanity) and let floors and ceilings stay quiet. Matching grout to tile reduces grid lines; large-format tiles (24×48) lower seam count and elongate the space. Repeat metal tones on the faucet, shower trim, pulls, and lighting for a cohesive thread. The restrained scheme supports storage-heavy solutions—tall niches, mirrored cabinets—because everything reads as one calm backdrop. In a long and narrow bathroom, this tonal discipline turns a potential tunnel into a spa-like passage that invites you to exhale.
Build Storage Into the Walls: Stud-Bay Niches and Tall Recesses
When floor area is tight, push storage into the walls. Between-stud niches above the toilet, full-height recessed cabinets, and medicine cabinets that sit flush with drywall keep the center aisle clear and the profile sleek. Frame niches before rough-in so plumbing and wiring route cleanly; line interiors with tile or a solid-surface insert for easy cleaning. For tall recesses, add a shallow (8–12 inch) cabinet with adjustable shelves and a door panel that matches your wall finish—paint-grade, fluted, or mirrored—to make storage visually disappear. In the shower, stack vertical niches rather than one big box to group products by user while maintaining smaller, elegant proportions. Magnetic push latches or finger pulls reduce hardware projection, and soft-close hinges prevent door swing from encroaching on the walkway. Don’t forget ventilation: leave a tiny gap or integrate louvers if storing linens. This built-in approach delivers real capacity for towels, skincare, and cleaning supplies while preserving the light, linear flow a long and narrow bathroom needs.
Stretch Lines Overhead with Linear LEDs and a Quiet Ceiling

In a narrow bath, the ceiling is your fifth wall—use it to guide movement and add width. Run a continuous, low-glare linear LED channel down the length of the room to pull the eye forward, then cross it with short wall grazers that wash tile and subtly widen the envelope. Choose 2700–3000K for warmth, 90+ CRI for true skin tones, and dimmable, wet-rated fixtures near wet zones. A shallow coffer or simple drywall reveal can hide drivers and create a shadow line that lightens the ceiling’s edge. Align exhaust and sprinkler heads neatly within the layout so the plane reads calm, not cluttered. Above the vanity, combine the overhead line with vertical sconces for balanced, shadow-free grooming. In very low ceilings, skip pendants and use perimeter coves to lift the lid visually. Thoughtful, layered lighting not only flatters finishes and faces; it choreographs circulation so a long and narrow bathroom feels intentional, not accidental.
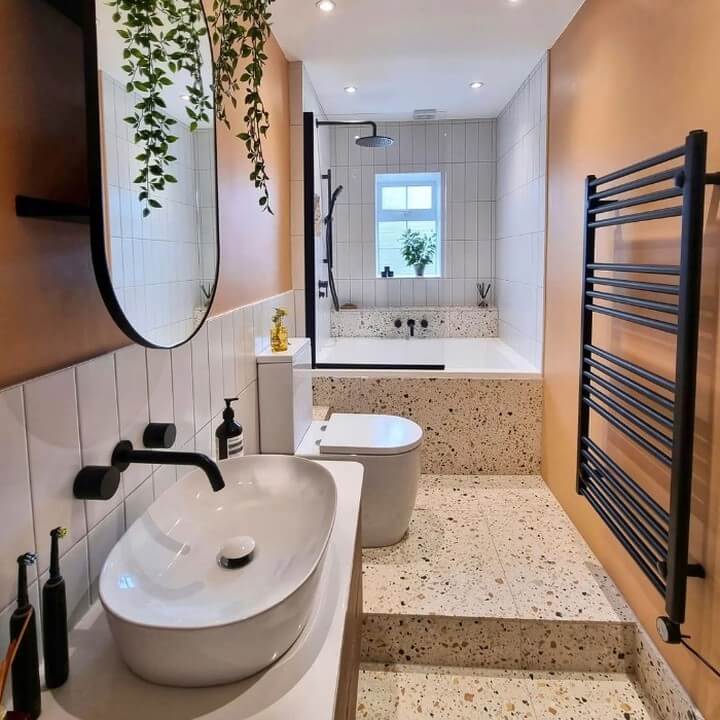
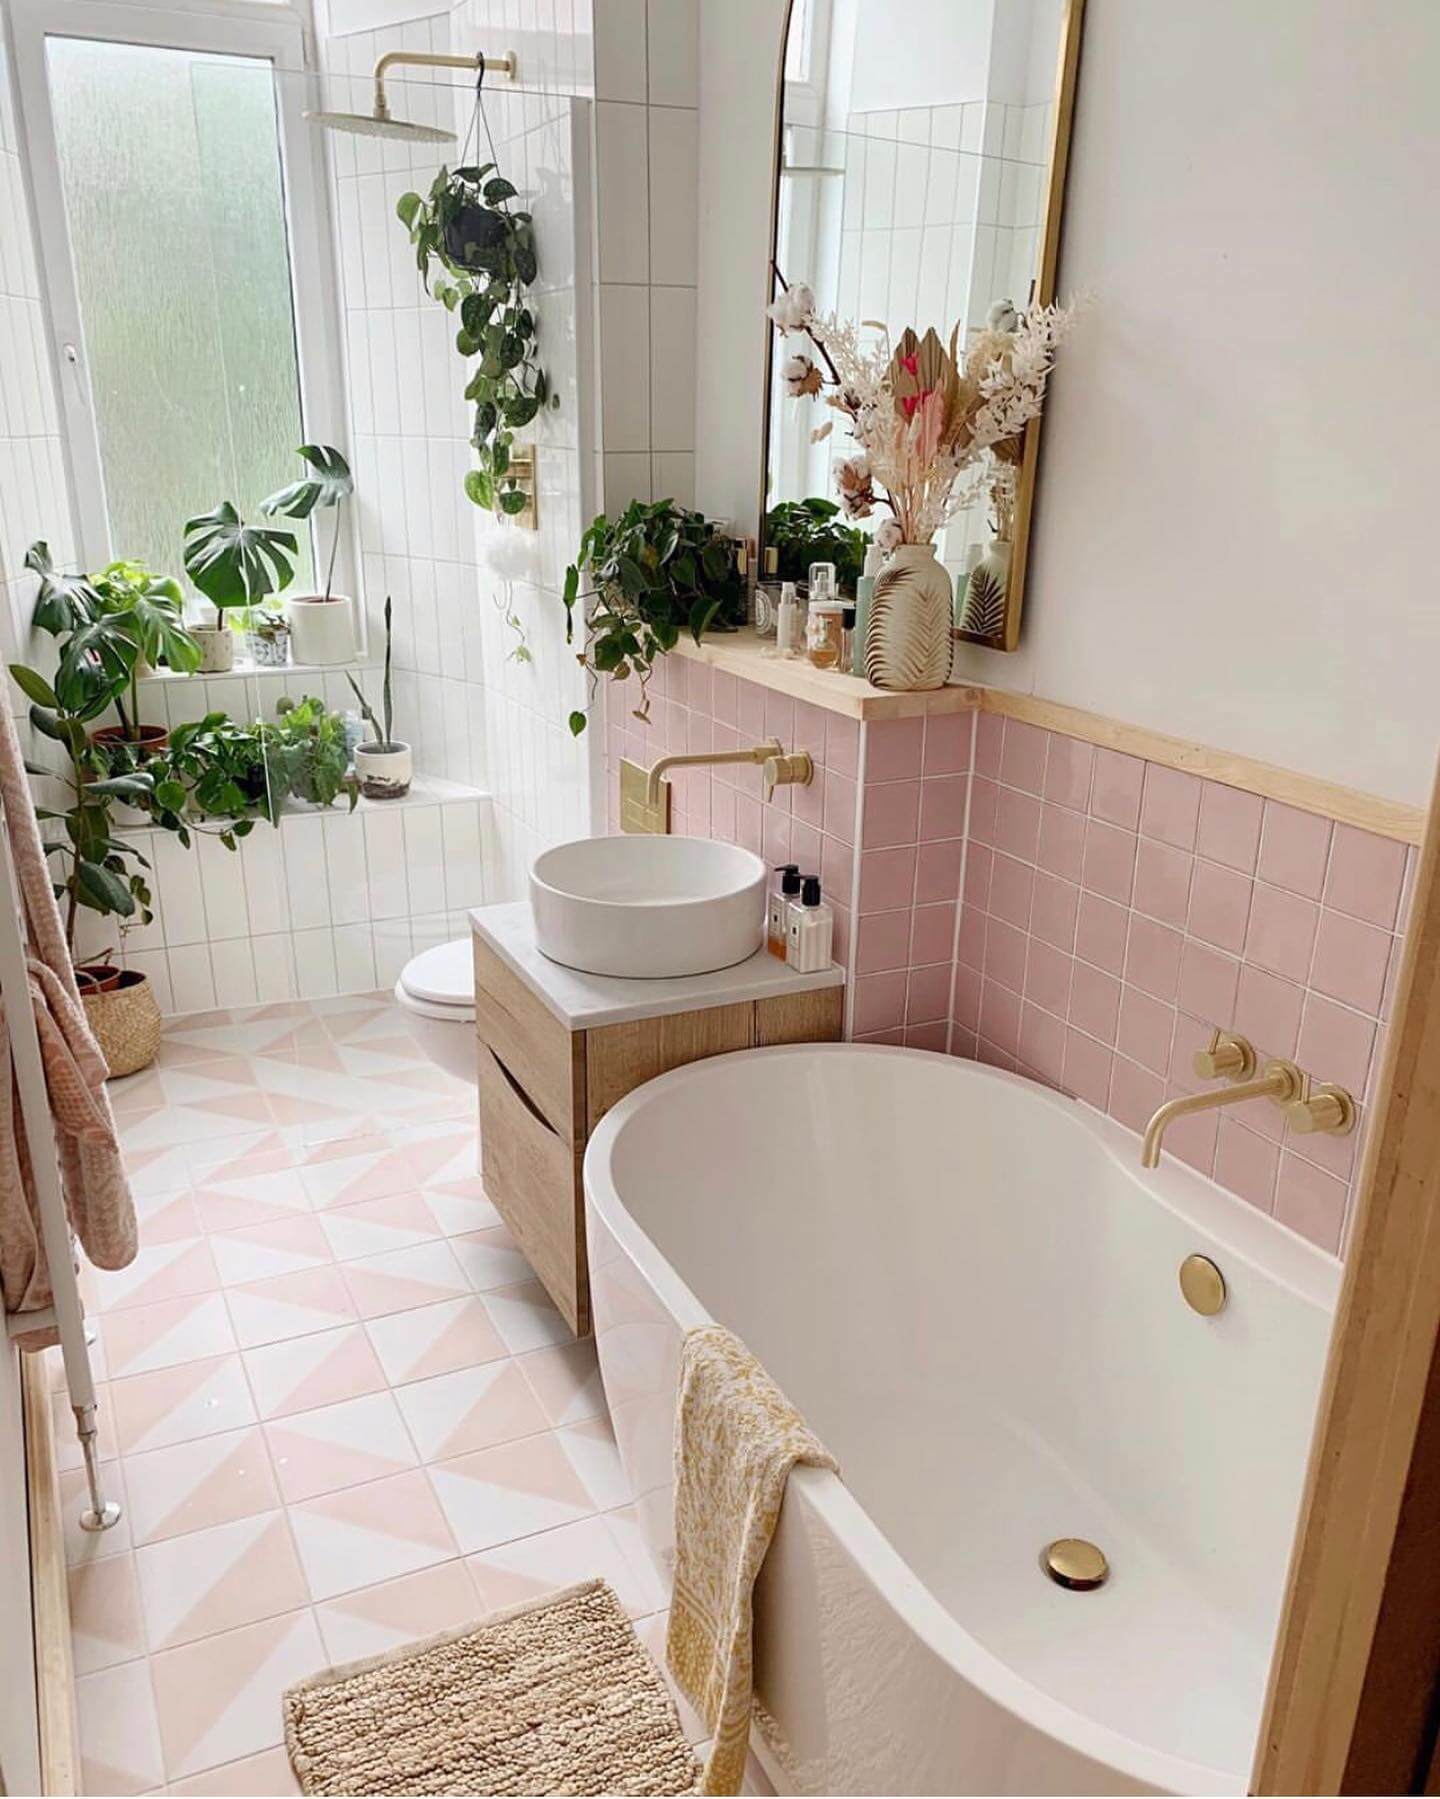
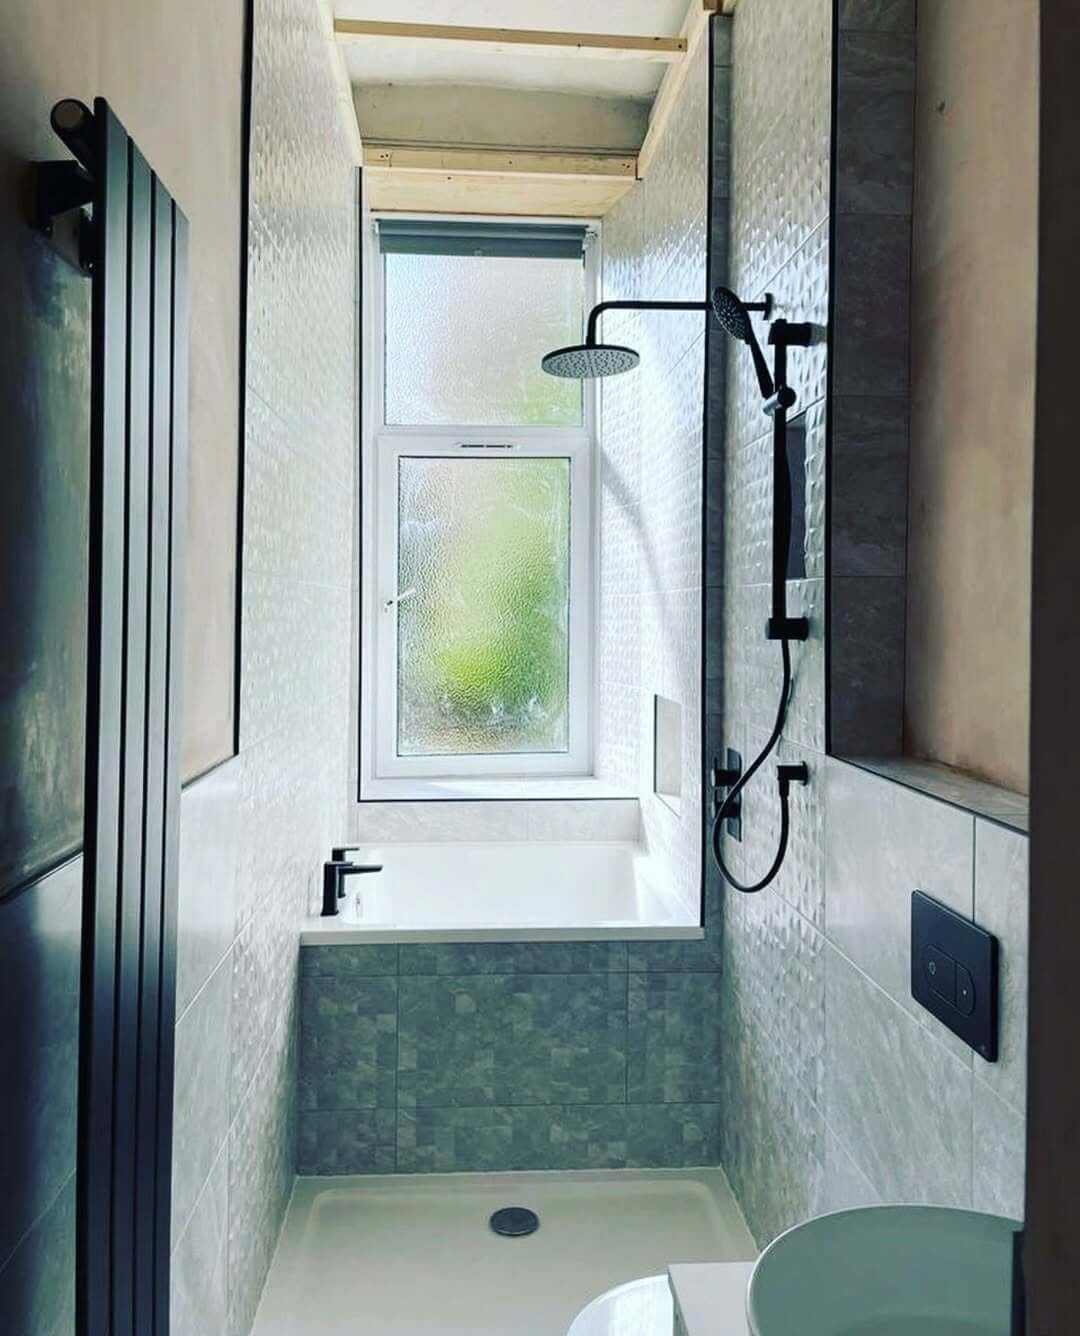
Install a Space-Savvy Soaking Tub Across the End Wall
If you dream of a bath but lack width, claim the destination wall with a compact soaking tub. Short, deep models (48–60 inches) or Japanese-style ofuros deliver full-immersion comfort without stealing aisle space. Nest the tub under a window or niche it into a three-sided alcove to keep side clearances generous along the run. Use a wall-mount filler with a handheld to save deck space, and cap the surround with a slim ledge for salts and candles without bulky shelving. For family baths, integrate a linear drain at the apron and run the same floor tile up the tub front to blur boundaries. A small step or teak slat mat signals spa energy while maintaining a clean, continuous floor. If the room also needs a shower, pair the tub with a fixed glass panel—not a swinging door—to contain spray. This end-wall strategy turns a long and narrow layout into a destination, balancing daily efficiency with an indulgent ritual.
Choose Fixed Glass Panels Instead of Swinging Shower Doors
In tight corridors, every arc matters. A fixed glass panel (or two) creates a walk-in shower entry without the clearance penalties of a hinged door. The result is quieter hardware, simpler cleaning, and a clearer path through a long and narrow plan. Keep panels full height to trap steam and elongate the vertical line; use minimal U-channels or pin mounts for a barely-there look. Align a linear drain along the panel or back wall and continue the floor tile into the shower for that coveted seamless feel. If privacy is a concern, specify a light-transmitting texture—fluted, satin-etched, or soft bronze tint—while preserving luminosity. Place the valve near the opening so you can start the water without stepping in, and add a small return panel if you need extra splash control. By editing moving parts and visual breaks, fixed glass keeps your circulation clean and your bathroom feeling wider and more modern.
Lay Large-Format Tile Crosswise to Visually Widen the Room
Tile orientation can change everything in a skinny bath. Run large-format planks or 24×48 tiles crosswise—from wall to wall—to create visual “rungs” that widen the room. Keep grout lines tight and color-matched so the surface reads as broad bands instead of a grid. On walls, stack-bond rectangular tiles horizontally at eye level (behind the vanity or along the shower) to reinforce the widening effect, reserving any vertical accents for corners where they add height without narrowing the center. Avoid high-contrast grout that outlines each piece; the goal is breadth, not busyness. If you love pattern, a subtle, low-contrast stone veining that sweeps laterally can do the trick without noise. Pair this move with a continuous floor and linear drain to erase thresholds. The combination stretches the short dimension visually, balancing the natural pull of a long plan so the bathroom feels proportionate and calm.
Plan a Clear Center Aisle: Offset Fixtures for Glide-Path Circulation
The smartest long and narrow bathrooms treat the centerline like a runway. Cluster bulk—vanity depth, towel storage, shower glass—on one side, and keep the opposite wall flatter with niches, hooks, or a wall-hung toilet. Aim for a clear aisle of 30–36 inches to prevent shoulder bumps and door conflicts. Stagger elements so handles, towel bars, and valves don’t collide; for example, place the vanity pullouts opposite open wall, and locate the shower controls near the entry while the head washes the far wall. If two users share the space, carve a “pull-off” bay: a shallow makeup perch or stool under a floating vanity where one person can pause without blocking traffic. Use floor lighting or a contrasting runner (already discussed) to visually mark the path. This choreography-first mindset reduces daily friction, makes cleaning easier, and helps even a sliver bath feel gracious and intuitive.
Get the Fail-Safe Paint Color Playbook (Free PDF)
36 proven colors • 8 ready palettes • trim & sheen guide • printable testing cards.
Add a Continuous Ledge Wall for Slim Storage and a Clean Datum
In a long and narrow bathroom, little ledges do heavy lifting. Build a continuous 4–8 inch deep ledge along the main wall—running behind the vanity, past the toilet, and straight into the shower—to corral daily essentials without widening the footprint. This low-profile shelf doubles as a backsplash, hides a slim plumbing chase or concealed cistern, and frees you to choose a shallower vanity for better aisle clearance. Cap it in one material (stone, quartz, or troweled microcement) to create a calm horizon line; that single datum visually stretches the room much like a chair rail for modern baths. For lighting, tuck a soft cove or strip LED beneath or just behind the ledge to wash the wall and widen sightlines. In the wet zone, continue the ledge as a long niche, pitched slightly for drainage, so bottles don’t encroach on elbow room. Keep hardware minimal and finishes matte-to-satin to avoid visual noise. Paired with wall-mount faucets and a wall-hung toilet, this continuous ledge system delivers clutter-free storage, a crisp silhouette, and the kind of linear rhythm that makes a galley bath feel designed—not squeezed.
Soften the Plan with Curves to Improve Flow and Safety
Right angles amplify the “corridor” feel in a skinny bathroom; curves interrupt that tunnel effect and make movement easier. Swap sharp vanity corners for a rounded or bullnosed front so hips glide past. Choose an arched mirror or radius medicine cabinet to lift the eye without adding bulk. If you’re installing a fixed shower screen, consider a softened leading edge or a gentle radius return panel to remove pinch points at entry. Repeating one curved motif—fluted drawer fronts, scalloped tile, or a rounded ledge profile—adds texture while keeping lines cohesive. Even a small gesture, like a quarter-round countertop edge or curved towel bar, prevents snags in tight clearances. Balance the softness with linear elements that visually widen the room: cross-laid large-format floor tile, a wall-to-wall mirror, and a quiet ceiling with linear LEDs. The mix of straight lines for direction and curves for comfort enhances circulation, reduces bruising in everyday use, and adds a bespoke note that reads intentional. In a long and narrow bath, those eased profiles are more than a style choice—they’re a space-planning strategy that improves safety, serenity, and flow.
Lighting, Storage, and Visual Tricks: Long and Narrow Bathroom Ideas to Maximize Space
Layered lighting transforms cramped proportions without demolition. Combine soft ambient light, glare-free task lighting at the mirror, and subtle accents that wash walls or toe-kicks to expand perceived width. Select 2700–3000K LEDs with high CRI for flattering skin tones and true tile colors. Flank mirrors with sconces at eye level, then backfill the length with a linear ceiling fixture or cove. Use dimmers and motion sensors for safe night navigation without blasting the corridor.
- Use large-format tiles across the floor to minimize grout lines, then run planks lengthwise to reinforce the corridor and draw the eye toward a brighter focal wall.
- Choose a floating vanity with integrated drawers, adding a shallow linen tower near the door; under-cabinet lighting makes the floor visible and makes the room feel weightless.
- Recess a mirrored medicine cabinet into studs and align it with a full-height niche in the shower, creating a clean datum line and unified storage rhythm from sink to stall.
- Mount sconces at eye level on each side of the mirror and add an overhead ambient fixture; this duality removes face shadows and keeps the galley visually bright and comfortable.
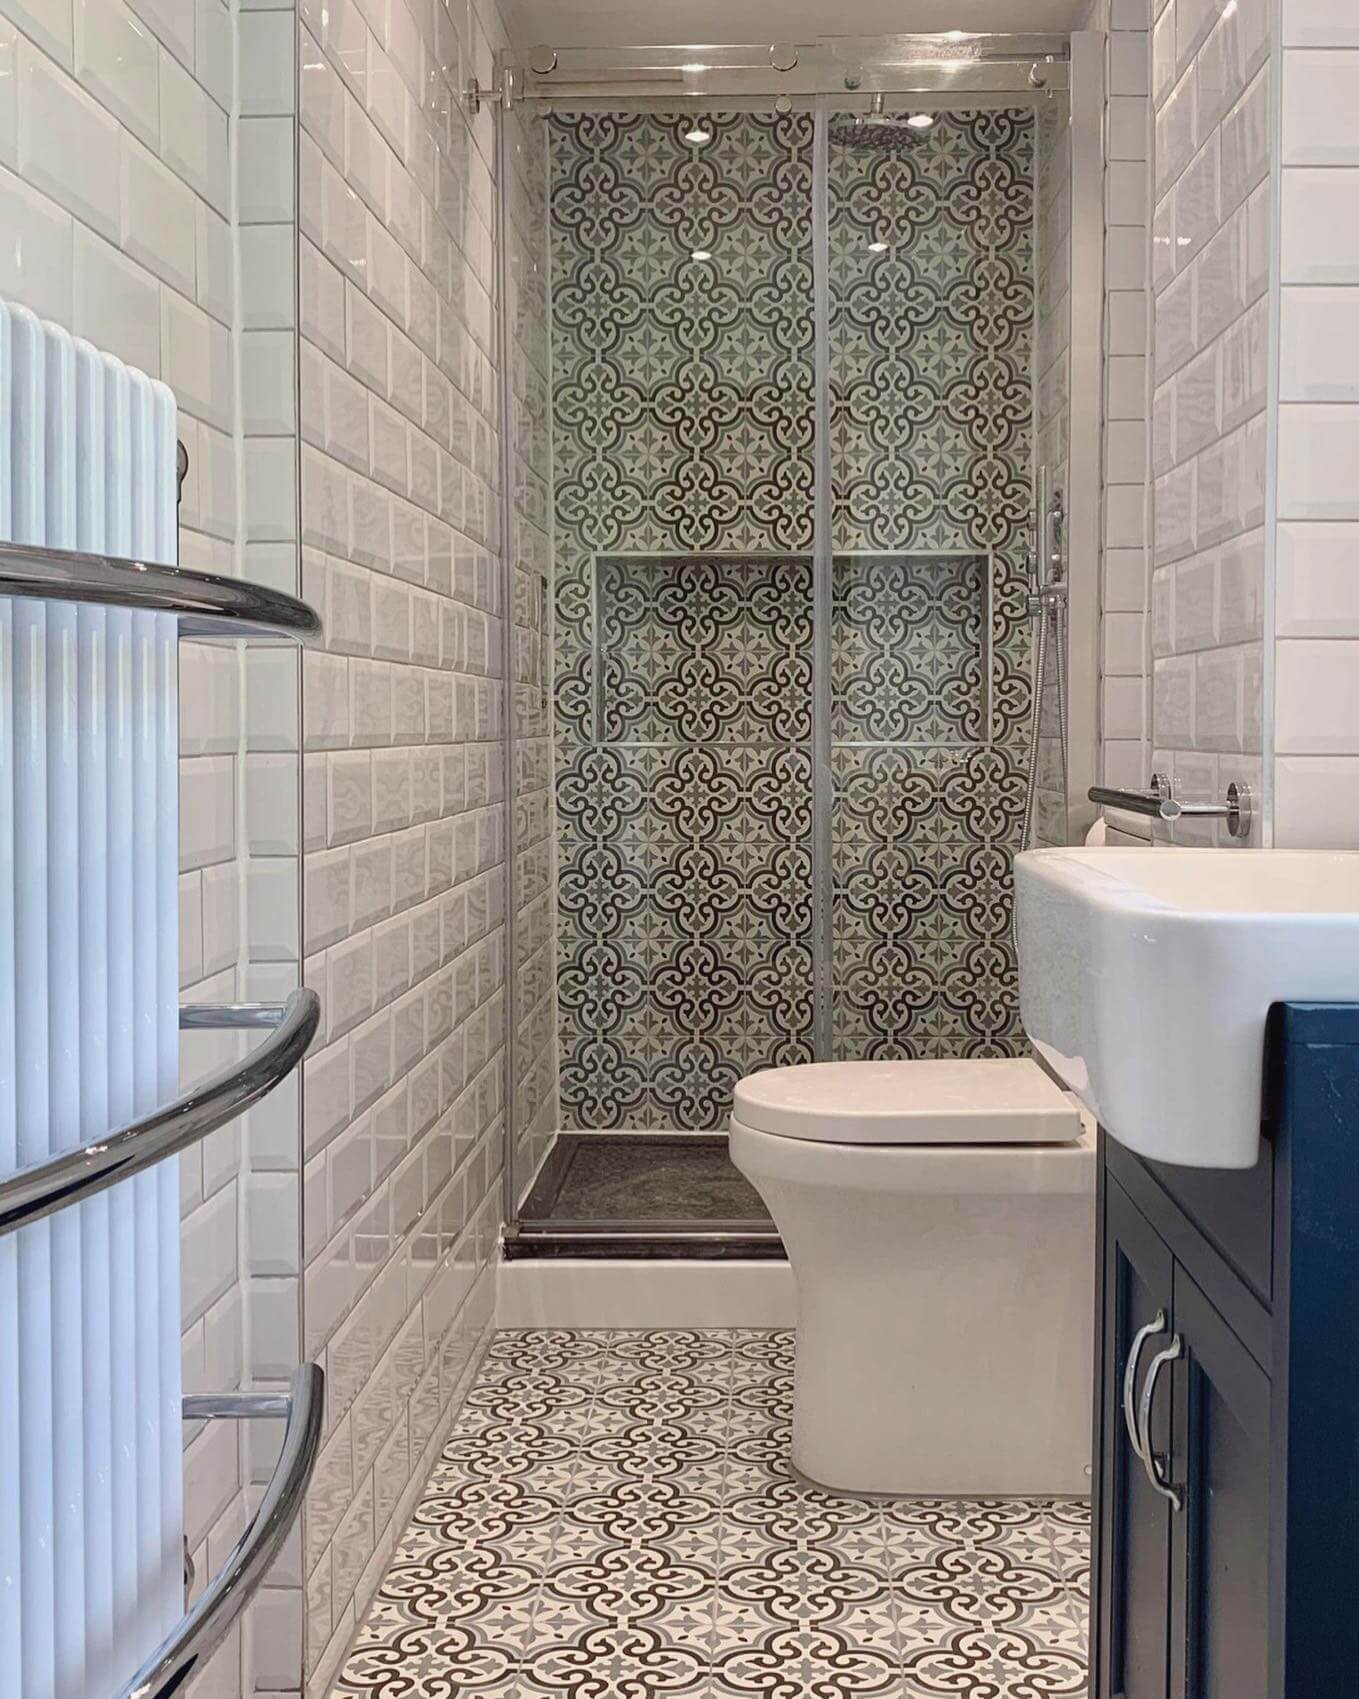
- Specify clear, frameless glass for the shower with minimal hardware, letting light pass through the narrowest section while showcasing patterned tile as a feature wall rather than a barrier.
- Stick to a light-neutral palette with one saturated accent at the room’s end; contrast grout slightly to articulate geometry without visual clutter or high-contrast stripes that shorten length.
- Install a heated towel ladder mounted vertically, saving footprint while emphasizing height; choose slim bars and matte finishes to prevent glare and fingerprints in tightly lit, reflective spaces.
- Add dimmable LED cove or toe-kick lighting on sensors for safe night use, preserving melatonin while keeping the long axis legible without harsh overheads or switch-hunting.
- Use patterned runner rugs with slender stripes aligned lengthwise, visually stretching the floor; select low-pile, washable materials with non-slip backing rated for wet bathrooms.
- Opt for wall-mounted faucets to pair with a shallow-depth vanity, reclaiming aisle width while simplifying cleanup and freeing counter space in a tightly proportioned layout.
Material and fixture choices should quietly support these Long and Narrow Bathroom Ideas. Matte finishes tame reflections that can strobe in tight spaces, while satin metals add warmth without glare. Linear drains enable curbless transitions, improving accessibility and maintaining an unbroken floor plane. Compact elongated toilets, narrow-depth vanities, and slim-profile radiators preserve the corridor without sacrificing comfort. Repeat a few decisive materials end-to-end to create coherence rather than a choppy, stop‑start experience.
Your Skinny-Bathroom Playbook: Quick Answers Before You Renovate
What tile size works best in a long and narrow bathroom?
Large-format floor tiles minimize grout lines and visually quiet the corridor. Run planks or rectangles lengthwise to reinforce length, and reserve bolder patterns for the focal end wall.
Get the Fail-Safe Paint Color Playbook (Free PDF)
36 proven colors • 8 ready palettes • trim & sheen guide • printable testing cards.
Is glass better than a shower curtain in a narrow layout?
Frameless glass keeps light traveling through the tightest section and protects sightlines. If you prefer curtains, choose a light, washable fabric and ceiling-mount the rod to maintain height.
How can I add storage without shrinking the aisle?
Recess storage into stud bays with medicine cabinets and shower niches. Choose a floating vanity with shallow drawers and add a slim linen tower near the entry for easy access.
What lighting plan prevents shadows at the mirror?
Flank the mirror with sconces at eye level and supplement with soft ambient overhead light. Add dimmable toe-kick or cove LEDs to guide nighttime trips without harsh glare.
Final Verdict: Maximize Style, Storage, and Flow in a Skinny Bath
A narrow bathroom thrives when you edit visual noise and choreograph movement. Prioritize an open runway by floating the vanity, choosing a wall-hung toilet, and pairing a curbless, frameless shower with fixed glass. Keep materials continuous—one floor plane with a linear drain, large-format tile laid crosswise, or seamless microcement—and echo a calm, warm-neutral palette from wall to wall. Build storage into the architecture with stud-bay niches, tall recesses, and a slim continuous ledge, then amplify width with a wall-to-wall mirror and quiet, linear lighting. Consolidating plumbing on one wet wall, opting for wall-mount faucets and shallow counters, and softening corners with gentle curves all add comfort without stealing inches.
Whether you’re refreshing a rental or gut-renovating, sequence choices around sightlines, circulation, and light. Test the plan with tape on the floor, anchor a destination end wall, and choose privacy glass that transmits light. Small upgrades—hardware swaps, a larger mirror, layered LEDs—can transform the feel; bigger moves—pocket doors, radiant floors, recessed storage—unlock lasting ease. Commit to fewer, better materials, keep the center aisle clear, and let every detail work double-duty. Your long and narrow bathroom can look broader, live smarter, and feel effortlessly serene.