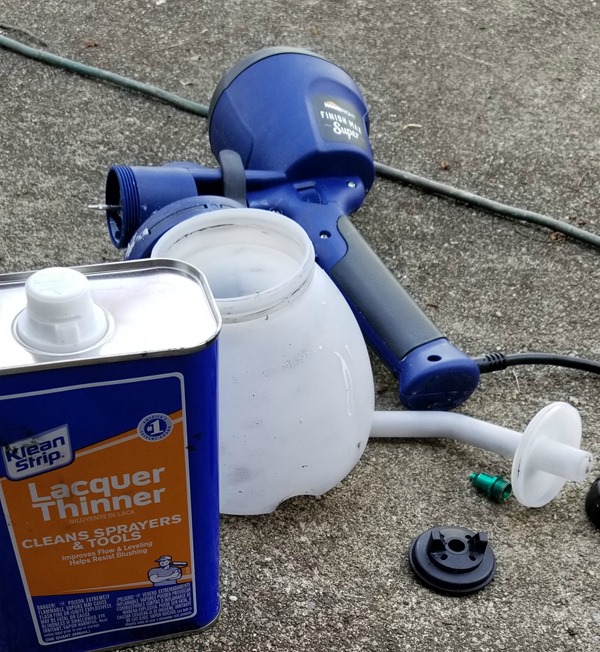
How To Clean Paint Sprayer After Oil Based Paint
Paint sprayers are a popular tool used by DIY enthusiasts and professionals alike to achieve a smooth and even finish on various surfaces. Whether you’re painting walls, furniture, or cabinets, a paint sprayer can make the job quicker and more efficient. However, after using oil-based paint, cleaning the paint sprayer can be a challenging and time-consuming task.
Oil-based paint is known for its durability and long-lasting finish, but it can be difficult to clean from a paint sprayer. If not cleaned properly, the leftover paint can cause clogs and damage to the machine. This is why it’s essential to clean your paint sprayer after every use, especially if you’ve used oil-based paint.
Cleaning a paint sprayer may seem intimidating, but with the right tools and techniques, it can be done quickly and easily. This comprehensive guide will walk you through the step-by-step process of cleaning your paint sprayer after using oil-based paint. We will cover everything from preparing the machine for cleaning to reassembling it after the cleaning process.
By following this guide, you can ensure that your paint sprayer operates effectively and lasts a long time. So, let’s dive into the world of paint sprayers and learn how to clean them after using oil-based paint.

Required Tools and Materials
Before you begin cleaning your paint sprayer, make sure you have the following tools and materials:
- Cleaning solution (such as mineral spirits or paint thinner)
- Water
- Cleaning brushes
- Cleaning rags
- Safety goggles
- Disposable gloves
Preparing for Cleaning
Before you start cleaning your paint sprayer, you need to prepare the machine. Follow these steps:
- Remove excess paint from the paint sprayer by spraying it into a waste container. This will help prevent the paint from drying and clogging the machine.
- Disassemble the paint sprayer according to the manufacturer’s instructions. This will make it easier to clean each part of the machine thoroughly.
- Identify the different parts of the paint sprayer. Refer to the owner’s manual or the manufacturer’s website for guidance.
- Prepare the cleaning solution. Follow the manufacturer’s instructions for mixing the cleaning solution with water.
Cleaning the Paint Sprayer
Now that you’ve prepared the paint sprayer for cleaning, you can begin the cleaning process. Follow these steps:
Cleaning the Container and Hoses
- Fill the paint container with the cleaning solution.
- Connect the hoses to the container and the sprayer.
- Turn on the sprayer and spray the cleaning solution through the hoses and into the container.
- Let the cleaning solution sit in the container and hoses for a few minutes.
- Disconnect the hoses and rinse them with water. Use a cleaning brush to remove any stubborn paint residue.
Cleaning the Spray Gun
- Remove the nozzle and tip from the spray gun.
- Soak the nozzle and tip in the cleaning solution for several minutes.
- Use a cleaning brush to remove any remaining paint residue from the nozzle and tip.
- Clean the spray gun body with a cleaning rag soaked in the cleaning solution. Make sure to get all the nooks and crannies.
- Rinse the nozzle, tip, and spray gun body with water.
Cleaning the Filters
- Remove the filters from the paint sprayer. Refer to the owner’s manual for guidance.
- Soak the filters in the cleaning solution for several minutes.
- Use a cleaning brush to remove any remaining paint residue from the filters.
- Rinse the filters with water.
- Reinstall the filters.
Reassembling the Paint Sprayer
Now that you’ve cleaned each part of the paint sprayer, you can reassemble the machine. Follow these steps:
- Dry all the paint sprayer parts with a clean, dry cloth.
- Reinstall the filters according to the manufacturer’s instructions.
- Reattach the nozzle and tip to the spray gun.
- Reassemble the spray gun according to the manufacturer’s instructions.
- Test the paint sprayer by spraying water through it. If the sprayer works properly, it is ready to use.
Tips for Maintaining a Paint Sprayer
To keep your paint sprayer in good condition, follow these tips:
- Regular cleaning: After each use, make sure to clean your paint sprayer thoroughly. This will help prevent paint buildup and clogs.
- Using the right cleaning solution: Make sure to use a cleaning solution that is recommended by the manufacturer. Using the wrong cleaning solution can damage the paint sprayer.
- Proper storage: Store your paint sprayer in a dry and cool place. Avoid leaving it in direct sunlight or extreme temperatures.
By following these tips, you can help extend the life of your paint sprayer and ensure it operates effectively.
Conclusion
Cleaning a paint sprayer after using oil-based paint may seem like a daunting task, but it is necessary to ensure the machine operates effectively and lasts a long time. By following the steps outlined in this guide and using the right tools and materials, you can clean your paint sprayer quickly and easily.
Remember to take safety precautions, such as wearing safety goggles and disposable gloves, when cleaning your paint sprayer. And always refer to the owner’s manual or manufacturer’s website for guidance on disassembling and reassembling the machine.
With proper cleaning and maintenance, your paint sprayer can continue to provide you with high-quality paint finishes for years to come.
