
How Do You Paint High Walls on Stairs
Painting high walls in a stairwell is one of the most rewarding, yet challenging, DIY home improvement projects. Because stairwells are high-traffic zones, the paint job must not only look beautiful but also be durable enough to withstand daily wear, scuffs, and changes in light. Successfully tackling this project requires more than just a can of paint; it demands meticulous preparation, the right tools, and a strong commitment to safety.
The unique vertical geometry of a stairwell introduces considerations that flat wall painting does not have. You must account for varying heights, the intersection of different materials (drywall, wood trim, stone risers), and the impact of natural light on color choice. By treating this project as a multi-stage process—from structural assessment to final touch-ups—you can achieve a professional, gallery-worthy finish that enhances the entire home.
Get the Fail-Safe Paint Color Playbook (Free PDF)
36 proven colors • 8 ready palettes • trim & sheen guide • printable testing cards.
Key takeaway: The key takeaway for How Do You Paint High Walls on Stairs depends on the exact question, context, and limits of the topic. Start with the direct definition or answer, then compare the practical factors that change what someone should do next.
Planning and Preparation: Before the First Brushstroke
The success of painting high walls on stairs is determined long before the roller touches the wall. This planning phase involves assessing the structural integrity, budgeting materials, and defining the scope of work. Ignoring these steps leads to poor adhesion, visible cracks, and premature paint failure.
Assessing the Surface and Structure
A thorough inspection is critical. Walk through the stairwell with a critical eye, looking for three key issues: cracks, peeling paint, and material inconsistency. Small hairline cracks in drywall or plaster can be filled with lightweight spackle or joint compound. For larger, deeper cracks, especially those near structural elements, it is strongly recommended that a professional assess the repair, as these may indicate underlying settling or moisture issues.
If the wall surface is porous (like bare concrete or unsealed masonry), you must plan to use a specialized penetrating sealer or masonry primer. This step prevents the paint from being absorbed unevenly, which could lead to patchiness or flaking later on. For painted trim and wainscoting, gently scrape off any loose, flaking paint using a putty knife. Do not use wire brushes, as they can damage the underlying material.
Budgeting and Material Selection
When budgeting, remember that the cost is not just the paint. Factor in quality tools (extension poles, specialized rollers), protective materials (heavy-duty drop cloths, painter’s tape), and necessary primers/sealers. Since stairwells are high-traffic areas, do not skimp on the paint quality or the primer. A good primer is often the single most important—and most overlooked—step.
When calculating paint quantity, measure the total square footage of the walls to be painted. Always add a 10-15% contingency to this estimate for touch-ups and spills. This ensures you do not run out of paint mid-project.
Step-by-Step Guide to Painting High Walls on Stairs
This process is broken down into distinct stages: prep, priming, cutting-in, and rolling. Adhering to this sequence ensures the most durable and flawless finish.
Step 1: Deep Cleaning and Degreasing
Before any primer goes down, the walls must be impeccably clean. Dust, grease, and household grime are paint killers. Use a mild detergent solution (like TSP substitute) and a clean sponge to wash the entire surface. Pay special attention to areas near light switches, banisters, and baseboards, as these accumulate grease. Rinse the walls thoroughly with clean water and allow them to dry completely—this may take several hours, depending on humidity.
Step 2: Priming for Adhesion and Uniformity
Priming is mandatory. Use a high-quality bonding primer designed for multi-surface use (e.g., one that works on both drywall and painted wood). This primer seals the surface, evens out the absorption rate, and provides the perfect base for the topcoat. Apply the primer according to the manufacturer’s instructions, allowing it to dry fully before proceeding.
Cutting-in involves using a high-quality angled brush to paint the edges, corners, and trim lines (baseboards, crown molding, railing trim). This precision work is crucial because rollers cannot reach these tight, detailed areas. Start at the highest point and work downwards. When cutting in near trim, gently feather the edges of the cut-in line, allowing a slight blend into the main wall area to prevent visible lines.
Step 4: Rolling the Main Surfaces
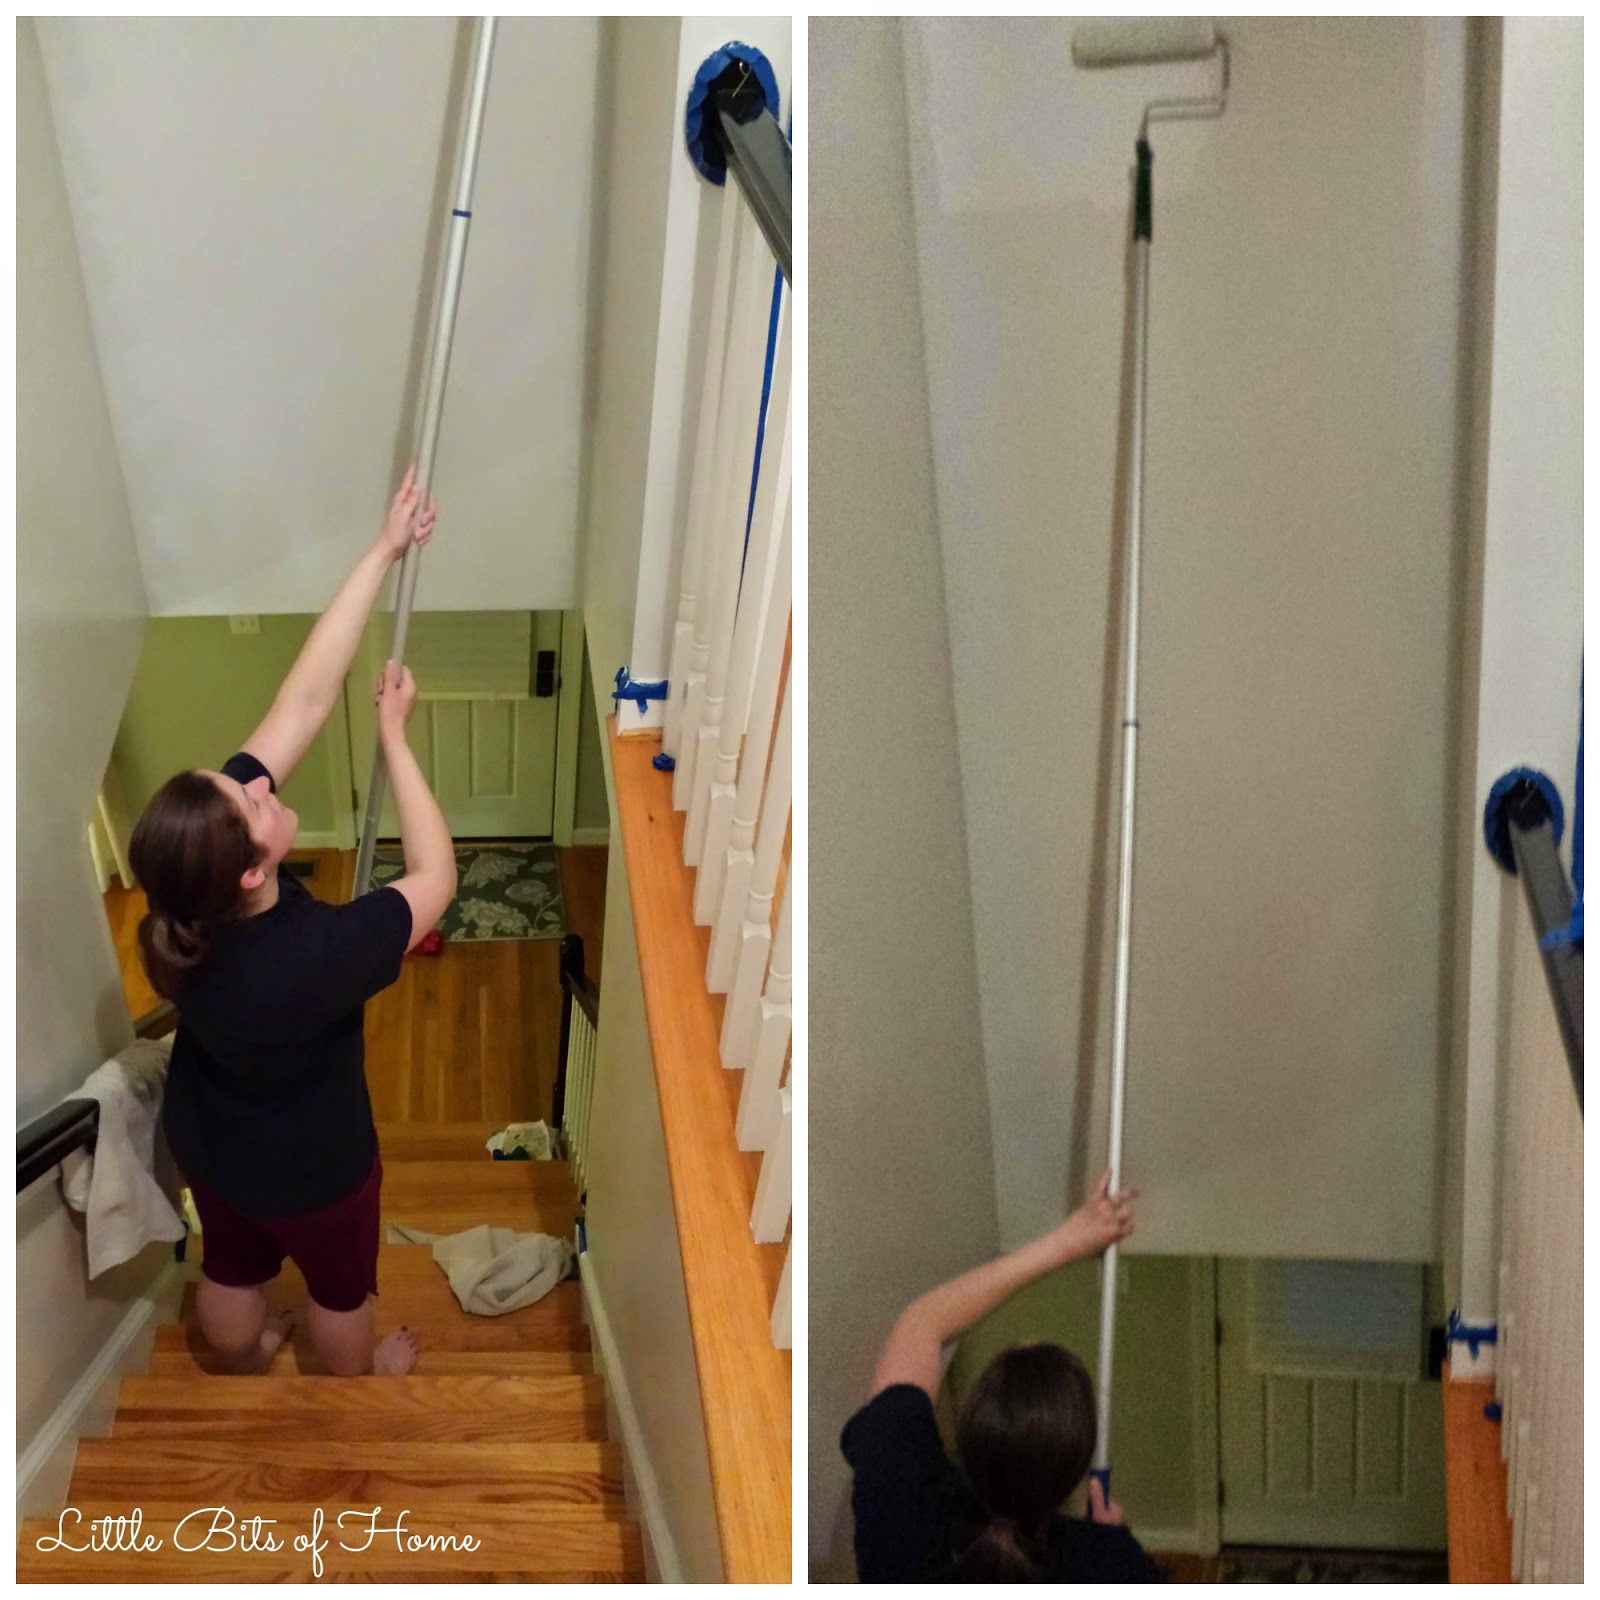
For the large, open wall areas, the roller is your best friend. Select a roller nap appropriate for the wall texture (e.g., 3/8 inch for smooth drywall, 1/2 inch for textured plaster). Load the roller evenly and apply paint using a consistent “W” or “M” pattern. Work in manageable sections, maintaining a wet edge—meaning you start a new section before the previous section has dried. This overlap prevents visible lap marks and streaks. Remember to use extension poles to maximize reach and minimize ladder repositioning.
Step 5: Dealing with Height and Stability
Safety is paramount. When working at height, always use sturdy, rated ladders or, ideally, scaffolding. Never overreach; reposition the ladder so you can maintain a stable footing. If painting a particularly tall wall, consider renting or purchasing a dedicated scaffold system designed for continuous, stable access, rather than relying solely on ladders.
Design and Color Decisions for Stairwells
The color choice in a stairwell has a profound effect on the perceived space, mood, and perceived height. This is where color theory meets practical home decor.
Understanding Sheen and Finish
The sheen (or finish) determines how reflective the paint is and how durable it is. For a high-traffic area like a stairwell, durability and cleanability are key:
- Semi-Gloss/Satin: These are excellent choices for stairwells. They are durable, easy to wipe clean, and handle scuffs and fingerprints better than flat finishes.
- Eggshell/Matte: These provide a softer, more subdued look, ideal for a calming, residential feel. However, they are prone to showing scuffs and dust more easily than semi-gloss and require more careful cleaning.
- Utility/Semi-Gloss Trim Paint: For trim and railings, a slightly higher sheen is often recommended for added resilience.
Color and Lighting Considerations
Natural light dramatically changes how paint colors appear. If your stairwell receives strong natural light, the color will look brightest during the day. If it is dimly lit or relies on artificial sources, the paint will look muted. Always purchase sample pots and paint large swatches (at least 2 feet by 2 feet) on the actual wall surface. Observe these swatches at different times of the day—morning, noon, and evening—to accurately gauge the final color.
To make a stairwell feel taller, consider using light, monochromatic colors that reflect light (like soft grays, whites, or pale neutrals). Darker, saturated colors can create a cozy, dramatic, or historic feel, but they also visually shrink the space.
Common Mistakes to Avoid
Even experienced DIY painters can make mistakes. Recognizing these common pitfalls can save time, money, and frustration.
- Skipping Surface Prep: The single biggest mistake is starting without cleaning and repairing the surface. If the walls are dirty or have loose paint, the new paint will not adhere properly and will peel off prematurely.
- Rushing the Drying Time: Paint, primer, and stain require adequate drying and curing time. Applying the second coat before the first is fully dry guarantees a poor, uneven finish. Always follow the manufacturer’s recommended cure time.
- Inconsistent Application: Attempting to paint the entire wall in one pass leads to visible lap marks and roller streaks. Always work in small, manageable sections and maintain a wet edge.
- Ignoring the Trim: Many people forget that trim and baseboards are integral parts of the color scheme. Painting the walls and the trim in different sheens or colors without a planned transition can look disjointed and unprofessional.
Safety, Ventilation, and Handling Notes
Working at heights and handling chemicals requires strict adherence to safety protocols. Your safety must always be the top priority.
Always wear appropriate Personal Protective Equipment (PPE). This includes safety goggles to protect against paint splatters, a respirator or dust mask (especially when sanding or using solvents), and gloves. Furthermore, paint, especially latex and oil-based coatings, requires proper ventilation. Open windows and use fans to ensure fresh airflow while painting and during the curing process. Never paint in a confined space without adequate ventilation.
Ladder and Scaffolding Safety
Never use a ladder if a stable scaffold is available. When using a ladder, ensure it is placed on level, non-slip ground and is properly rated for the task. Always maintain the “three-point contact” rule—keep three points (two hands and one foot, or two feet and one hand) touching the ladder at all times. Never climb or overreach; step down and reposition the ladder instead.
Professional Consultation
If you encounter structural damage (large voids, rot, or deep cracks) or if the paint job involves historic materials, do not attempt repairs or painting until a licensed professional has inspected the area. These issues may require specialized stabilization beyond the scope of a DIY project.
Frequently Asked Questions
What is the most important step before painting high walls on stairs?
The most critical step is thorough surface preparation. Do not skip cleaning, repairing, and priming. High-traffic areas accumulate grease and dirt, which prevent proper adhesion. Use a mild detergent (like a TSP substitute) to degrease the entire area, fill all visible cracks with lightweight spackle, and apply a high-quality bonding primer designed for multi-surface use. This ensures the new paint adheres correctly and uniformly, preventing peeling and patchiness.
Get the Fail-Safe Paint Color Playbook (Free PDF)
36 proven colors • 8 ready palettes • trim & sheen guide • printable testing cards.
Should I use a roller or an angled brush for the corners and trim?
You must use a high-quality angled brush for corners, edges, and trim work (“cutting in”). Rollers are designed for large, flat surfaces and cannot reach the tight lines of baseboards, crown molding, or banisters. Always start by cutting in all the detailed areas with the brush first, and then use the roller for the large, open wall sections. This combination of techniques is key to a professional finish.
What is the best paint sheen for a high-traffic stairwell?
For a stairwell, durability and cleanability are paramount. Semi-gloss or durable satin finishes are generally recommended over flat or matte finishes. These higher sheens are far more resilient, easier to wipe clean of scuffs and dirt, and can withstand the constant wear and tear of a high-traffic zone. If the stairwell is historic, consult with a professional painter regarding traditional materials and finishes.
How do I ensure safety when painting extremely high walls?
Safety must be the absolute priority. Never rely solely on ladders if a stable scaffold is available; scaffolding provides continuous, stable access. When using a ladder, ensure it is placed on level ground and follow the “three-point contact” rule at all times. Never overreach; instead, step down and reposition the ladder. If the wall is exceptionally tall, consider professional scaffolding rental rather than risking overreaching or instability.
Conclusion
Painting high walls in a stairwell is a significant undertaking, but by adopting a methodical approach—prioritizing detailed preparation, selecting the correct durable finish, and maintaining unwavering safety—the project becomes entirely achievable. Remember that the quality of your final finish is directly proportional to the quality of your initial planning and preparation.
Take your time, work methodically, and treat the process as a collaborative effort between your careful planning and the powerful tools at hand. The result will be a stunning, durable feature that elevates the entire aesthetic of your home.