
How Long After Stucco Can You Paint
Stucco is a highly popular choice for exterior cladding due to its remarkable combination of durability, versatility, and classic architectural appeal. Whether you are applying a completely new coat of stucco or simply refreshing the finish on existing walls, understanding the precise timing required for painting is the single most critical step toward achieving a beautiful, long-lasting, and structurally sound result. Ignoring the curing process can lead to severe adhesion failure and premature paint flaking.
The process of painting stucco is not merely a matter of waiting; it is a complex interplay between chemistry, climate, and surface science. When stucco is applied, it undergoes a chemical hardening process called curing. This curing process must reach a stable point before paint can bond properly. In this comprehensive guide, we will demystify the timing, providing you with an authoritative, practical roadmap to ensure your paint job endures for years to come.
Get the Fail-Safe Paint Color Playbook (Free PDF)
36 proven colors • 8 ready palettes • trim & sheen guide • printable testing cards.
Quick answer: Paint may feel dry within hours, but full cure can take much longer depending on paint type, humidity, temperature, ventilation, coat thickness, and surface. Always follow the product label before recoating, cleaning, or applying a topcoat.
Planning and Site Assessment Before You Start
Before even considering the date you will apply paint, a thorough assessment of your job site is non-negotiable. The environment and the stucco material itself dictate the project timeline and required preparation. Think of this phase as your architectural detective work, ensuring every variable is accounted for.
Understanding Stucco Composition and Type
The type of stucco you are working with fundamentally changes the curing process. It is vital to distinguish between traditional cement-based stucco and modern synthetic options like Exterior Insulation and Finish System (EIFS). These materials cure through different chemical mechanisms and therefore require different cure times.
- Traditional Cement Stucco: This material relies on hydration (a chemical reaction with water) to harden. Its cure time is heavily dependent on available moisture and temperature.
- EIFS (Synthetic Stucco): This is a prefabricated, lightweight system that often includes insulation. While it cures relatively quickly compared to thick cement layers, it still requires time for the insulation components and the finish layer to stabilize and reach full structural integrity.
Understanding this difference is crucial because a quick-drying surface might still have underlying structural components that are not yet fully cured, leading to failure months down the line.
Assessing Environmental Variables
The local microclimate is perhaps the most influential factor. Never rely solely on a calendar date. Consider the cumulative effect of weather:
- Humidity: High humidity slows evaporation, extending the cure time significantly.
- Temperature: Optimal curing occurs in moderate temperatures (50°F to 90°F). Extreme heat or cold can interrupt the chemical bonding process.
- Airflow: Good, consistent airflow is essential for moisture to escape the porous surface.
If you are painting after a major weather event—such as a tropical storm, heavy rain, or sustained period of high moisture—the cure time must be extended by at least a week, regardless of what the manufacturer suggests.
The Science of Curing: What It Means to Be Ready
Many homeowners confuse “drying” with “curing.” This is the most common misconception when painting stucco. Drying simply means the surface water has evaporated; curing is the chemical process where the materials solidify and achieve maximum structural and chemical resistance. For paint to adhere strongly and last, the stucco must be fully cured.
Differentiating Curing vs. Drying
When stucco dries, the surface water evaporates, leaving a porous, dry material. When it cures, the cementitious components react with the air and remaining moisture to form stable, crystalline structures (like calcium silicate hydrate). Only once the curing is complete is the surface chemically inert enough to accept and hold paint pigments and binders without the paint being compromised by underlying chemical reactions or moisture migration.
The Role of Porosity and Adhesion
Stucco is inherently porous. This porosity is what makes it breathable, allowing moisture vapor to escape, which is beneficial for the building structure. However, this porosity also means that the surface is constantly interacting with its environment. A high-quality paint for stucco must be formulated to handle this porosity, often requiring specific alkali resistance to counteract the natural alkalinity of cement-based materials. Using a standard interior or non-porous exterior paint will result in poor adhesion and eventual peeling.
Step-by-Step Guide to Preparing the Surface for Paint
Preparation is arguably more important than the paint itself. Even the most expensive paint will fail if the surface is not meticulously prepared. Follow these steps in order to maximize paint adhesion and longevity.
Step 1: Cleaning and Inspection (The Deep Clean)
Thorough cleaning removes contaminants that act as paint barriers. This includes loose dust, dirt, mildew, efflorescence (white, powdery mineral deposits left by evaporating salts), and biological growth. Use a soft brush and mild detergent solution. For heavy debris, a low-pressure wash (never too high, as this can damage the surface) is appropriate. After cleaning, allow the surface to dry completely—this can take several days.
Step 2: Structural Repair and Patching
Inspect the entire surface for cracks, chips, or signs of movement. Any visible cracks, especially those wider than a quarter-inch, must be addressed first. These are not just cosmetic issues; they are structural pathways for moisture. Use a flexible, elastomeric patching compound designed for masonry to fill these gaps. Once patched, the compound must cure fully according to its specific instructions. Do not paint over a patch until it has achieved its full cure time.
Step 3: Priming for Optimal Adhesion
A dedicated masonry or stucco primer is mandatory. This primer is not just a base coat; it is a chemical sealant designed to penetrate the porous surface, neutralize the alkalinity of the stucco, and provide a consistent “tooth” (texture) for the final paint layer to grip. Choose a primer specifically rated for high-alkali, porous substrates. Apply the primer evenly, ensuring full coverage, and allow it to dry completely—usually within 24 to 48 hours, depending on manufacturer recommendations.
Selecting the Right Paint and Finish for Stucco
The paint you choose must be designed to perform in the unique, demanding environment of a masonry substrate. It must be breathable, durable, and chemically stable.
Choosing Paint Formulation and Breathability
Always opt for 100% acrylic or siloxane-based exterior paints formulated for masonry. These paints are engineered to manage the movement and minor moisture fluctuations inherent in stucco. The concept of “breathability” is key: the paint should allow moisture vapor to escape from the wall while simultaneously protecting the surface from rain and UV damage. Paints that trap moisture can lead to blistering, peeling, and deep structural damage.
Understanding Sheen and Undertones
The sheen (or finish) significantly impacts durability and appearance. For stucco, a matte or flat finish is often recommended because it minimizes the visibility of minor surface imperfections and helps absorb light, giving the stucco a more uniform, classic look. While semi-gloss finishes are durable, they are more prone to highlighting minor cracks or uneven textures, which is usually undesirable on a porous masonry surface.
When considering color, remember that stucco is a highly textured, porous material. Darker colors absorb more heat and may show mineral staining (efflorescence) more dramatically. Lighter, earthy tones often complement the natural texture of the stucco and are forgiving regarding minor surface variations.
Critical Mistakes and Misconceptions to Avoid
The path to a flawless stucco paint job is littered with common, costly mistakes. Avoiding these pitfalls will save you time, money, and frustration.
- Ignoring the Primer: Skipping the primer is the single biggest mistake. Without it, the paint will not bond chemically, resulting in flaking paint within months.
- Painting Over Mold or Mildew: Do not simply paint over visible mildew or mold. This requires professional remediation using specialized biocides and deep cleaning. Painting over it only traps the spores and guarantees recurrence.
- Rushing the Cure Time: Assuming that “dry” means “ready” is dangerous. If the stucco is chemically uncured, the paint will react with the still-curing chemicals, leading to immediate adhesion failure and potential discoloration.
- Using Improper Tools: Using a standard household roller or brush without proper preparation can embed contaminants or apply the paint too thickly, leading to drips and inconsistent sheens.
Safety, Handling, and Professional Protocols
Working with masonry materials and strong chemical paints requires adherence to safety protocols. Always treat the materials with the respect they demand.
Personal Protective Equipment (PPE)
Always wear appropriate PPE, including chemical-resistant gloves, safety goggles, and, when sanding or working with high concentrations of dust or chemicals, a proper respirator mask. Never allow children or pets in the immediate work area until the paint has fully cured and the fumes have dissipated.
Mistakes to Avoid
Do not skip assessment just because the project looks simple. Most paint, cleaning, repair, and tool-care problems come from poor prep, incompatible products, rushed drying time, or using a method that does not match the material.
Avoid working without ventilation, gloves, eye protection, or a cleanup plan when coatings, solvents, sanding dust, or business/studio supplies are involved. Test first, read manufacturer directions, and pause if the surface, tool, or client setting creates safety questions you cannot answer confidently.
Ventilation and Chemical Safety
When mixing, applying, or stripping paints and primers, ensure adequate ventilation. Work in an area with open airflow to dissipate volatile organic compounds (VOCs). Always read and follow the Safety Data Sheet (SDS) for every product used—primer, paint, and sealant—before opening the container.
When to Call a Professional
While DIY is rewarding, certain situations demand professional intervention. You must call a structural engineer if you discover significant, wide, or shifting cracks. You must call a licensed professional if the stucco was applied over suspected lead paint or asbestos materials. Furthermore, if you are unsure about the underlying structural integrity or the exact type of stucco, consulting a specialist is the safest choice.
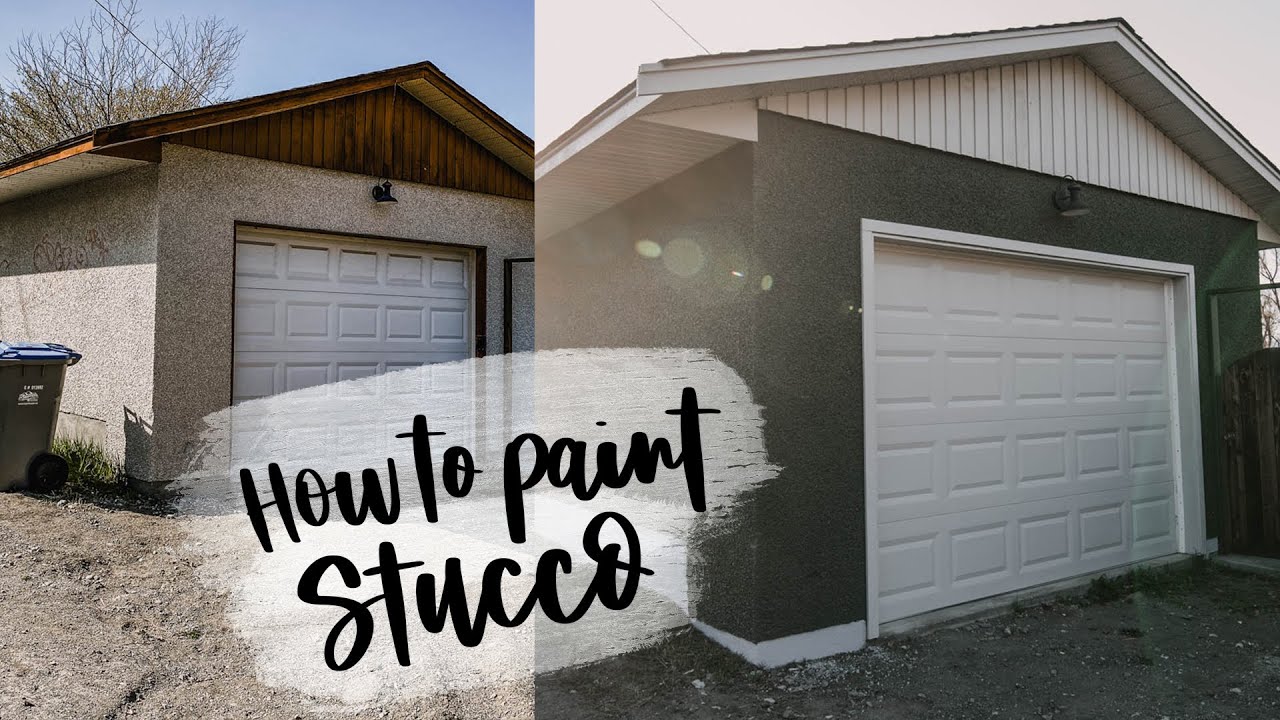
Frequently Asked Questions
How long do I wait after applying stucco before painting?
The biggest misconception is that “dry” means “ready.” The wait time is determined by the stucco’s chemical curing process, not just the evaporation of surface water. While specific cure times vary wildly based on climate and stucco type (cement vs. EIFS), assume the minimum wait time is 28 days, but always extend this if conditions were poor. If the stucco was applied after a period of heavy rain, high humidity, or extreme temperature shifts, you must extend the wait time by at least one week to ensure full chemical stabilization.
Get the Fail-Safe Paint Color Playbook (Free PDF)
36 proven colors • 8 ready palettes • trim & sheen guide • printable testing cards.
Is it okay to patch cracks and then paint over them?
Patching is essential, but timing is critical. Any structural patch or repair compound must cure fully according to its specific manufacturer instructions before you proceed. Never paint over a patch until it has achieved its maximum cure time. Furthermore, after patching, you must use a flexible, elastomeric sealant or compound designed for masonry to ensure the patch can accommodate future movement, preventing immediate cracking upon painting.
What is the most important preparatory step before applying paint?
The most crucial step is applying a dedicated, high-quality masonry or stucco primer. This primer serves three functions: it chemically neutralizes the high alkalinity of the fresh cement, it penetrates the porous surface, and it provides a consistent, rough “tooth” that the final paint layer can physically and chemically grip. Skipping the primer guarantees poor adhesion and eventual paint failure.
When should I call a professional instead of DIYing?
While many tasks are manageable for a homeowner, professional help is mandatory if you discover wide cracks (over a quarter-inch), any signs of shifting or structural movement, or if the stucco was applied over suspected hazardous materials like lead paint or asbestos. Always prioritize structural safety over cost savings. If you are unsure about the underlying integrity of the wall, consult a structural engineer before beginning any work.
Conclusion: Achieving a Lasting Finish
Achieving a stunning and durable paint finish on stucco is a multi-stage project that relies entirely on patience and scientific adherence. The key takeaway is that successful painting is not about the paint itself, but the rigorous preparation and the respectful adherence to the stucco’s natural curing process. By treating the initial curing time as a chemical process requiring time for full molecular stability, and by diligently following preparation steps—from cleaning and patching to priming—you set the foundation for a paint job that will stand the test of time, weather, and beauty.
Remember to always consult local building codes regarding exterior paint and to prioritize the manufacturer’s guidelines above all else. By combining expert planning, proper materials, and careful execution, your stucco walls will not only look beautiful but will also receive the maximum protection they deserve.