
How Long Does Paint By Numbers Take? A Step-by-Step Guide
Whether you are planning a full room renovation, tackling a detailed wall accent, or engaging in the meditative process of completing a piece of art like paint by numbers, the journey of color and finish is always complex. Understanding the scope of the project—not just in terms of square footage, but in terms of time, materials, and technique—is the most critical step toward achieving a flawless, professional-looking result.
The process of bringing color to life, whether through professional painting or detailed crafting, is highly variable. It depends on everything from the underlying surface material and the type of paint medium you choose, to the specific color palette you are working with, and the level of detail required in the final design. By breaking down the project into manageable stages, you can set realistic expectations and enjoy the creative process.
Get the Fail-Safe Paint Color Playbook (Free PDF)
36 proven colors • 8 ready palettes • trim & sheen guide • printable testing cards.
Quick answer: Paint by numbers usually takes 6 to 24 hours of hands-on painting for a standard kit, spread across several sessions. Larger canvases, tiny numbered areas, extra blending, and slow-drying acrylic layers add time. Work one color family at a time, keep brushes clean, and let wet sections dry before adding nearby details.
Planning Before You Start: Assessing Your Canvas and Environment
Before the first brushstroke touches the surface, thorough planning is non-negotiable. This phase involves more than just looking at the number of squares on your kit; it requires assessing the physical environment, the materials, and your personal time commitment. Proper planning saves hours of frustration and costly mistakes later.
First, consider the surface itself. Is the material primed and sealed? If you are working on a canvas, ensure it is stable and appropriately sized for the paint type you are using. If the surface is porous, it will absorb paint unevenly, requiring a specialized primer (like gesso or a specialized acrylic primer) to create a uniform base. Second, assess the lighting. Natural light is ideal for color matching, but you must also consider the ambient light of the room where the piece will live. How will the color look in morning light versus evening lamplight? Test swatches in these conditions.
Finally, establish a realistic timeline. Do not treat painting as a single-weekend marathon. The most common mistake is rushing the drying and curing process. Instead, plan for multiple, shorter sessions (e.g., 1–2 hours every evening). This allows the paint to dry fully, preventing colors from bleeding or smearing, which is crucial for maintaining the integrity of the painted design.
The Main Guide: Mastering the Medium and Technique
The time it takes to complete a piece is deeply connected to the technical requirements of the paint medium itself. Understanding the difference between various types of paint—and how they dry—is key to efficient project management. For most Paint By Numbers kits, acrylic paint is recommended because of its fast drying time and vibrant pigmentation, which is ideal for layering.
When working with acrylics, the process involves several stages. Initially, you will apply the base coats, filling in the largest, most distinct areas. These areas dry fastest, allowing you to quickly build up the foundational colors. The next stage involves detailing, where you focus on the smaller, more intricate sections. This is where the time commitment increases exponentially, as fine lines and small geometric patterns demand patience and steady hands.
Crucially, remember the difference between drying time and curing time. The paint may look dry to the touch after an hour (drying time), but the polymer binders need time to fully harden and cure (curing time). This curing process can take several days, especially if you apply multiple coats or use thicker paint consistency. Allowing sufficient curing time is what ensures the piece is durable and resistant to moisture or fading.
Acrylic vs. Oil: A Medium Comparison
While oil paints offer unparalleled depth of color and blending capability, they require significantly longer drying times (often days) and specialized solvents, making them challenging for time-sensitive DIY projects. Acrylics, conversely, dry quickly and are water-soluble, making them far more forgiving for beginners and perfect for the structured, numbered application of a kit. If you are pressed for time, acrylics are the superior choice.
Materials and Tools: Essential Supplies Checklist
Having the right tools can save immense time and frustration. Do not attempt to paint a detailed piece with inadequate supplies. Here is a checklist of essential items:
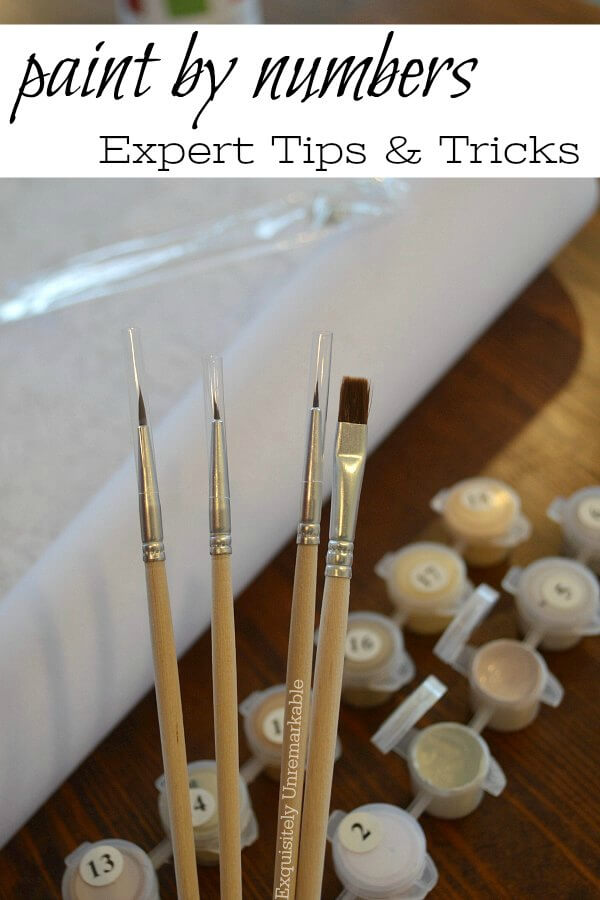
- High-Quality Brushes: Invest in a variety of synthetic brushes. You will need large, flat brushes for base coats and small, pointed detail brushes (like size 0 or 1) for the fine lines.
- Paint Mediums: Use quality acrylic paint formulated for fine art. Consider a flow improver or retarder if you need to blend colors slightly, although for a kit, straight acrylic paint is usually best.
- Primer/Gesso: A good quality acrylic primer will seal the surface and ensure that the pigment colors you select match the intended hues, preventing the surface material from altering the color.
- Sealer/Varnish: Once the piece is fully cured (wait at least 7 days!), apply an acrylic varnish or sealant. This protects the painted surface from dust, humidity, and minor scuffs, giving the final piece a professional, gallery-quality finish.
Design and Color Tips: Understanding Undertones and Sheen
Color selection is an art form that goes far beyond simply picking a pleasing shade. When choosing paint colors for your project, always pay attention to undertones. An undertone is the subtle color that lies beneath the dominant hue (e.g., a pinkish undertone in a beige, or a greenish undertone in a gray). If the kit colors or the paint you are using have clashing undertones, the final piece may look muddy or dull, no matter how vibrant the individual colors are.
When considering the final finish (or sheen), think about the environment. A high-gloss finish will reflect a lot of light, making the piece look vibrant but also potentially emphasizing dust or imperfections. A matte finish absorbs light, giving a soft, velvety look that is excellent for detailed, intricate work. Satin is a good middle ground, offering protection without being overly reflective.
To ensure the colors harmonize, practice color pairing principles. If the primary color in the design is cool (blues, greens), complement it with a warm accent color (terracotta, mustard yellow). This contrast adds visual depth and makes the overall piece pop, mimicking the way professional artists use limited palettes to achieve maximum impact.
Mistakes to Avoid: Common Application Errors
Even with the best intentions, several common mistakes can derail a beautiful project. The most frequent error is insufficient drying time. Rushing the process leads to paint lifting, smearing, or the colors mixing unexpectedly. Always let the area dry completely before moving to the next section.
Another critical mistake is improper surface preparation. If the canvas or panel is dirty, greasy, or dusty, the paint will not adhere properly, leading to peeling or flaking paint later on. Always wipe the surface with a mild solvent and allow it to dry fully before priming.
Finally, resist the urge to over-detail. While complex patterns are beautiful, over-painting or adding too many layers of semi-opaque paint can mute the original vibrancy of the colors. Trust the integrity of the numbered design and let the colors speak for themselves.
Safety and Practical Notes: Working with Paints
Safety must always be the priority when dealing with solvents, acrylics, and varnishes. Always ensure adequate ventilation. Working in a well-ventilated area, ideally near an open window or under an exhaust fan, prevents the buildup of fumes, especially when using thinner or strong solvents. Wear appropriate protective gear, such as nitrile gloves and safety glasses, when mixing large quantities of paint or applying sealants.
Always consult the manufacturer’s instructions for every product you use, whether it is the paint, the primer, or the varnish. These instructions dictate the proper mixing ratios, application methods, and, most importantly, the required drying and curing times. Never attempt to move, hang, or clean the piece until the full curing period has elapsed.
Frequently Asked Questions
How long does it realistically take to complete a Paint By Numbers kit?
The time required is highly variable and depends entirely on the level of detail in the design and the complexity of the piece. Instead of planning for one marathon session, plan for multiple shorter sessions (1-2 hours) spread over several days. Focus on allowing adequate drying time between sections rather than rushing to finish the entire piece in a single weekend.
Get the Fail-Safe Paint Color Playbook (Free PDF)
36 proven colors • 8 ready palettes • trim & sheen guide • printable testing cards.
What is the best paint medium to use for a beginner kit?
Acrylic paint is generally the superior choice for beginners and structured kits. It is water-soluble, dries quickly, and provides vibrant pigmentation, making it forgiving for layering. Regardless of the paint type, always ensure the surface is properly primed with a quality gesso or acrylic primer first. This seals the material and guarantees color consistency.
Drying time is how long the paint takes to look dry to the touch (often hours). Curing time is how long the paint needs to fully harden and bond (this can take days or weeks). It is critical to wait for the full curing time before moving the piece, handling it, or applying a sealant. Rushing this stage can lead to the paint flaking, peeling, or losing structural integrity.
How should I protect the finished artwork?
Once the piece has fully cured (wait at least 7 days!), you must apply a quality acrylic varnish or sealant. This protective layer seals the surface, shielding the paint from dust, minor scuffs, and environmental humidity. Always ensure the area where you apply the sealant is well-ventilated and follow the manufacturer’s instructions regarding drying times for the sealant itself.
Conclusion
Completing a detailed art piece like a Paint By Numbers project is a rewarding journey that requires patience, planning, and an understanding of the materials at hand. By respecting the drying times, preparing your surface thoroughly, and utilizing the right tools, you can manage your time effectively and achieve a result that rivals professional artwork.
Remember that the process itself is as valuable as the finished product. Take breaks, enjoy the methodical nature of the work, and celebrate the small victories. With a structured approach and a little dedication, you will transform a simple kit into a beautiful, lasting piece of decor.