
How Much Does It Cost to Paint a Concrete Floor? A Step-by-Step Guide
Considering a painted concrete floor is a popular way to dramatically refresh a space, offering both aesthetic appeal and enhanced durability. It transforms what might be a utilitarian surface into a stylish, custom feature that anchors a room’s design. However, painting concrete is not a simple weekend project; it requires careful planning, thorough preparation, and the right materials to ensure the results are beautiful and long-lasting.
The initial thought of simply buying paint and applying it might overlook critical details, such as the surface porosity, the type of traffic the area receives, or the necessary chemical preparation. Because the final look and the longevity of the finish depend so heavily on the groundwork, understanding the process—from initial cleaning to final sealing—is crucial for success.
Get the Fail-Safe Paint Color Playbook (Free PDF)
36 proven colors • 8 ready palettes • trim & sheen guide • printable testing cards.
Quick answer: how much to paint concrete floor should be calculated from square footage, coat count, and the coating’s labeled coverage rate. Measure length by width, subtract large unpainted areas, then divide by coverage per gallon and multiply by the number of coats. Add 10 to 20 percent for porous concrete, roller loss, edges, and touch-ups.
Planning Before You Start
Before a single bucket of paint is opened, comprehensive planning is essential. This stage dictates the budget, the timeline, and ultimately, the quality of the finished floor. The first step is assessing the existing concrete surface itself. Is it sealed, porous, stained, or covered in oil residue? Any organic matter or deep staining must be chemically treated and removed, as paint cannot adhere properly to these surfaces. For structural integrity, inspect the floor for major cracks, settling issues, or uneven patches. Minor cracks can often be filled with specialized concrete crack fillers, but large, deep cracks may require professional structural repair before painting can begin.
Next, consider the room’s function and traffic level. A floor in a garage or commercial kitchen, subject to heavy chemicals, oils, and constant abrasion, requires an industrial-grade, highly durable epoxy coating. In contrast, a floor in a low-traffic hallway or a basement area might be suitable for a more decorative, yet still robust, acrylic finish. The intended use directly dictates the necessary paint type and thickness of the protective layers. Similarly, note the lighting in the space; natural light exposure will affect how the chosen color and sheen are perceived, while artificial lighting can highlight imperfections or variations in color.
Establishing a realistic budget involves more than just paint cost. You must account for specialized cleaning chemicals, necessary fillers, sanding equipment rental, protective sheeting, and personal protective equipment (PPE). If the surface preparation is complex—for example, if the floor has years of oil buildup or mildew—the cost of professional cleaning and deep etching chemicals must be factored in, as this is often the most time-consuming and expensive part of the entire process.
The Painting Process: Step-by-Step Guide
The core of a successful painted concrete floor revolves around preparation, which can be broken down into several critical steps. Never underestimate the cleaning process; it is the foundation of adhesion.
- Deep Cleaning and Degreasing: Start by thoroughly vacuuming the entire area to remove dust and loose debris. Next, use a specialized concrete cleaner and degreaser to strip away any oils, grease, or surface grime. Depending on the severity of the staining, you may need to use a mild acid etch or enzymatic cleaner, following the manufacturer’s instructions precisely.
- Repair and Patching: Once the surface is clean, inspect and repair all cracks, holes, and uneven areas. Use a hydraulic cement or specialized concrete filler designed for flooring. Allow all patches and repairs to cure completely according to the manufacturer’s timeline.
- Sanding and Profile Preparation: To ensure the paint adheres perfectly, the surface must be lightly sanded or ground. This process, often called “profiling,” removes the weak, dusty surface layer and creates a porous, rough surface (a mechanical key) for the primer and paint to grip. This step is crucial for maximum adhesion.
- Priming and Sealing: Apply a specialized concrete primer. This primer seals the concrete’s natural porosity, preventing the paint from being absorbed unevenly and ensuring a uniform base coat. Allow the primer to cure fully. Following the primer, if recommended by the paint manufacturer, apply a sealer coat to stabilize the surface further.
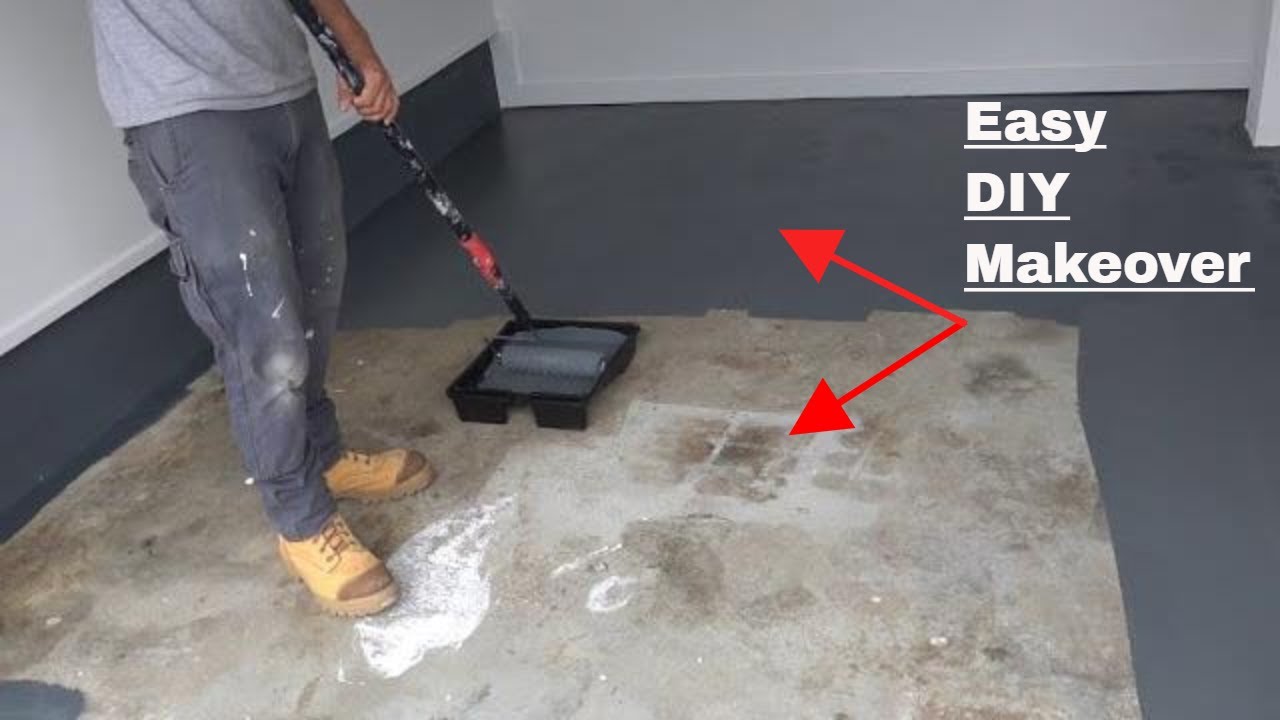
- Applying the Color Coat: Finally, apply the chosen concrete paint or epoxy coating. Most high-quality coatings require multiple coats (usually two or three) to achieve the desired depth of color and maximum protection. Ensure the application is consistent and follow the recommended recoat times between each coat.
Materials and Tools
Choosing the right materials is non-negotiable for a durable finish. The type of paint must match the environment. For garages, basements, or commercial areas, an industrial-grade epoxy coating is generally recommended due to its chemical resistance and extreme durability. For indoor living spaces with low traffic, a high-quality acrylic or urethane-based coating might offer sufficient protection while providing better color depth and aesthetics.
Essential tools include industrial-grade vacuum cleaners, heavy-duty scrubbers, specialized concrete cleaners (degreasers/etchers), concrete crack filler, sanding/grinding equipment, paint rollers, and brushes suitable for the specific coating. Always acquire proper protective gear, including respirators, safety glasses, gloves, and overalls, especially when handling acids, solvents, or epoxy compounds. Never skimp on quality; using low-grade materials will compromise the entire project.
Design and Color Tips
When selecting colors for a painted concrete floor, remember that the finish and the undertones are just as important as the color itself. Concrete floors often look best when the color is slightly deeper or darker than what you might expect, as this helps mask minor imperfections and stains. Consider neutral, earthy tones (greys, slate blues, deep browns) that complement the surrounding permanent fixtures, like wood cabinets or stone countertops.
The sheen of the paint dramatically affects the look. A high-gloss finish maximizes reflectivity, making the room feel larger and brighter, but it also makes the floor more prone to showing scuffs and dust. A satin or semi-gloss finish is often the best balance, offering good durability and a slight luster without being overly reflective. For maximum practicality and hiding minor wear, a matte or low-luster finish is often preferred, especially in high-traffic areas.
Understanding the impact of lighting is key. Natural daylight will reveal the true color and undertone of the paint, often appearing cooler and brighter. Artificial lighting, particularly warm-toned LED lighting, will shift the perception, making colors appear warmer and richer. Always test your chosen color and finish in the space at different times of the day to ensure the result matches your vision.
Mistakes to Avoid
The most common mistake is rushing the preparation phase. People often assume that a simple scrub and rinse is enough, but failing to properly degrease and etch the concrete means the paint will have nothing substantial to bond to, leading to premature peeling and failure. Another critical error is ignoring the manufacturer’s cure and recoat times. Applying the next coat too early can trap solvents or prevent the material from fully hardening, leading to a weak, brittle finish.
Furthermore, choosing a paint that is unsuitable for the environment is a major pitfall. Using a standard wall paint in a garage, for example, will result in rapid deterioration due to temperature fluctuations, moisture, or chemicals. Always select a coating specifically formulated for concrete flooring and the intended use (e.g., oil-resistant, chemical-resistant). Finally, neglecting proper ventilation during the application process poses both a health risk and can compromise the curing process of the specialized coatings.
Safety and Practical Notes
Safety must be the highest priority. Concrete painting involves strong chemicals, solvents, and particulate matter. Always ensure the area is thoroughly ventilated—open all windows and use exhaust fans—and wear appropriate personal protective equipment (PPE), including chemical-resistant gloves, safety goggles, and a respirator rated for organic vapors. Never mix chemicals, especially acids and solvents, without explicit instructions from the manufacturer, as this can create toxic fumes.
Always read and follow the manufacturer’s technical data sheets (TDS) and safety data sheets (SDS) for every product used, including primers, sealers, and the final paint. These documents contain critical information regarding application methods, necessary curing times, and required safety precautions. If the concrete floor has any suspected historical contaminants, such as lead paint residue or asbestos-containing materials, do not attempt removal or remediation yourself; call a licensed professional immediately.
Painting a concrete floor is a rewarding project that can drastically improve the look and function of your home. By treating the process as a comprehensive renovation—focusing equally on meticulous preparation, material selection, and safety—you can achieve a professional, durable, and beautiful finish.
Remember that the key to longevity is patience. Dedicate adequate time to cleaning, patching, and allowing each layer to cure completely. By following these detailed steps and prioritizing safety, you can confidently transform your concrete floor into a stunning, custom feature that enhances the overall character of your space for years to come.
Frequently Asked Questions
Do I need professional help, or can I do this myself?
While painting concrete is a demanding DIY project, it is manageable for dedicated homeowners. However, you should call a licensed professional if the floor has deep structural cracks, significant settling issues, or suspected historical contaminants (like lead paint or asbestos). Furthermore, if the oil or staining buildup is extremely severe, professional chemical stripping and etching services are highly recommended, as this preparation stage is the most critical for long-term adhesion.
Get the Fail-Safe Paint Color Playbook (Free PDF)
36 proven colors • 8 ready palettes • trim & sheen guide • printable testing cards.
What is the biggest mistake I can make when painting concrete?
The biggest mistake is insufficient preparation. Simply scrubbing and rinsing the floor is not enough. The concrete must be thoroughly degreased (to remove oils and grease) and mechanically profiled (sanded or ground) to create a rough, porous surface for the paint to bond to. If the surface is not properly cleaned and etched, the paint will peel and fail prematurely, regardless of how high-quality the coating is.
How long does the entire process take, and how many coats are needed?
The timeline is dictated by curing time, not application time. While the physical application of the color coat might take a single day, the overall project can take anywhere from 3 to 7 days. You must strictly adhere to the manufacturer’s specified drying and recoat times between the primer, sealer, and subsequent color coats. Rushing these curing times is the primary cause of a weak, brittle finish.
What kind of paint should I use for a garage versus a living room?
The intended use dictates the material. For areas exposed to heavy chemicals, oils, temperature swings, or constant abrasion (like garages or commercial kitchens), an industrial-grade epoxy coating is mandatory due to its chemical resistance. For low-traffic, indoor living spaces, a high-quality acrylic or urethane-based coating may offer sufficient durability and superior aesthetics. Always select a coating specifically designed for concrete and the specific environment.
Conclusion: Achieving a Lasting, Beautiful Finish
Successfully painting a concrete floor is less about the paint itself and more about the meticulous execution of the preparation steps. By dedicating the necessary time to deep cleaning, etching, and proper structural repair, you lay the foundation for a finish that will last for years. Remember that the initial investment of time and effort in preparation directly correlates to the longevity and appearance of the final product.
Approach the project with the mindset of a professional renovation—prioritizing safety, following every manufacturer’s guideline for curing and recoat times, and selecting materials appropriate for the specific environment. While the process may seem daunting, following this detailed guide, and understanding the critical role of proper adhesion, ensures that the final result is a durable, aesthetically stunning feature that significantly enhances the character and value of your home.