
How To Chalk Paint Metal
Chalk painting metal surfaces is one of the most rewarding and versatile projects in home decor and artistic crafting. This technique allows even those who consider themselves novice painters to transform dull, rusted, or industrial-looking metal objects into pieces of striking, personalized art. Whether you are refreshing vintage furniture, adding accents to a garden, or customizing unique decorative pieces, chalk paint provides a beautiful, matte finish that is surprisingly forgiving to work with.
The process, however, requires more than just applying paint; it demands meticulous preparation. Because paint adheres differently to various metals—especially those with rust, grease, or heavy patina—skipping the prep work is the fastest way to a failed project. This comprehensive guide will walk you through every critical step, from assessing the metal’s condition to the final protective sealing, ensuring your chalk-painted masterpiece is durable, beautiful, and built to last.
Get the Fail-Safe Paint Color Playbook (Free PDF)
36 proven colors • 8 ready palettes • trim & sheen guide • printable testing cards.
Quick answer: To Chalk Paint Metal, start with the safest first step for the material involved, test a small area when needed, and follow the process in thin, controlled stages. Use proper ventilation and protective gear when chemicals, sanding, spraying, or solvents are involved.
Planning and Assessing Your Metal Project
Before you even open a can of paint, a successful project begins with careful planning. You must assess three key factors: the type of metal, the environment, and the desired aesthetic. Taking these steps upfront will prevent costly mistakes and ensure the paint adheres properly.
Understanding the Metal Type and Condition
Different metals require unique preparation methods. It is vital to identify what you are working with:
- Iron and Steel: These are highly susceptible to rust (oxidation). If the rust is deep, aggressive sanding and chemical treatment are necessary. The primer must be rust-inhibiting.
- Aluminum: Aluminum reacts differently to acids and requires primers designed to bond with non-ferrous metals. It can sometimes be more difficult to paint than steel, so patience is key.
- Copper and Brass: These metals develop a natural patina over time. If you want to preserve that aged look, you must be careful not to over-clean the surface. Primers formulated for decorative metals are best.
- Galvanized Metal: This is a coated steel, and while it can be painted, the coating itself must be thoroughly cleaned, as paint may adhere better to the original surface rather than the new paint layer.
Also, determine the environment. Is the piece strictly indoor, or will it be exposed to rain, humidity, and UV rays? If it is outdoors, your sealant must be specifically rated for exterior, weather-resistant use, and the prep work must be even more rigorous.
The Metal Preparation and Painting Process
This detailed, step-by-step guide covers everything from initial cleaning to the final protective coat. Adherence to these steps is non-negotiable for a professional, lasting finish.
Step 1: Comprehensive Cleaning and Rust Removal
The foundation of your project is a clean surface. Any dirt, oil, grease, or rust particles will prevent the paint from bonding, leading to flaking and peeling.
- Initial Cleaning: Wipe down the entire piece with a degreaser (like mineral spirits or specialized metal cleaner) and a clean, lint-free cloth. This removes loose dust and surface grime.
- Rust Mitigation (The Crucial Step): If rust is present, you must remove it.
- Mechanical Removal: For general surface rust and flaky corrosion, use a wire brush, sandpaper (starting with 80-grit and moving up to 120-grit), or a scraper. This is effective but labor-intensive.
- Chemical Removal: For heavy, deep rust, use a commercial rust converter or remover. These products chemically stabilize and lift the iron oxide. Safety Note: Always wear gloves and eye protection when using chemical rust removers. Ensure excellent ventilation.
- Rinsing: After mechanical or chemical cleaning, rinse the piece thoroughly with clean water and allow it to dry completely.
Step 2: Priming for Adhesion and Protection
Never apply chalk paint directly to bare, metal-prepared metal. A specialized metal primer is essential. The primer acts as a barrier, preventing flash rust from forming between the paint coats and providing a stable, uniform surface for the chalk paint to grip.
- Applying the Primer: Using a dedicated synthetic brush or foam roller, apply a thin, even coat of metal primer, following the manufacturer’s dilution and application instructions precisely.
- Curing Time: Allow the primer to dry and cure completely. Do not rush this step. The primer needs time to chemically bond with the metal and dry fully before the next step.
Step 3: Applying the Chalk Paint Layers
Once the primer is dry, you can begin the creative application of the chalk paint.
- Preparation: Stir the chalk paint thoroughly. Chalk paints often contain pigments that settle, and mixing ensures consistent color and application.
- First Coat: Apply the first coat of chalk paint. Work in manageable sections and try to keep the paint application consistent. Do not glob or apply too thickly, as this can lead to drips or uneven coverage.
- Second and Subsequent Coats: Allow the first coat to dry completely (check the manufacturer’s recommended drying time). Apply subsequent coats, allowing each coat to dry fully before starting the next. Multiple thin coats are always better than one thick coat, as they build opacity and durability.
Step 4: Distressing and Customizing the Finish
This stage adds character and depth, moving the piece from merely painted to truly bespoke art. Choose a technique based on the desired look:
- Sanding Distress: Use fine-grit sandpaper (220-grit or higher) and gently sand the paint in specific areas (like edges or corners) to simulate natural wear and expose the metal underneath.
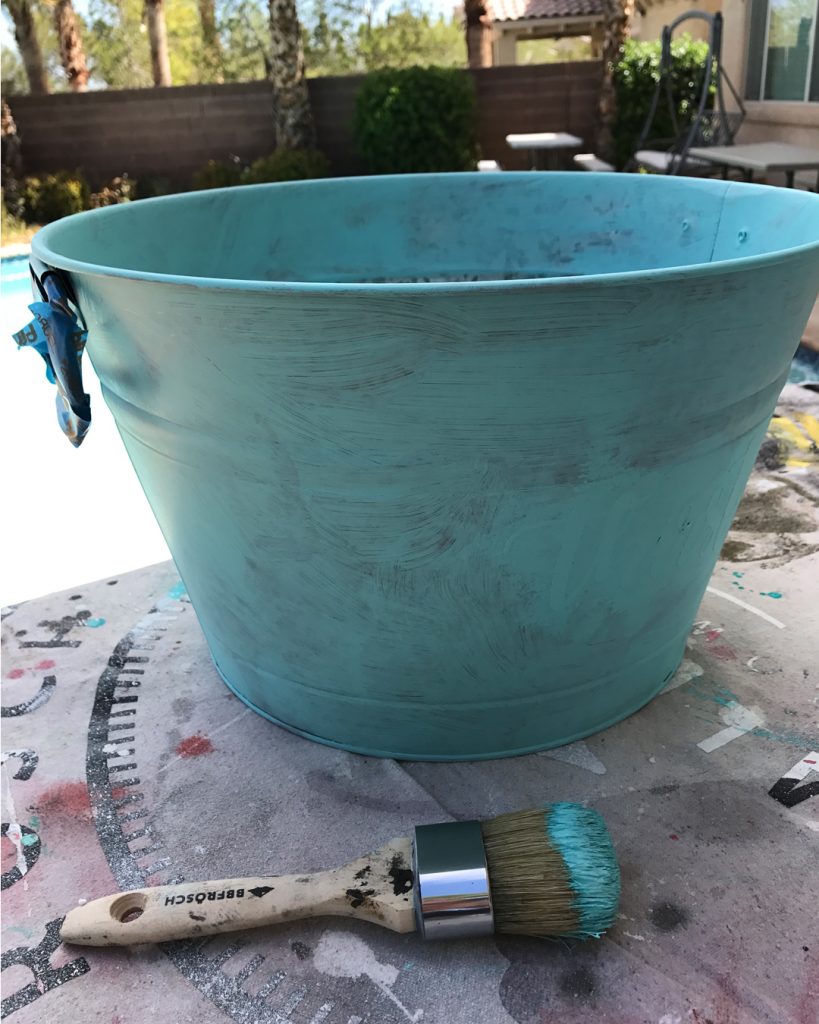
- Dry Brushing: This technique adds highlights and texture. Dip a stiff brush into a contrasting color of chalk paint, wipe the brush on a paper towel until almost dry, and then lightly “drag” the brush over the raised areas of the piece.
- Wax Resist: Apply a thin layer of wax to the areas you want to look unpainted or deeply patinated. After the paint is dry, sanding over the entire piece will reveal the wax-protected areas, creating a controlled, antique look.
Step 5: Sealing and Protecting the Masterpiece
The final, and perhaps most crucial, step is sealing. Chalk paint, by itself, is decorative but porous and susceptible to moisture, scratching, and UV damage. A sealant locks in the color and provides a protective barrier.
- Selecting the Sealant: Choose a protective sealant (such as a clear wax, lacquer, or polyurethane) that is specifically compatible with chalk paint and appropriate for the intended use (indoor/outdoor).
- Application: Apply the sealant in thin, even coats using a soft brush or cloth. Work in small, controlled areas.
- Curing and Buffing: Allow the sealant to cure completely according to the product instructions. Once cured, you can gently buff the surface with a clean, soft cloth to enhance the sheen and protective layer.
Materials and Tools
Gather brushes, rollers, painter’s tape, drop cloths, and the correct primer and paint for your surface. A sturdy ladder, sanding block, and cleaning rags will also help.
Do not forget safety gear: gloves, eye protection, and a respirator if ventilation is limited. Having everything ready before you start prevents mid-project delays and reduces mess.
Design Considerations: Sheen, Undertones, and Color Pairings
The color and finish you choose are critical to the final aesthetic. Think about how the paint will interact with the metal’s natural patina and the lighting in the room.
Understanding Sheen and Finish:
Because chalk paint is famous for its matte, chalky finish, it is generally meant to be left that way. However, the protective sealant you apply can influence the final sheen. A matte sealant maintains the rustic look, while a satin or semi-gloss sealant offers more durability and a slight reflective sheen, making the piece feel more polished. Always test the sealant finish on a small, hidden area first.
Color Pairing and Undertones:
When choosing colors, consider the undertones. If your metal has a warm, coppery patina, pairing it with a cool, bluish-gray chalk paint can create a striking contrast. Conversely, using creamy neutrals or deep earthy tones can enhance a rustic, unified farmhouse look. Always test your paint swatches in the actual light conditions of the room—natural light changes dramatically throughout the day, affecting how colors appear.
Common Mistakes and Troubleshooting
Even experienced crafters can encounter issues. Knowing the common mistakes to avoid can save hours of frustration and ensure a professional outcome.
- Skipping Surface Prep: This is the number one mistake. If you do not remove all rust, oil, or residue, the paint will lift and flake off, regardless of how well you apply it.
- Rushing the Drying Time: Chalk paint, primers, and sealants all require proper drying/curing times. Applying the next coat too early will lead to poor adhesion, blotchiness, and peeling.
- Ignoring the Primer: Treating the primer as optional is a critical error. The primer is the glue that makes the paint durable on metal.
- Using the Wrong Sealant: Using a sealant designed for wood or plastic on metal can fail quickly due to moisture exposure or chemical incompatibility. Always check the product label for metal compatibility.
Safety and Practical Considerations
Safety must be your top priority throughout the process. Metal preparation often involves abrasive materials, chemicals, and dust, requiring protective gear and proper ventilation.
- Ventilation is Mandatory: When using chemical rust removers, degreasers, or solvents, always work outdoors or in a well-ventilated area. Wear an appropriate respirator mask.
- Personal Protective Equipment (PPE): Always wear safety glasses, chemical-resistant gloves, and appropriate dust masks when sanding or using abrasives.
- Professional Help: If the metal item is extremely large, contains complex structural components, or if the rust or material residue is suspected to be lead-based, asbestos-containing, or requires major structural repair, do not attempt it yourself. Call a licensed professional.
| Tools and Materials |
|---|
| Paintbrushes (various sizes) |
| Sandpaper or sanding block |
| Painter’s tape |
| Drop cloth or newspaper |
| Protective gear (gloves, safety goggles, mask) |
| Metal primer |
| Chalk paint sealant or wax |
| Clean cloth or sponge |
| Rust removal products (if needed) |
Frequently Asked Questions
How do I prepare metal that has deep, heavy rust?
If the rust is deep, sanding alone will not suffice. You must use a chemical rust converter or remover first, following the product’s instructions carefully. After chemically treating the rust, use a wire brush or scraper to remove all remaining flaky corrosion. Always rinse the piece thoroughly afterward and allow it to dry completely before proceeding to the primer step. Never skip the cleaning process, as remaining rust residue will compromise adhesion.
Get the Fail-Safe Paint Color Playbook (Free PDF)
36 proven colors • 8 ready palettes • trim & sheen guide • printable testing cards.
Is a specialized primer absolutely necessary for metal?
Yes, a metal-specific primer is mandatory. Chalk paint is decorative, but the primer acts as the crucial adhesive barrier. It prevents the metal from reacting with the paint (forming flash rust) and ensures that the paint has a stable, uniform surface to grip. Do not apply chalk paint directly to bare, prepped metal.
Can I chalk paint metal that will be exposed to the outdoors?
Yes, but the prep and sealing process must be significantly more rigorous. For outdoor use, the metal must be cleaned to remove all dirt and salts, and you must use a primer designed for exterior metal. Most importantly, the final sealant must be rated as weather-resistant and UV-stable. An indoor sealant will fail rapidly when exposed to rain, humidity, or direct sunlight.
What if the metal item is very old or its composition is unknown?
If you suspect the metal item is extremely old, or if it may contain lead paint, asbestos, or other hazardous materials, do not attempt preparation yourself. Call a licensed professional or restoration specialist. Safety is paramount; sanding or scraping unknown materials can release toxic dust that requires specialized handling and filtration.
Conclusion
Chalk painting metal is a deeply satisfying blend of artistry and practical craftsmanship. By respecting the material science—from the initial deep cleaning to the final protective seal—you elevate the project from a simple paint job to a durable piece of functional art. Remember that the preparation is just as important as the paint itself.
Take your time, experiment with the distressing techniques, and most importantly, enjoy the process. With careful planning and attention to detail, your chalk-painted metal objects will not only look beautiful but will also retain their charm and structural integrity for years to come, adding a unique story and piece of art to your home.