
How To Clean A Graco Paint Sprayer
For professional painters and dedicated DIY enthusiasts, a Graco paint sprayer is an invaluable tool, capable of delivering a consistently smooth and professional finish that would be difficult to achieve by hand. However, the power and precision of these machines come with a crucial requirement: meticulous and regular maintenance. Neglecting the cleaning process can lead to paint residue hardening, clogging fine components, and ultimately compromising the sprayer’s performance, leading to uneven coats or total failure.
This comprehensive guide is designed to take you through the entire process—from initial setup and solvent selection to advanced flushing techniques and proper reassembly. By mastering these steps, you will not only ensure that your Graco sprayer operates at peak efficiency but also significantly extend its operational lifespan, making your next project smoother and more reliable than ever before.
Get the Fail-Safe Paint Color Playbook (Free PDF)
36 proven colors • 8 ready palettes • trim & sheen guide • printable testing cards.
Quick answer: To clean a graco paint sprayer, depressurize the sprayer or gun, flush the cup and hose with the cleaner that matches the coating, then remove the tip, guard, filter, and nozzle parts for separate soaking. Brush out softened residue, rinse the flow path until clear, and reassemble only after the parts are dry. Wear eye protection and ventilate solvent cleanup.
Planning and Preparation Before You Start
Before you even reach for a wrench, proper planning is essential. The cleaning process is not one-size-fits-all; the solvent you use and the components you focus on depend entirely on what you painted. This initial planning phase saves time, prevents damage, and ensures safety.
The first crucial decision is determining the paint type. Was it a latex (water-based) paint, or was it an oil-based enamel? This dictates your entire cleaning protocol. Using the wrong solvent can damage seals, degrade plastic components, or simply fail to dissolve the hardened paint residue.
Furthermore, assess the scale of the cleanup. If the sprayer was used for a small touch-up job, a simple flush might suffice. If it was used for multiple rooms or over several hours, a deep, component-by-component soak and scrub is mandatory. Gather all your tools, set up a designated, well-ventilated workspace, and ensure you have adequate protection before proceeding.
Main Guide
Start by identifying the material, coating, tool condition, and finish goal before choosing a method. Clean loose residue first, then test the safest compatible product or technique in a small area. Work slowly, keep the surface or tool supported, and avoid jumping to harsh solvents or aggressive sanding unless the manufacturer directions and material condition support it.
Move through the project in controlled stages: assess, prepare, apply or clean, inspect, and repeat only as needed. Let coatings dry fully, let tools reshape naturally, and keep cleanup materials ready before the mess spreads. If the article topic involves fumes, specialty coatings, damaged surfaces, business settings, or uncertain product compatibility, pause and get qualified guidance before continuing.
Essential Tools and Materials Checklist
Gathering the right supplies is half the battle. Never start cleaning without having these materials on hand. We categorize them based on the type of paint you used.
Required Safety Gear (Non-Negotiable):
- Chemical-resistant gloves (Nitrile or rubber)
- Safety goggles or face shield
- Appropriate clothing (avoid synthetic materials that might catch fire)
Tools:
- Adjustable wrench or specific sprayer wrench set
- Soft-bristled brush (dedicated only for cleaning)
- Several clean, lint-free rags
- Funnel for draining paint
Cleaning Agents (Choose ONE based on paint type):
- For Latex/Water-Based Paints: Warm water mixed with a mild detergent (dish soap is usually effective) and dedicated paint thinner/cleaner designed for water-based systems.
- For Oil-Based Paints: Mineral spirits, paint thinner, or specialized solvent recommended by the paint manufacturer.
- For Mixed Media: A combination of solvents and water, always following the manufacturer’s advice for the specific Graco model.
Note: Always check the manufacturer’s guide for the specific solvent ratio and type to ensure compatibility with your sprayer model.
The Step-by-Step Cleaning Method
The cleaning process must be executed sequentially to ensure no component is overlooked. Follow these steps carefully, prioritizing safety and proper disassembly at every stage.
1. Initial Safety and Disconnection
Before anything else, locate the power source and unplug the unit completely. If it is battery-powered, remove the batteries. Put on all required personal protective equipment (PPE). Drain any remaining paint from the reservoir and the hose into a designated container for proper disposal. Never attempt to clean the unit while connected to power.
2. Comprehensive Disassembly
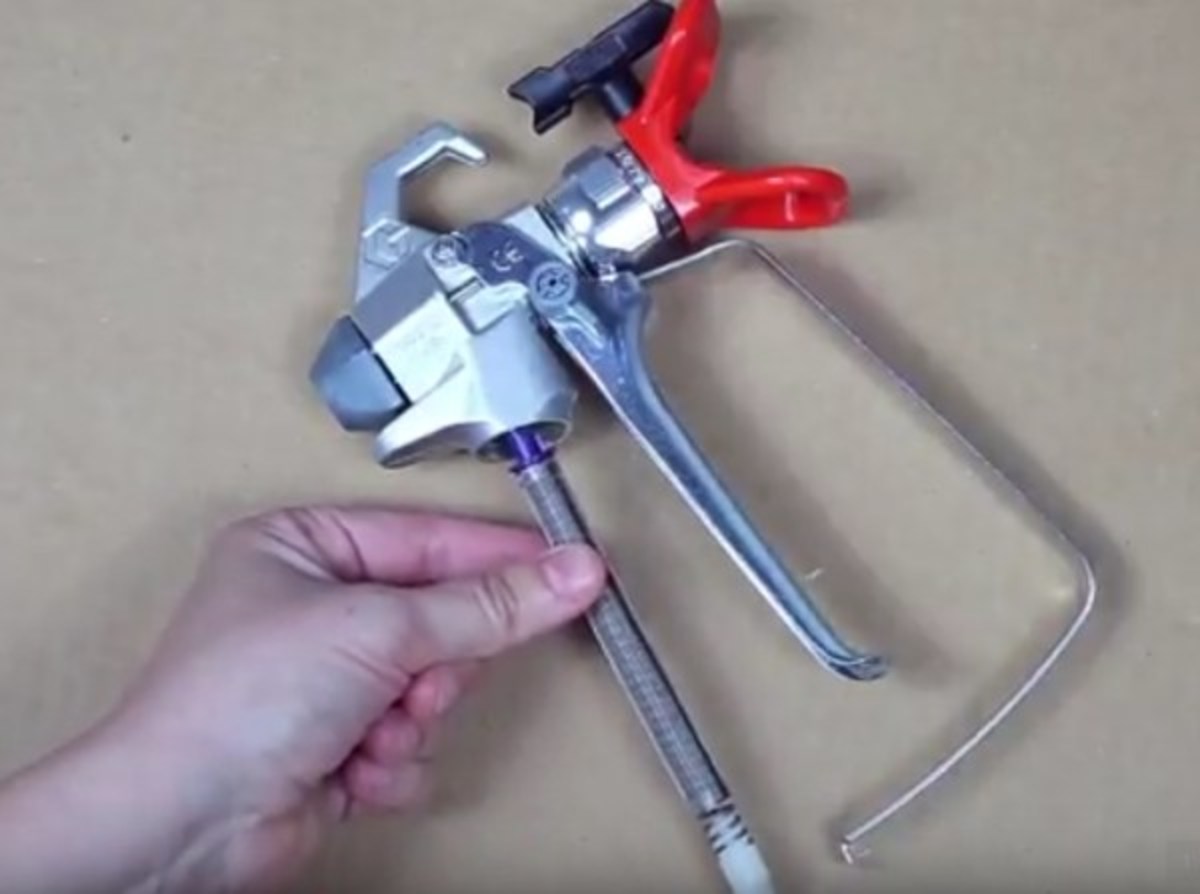
Using the appropriate wrench, systematically detach the spray gun from the hose and the pump body. You must separate the following key components: the spray gun nozzle/tip, the inlet filter, the outlet valve, and the pump diaphragm/reservoir (if applicable). Lay all parts out on a clean, flat surface so you can see every piece that needs attention.
3. Deep Cleaning the Spray Gun
The spray gun is the most delicate component. Fill a bucket with your chosen cleaning solution. Submerge the entire spray gun assembly, paying special attention to the air cap and the nozzle tip. Use the soft-bristled brush to scrub the internal pathways of the nozzle and tip. These small passages are where most clogs form. After soaking and scrubbing, flush the entire unit by running the cleaning solution through the air cap and the tip until the runoff is visibly clean and free of paint residue. Rinse thoroughly with clean water.
4. Flushing the Pump and Hose Assembly
The pump body and hose need to be flushed to remove solvents and paint residue from the internal pathways. Attach the hose to the pump and connect a clear liquid source (the cleaning solvent). Open the unit to allow the solvent to flow through the pump’s internal chambers. This process is often best done by running the solvent through the pump multiple times, simulating the spraying action. This action forces the solvent through the inlet filter, the internal valves, and the outlet valve. Crucially, inspect the inlet filter; if it is heavily saturated or visibly clogged, it must be replaced, not just cleaned.
5. Component Scrubbing and Inspection
Scrub the filters, valves, and internal mechanisms of the pump body. Use a mild detergent solution for this stage. Pay close attention to the threads and connection points, ensuring no dried paint is trapped. Rinse every component under running water until the runoff is completely clear and free of cleaning residue.
6. Reassembly and Testing
Once every single component—the spray gun, the filters, the pump body, and the valves—is thoroughly rinsed and, critically, completely dry, you can begin reassembly. Reconnect the spray gun to the hose, and attach the filters and valves to the pump body. Use the wrench to tighten all connections to the manufacturer’s specified torque. Over-tightening can strip threads, while under-tightening can cause leaks. Once assembled, plug the unit back in (or insert batteries) and run the pump dry first, then run it with a small amount of clean water to confirm there are no leaks or pressure drops. The unit is now ready for its next job.
Finish, Compatibility, and Prevention Tips
Choose a finish that matches the repair goal and the surface conditions. Gloss and semi-gloss resist moisture and are easier to clean, while flat or matte finishes hide imperfections better but are less washable.
Check compatibility between primer, filler, paint, and the existing surface. Some repairs require specific primers or prep steps to prevent the problem from returning. Consider drying time, odor, and cleanup method before starting, and confirm that the product suits interior or exterior use as needed.
Common Mistakes to Avoid When Cleaning
Even with detailed instructions, minor mistakes can sabotage the entire cleaning effort. Avoiding these common pitfalls will save you time, money, and frustration.
- Using the Wrong Solvent: This is the most frequent error. Never mix solvents or use a solvent intended for oil paint on a water-based system, or vice versa. Always defer to the paint manufacturer’s recommendation.
- Skipping the Drying Phase: Reassembling components while they are even slightly damp can lead to rust, mold, or poor performance. Allow all parts to air dry completely before putting the unit back together.
- Ignoring Filter Replacement: Filters are designed to capture debris. If they are saturated or visibly compromised, cleaning them will not restore their function. Always replace the filter when in doubt.
- Overlooking Small Passages: The nozzles and internal valves have microscopic passages. Simply flushing them is not enough; a dedicated soft brush is needed to physically dislodge dried paint.
Safety and Professional Handling Notes
Paint sprayers and their cleaning solvents involve chemicals and electricity, making safety the paramount concern. Never sacrifice safety for speed.
- Ventilation is Key: Always conduct cleaning and flushing procedures in an extremely well-ventilated area, preferably outdoors or under a powerful exhaust fan. Solvents can release strong fumes.
- Personal Protective Equipment (PPE): Always wear chemical-resistant gloves and safety goggles. If the solvents are strong or used for extended periods, a respirator mask rated for organic vapor is highly recommended.
- Chemical Disposal: Do not pour paint, thinners, or solvents down the drain. Check with your local waste management facility for designated collection points for chemical waste.
- Know When to Call a Pro: If you encounter a major leak, severe pressure loss that cannot be resolved by cleaning, or if the machine is very old and parts are suspect, do not attempt complex repairs. Call a professional paint sprayer technician.
Safety and Practical Notes
Work in a well-ventilated space and wear gloves, eye protection, and a respirator when needed. Keep children and pets away from wet surfaces and open containers.
Follow manufacturer drying times between coats. Dispose of rags and leftover materials according to local regulations. If the project involves heights, lead paint, or structural work, consider hiring a licensed professional.
Frequently Asked Questions
What solvent should I use for cleaning my Graco sprayer?
The solvent choice is entirely dependent on the paint type used. Never mix solvents or use a solvent meant for oil paint on a latex (water-based) system, and vice versa. For water-based paints, warm water and mild detergent are usually sufficient, supplemented by a dedicated water-based cleaner. For oil-based paints, mineral spirits or paint thinner recommended by the paint manufacturer must be used. Always consult the specific paint manufacturer’s guidelines for the most accurate solvent ratio.
Get the Fail-Safe Paint Color Playbook (Free PDF)
36 proven colors • 8 ready palettes • trim & sheen guide • printable testing cards.
How frequently do I need to clean the sprayer?
For optimal performance and longevity, you should clean the sprayer immediately after completing a job. Even if you only used it for a small touch-up, a quick flush prevents residue from hardening. If the sprayer was used for multiple rooms or over several hours, a deep, component-by-component cleaning and flush is mandatory.
What if I experience a major leak or pressure drop after cleaning?
If you have thoroughly followed the cleaning and reassembly steps and still encounter significant leaks or a drastic pressure drop, the issue may be internal component damage, a compromised seal, or a worn part. Do not attempt complex repairs yourself. Call a professional paint sprayer technician. They have specialized tools to diagnose leaks that may be invisible to a novice user.
Where should I dispose of the leftover paint and cleaning solvents?
Never pour paint, thinners, or solvents down the drain or into household trash. These chemicals are considered hazardous waste. Before disposal, check with your local waste management facility or municipal authority. They will provide designated collection points or guidelines for properly disposing of chemical waste materials.
Can I clean the entire unit without fully disassembling it?
While a basic flush can be done without full disassembly, it is highly discouraged for deep cleaning. The most critical clogs and residue build-up occur in the tiny passages of the nozzle, the inlet filter, and the valves. To ensure peak performance and prevent future clogs, you must systematically disassemble the spray gun and pump body to scrub and soak every component.
Conclusion
Proper maintenance is not merely a suggestion; it is the cornerstone of reliable painting. By integrating this detailed, methodical cleaning process into your routine—especially the habit of cleaning immediately after every single use—you ensure that your Graco paint sprayer remains a high-performing, durable tool. Investing the time in deep cleaning and preventative care will save you significant headaches, costly repairs, and downtime down the road, guaranteeing professional results every time you spray.