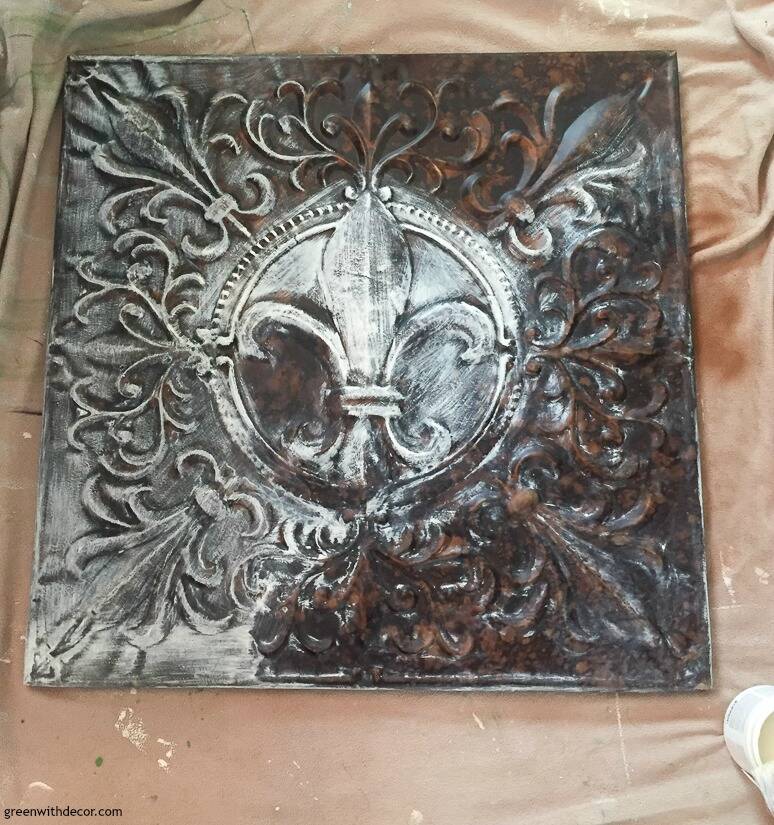
How To Distress Metal With Paint
Are you looking for a unique and rustic finish for your metal projects? Distressing metal with paint is a popular technique that can help you achieve a worn and weathered appearance, adding character and charm to your home decor. Whether you’re refurbishing an old piece of furniture or creating a new accessory, distressing metal with paint is an easy and affordable way to achieve a custom and vintage look.
Distressing metal with paint involves applying multiple layers of paint and then removing some of it to reveal the metal underneath. This creates a worn and uneven appearance, which can be customized to your liking by using different colors and techniques. With a few simple tools and steps, you can achieve a custom and vintage look for your metal furniture, decor, and accessories.
Get the Fail-Safe Paint Color Playbook (Free PDF)
36 proven colors • 8 ready palettes • trim & sheen guide • printable testing cards.
In this article, we’ll walk you through the steps involved in distressing metal with paint, including preparation, different distressing techniques, and sealing and finishing. We’ll also share some tips and tricks to help you achieve the perfect level of distress and create a unique and custom look. So whether you’re a beginner or an experienced DIY enthusiast, read on to learn how to distress metal with paint and add some rustic charm to your home decor.

Preparation
Before distressing metal with paint, it’s important to properly prepare the surface to ensure the paint adheres well and the distressed look is even. First, gather all necessary supplies, including sandpaper, paint, paintbrushes, and a sealer. Next, clean the metal surface thoroughly with soap and water and let it dry completely. Once dry, lightly sand the surface to roughen it up, which helps the paint adhere better. Finally, apply a base coat of paint to the metal surface and let it dry completely.
Distressing Techniques
There are several techniques you can use to distress metal with paint, depending on the level of distress you want to achieve and the look you’re going for.
Dry Brushing
One technique for distressing metal with paint is dry brushing. This technique involves lightly brushing a small amount of paint onto the metal surface with a dry brush, then immediately wiping it off with a rag or paper towel. This removes some of the paint, leaving a worn and uneven appearance.
To dry brush metal, dip your brush in the paint and then dab it onto a paper towel or rag to remove most of the paint. Then, gently and quickly brush the paint onto the metal surface, being sure to vary the pressure and direction of the brush strokes. Immediately wipe off any excess paint with a rag or paper towel to create the desired level of distress.
Sandpaper Distressing
Another technique for distressing metal with paint is sandpaper distressing. This technique involves sanding the painted surface with sandpaper, removing some of the paint and revealing the metal underneath.
To sandpaper distress metal, first apply a layer of paint to the metal surface and let it dry completely. Then, use fine-grit sandpaper to gently sand the surface, being sure to vary the pressure and direction of the sanding. Sand until you achieve the desired level of distress, then wipe the surface clean with a rag or paper towel.
Get the Fail-Safe Paint Color Playbook (Free PDF)
36 proven colors • 8 ready palettes • trim & sheen guide • printable testing cards.
Chemical Patina
For a more dramatic and unique distressed look, you can use a chemical patina to distress the metal. This technique involves applying a special solution to the metal surface, which reacts with the paint and creates a rusted or aged appearance.
To apply a chemical patina, first apply a layer of paint to the metal surface and let it dry completely. Then, apply the chemical patina solution according to the manufacturer’s instructions, being sure to protect yourself and your workspace with gloves and adequate ventilation. The solution will react with the paint and create a unique and custom look. Once the solution has done its work, rinse the surface with water and let it dry completely.
Sealing and Finishing
Once you’ve achieved your desired level of distress, it’s important to seal and finish the surface to protect the paint and preserve the distressed look. Apply a clear sealer to the metal surface, following the manufacturer’s instructions, and let it dry completely.
Tips and Tricks
- Use a variety of colors and layers to achieve a unique and custom look.
- Experiment with different techniques and tools to create different levels of distress.
- Practice on a small piece of metal before tackling a larger project.
Conclusion
Distressing metal with paint is a fun and creative way to achieve a unique and rustic look for your metal projects. By following these simple steps and using different techniques, you can create a custom finish that is perfect for your style and decor. Whether you’re refurbishing an old piece of furniture or creating a new accessory, distressing metal with paint is an easy and affordable way to achieve a custom and vintage look. With a little practice and experimentation, you can master this technique and create one-of-a-kind pieces that are sure to impress.
So what are you waiting for? Gather your supplies and start distressing your metal with paint today. With a few simple steps, you can achieve a unique and custom look that is sure to add character and charm to your home decor.
