
How To Get Acrylic Paint Off Of Paint Brushes
Acrylic paint is a beloved and highly versatile medium, cherished by artists and designers alike for its quick drying time, vibrant pigments, and durability. However, this very versatility contributes to a significant challenge: when the paint dries and hardens within the fine hairs of your brushes, it creates stubborn, polymeric residue that can quickly diminish the brush’s performance and lifespan. Ignoring this buildup is one of the fastest ways to render a quality tool unusable.
Restoring your brushes requires more than just rinsing them with water; it involves understanding the chemical nature of acrylic polymers and applying a systematic, multi-stage cleaning process. By treating your brushes as valuable, specialized equipment, you can ensure they maintain optimal flexibility, shape, and function, allowing you to enjoy the full spectrum of your chosen artistic medium for years to come.
Get the Fail-Safe Paint Color Playbook (Free PDF)
36 proven colors • 8 ready palettes • trim & sheen guide • printable testing cards.
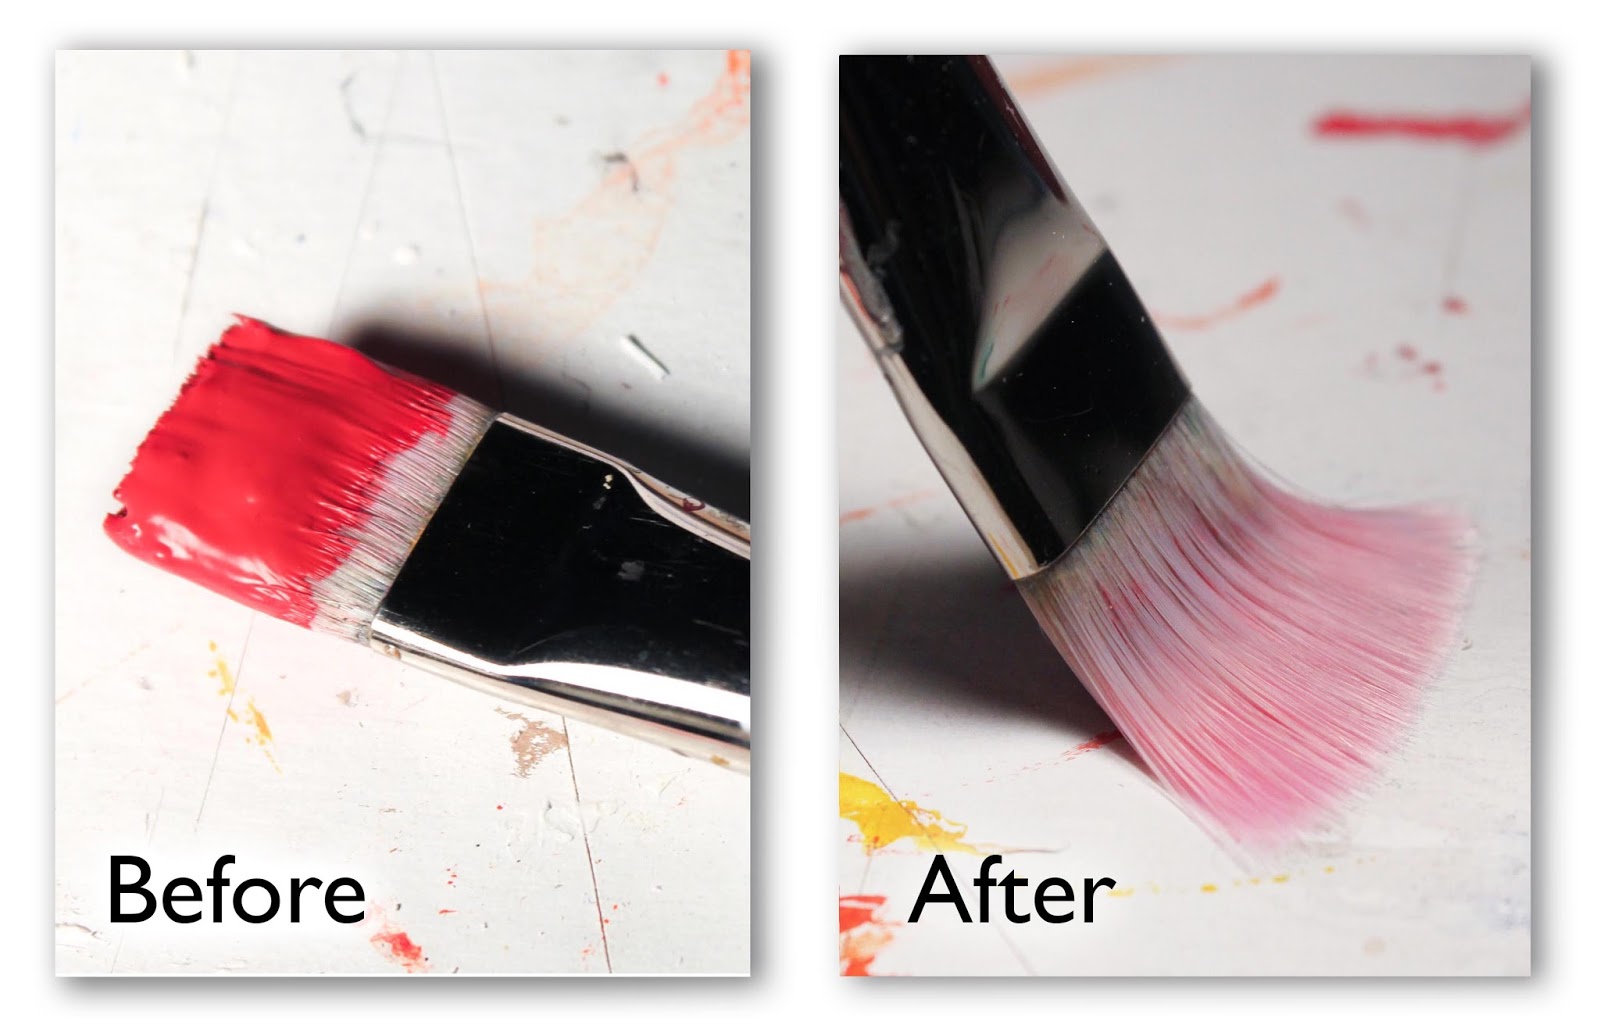
Quick answer: To get acrylic paint off of paint brushes, remove wet paint first, then wash the bristles with warm water and mild soap for water-based coatings or the correct solvent for oil-based or enamel paint. Comb out residue, rinse until the bristles release cleanly, reshape the brush, and dry it flat. Use gloves and ventilation when mineral spirits or strong cleaners are involved.
Planning Before You Start: Assessing the Clean-Up
Before you even dip a brush into a solvent, proper planning is crucial for both efficacy and safety. The scope of the clean-up dictates the time and intensity of the process. Are you performing a quick wash-off after a thin layer of paint, or are you dealing with a heavy, impasto build-up that has cured over several days? Knowing this helps you select the right solvent and soaking time.
First, assess your workspace. This process involves chemicals, and preparation should include laying down plastic sheeting or drop cloths to contain any spills. Secondly, gather all necessary tools and ensure your safety gear (gloves, goggles) is easily accessible. A systematic approach, following the soak-scrub-rinse-dry sequence, prevents accidental damage and ensures the paint residue is fully broken down.
Timing is also a factor. If the paint is extremely old or hardened, do not attempt to scrub it dry. Aggressive scrubbing on dried acrylic will only fray the delicate bristle tips. Instead, plan for a long, gentle soak to allow the solvent to do the heavy lifting of breaking down the polymer matrix.
Materials and Tools for Optimal Restoration
Having the right supplies is half the battle. Treating your brush cleaning kit like a professional art supply setup ensures you have everything needed for a deep, reliable clean. Never skimp on safety gear or proper solvents.
- Specialized Solvent: Never use tap water as the primary cleaner. For deep cleaning, mineral spirits (odorless mineral spirits are often preferred) or a commercial, dedicated acrylic brush cleaner are necessary. These solvents are designed to break the polymeric bonds of acrylic paint.
- Protective Gear: Chemical-resistant gloves (nitrile gloves are ideal) and safety goggles are mandatory. This protects your skin and eyes from solvent fumes and chemical splashes.
- Cleaning Tools: A specialized brush comb or a soft, natural bristle brush (like a clean, dedicated makeup brush) is used for gentle agitation.
- Containers: Use several clean, non-metal containers. One for the initial solvent soak, one for rinsing, and a separate area for soaking discarded rinse water.
- Drying Medium: Clean, absorbent towels or wire drying racks are best for air drying.
The Step-by-Step Restoration Process
This section outlines the systematic process for safely and effectively removing acrylic paint residue, ensuring full restoration of the brush’s structure.
Stage 1: Initial Removal and Soaking
The goal of this stage is to soften the paint and break the chemical bond between the acrylic polymer and the bristle. This must be done before any scrubbing takes place.
- Initial Wipe: Gently wipe off any obvious, thick clumps of paint using a paper towel. Do not press hard, as this can embed the paint deeper into the bristles.
- Solvent Preparation: Pour enough mineral spirits or dedicated cleaner into your primary container to fully submerge the brush head. Ensure the solvent level is high enough to cover the bristles completely, but low enough that it does not soak the ferrule (the metal band) or the handle.
- The Soak: Submerge the entire brush head. Allow the brush to soak for a minimum of 30 minutes. If the paint buildup is severely hardened (impasto), extend the soak time to 60 to 90 minutes. The solvent must have time to penetrate the dried polymer structure.
Stage 2: Gentle Scrubbing and Agitation
Once the soaking period is complete, the paint should have softened significantly. This is where mechanical action removes the residue.
- Agitation: Gently massage the brush bristles within the solvent bath using your fingers or a dedicated brush cleaner. The motion should be circular and gentle, working from the ferrule outwards.
- Tool Scrubbing: Use the brush comb or soft brush to lightly comb through the bristles, lifting the softened paint chunks. The goal is to lift, not tear.
- Repeat Cleaning: If paint residue still appears attached, allow the brush to soak for another 15 minutes and repeat the gentle scrubbing process. This cycle continues until the solvent runs clear and no visible paint is removed.
Stage 3: Rinsing and Neutralization
Rinsing removes the solvent and the loosened paint residue. This must be done carefully to prevent the solvent from damaging the bristle oils or the natural shape of the hairs.
- Rinse 1 (Solvent Removal): Remove the brush from the solvent and rinse it under running, lukewarm water. The initial rinse is meant to flush out the bulk of the solvent and the paint slurry.
- Rinse 2 (Final Wash): Rinse the brush under cool, running water. The water should run clear, indicating that all traces of solvent and paint have been removed.
- Inspect: At this point, inspect the bristles. They should feel flexible, resilient, and free of any sticky or hardened residue.
Stage 4: Drying and Reshaping
Proper drying is critical for maintaining the structural integrity of the bristles. Never let the brush dry in a container of water, as this can alter the bristle oils and cause mildew.
- Reshape: While the brush is still damp, gently reshape the bristles back into their original, intended curve. This manual step is vital for maintaining the brush’s performance.
- Drip and Hang: Allow the brush to drip completely, then hang it by the ferrule on a dedicated brush holder or a clean, non-absorbent rack. Gravity will pull the water out, maintaining the natural curve.
- Drying Time: Allow the brush to air dry completely. Depending on the humidity and the size of the brush, this can take several hours to a full day. Do not use heat sources like hair dryers, as excessive heat can damage the natural oils and structure of the bristles.
Mistakes to Avoid When Cleaning Brushes
Even with careful intent, several common mistakes can damage a brush or make the cleaning process ineffective. Avoiding these pitfalls is key to brush longevity.
- The Water-First Mistake: Never rinse the brush with plain water before soaking it in a solvent. Water can cause the acrylic paint to cure and bind more tightly to the natural oils in the bristles, making removal exponentially harder.
- Over-Scrubbing: Do not use excessive physical force or abrasive materials. Over-scrubbing can break the delicate keratin structure of the hairs, leading to fraying and uneven bristle tips.
- Improper Disposal: Pouring solvents and paint slurry down the drain is illegal and environmentally harmful. Always treat chemical disposal according to local hazardous waste protocols.
- Drying in Water: Allowing brushes to dry submerged in water can saturate the bristles, altering their natural balance and potentially leading to mildew growth.
Safety and Practical Notes for Solvent Handling
When working with chemical solvents, safety must be the absolute priority. These solvents are powerful and require respect and caution. Adherence to these protocols protects both the user and the environment.
Ventilation is Non-Negotiable: Always perform brush cleaning in a well-ventilated area, preferably outdoors or under a fume hood. Solvents release volatile organic compounds (VOCs), and prolonged exposure to high concentrations of fumes can cause dizziness, nausea, or respiratory irritation. Use a fan to ensure continuous airflow.
Personal Protective Equipment (PPE): Always wear chemical-resistant gloves (nitrile or neoprene) and safety goggles. These items create a critical barrier between your skin/eyes and the chemicals being used. Never handle solvents or mixed waste without proper PPE.
Disposal Protocol: Never pour solvents, paint slurry, or rinse water down household drains. Allow the solvents to evaporate or collect them in a sealed, labeled container. Contact your local municipal waste management or art supply store for guidance on proper hazardous material disposal. Adhering to these regulations protects public health and the environment.
Optimal Brush Care and Preventative Techniques
The best way to clean a brush is to minimize the buildup in the first place. Implementing these preventative measures will drastically reduce the severity of deep cleaning sessions.
The Immediate Rinse: After every single use, regardless of how small the amount of paint, immediately rinse the brush under running water. This removes the bulk of the pigment before it has a chance to dry and bond with the bristles.
The Solvent Swab: For particularly thick or oily paints, after the initial water rinse, dip the brush tip briefly into a small amount of solvent (like mineral spirits) and gently wipe the bristles on a paper towel. This pre-emptively breaks the bond before the paint has time to dry and harden.
Storage Practices: When not in use, store brushes upright in a container that allows the bristles to air dry completely. The container should be breathable, and the tips should not be pressed against the sides of the container, allowing them to maintain their natural shape and prevent warping.
Frequently Asked Questions
What is the best solvent to clean hardened acrylic paint?
Never use plain tap water as the primary cleaner for hardened acrylic. For deep cleaning, mineral spirits (odorless mineral spirits are often preferred) or a commercial, dedicated acrylic brush cleaner are necessary. These solvents are specifically formulated to break down the polymeric bonds of acrylic paint, which water alone cannot penetrate. Always ensure you are in a well-ventilated area when using solvents.
Get the Fail-Safe Paint Color Playbook (Free PDF)
36 proven colors • 8 ready palettes • trim & sheen guide • printable testing cards.
How long should I soak the brushes?
The soaking time depends entirely on the severity of the buildup. For standard residue, 30 minutes is usually sufficient. However, if you are dealing with a heavy, impasto build-up that has cured over several days, extend the soak time to 60 to 90 minutes. The goal of the soak is to allow the solvent to do the heavy lifting and soften the polymer matrix before you attempt any scrubbing.
Can I clean my brushes using dish soap and water?
No, it is strongly recommended that you do not. While dish soap is useful for light, fresh cleanup, it is ineffective against cured acrylic polymer. Furthermore, using water first can cause the acrylic paint to cure and bind more tightly to the natural oils in the bristles, making removal exponentially harder. Always prioritize solvent soaking first.
What is the biggest mistake I can make when drying my brushes?
The most common mistake is letting the brushes dry submerged in water. This saturates the bristles, altering their natural balance and potentially leading to mildew growth, and it can also damage the bristle oils. Instead, after rinsing, gently reshape the brush and allow it to drip completely, then hang it by the ferrule on a non-absorbent rack to air dry completely.
Is it safe to use wire brushes or abrasive materials for cleaning?
No. Over-scrubbing or using abrasive materials can break the delicate keratin structure of the hairs, leading to fraying, uneven tips, and permanent damage to the brush’s performance. Cleaning should always involve gentle agitation within the solvent bath and light combing with a specialized brush comb. Physical force should only be applied after the paint has been sufficiently softened by the solvent.
Conclusion
Properly maintaining your brushes is not merely a chore; it is a foundational element of your artistic process. By understanding the chemistry of acrylic paint, prioritizing safety when using solvents, and following a strict, multi-stage cleaning routine, you ensure that your tools retain their optimal performance. Remember that a clean, well-cared-for brush is a resilient and reliable extension of your creativity, ready to support your next masterpiece for years to come.