
How to Get Marker Off Walls Without Removing Paint: A Step-by-Step Guide
When artistic inspiration strikes, it’s not uncommon for markers to find their way onto walls. While the vibrant colors may bring temporary joy, the lingering marker stains can quickly become a source of deep frustration. The last thing you want is to attempt removal only to find yourself with damaged paint, areas that bubble, or stains that simply bleed through, leading to costly touch-ups or a full repainting project. Fortunately, with a systematic, informed approach, you can effectively remove most marker stains from walls without compromising the integrity of the underlying paint finish.
This comprehensive guide is designed to empower you with the knowledge of paint chemistry, stain assessment, and targeted cleaning techniques. We will explore methods tailored to every type of surface—from durable semi-gloss paint to delicate matte drywall and fragile wallpaper. By following these practical, safety-first steps, you can restore your walls to their former glory and bid farewell to those stubborn, unsightly blemishes.
Get the Fail-Safe Paint Color Playbook (Free PDF)
36 proven colors • 8 ready palettes • trim & sheen guide • printable testing cards.
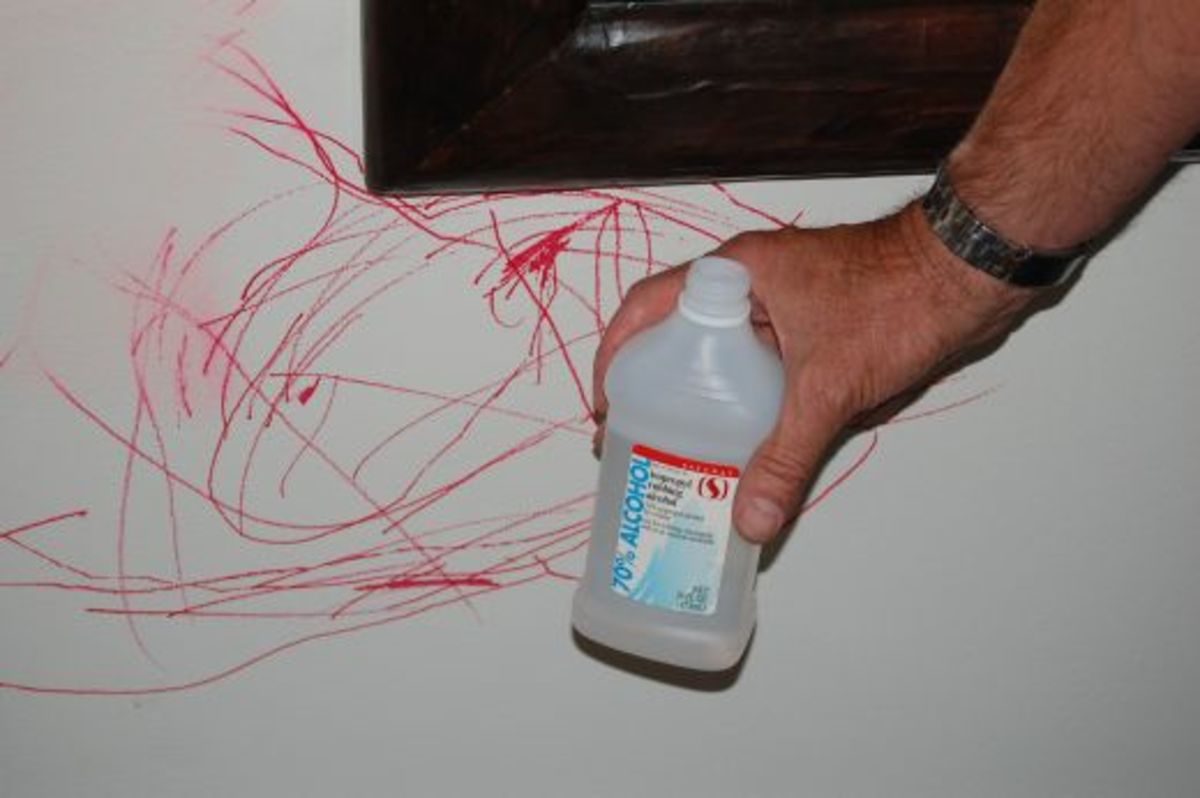
Quick answer: To Get Marker Off Walls Without Removing Paint, start with the safest first step for the material involved, test a small area when needed, and follow the process in thin, controlled stages. Use proper ventilation and protective gear when chemicals, sanding, spraying, or solvents are involved.
Planning Before You Start: Assessing the Stain and Surface
Before you reach for any cleaning agent, the most critical step is assessment. Treating a glossy wall with a solution meant for matte paint, or vice versa, can cause irreparable damage. This initial planning phase ensures you select the right chemical and technique for the job.
Assessing the Paint Finish and Type:
- Glossy/Semi-Gloss Paint (Non-Porous): These finishes have a high sheen and are generally more durable and less absorbent. They are better suited for solvents, which can dissolve the marker ink on the surface without soaking into the paint layer.
- Matte/Flat Paint (Porous): These finishes are designed to scatter light and are highly absorbent. They are more susceptible to staining and damage. Here, harsh solvents can strip the paint, so gentle, mild abrasives or blotting techniques are preferred.
- Chalk Paint or Aged Finishes: These surfaces are highly delicate and often have a chalky texture. Use minimal moisture and the gentlest blotting possible, as these surfaces can be easily damaged by strong chemicals.
- Wallpaper: Wallpaper requires the absolute minimum amount of moisture. Never saturate the area, as excess water can seep into the adhesive and cause peeling or warping.
Assessing the Stain and Marker:
Consider the marker type (alcohol-based, oil-based, or permanent) and the stain’s age. A fresh stain is much easier to lift than one that has set into the paint or has been exposed to environmental changes over years. If the stain is years old, the ink may have chemically bonded with the paint, requiring more intensive, but still cautious, cleaning.
Step-by-Step Guide to Stain Removal
The cleaning protocol must be adjusted based on the surface porosity. Never use a solvent on a porous surface, and never use an abrasive on a glossy surface—the damage will be different, but equally bad.
| Wall Surface | Characteristics |
|---|---|
| Glossy paint | Smooth and shiny finish |
| Semi-glossy | Moderately smooth with a slight sheen |
| Matte paint | Non-reflective, flat finish |
| Flat paint | Highly porous with no shine |
| Wallpaper | Varies based on material and texture |
For Non-Porous Surfaces (Glossy, Semi-Gloss Tile, or Enamel)
These surfaces can withstand stronger solvents because the liquid tends to sit on top rather than being absorbed. The goal is to dissolve the ink film.
- Preparation: Dampen a clean, soft cloth or cotton swab with a solvent like isopropyl alcohol (rubbing alcohol) or mineral spirits.
- Application: Gently dab or wipe the stained area. Do not scrub. Use a light, circular motion, working from the outer edges of the stain inward to prevent spreading the stain.
- Removal: As the solvent lifts the ink, immediately switch to a clean section of the cloth.
- Rinse: Once the stain is lifted, gently wipe the area with a cloth dampened only with plain water to remove any chemical residue.
For Porous Surfaces (Matte Drywall, Flat Paint, Plaster)
Because these surfaces absorb liquid easily, you must use a mechanical, gentle lifting action rather than a liquid solvent. The goal is to lift the stain without dissolving the paint binder.
- Create the Paste: Mix a paste using baking soda and a minimal amount of distilled water, or use a gentle, non-acidic toothpaste. The paste should be thick enough to cling to the stain but not so thick that it dries too quickly.
- Application: Apply the paste to a soft sponge or cloth.
- Blotting Action: Gently blot the stained area. Do not rub back and forth; instead, use a gentle, repeating dabbing or blotting motion. This action lifts the stain while minimizing paint erosion.
- Rinse and Repeat: Rinse the sponge thoroughly between applications to prevent introducing new contaminants.
Special Care for Wallpaper and Delicate Finishes
When dealing with wallpaper or antique plaster, moisture is the primary enemy. Treat these areas with extreme caution.
- Minimal Moisture: Use a cloth that has been barely dampened—it should feel almost dry to the touch.
- Targeted Blotting: Instead of cleaning the entire stain, focus only on the stain itself, blotting with the absolute minimum pressure necessary.
- Test First: Always test the solution on a corner piece of the wallpaper or an unseen section of the plaster to ensure the moisture content and chemistry are safe for the material.
Materials and Tools Checklist
Having the right tools is half the battle. Do not substitute these materials with common household items, as they may be too harsh or too abrasive.
- Cleaning Agents (Choose based on surface):
- Isopropyl Alcohol (70% concentration or higher): Best for non-porous surfaces and inks.
- Mineral Spirits: Good general solvent for many marker inks.
- Baking Soda and Distilled Water: Best for gentle, abrasive paste on porous surfaces.
- Mild, pH-neutral Detergent: For general cleaning and rinsing.
Cleaning Tools:
- Microfiber Cloths: Ideal for general wiping and rinsing; they hold liquid well without shedding fibers.
- Cotton Swabs/Q-Tips: Excellent for detailed, contained stain removal on small areas.
- Soft Sponge or Brush: Used for applying and blotting the cleaning paste.
Safety & Protection:
- Chemical-Resistant Gloves (Nitrile): Essential barrier against skin contact.
- Safety Goggles: Protect eyes from splashes.
- Ventilation: Fans, open windows, or exhaust fans are mandatory when using solvents.
Once the stain is successfully lifted, the paint in that localized area may be slightly compromised, faded, or discolored. This is where the restoration process begins. Ignoring this step means the stain will reappear or the patch will look visibly different from the surrounding area.
1. Neutralization and Drying: After cleaning, thoroughly rinse the area with clean water and dry it completely using a soft, absorbent cloth. Do not let the area air dry if the underlying paint is susceptible to mold or mildew.
2. Patching and Color Matching:
- Sample Paint Acquisition: You must acquire a sample pot of the exact color and, critically, the exact sheen (matte, eggshell, semi-gloss) of the existing paint.
- Primer Application: If the stain removal process has exposed bare drywall or has slightly dulled the paint, apply a spot of stain-blocking primer to the affected area first. This ensures the new paint adheres evenly and doesn’t pick up subsequent stains.
- Blending: Apply the matching paint sparingly. Use a small, clean brush to feather the paint edges, blending the patch seamlessly into the surrounding wall color. Multiple thin coats are always better than one thick coat.
3. Addressing Sheen Discrepancy: If the cleaned area appears slightly duller or shinier than the surrounding wall, this difference is difficult to eliminate entirely. A professional painter may need to apply a spot coat of paint that matches the sheen to restore consistency.
Mistakes to Avoid When Cleaning Walls
The desire for a quick fix can lead to common, costly mistakes. Avoiding these pitfalls is as important as knowing the right cleaning agent.
- The Over-Saturation Mistake: Never soak the stain. Applying excessive liquid, even water, can penetrate porous paint layers and cause the stain to bleed or the paint to bubble.
- The Scrubbing Mistake: Excessive physical force—scrubbing, scrubbing, scrubbing—will inevitably damage the paint film, regardless of how gentle you try to be. Always prioritize blotting and gentle wiping.
- The Chemical Mixing Mistake: Never mix household chemicals (especially chlorine bleach with ammonia or vinegar). This can create toxic, harmful fumes. Use solvents and cleaning agents one at a time, and always ensure proper ventilation.
- The Ignoring the Sheen Mistake: Assuming that because a stain is gone, the wall is fixed. The underlying paint may be weakened or discolored, requiring proper patching and restoration before the area looks finished.
Safety and Practical Notes
Because this process involves chemicals and potential structural damage, safety and caution are paramount. Never skip these steps.
Personal Protective Equipment (PPE): Always wear chemical-resistant gloves and eye protection when handling solvents. Many cleaning agents are skin and eye irritants.
Ventilation: When using any strong solvents (alcohol, mineral spirits, etc.), ensure the area is extremely well-ventilated. Open windows and use fans to dissipate fumes. Do not work in confined spaces.
When to Call a Professional:
- Deep Penetration: If the stain appears to have penetrated deeply into the drywall or plaster, suggesting potential structural damage, consult a professional restorer.
- Large Areas: If the stain covers a large, visible area (e.g., an entire accent wall), or if the paint is severely damaged, hiring a professional painter ensures proper color matching and structural repair.
- Unknown Material: If the wall material is antique plaster, historical wood, or a painted surface of unknown composition, call a specialist first.
Frequently Asked Questions
What is the biggest mistake I can make when removing marker stains?
The biggest mistake is treating all surfaces the same way. Using strong solvents (like those meant for glossy paint) on a highly porous surface (like matte drywall) will strip the paint and cause extensive damage. Conversely, scrubbing a glossy surface can still damage the finish. Always assess if your surface is porous or non-porous first, and adjust your cleaning method accordingly.
Get the Fail-Safe Paint Color Playbook (Free PDF)
36 proven colors • 8 ready palettes • trim & sheen guide • printable testing cards.
Can I use bleach or vinegar on marker stains?
No. Never mix household chemicals, especially bleach with vinegar or ammonia, as this creates toxic fumes. While some people might instinctively reach for common household cleaners, they are often too harsh for paint and can damage the underlying finish. Stick to mild, pH-neutral detergents or specific solvents like isopropyl alcohol, used only on non-porous surfaces.
How do I restore the paint color after the stain is removed?
Removing the ink stain is only the first step; the paint in that localized area will likely be compromised, faded, or discolored. To finish the repair, you must acquire a sample pot of paint that matches both the color and, crucially, the sheen (matte, semi-gloss) of the existing paint. After cleaning, apply a spot of stain-blocking primer, and then feather the matching paint edges using multiple thin coats to blend the patch seamlessly.
If the stain is very old or deeply set, should I call a professional?
Yes, if the stain appears to have penetrated deeply into the material, or if the affected area is large (e.g., an entire accent wall), professional help is recommended. If the surface is antique plaster, historical wood, or unknown composition, do not attempt removal yourself. A professional painter or restorer will have the specialized knowledge and tools to match the material and sheen correctly.
Conclusion
Removing marker stains from walls without damaging the paint is a challenging but achievable task that demands patience, careful assessment, and the right materials. By understanding the critical difference between porous and non-porous surfaces, and by treating stain removal as a two-part process—cleaning followed by meticulous restoration—you can successfully restore the beauty and integrity of your walls.
Always remember that prevention is your best tool. By utilizing designated art walls, protective coverings, and establishing clear rules for marker use, you can maintain pristine walls and avoid the need for deep cleaning and restoration in the first place. Approach every stain with caution, and your walls will thank you for the gentle care.