How To Make Indigo Paint: A Simple Guide for Beginners
Indigo paint is a stunning color that has captured the hearts of artists for centuries. You can create your own indigo paint easily by mixing blue and violet in a specific ratio. This vibrant hue has deep historical significance, often linked to the indigo plant, Indigofera, which has been used for dyeing fabrics across various cultures.

Using the indigo color in your artwork can add depth and richness to your pieces. Whether you’re a beginner or an experienced artist, learning how to make indigo paint can elevate your creative projects. The process isn’t complicated, and the results can be truly rewarding.
Get the Fail-Safe Paint Color Playbook (Free PDF)
36 proven colors • 8 ready palettes • trim & sheen guide • printable testing cards.
Exploring the world of indigo also connects you to its fascinating history. This color was once a valuable commodity, with the indigo plant being cultivated for its dye in many parts of the world. By making your own indigo paint, you can appreciate the beauty and tradition behind this remarkable color.
Understanding Indigo
Indigo is a fascinating pigment with a rich history and cultural significance. This section will explore its origins, the plant it comes from, and its relevance in art and culture.
Origin and History of Indigo
Indigo has been used for thousands of years. It has roots in ancient cultures, especially in India, where the dye was extracted from plants. The earliest evidence of indigo dyeing dates back to around 2500 BC.
Traditionally, indigo was derived from the Indigofera tinctoria plant. People cultivated this plant for its vibrant blue dye. The dyeing process involved fermenting the leaves to create a deep blue liquid.
As trade routes expanded, indigo became popular in Europe and other regions. It significantly influenced fashion and textiles in the 18th century. Its value led to the establishment of plantations, especially in the Americas.
Indigofera Tinctoria and Synthetic Variants
Indigofera tinctoria is the primary plant source of natural indigo dye. This species thrives in tropical and subtropical regions. It is well-known for producing a unique shade of blue that is both vibrant and deep.
In the late 19th century, synthetic indigo was developed. Manufacturers used chemical processes to create a similar blue pigment. This synthetic version is more cost-effective and easier to produce than natural indigo.
While synthetic indigo has its advantages, many artists prefer the characteristics of the natural dye. Natural indigo can offer a range of hues depending on how it is processed. Both types have their place in art and industry today.
Cultural and Artistic Relevance
Indigo holds significant cultural value in many societies. In West Africa, for instance, indigo dyeing is integral to traditional crafts and ceremonies. It symbolizes wealth, status, and beauty.
In the art world, indigo has become a favorite among many artists. Its rich blue hue offers endless possibilities for creativity. From textiles to paintings, indigo serves as a versatile color.
Environmental considerations are also important. As awareness of sustainable practices grows, many artists and designers return to natural indigo. They appreciate both its environmental benefits and its authentic look in their work.
Gathering Essential Materials

To create indigo paint, you need a few key ingredients and tools. Each item plays a vital role in ensuring that your paint has the right color and consistency. Here’s what you’ll need to get started.
Indigo Pigment and Alternatives
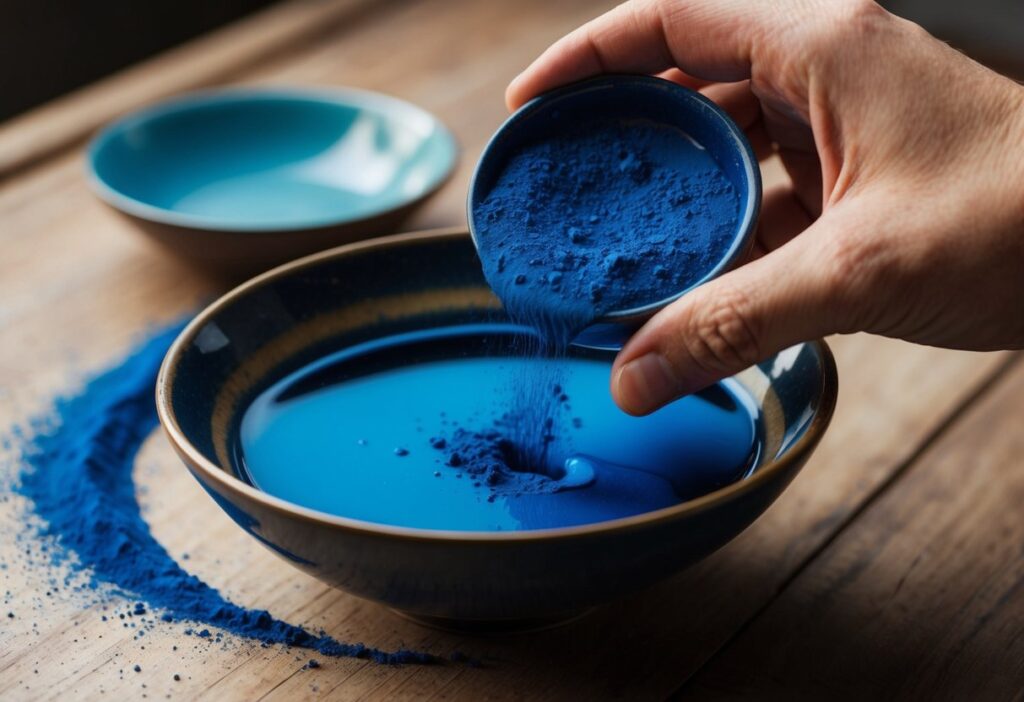
The star of your indigo paint is the indigo pigment powder. This gives your paint its signature deep blue color. You can find indigo powder online or in art supply stores.
Get the Fail-Safe Paint Color Playbook (Free PDF)
36 proven colors • 8 ready palettes • trim & sheen guide • printable testing cards.
If you can’t find indigo powder, consider alternatives. Other blue pigments, such as ultramarine blue or phthalo blue, can work in a pinch. Just remember, they will alter the final color slightly, so test your mix before committing to a larger batch.
Binders and Additives
A crucial component of paint is the binder. For indigo watercolor paint, gum arabic is a common choice. It helps the pigment stick to your paper and provides a smooth application.
You’ll also want to use water as your solvent. It helps to thin the paint and can adjust the transparency. If you want to create a different texture, consider adding a few drops of other mediums like glycerin, which can make your paint more fluid.
Tools and Equipment
Gathering the right tools is just as important. Start with containers to hold your paint. Small jars or palettes work well for mixing.
You’ll also need measuring spoons to ensure accurate amounts of each ingredient. A pipette can help you control the amount of water added, making your paint consistency just right. Lastly, have a stirring stick handy to mix everything evenly.
Preparing the Pigment

To create indigo paint, you first need to prepare the pigment properly. This involves setting up the indigo vat and mixing the pigment with distilled water. Finally, adding a preservative helps keep your paint fresh.
Creating the Indigo Vat
Start by gathering your materials. You will need indigo pigment, distilled water, and calcium hydroxide.
- In a glass jar, mix indigo powder with water. Use a ratio of about 1 part indigo to 2 parts distilled water.
- Carefully stir the mixture until it is smooth.
- Add a small amount of calcium hydroxide. This helps the pigment dissolve better and enhances the color. Use about 1/4 teaspoon for every cup of pigment.
After mixing, let the vat sit for a few hours. This rest period allows the pigment to settle and creates a vibrant base for your paint.
Mixing Pigment with Distilled Water
Once your indigo vat is ready, it’s time to mix the pigment to make paint.
- Take a portion of the settled indigo from the vat and place it in a mixing bowl.
- Gradually add distilled water while stirring. Aim for a smooth and consistent texture.
- You may need to adjust the amount of water depending on whether you want thicker or thinner paint.
If you prefer a brighter hue, add more pigment. Keep mixing until you achieve your desired shade of indigo. Remember, paint with too much water can be too light, while too much pigment can be too dark.
Adding Preservative
To ensure your indigo paint lasts, adding a preservative is important.
Get the Fail-Safe Paint Color Playbook (Free PDF)
36 proven colors • 8 ready palettes • trim & sheen guide • printable testing cards.
- Honey is a popular natural option. For every cup of mixed paint, add about 1 tablespoon of honey. This works as both a binder and a preservative.
- Alternatively, use a commercial preservative if you prefer a more long-lasting solution.
Mix the preservative thoroughly into your paint. This step not only helps your paint stay fresh longer but also improves its texture, making it easier to work with. Enjoy creating your art with your new indigo paint!
Mixing Pigment and Binder
To create your own indigo paint, you’ll need to mix indigo pigment powder with a binder. The binder helps the pigment stick together and adhere to your painting surface. In this section, you’ll see how to combine these components effectively.
Combining Indigo with Gum Arabic
Start by measuring the indigo pigment powder. A good rule is to use 1 teaspoon of indigo per 1 fluid ounce of paint you want to make. If you’re making 4 ounces of paint, use 4 teaspoons of indigo powder.
Next, you will need gum Arabic as your binder. Use about 1 teaspoon of gum Arabic per 1 teaspoon of indigo. This binder gives your paint a smooth texture. Mix the two together using a mortar and pestle, or a small bowl and a spoon. Make sure to grind the powder until it is thoroughly blended.
Achieving the Desired Consistency
The consistency of your paint matters a lot for painting. You want a mix that isn’t too thick or too runny. After combining your indigo and gum Arabic, add a small amount of water. Start with about 1 teaspoon and slowly add more until you reach the right consistency.
Your paint should flow nicely off your brush but still hold its shape when applied. A good test is to use a brush and paint a small swatch on watercolor paper. If the paint runs too much, add a little more gum Arabic or pigment to thicken it.
Testing on Watercolor Paper
Before you start a big painting project, test your paint on watercolor paper. This helps you see how the color looks when dry. Take a small brush and apply a bit of your mixed paint to the paper. Observe how it dries and adjust accordingly.
If the color is too light, you might need to add more pigment. Conversely, if it is too dark or thick, add more water or gum Arabic. Experimenting is part of the fun! Adjust the ratios until you find the perfect mix that works for your style.
Making Your Own Watercolor Paint
Creating your own indigo watercolor paint can be a fun and rewarding project. You’ll learn how to mix the right ingredients, customize your colors, and troubleshoot any issues that arise.
Get the Fail-Safe Paint Color Playbook (Free PDF)
36 proven colors • 8 ready palettes • trim & sheen guide • printable testing cards.
Step-by-Step Guide to Indigo Watercolor
To start making indigo watercolor paint, gather the following materials:
- Indigo pigment
- Gum Arabic (as a binder)
- Honey (for mixing)
- Water
- First, heat some water until it cools.
- Mix the cooled water with the indigo pigment in a bowl.
- Add an equal amount of gum Arabic to the mixture.
- Then, add a small amount of honey for sweetness.
- Stir thoroughly until you achieve a smooth consistency.
Customization and Versatility
One of the best things about making your own indigo watercolor is the ability to customize it. You can adjust the consistency by adding more water for a thinner wash or less for a thicker application.
You can also play with the color depth by varying the amount of indigo pigment. For more vibrant hues, increase the pigment level. If you prefer softer colors, add more water. Mixing with other pigments lets you create new shades. Use the paint for various techniques, including washes, glazing, or layering.
Troubleshooting Common Issues
Sometimes, you might face challenges while making indigo watercolor paint. Here are some common problems and their solutions:
- Too Thick: If your paint is too thick, simply add a bit more water until you reach your desired consistency.
- Poor Color: For a less vibrant color, mix in more indigo pigment slowly.
- Bubbles or Foam: Whisk the mixture gently. This helps to minimize air bubbles.
Final Considerations
When making your own indigo paint, it’s important to think about how you will store it, explore its various uses, and consider its environmental impacts. Each of these factors can enhance your painting experience.
Storing Your Indigo Paint
To keep your indigo paint fresh, store it in airtight containers. Glass jars work well, as they prevent air from getting in and drying out the paint. Be sure to label each jar with the date and type of paint.
For indigo watercolor, keep the paint in a cool, dark place. This helps maintain its vibrant colors. If you notice any separation, give it a gentle stir before use.
Check the paint periodically for any changes in texture or smell. If it seems off, it may be time to discard it.
Exploring Different Applications
Indigo paint is versatile and can be used in various art forms. For watercolor, mix it properly with a binder to get the right consistency. This blend allows for stunning washes or detailed strokes in your work.
For acrylics and oils, adjust the pigment-to-binder ratio to achieve the desired shade. You might want to experiment with lightening indigo by adding white or mixing it with vibrant blue and violet hues.
Get the Fail-Safe Paint Color Playbook (Free PDF)
36 proven colors • 8 ready palettes • trim & sheen guide • printable testing cards.
Consider trying indigo in fabric dyeing as well. It produces beautiful patterns and colors on textiles, adding depth to your projects.
Environmental Impacts and Best Practices
When working with indigo, it’s important to keep environmental considerations in mind. Natural indigo dyes are generally safer, but synthetic pigments can contain harmful chemicals. Always check the labels for safety information.
Dispose of any leftover paint in a responsible manner. Avoid pouring it down the drain. Instead, contact local waste management for proper disposal methods.
Exploring eco-friendly options and practicing sustainable techniques will help you enjoy your art while protecting the environment. Using natural binders also lessens your ecological footprint, making your creativity kinder to our planet.
