
How to Paint a Driveway: A Step-by-Step Guide for Durable Results
Your driveway is far more than just a path from your garage to the street; it is a significant piece of curb appeal and a defining feature of your home’s exterior. A concrete driveway that has faded, stained, or chipped can detract from the overall aesthetic value, making the property look neglected. Fortunately, revitalizing this surface is a highly manageable DIY project that can dramatically enhance both the look and the perceived value of your home.
While the idea of painting a concrete surface might seem daunting—given the porous, uneven, and rough nature of the material—modern coatings and proper preparation techniques make this process achievable for the homeowner. By treating the project with the same meticulous care you would apply to painting a wall, you can transform a dull, weathered expanse into a durable, beautiful, and inviting entrance.
Get the Fail-Safe Paint Color Playbook (Free PDF)
36 proven colors • 8 ready palettes • trim & sheen guide • printable testing cards.
Quick answer: To paint driveway, pressure-wash the concrete, remove oil stains, repair cracks, and let the slab dry fully before coating. Use concrete paint, stain, or sealer rated for vehicle traffic, apply thin coats by roller or sprayer, and follow the label before walking or parking on the surface.
Planning Before You Start
Before you even open a can of paint, detailed planning is crucial. A successful driveway paint job hinges entirely on the initial assessment and preparation, which takes more time than the actual application.
Assessing the Concrete Surface
Take time to walk the entire length of your driveway and observe the concrete closely. You are looking for potential weak points that must be addressed before painting:
- Cracks and Spalls: Note any visible cracks, chips, or areas where concrete has flaked off (spalling). These structural weaknesses must be filled and stabilized first, as paint cannot adhere properly to crumbling material.
- Stains: Identify types of stains—oil, tire rubber, rust (from metal objects), or biological growth (moss/mold). Knowing the stain type dictates the specific cleaning agent you will need.
- Porosity: Examine the surface texture. Highly porous concrete requires aggressive cleaning and etching to ensure the paint penetrates and grips the substrate effectively.
Timing and Weather Considerations
The weather is perhaps the single greatest variable in this project. Do not start if:
- It is raining or actively damp: Water interferes with proper adhesion and curing.
- Temperatures are too low: Most concrete coatings require temperatures above 50°F (10°C) to cure properly. Cold weather drastically extends curing times and can compromise the coating’s integrity.
- Humidity is excessively high: High humidity slows the evaporation process, which can affect the chemical reactions needed for proper curing.
Ideal conditions involve mild temperatures, low humidity, and a clear forecast for the entire duration of the project, as you will need time for multiple coats and curing.
Materials and Tools
Selecting the right materials is the difference between a temporary coat and a durable, long-lasting finish. Do not skimp on these supplies.
Essential Materials
- Concrete Cleaner/Degreaser: A heavy-duty, pH-neutral cleaner designed for concrete to remove surface grime and oil.
- Specialized Stain Remover: Depending on the stain (e.g., phosphoric acid for rust, poultice kits for oil).
- Crack Filler/Concrete Repair Mortar: A flexible, durable filler appropriate for the size and type of crack.
- Concrete Etching Solution: Typically a mild acid (like muriatic acid, used with extreme caution) or a specialized etching solution to roughen the surface and create a mechanical bond for the primer.
- Primer/Sealer: A specialized concrete primer designed to seal the pores and provide a uniform base for the topcoat.
- Topcoat Paint/Coating: Choose between specialized acrylic coatings, epoxy coatings (for high durability), or concrete stains (for a natural look).
Necessary Tools
- Pressure Washer: Essential for deep cleaning and removing loose debris.
- Stiff-Bristle Brushes and Scrub Brushes: For scrubbing the surface and applying cleaners.
- Bucket System: For mixing cleaning solutions and preparing materials.
- Safety Gear: Safety glasses, chemical-resistant gloves, and an appropriate respirator mask (crucial when handling acids or solvents).
- Application Tools: High-quality paint rollers, brushes, and, if necessary, a paint sprayer.
Main Guide: The Step-by-Step Process
This process must be followed sequentially. Skipping any step—especially cleaning or etching—will severely compromise the adhesion and longevity of the paint.
Step 1: Deep Cleaning and Stain Removal
The goal here is to remove all organic material, loose dirt, and surface contaminants. Start by rinsing the entire area with a high-pressure stream to remove loose debris. Next, apply the specialized degreaser and allow it to dwell according to the manufacturer’s instructions. Scrub vigorously with stiff brushes. For specific stains (like oil), apply a poultice—a paste made of absorbent material and the stain remover—and let it sit overnight to draw out the contaminants. Finally, rinse the entire driveway thoroughly until the runoff water is clean.
Step 2: Repair and Etching
Once the surface is visibly clean, address the structural issues. Mix the crack filler and mortar, applying it into every visible crack and spall. Allow the filler to cure completely (this may take 24-48 hours). After the filler is set, apply the concrete etching solution. This chemical process slightly roughens the surface pores, creating a microscopic texture that the primer and paint can grip onto, preventing a slick, non-adherent surface.
Step 3: Priming the Surface
Do not skip the primer. The primer acts as a crucial intermediary layer, sealing the pores and providing a uniform, receptive base. Apply the specialized concrete primer according to the manufacturer’s directions. Use rollers and brushes, ensuring full coverage in all areas, especially the edges and repaired cracks. Allow the primer to dry completely. If the primer is too wet or tacky, it will compromise the topcoat.
Step 4: Applying the Topcoat
Whether you are using a durable acrylic coating, an epoxy, or a decorative stain, the application method remains consistent: thin, even coats.
Start by painting the edges and corners with brushes, getting the material into all crevices. Then, use the rollers to cover the main surface area. Work in manageable sections to ensure even coverage. Once the first coat is dry (follow the manufacturer’s recoat window), apply the second coat. Two coats are almost always necessary to achieve the desired depth of color, uniform finish, and maximum protection. Allow sufficient time between coats, as rushing this step is a common cause of failure.
Step 5: Curing and Drying
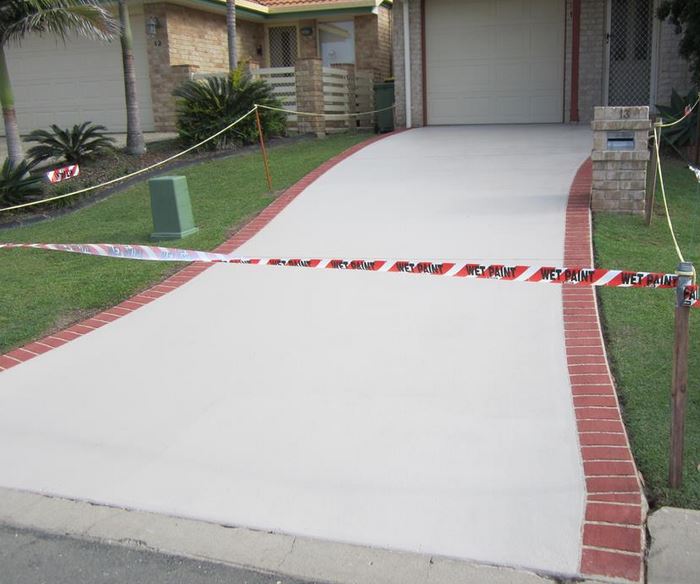
Patience is mandatory. While the paint may feel dry to the touch within hours, the coating must fully cure chemically. This process can take several days, depending on the product and climate. Never drive on the driveway or walk on it heavily until the manufacturer’s stated cure time has elapsed. This time allows the chemical bonds to fully set, ensuring maximum durability and preventing premature chipping or peeling.
Design and Color Tips
The choice of color and finish profoundly impacts the final look and the required maintenance of the driveway. Think about complementing your home’s architectural palette.
Selecting the Right Sheen/Finish
The finish dictates the durability and appearance. For a driveway, durability is paramount:
- Matte/Flat: Offers a very natural, low-gloss look, which is often desired for curb appeal. However, it can sometimes be more susceptible to showing scuffs and stains.
- Semi-Gloss: Provides excellent durability and is easier to clean than a matte finish. This is a common choice for high-traffic areas.
- Epoxy (High-Gloss): Extremely durable and resistant to chemicals and abrasion. While highly protective, the intense shine can sometimes look overly industrial, so use this if maximum longevity is the priority.
When choosing a color, consider the surrounding elements—the house siding, the garage doors, and the landscaping. If your house has warm, earthy tones (red brick, beige stucco), opt for complementary tones in the driveway, such as deep charcoal grays, rich browns, or muted taupes. If your home is cool-toned (blues, grays), consider cooler grays or slate tones for the pavement. Always test samples on a small, inconspicuous area of the driveway first to see how the color interacts with the specific concrete and local light conditions.
Mistakes to Avoid
DIY projects are rife with potential pitfalls. Being aware of these common mistakes can save you significant time, money, and frustration.
- Ignoring Deep Cleaning: The single most common mistake. If you fail to remove oil, grease, and deep grime, the paint will not adhere properly and will peel or lift within months.
- Insufficient Drying Time: Applying a new coat or the topcoat before the previous layer has fully cured leads to poor adhesion, resulting in a weak, flaky finish.
- Mixing Products: Never mix cleaning chemicals, especially acids and solvents, without knowing their chemical properties. This can create toxic fumes or unusable mixtures. Always follow manufacturer safety data sheets.
- Underestimating Curing Time: Assuming the paint is dry enough to drive on after a few hours is dangerous. Structural curing takes days or weeks, regardless of surface appearance.
Safety and Practical Notes
Safety is non-negotiable when working with concrete chemicals, solvents, and high-pressure equipment. Treat every chemical application seriously.
Personal Protective Equipment (PPE): Always wear safety goggles, chemical-resistant gloves, and a proper respirator mask, especially when mixing or applying acids, solvents, or specialized cleaners. These materials can be irritating or corrosive to skin and respiratory passages.
Ventilation and Handling: Work in a well-ventilated area. When using acid etching solutions or strong solvents, ensure the area is open to fresh air. Follow all manufacturer instructions regarding dilution ratios and application methods. Never mix incompatible chemicals.
When to Call a Professional: While painting is DIY-friendly, certain issues require expert help. You must call a licensed professional for any structural work, including:
- Major structural cracks or settlement issues.
- Suspected lead paint or asbestos contamination.
- Electrical or major plumbing repairs that intersect the driveway.
Transforming your driveway is a significant investment in your home’s curb appeal. By following this detailed, multi-stage process—prioritizing deep cleaning, structural repair, and proper curing times—you can achieve a professional, durable, and beautiful finish. Remember that preparation is 90% of the job, and safety is always the most important step. With careful planning and execution, your driveway will not only look refreshed but will also add undeniable lasting value to your property.
Frequently Asked Questions
How long does the driveway paint take to cure before I can drive on it?
The time listed for “dry to the touch” is not the same as the time it takes to cure structurally. You must wait for the manufacturer’s specified cure time, which can range from several days to weeks, depending on the coating and the climate. Driving or walking on the surface before the full cure time has passed can cause the coating to chip, lift, or fail entirely, regardless of how dry it looks.
Get the Fail-Safe Paint Color Playbook (Free PDF)
36 proven colors • 8 ready palettes • trim & sheen guide • printable testing cards.
What if my driveway has deep structural cracks or major settling issues?
If the cracks are wide, deep, or if you suspect the concrete has suffered significant settlement, do not rely solely on paint and filler. These issues require professional structural assessment. It is highly recommended that you call a licensed concrete specialist or foundation repair expert before proceeding to ensure the underlying structure is stable. Paint coatings cannot fix structural instability.
What are the absolute worst weather conditions for painting?
The two biggest enemies of a successful paint job are rain and cold temperatures. Do not attempt the project if it is actively raining or if the temperature is below 50°F (10°C), as low temperatures drastically slow the chemical curing process and can compromise adhesion. Excessively high humidity can also interfere with proper curing and drying.
How do I handle stubborn stains like oil or rust?
Do not simply scrub the surface. Different stains require specialized chemical removal. For oil, use an absorbent poultice (a paste made of absorbent material and a specific stain remover) that must be left to sit for an extended period to draw the contaminant out. For rust, use a phosphoric acid-based remover. Always follow the manufacturer’s instructions for dwell time and ensure the surface is rinsed thoroughly after using any stain remover.
Conclusion
How To Paint Driveway works best when the plan, materials, safety steps, and finish goals all line up before work begins. Review the surface or tool condition, choose compatible products, and leave enough time for drying, cleanup, and final checks.
Use the guidance above as a practical checklist, then adjust it to the specific surface, workspace, product directions, and risk level. When the project involves fumes, damaged materials, business liability, or uncertain conditions, slow down and get qualified help before moving forward.