
How to Paint With Resin: A Beginner’s Guide to Mastering the Medium
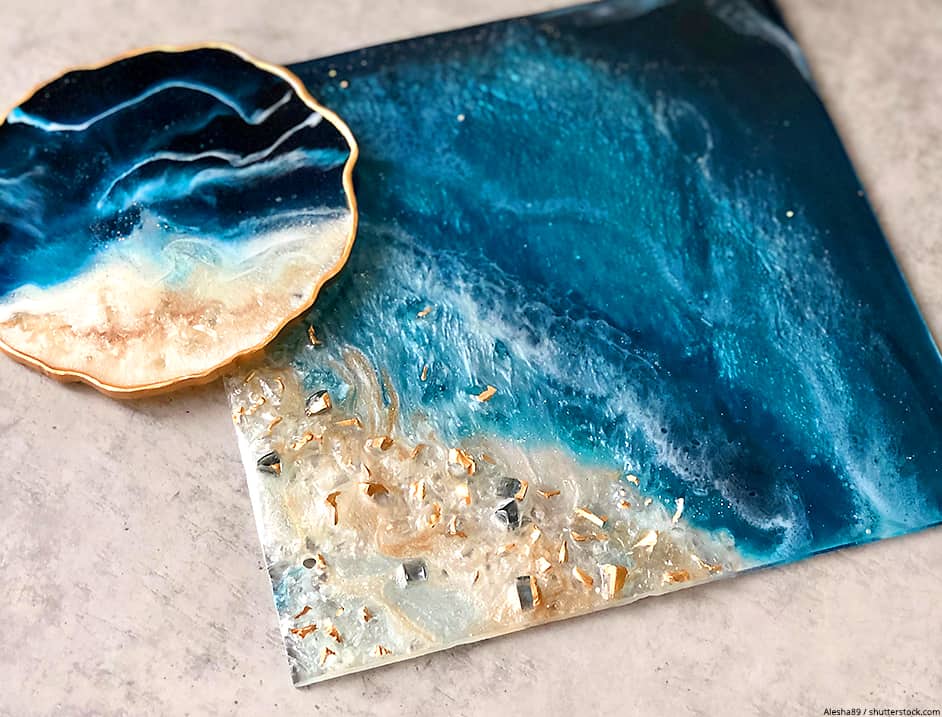
The art of resin painting stands at the intersection of chemistry and creativity, allowing artists to transform simple liquid components into breathtaking, durable works of art. This medium is celebrated for its unparalleled depth, glossy finish, and ability to encapsulate color, texture, and natural elements into a single, polished piece.
Whether you are aiming for a delicate, ethereal background or a massive, dramatic river table, resin provides the versatility to achieve mesmerizing results. To master this medium, however, requires more than just mixing chemicals; it demands meticulous planning, an understanding of chemical processes, and careful execution from start to finish. This comprehensive guide will walk you through every professional step, ensuring you build your skills safely and confidently.
Get the Fail-Safe Paint Color Playbook (Free PDF)
36 proven colors • 8 ready palettes • trim & sheen guide • printable testing cards.
Quick answer: To Paint With Resin, start with the safest first step for the material involved, test a small area when needed, and follow the process in thin, controlled stages. Use proper ventilation and protective gear when chemicals, sanding, spraying, or solvents are involved.
Planning and Preparation: Choosing Your Resin and Surface
Before the first drop of resin is mixed, careful planning is paramount. Your project goals—such as the depth of the pour, the desired UV resistance, and the adhesion requirements—will dictate the correct choice of resin and the necessary surface preparation.
Understanding Resin Chemistry: Epoxy vs. Polyester
The two most common resins are epoxy and polyester. Understanding their fundamental chemical differences is the most critical planning step, as using the wrong resin for a specific project can lead to failure, yellowing, or improper curing.
- Epoxy Resin: This is the most popular choice for fine art and decorative painting due to its exceptional clarity, low viscosity, and self-leveling properties. Epoxy systems typically cure through a two-part chemical reaction (resin and hardener) and are often recommended for deep pours and highly visible, clear finishes. They generally offer excellent adhesion and can be formulated for UV resistance, though proper sealing is always recommended for longevity.
- Polyester Resin: Polyester resin offers excellent adhesion to a variety of materials, including fiberglass and certain metals. While durable, its handling, curing process, and resistance to yellowing can sometimes be more challenging than epoxy, and it often requires specific catalysts or higher temperature curing cycles for optimal results.
When making your selection, consider the following:
- Clarity and Color Depth: If absolute clarity and a glass-like depth are your primary goals, epoxy is usually preferred.
- Adhesion to Unconventional Materials: If you are working with materials that are notoriously difficult to bond (like certain types of porous stone or aged metals), check the resin manufacturer’s compatibility list, as some resins are better suited for specific substrates than others.
- Curing Time and Environment: Be realistic about your curing environment. Extreme temperature drops or rapid humidity changes can significantly delay or halt the chemical curing process, regardless of the resin type.
Preparing the Substrate: The Foundation of Your Art
The surface you paint on (the substrate) must be chemically stable and physically prepared to accept the resin properly. Resin does not like to adhere to porous materials without proper sealing.
- Cleaning and Degreasing: Regardless of the surface—be it wood, metal, or acrylic—it must be thoroughly cleaned to remove all oils, dust, wax, and surface grime. Use a mild solvent (like isopropyl alcohol) and a lint-free cloth to ensure the surface is chemically clean.
- Sealing Porous Materials (Wood/Stone): If working on wood or porous stone, applying a dedicated sealant or primer is non-negotiable. This step prevents the resin from being absorbed unevenly into the material, which can cause discoloration or warping. The sealant acts as a barrier, ensuring the resin cures on the surface rather than soaking into it.
- Sanding and Smoothing: Light sanding (using a fine grit, such as 180–220 grit) helps remove any surface inconsistencies. This process also creates a micro-texture that enhances the mechanical grip between the substrate and the resin, ensuring a strong bond.
Step-by-Step Guide to Resin Painting
With your materials selected and your surface prepared, the focus shifts to the technical process: mixing, application, and curing. Precision at every stage is key to achieving a professional, flawless finish.
Setting Up the Ideal Working Environment
A proper workspace is not merely a table; it is a controlled environment. Because resin is a volatile chemical compound, safety and climate control are the first priorities.
- Ventilation: Always work in an area with powerful, dedicated ventilation. An exhaust fan or professional fume extractor is highly recommended to continuously draw away the volatile organic compounds (VOCs) released during the chemical curing process.
- Temperature Control: Maintain a stable, moderate temperature (ideally 65°F–75°F or 18°C–24°C). Extreme cold slows the chemical reaction, while extreme heat can cause the resin to cure too quickly (premature skinning), making it impossible to manipulate.
- Surface Protection: Cover your entire work area with disposable plastic sheeting and use silicone mats or non-stick release wax on your palette and working surface to contain spills and simplify cleanup.
Mixing the Resin Components
Accurate measurement is the single most important technical skill in resin work. Deviation from the manufacturer’s specified ratio will prevent proper curing, leading to sticky, weak, or brittle results.
- Weighing vs. Measuring by Volume: Always use a digital scale and measure the resin and hardener components by weight, not by volume. Resin chemical reactions are precise, and weight measurements guarantee the exact stoichiometric ratio required for a full cure.
- The Mixing Process: Pour the measured resin component into a clean, disposable mixing container. Slowly and deliberately add the hardener component. Using a dedicated, non-metallic stirring stick, mix the components slowly and methodically. Scrape the sides and bottom of the container repeatedly, ensuring that every part of the resin and hardener mixture is fully incorporated.
- Degassing: After mixing, the resin will inevitably trap tiny air bubbles. To minimize these, let the mixture sit undisturbed for 5–10 minutes. For advanced projects, placing the container in a vacuum chamber (if available) is the best way to remove trapped air and guarantee a bubble-free pour.
Application Techniques and Depth Control
The application method determines the final look, and depth control is crucial to prevent stress cracks and warping.
- Pouring Technique (Flat Surfaces): For flat, smooth surfaces, pour the resin mixture slowly and steadily in the center, allowing it to flow outward. If the resin is thick, gently tilting the entire piece can help guide the resin to cover the edges and corners evenly.
- Controlled Pouring (Layering): To achieve maximum depth and dramatic effects (like river tables), you must pour in layers. Allow the initial layer to cure until it reaches a “tacky” state (a state where it is solid but still flexible and not fully hardened). This partial cure prevents the subsequent layer from pulling the first layer away and ensures the entire piece cures under consistent conditions.
- Brushing and Sculpting: For textured or contoured applications, use specialized tools like silicone brushes, palette knives, or even heat guns to manipulate the resin. Apply the resin in controlled sections, building up depth and detail before allowing it to cure.
Materials and Essential Tools
A professional resin art setup requires a specific inventory of tools and colorants to execute complex designs.
- Resin System: High-quality, specific-use resin (Epoxy Deep Pour or UV/Casting).
- Colorants: Resin-specific pigments (powder or liquid), acrylic inks, or alcohol inks. *Note: Always use colorants formulated for resin; standard acrylic paints may not mix or cure properly.*
- Mixing Equipment: Digital scale, disposable plastic mixing cups, and dedicated stirring sticks.
- Application Tools: Silicone brushes (ideal for non-stick application), small spatulas, and pouring cups.
- Safety Gear: Chemical-resistant gloves (nitrile is best), safety goggles, and a NIOSH-approved respirator mask.
- Finishing Tools: Heat gun (for bubble removal), fine-grit sandpaper (starting at 200 grit, progressing to 2000 grit), and specialized polishing compound.
Designing with Color and Mixed Media
The true magic of resin painting lies in the ability to combine the liquid medium with various colorants and physical elements. These techniques allow for the creation of highly realistic and visually complex pieces.
Achieving Natural Effects: To mimic natural formations like agate or geode slices, the process involves precise layering and the strategic introduction of metallic mica powders. Start with a base color, then apply a second layer of contrasting color, and finally, gently introduce metallic or iridescent pigments during the final pour to give the illusion of crystalline structure.
Incorporating Mixed Media: When embedding physical objects—such as pressed botanicals, seashells, or delicate pieces of paper—it is crucial to stabilize them first. Any object that is not fully dry or securely attached will float, shift, or degrade during the curing process. For maximum depth and permanence, consider setting the embedded items in a thin layer of adhesive glue *before* pouring the resin.
Advanced Color Techniques: Dirty pouring is a popular method for creating abstract, organic patterns. This involves mixing multiple colors of resin and pouring them together in a controlled manner, allowing them to flow and interact naturally. This technique requires patience and careful manipulation of the pour to achieve desired color distribution.
Common Mistakes and Pitfalls to Avoid
Even professional artists encounter challenges. Recognizing these common mistakes will save time, materials, and frustration.
- Inaccurate Ratios: The single biggest mistake is poor measurement. Always weigh both parts. If the ratio is off, the resin will not cure correctly.
- Neglecting Ventilation: Never underestimate the fumes. Working without adequate ventilation poses health risks and can negatively impact the chemical curing process by allowing airborne contaminants to interfere.
- Rushing the Cure: Trying to rush the curing process or attempting to move the piece before the manufacturer’s recommended partial cure time has passed can result in warping or cracking.
- Using Non-Resin Colorants: Mixing standard craft acrylics directly into the resin can interfere with the chemical reaction, resulting in a weak bond or a sticky residue. Always use resin-compatible colorants.
Safety and Chemical Handling Protocols
Due to the chemical nature of resins, adhering to strict safety protocols is mandatory. Treat all resin components as industrial chemicals.
- Personal Protective Equipment (PPE): Always wear chemical-resistant gloves and eye protection. If working in a confined space or pouring large quantities, a respirator mask rated for organic vapors is essential to prevent inhalation of fumes.
- Ventilation and Heat Sources: Never mix or cure resin near open flames, intense heat sources, or sources of strong chemicals. The fumes released during curing are strongest during the initial exothermic reaction.
- Waste Disposal: Never pour excess resin or hardener down the drain. Excess resin and hardener are chemical waste. Follow all local municipal regulations for proper disposal, typically requiring collection in designated chemical waste containers.
Safety and Practical Notes
Work in a well-ventilated space and wear gloves, eye protection, and a respirator when needed. Keep children and pets away from wet surfaces and open containers.
Follow manufacturer drying times between coats. Dispose of rags and leftover materials according to local regulations. If the project involves heights, lead paint, or structural work, consider hiring a licensed professional.
Frequently Asked Questions
Which type of resin should I use for my first project?
For most beginner decorative painting projects, an Epoxy Resin is recommended. It is generally clearer, easier to work with, and offers self-leveling properties that make pouring simpler. However, always check the manufacturer’s guidelines and ensure the resin is formulated for the specific substrate you are using (e.g., deep pour vs. coating). Never assume a resin type will work; always confirm compatibility.
Get the Fail-Safe Paint Color Playbook (Free PDF)
36 proven colors • 8 ready palettes • trim & sheen guide • printable testing cards.
Temperature and ventilation are critical safety and chemical concerns. You must work in a well-ventilated area with an exhaust fan to remove volatile organic compounds (VOCs). Maintain a stable room temperature, ideally between 65°F and 75°F (18°C–24°C). Extreme cold will drastically slow the curing process, while extreme heat can cause premature skinning, making it impossible to manipulate the surface.
How do I prevent my mixed media (like flowers or shells) from sinking or floating during the pour?
Proper preparation is key. Any object placed into the resin must be completely dry and stable. For delicate or lightweight items, do not simply place them on the surface. Instead, use a thin, pre-mixed layer of adhesive glue (like a specialized epoxy adhesive) to secure the object to the substrate before you begin the resin pour. This provides foundational support and prevents flotation.
Is it safe to mix standard acrylic paints directly into the resin?
No. While tempting, standard acrylic paints are not formulated to participate in the resin’s chemical curing reaction. Mixing them can interfere with the stoichiometry, resulting in an uneven cure, weak adhesion, or a sticky residue. Always use colorants that are specifically formulated for use with resin (such as pigmented resin powders, alcohol inks, or dedicated liquid dyes) to ensure a strong, durable bond.
Conclusion
Resin painting is a rewarding art form that rewards diligence, technical knowledge, and creative experimentation. By mastering the chemistry of the materials, respecting the safety protocols, and executing the process in controlled, layered stages, you can elevate your work from a simple craft to a genuine piece of art.
Remember that every pour, every color mix, and every layer of varnish is an opportunity to learn. Embrace the imperfections, treat mistakes as learning opportunities, and let your creativity flow freely. Happy painting!