
Can You Paint Inside When It’s Raining Outside? A Step-by-Step Guide
Painting is one of the most transformative and satisfying home improvement projects. It’s a relatively low-risk endeavor that can dramatically refresh a room, update a kitchen, or revitalize an entire living space. However, sometimes Mother Nature decides to interfere, presenting a challenging backdrop of rain, high humidity, or cold temperatures. This raises a critical question for every DIY enthusiast: Can you still paint inside when it’s raining outside?
The short answer is yes, you can—but success depends entirely on meticulous planning, proper preparation, and selecting the right materials. While the weather outside may be gloomy, the right techniques can create a controlled, optimal environment inside your home, ensuring a durable and beautiful finish regardless of the storm.
Get the Fail-Safe Paint Color Playbook (Free PDF)
36 proven colors • 8 ready palettes • trim & sheen guide • printable testing cards.
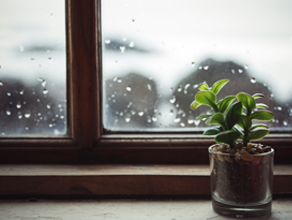
Quick answer: It depends on the exact product, surface, and conditions, but Can You Paint Inside When Its Raining Outside should be answered by checking the label first and matching the advice to the material involved. Look for the product’s safety, drying, compatibility, and application limits before treating the answer as a simple yes or no.
Planning Your Indoor Painting Project During Inclement Weather
Before you even think about mixing the first batch of paint, a comprehensive planning phase is mandatory. Painting is not just about applying color; it’s about chemistry, surface stability, and environmental control. When the weather outside is poor, these factors become even more critical because the ambient humidity and temperature can significantly impact paint adhesion and drying times. Assess your project scope, the existing condition of the walls, and your timeline to set realistic expectations.
Consider the source of any potential moisture. If the rain outside has led to leaks, persistent damp spots, or structural seepage, the immediate priority is remediation—not painting. You must ensure the underlying structure is stable and completely dry before applying any finish. Ignoring this step guarantees paint failure, leading to peeling, blistering, and poor longevity.
Selecting the Right Paint and Finish for Indoor Durability
The paint itself is your primary defense against environmental variables. Since you are dealing with potential high humidity from the rainy weather, choosing the correct paint chemistry is paramount. Water-based latex or acrylic paints are generally the best choice for indoor projects, as they are flexible and resist moisture penetration better than traditional oil-based paints. These modern formulations are designed to breathe with your home, accommodating natural changes in humidity.
When deciding on the finish or sheen, think about the room’s function and the potential for humidity. For high-moisture areas like bathrooms or kitchens, consider semi-gloss or satin finishes, as these are more washable and moisture-resistant. However, if you are painting a bedroom or living room, a flat or eggshell finish can provide a sophisticated, matte look while still offering adequate durability. Always test your chosen paint color and finish on a small, inconspicuous patch of the wall before committing to the entire room.
The Step-by-Step Guide to Painting Indoors When It’s Raining Outside
A successful paint job follows a strict, multi-stage process. Since the weather outside is a variable, every step must be executed with maximum care and attention to detail to ensure the paint cures properly and adheres strongly to the substrate.
Gathering Essential Materials and Tools
A well-stocked toolbox prevents delays and frustration. Beyond the paint itself, gather the following:
- Quality Paint: Ensure it is a breathable, water-based formula suitable for interior walls.
- Primer: Use a stain-blocking or bonding primer, especially if you are painting over porous or previously patched surfaces.
- Cleaning Agents: Mild detergent, TSP substitute (if necessary), and sponges.
- Application Tools: High-quality brushes (angled sash brushes are best for cutting in), rollers (the nap size should match the texture of your wall), and trays.
- Protection: Drop cloths (canvas or plastic), painter’s tape (high-quality blue or green tape is recommended for clean lines), and masking film.
- Safety Gear: Gloves, safety glasses, and appropriate respiratory masks, especially if dealing with sanding or solvents.
Preparing the Surfaces for Maximum Adhesion
Preparation is arguably 80% of the job. Do not rush this phase. Start by inspecting the walls for any signs of water damage, efflorescence (white, powdery mineral deposits), or deep cracks. If moisture is present, it must be addressed by calling a professional before painting. If the walls are structurally sound but dusty or dirty, proceed with cleaning.
- Cleaning: Wash the walls thoroughly with a mild detergent solution. Pay special attention to areas near plumbing or potential water sources. Rinse the walls completely with clean water and allow them to dry for at least 24 to 48 hours, depending on the ambient humidity.
- Repairing: Use spackling compound or joint filler to fill all visible cracks, nail holes, and imperfections. Once the filler is dry, sand the patched areas smooth using fine-grit sandpaper.
- Dusting: Wipe down all surfaces with a damp cloth to remove sanding dust and debris.
- Priming: Apply the appropriate primer. Primer acts as a uniform sealant, ensuring that the topcoat adheres evenly and blocks any underlying stains or tannins that could bleed through the new paint.
Applying the Paint and Managing Drying Time
Once the primer is dry, you can begin applying the topcoats. Start by “cutting in”—using a brush to paint the edges, corners, and trim where the roller cannot reach. Then, use the roller to cover the large, flat areas. Remember to maintain a wet edge as you work to prevent lap marks and ensure consistent coverage.
Crucially, managing drying time is key when painting during high humidity. While the paint manufacturer will provide a recommended drying time (e.g., 2-4 hours), the actual time can be extended by cool or humid air. Use fans and dehumidifiers (if necessary) to keep the air moving and humidity levels stable. Do not attempt a second coat until the first coat has cured sufficiently, which means it is dry to the touch and the manufacturer’s recommended interval has passed.
Design and Color Tips for Mood and Function
Color is far more than just aesthetics; it influences the mood and perceived size of a room. When painting, consider how the color will interact with the light sources in the room, especially if natural light is limited due to the rainy weather.
Understanding Undertones: Every paint color has undertones—a subtle base color (e.g., green, yellow, or blue). For instance, a beige paint might have pink or yellow undertones. These undertones interact dramatically with your existing flooring, trim, and natural wood elements. Test swatches against your actual natural light sources at different times of the day to see how the undertones shift.
Light and Sheen Pairing: In darker rooms or those with limited natural light, lighter, reflective colors (like soft off-whites or pale grays) are often recommended to maximize the feeling of space and brightness. The sheen also plays a role: a satin or eggshell finish reflects light softly, making a room feel brighter than a flat finish, without the high glare of a full gloss.
Creating Cohesion: To ensure a cohesive look, use the same paint brand and line for all surfaces (walls, trim, and doors) to guarantee color consistency, even if you are using different colors. For example, if your main wall color is a deep navy, use that same brand’s trim paint line to ensure the trim color complements the wall color perfectly.
Common Mistakes and Misconceptions to Avoid
Even experienced DIY painters make mistakes, and most are related to poor preparation or environmental neglect. Avoiding these common pitfalls will save you time, money, and frustration.
- Painting over Damp Walls: This is the most critical mistake. If the wall substrate is even slightly damp, the paint will fail to adhere properly and will bubble, peel, or crumble prematurely. Always wait for the wall to reach a stable, dry equilibrium.
- Skipping the Primer: Assuming the paint is good enough to stick directly to the wall surface is risky. Primer seals the surface, ensures uniform absorption, and vastly improves paint adhesion, especially on new drywall or patched areas.
- Improper Ventilation Management: Thinking that simply opening a window is enough is insufficient. High humidity requires mechanical assistance. Use fans and consider a dehumidifier to actively pull moisture out of the air, aiding the curing process and preventing mildew growth.
- Poor Masking: Sloppy taping or inadequate masking means paint will bleed onto trim, baseboards, or adjacent surfaces, requiring extensive clean-up and multiple touch-up rounds.
Safety, Environmental, and Practical Notes
Safety is never negotiable, particularly when dealing with solvents, dust, and fumes. When painting indoors, especially during a stormy period when ventilation might be compromised, extra vigilance is required.
Ventilation and Air Quality: Always use proper ventilation. Open windows (if dry outside), use exhaust fans, and employ electric fans to circulate air. If you are using paints with strong solvents, consider using low-VOC (Volatile Organic Compound) or zero-VOC paints to minimize the impact on indoor air quality. If you suspect mold or severe mildew, do not attempt remediation yourself; call a professional mold remediation specialist.
Protection Protocol: Beyond drop cloths, ensure that all electrical outlets and light switches are covered or turned off. Be mindful of pets and small children, keeping them away from the wet paint and chemical fumes until the paint has fully cured.
Professional Guidance: While DIY is rewarding, understand your limits. If the project involves structural repairs, electrical work, or dealing with suspected lead paint or asbestos, always hire a licensed and insured professional. Their expertise is worth the cost and ensures compliance with safety codes.
Get the Fail-Safe Paint Color Playbook (Free PDF)
36 proven colors • 8 ready palettes • trim & sheen guide • printable testing cards.
Frequently Asked Questions
Is it safe to paint indoors during a rainstorm?
Yes, it is safe to paint indoors during a rainstorm, provided you take necessary precautions. The primary concern is managing the indoor environment to prevent mold growth and ensure proper curing. Always use dehumidifiers and fans to keep air circulation high and humidity levels low. Never ignore signs of structural dampness; if you suspect a leak, do not paint until the source of the moisture is professionally remediated.
How long must the wall dry before priming or painting?
The required drying time depends heavily on the wall material, the moisture level, and the ambient humidity. Generally, after major cleaning or repairs, allow a minimum of 24 to 48 hours for the substrate to dry completely. Use a moisture meter if possible. The primer and paint manufacturer’s instructions must always be followed, but if the air is very humid, the drying time can be significantly extended.
Should I use a dehumidifier when painting in high humidity?
Yes, using a dehumidifier is highly recommended when painting during rainy weather or high humidity periods. High moisture content slows the drying and curing process, which can compromise paint adhesion and lead to mildew. A dehumidifier actively pulls excess moisture out of the air, creating a stable, controlled environment that allows the paint to cure properly and quickly.
Conclusion
Painting indoors during a rainstorm is a manageable, rewarding project, but it demands a methodical approach that prioritizes preparation and environmental control. By treating the process with the same diligence you would use for a weather-proof exterior job—focusing on dry surfaces, proper ventilation, and high-quality materials—you can achieve a professional, long-lasting finish.
Remember that patience is your greatest tool. Allow ample time for surfaces to dry, for primers to set, and for paint to cure between coats. By following these detailed steps and safety guidelines, you can confidently bring life and color back into your home, regardless of what the weather outside may be doing.