
How to Thin Enamel Paint: A Step-by-Step Guide for Perfect Finish
Achieving a truly professional and flawless finish with enamel paint requires more than simply applying the paint; it demands a deep understanding of material science, particularly the concept of viscosity. In many common painting situations, the paint consistency needs adjustment to ensure smooth, even coverage that resists streaks and sags.
Understanding how to correctly thin enamel paint is a critical skill that elevates a DIY project from merely finished to genuinely master-crafted. This comprehensive guide provides practical, step-by-step instructions and technical knowledge, ensuring you can accurately assess, mix, and apply the perfect consistency for any surface or tool—whether you are rolling, brushing, or spraying.
Get the Fail-Safe Paint Color Playbook (Free PDF)
36 proven colors • 8 ready palettes • trim & sheen guide • printable testing cards.
Key takeaway: The key takeaway for How Do You Thin Enamel Paint depends on the exact question, context, and limits of the topic. Start with the direct definition or answer, then compare the practical factors that change what someone should do next.
Understanding the Importance of Paint Consistency
Enamel paint, by its nature, is formulated to hold a specific viscosity—a measure of its resistance to flow. This consistency is crucial because it dictates how the paint will behave when applied. If the paint is too thick, it will drag on the surface, leaving visible brush marks, roller stipple, and streaks. If it is too thin, it loses its body, potentially running or sagging off vertical surfaces, which compromises both the aesthetic finish and the paint’s protective integrity.
The Science of Viscosity in Enamels
Viscosity is not just “thickness”; it is the internal friction that resists flow. For optimal painting results, the thinned paint must achieve a state of “leveling.” Leveling means the paint spreads out and settles evenly, filling minor surface imperfections without running off. The ideal viscosity ensures the paint maintains its protective film-forming capabilities while achieving a glass-smooth appearance.
Factors Influencing Paint Viscosity
Before making any adjustments, it is essential to consider several variables that can naturally alter the paint’s consistency:
- Environmental Conditions: High temperatures or low humidity can cause rapid evaporation of solvents, leading to a thicker-than-intended paint. Conversely, extreme cold can cause the paint to become sluggish.
- Surface Porosity: When painting highly porous surfaces, such as unsealed concrete or rough plaster, the surface will aggressively absorb the paint, making the paint appear to thin out faster than intended, requiring a careful adjustment of the initial mix.
- Application Method: The required viscosity differs dramatically depending on the tool. A paint intended for delicate brush work requires a different consistency than paint designed for high-volume spray applications.
- Paint Age and Storage: If the paint has been sitting in a can for a long time, pigments may settle, or the paint may start to dry near the edges, necessitating thorough stirring and sometimes specialized restoration techniques.
Assessing Your Paint: Determining the Need for Thinning
Never thin paint based on a guess. A professional assessment is mandatory. Here are three reliable, actionable methods to determine if your enamel paint needs adjustment:
Method 1: Visual Flow Test
Pour a small amount of paint into a disposable, clean container. Tilt the container and observe the paint’s flow. If the paint appears sluggish, holds its shape too much, or seems to resist gravity’s pull, it is likely too thick. If it flows immediately and runs off the sides excessively, it may be too thin.
Method 2: The Viscosity Cup Test (Advanced)
Professional painting kits often include a viscosity cup. You fill the cup with the paint and measure the time it takes for the paint to flow through the bottom aperture. The manufacturer’s guidelines provide a target flow time. If your measured time significantly exceeds the recommended time, the paint is too thick and requires careful thinning.
Method 3: The Test Patch Method (Most Reliable)
This is the most practical and foolproof method. Apply a small, thin coat of the paint to a scrap board that closely matches your intended surface material. Allow it to dry completely. When the paint dries, examine the surface. If you see visible brush marks, streaking, or areas that look clumpy, the paint requires thinning. If the coverage is patchy or uneven, the paint may be too thin or too thick for the job.
Planning Before You Start
Measure the space and estimate how much paint or material you will need. Check the surface condition for cracks, peeling, or moisture issues that could affect adhesion.
Decide whether you need primer, specialty coatings, or extra prep steps. Review the weather forecast if working outside, and schedule the project when conditions support proper drying and curing.
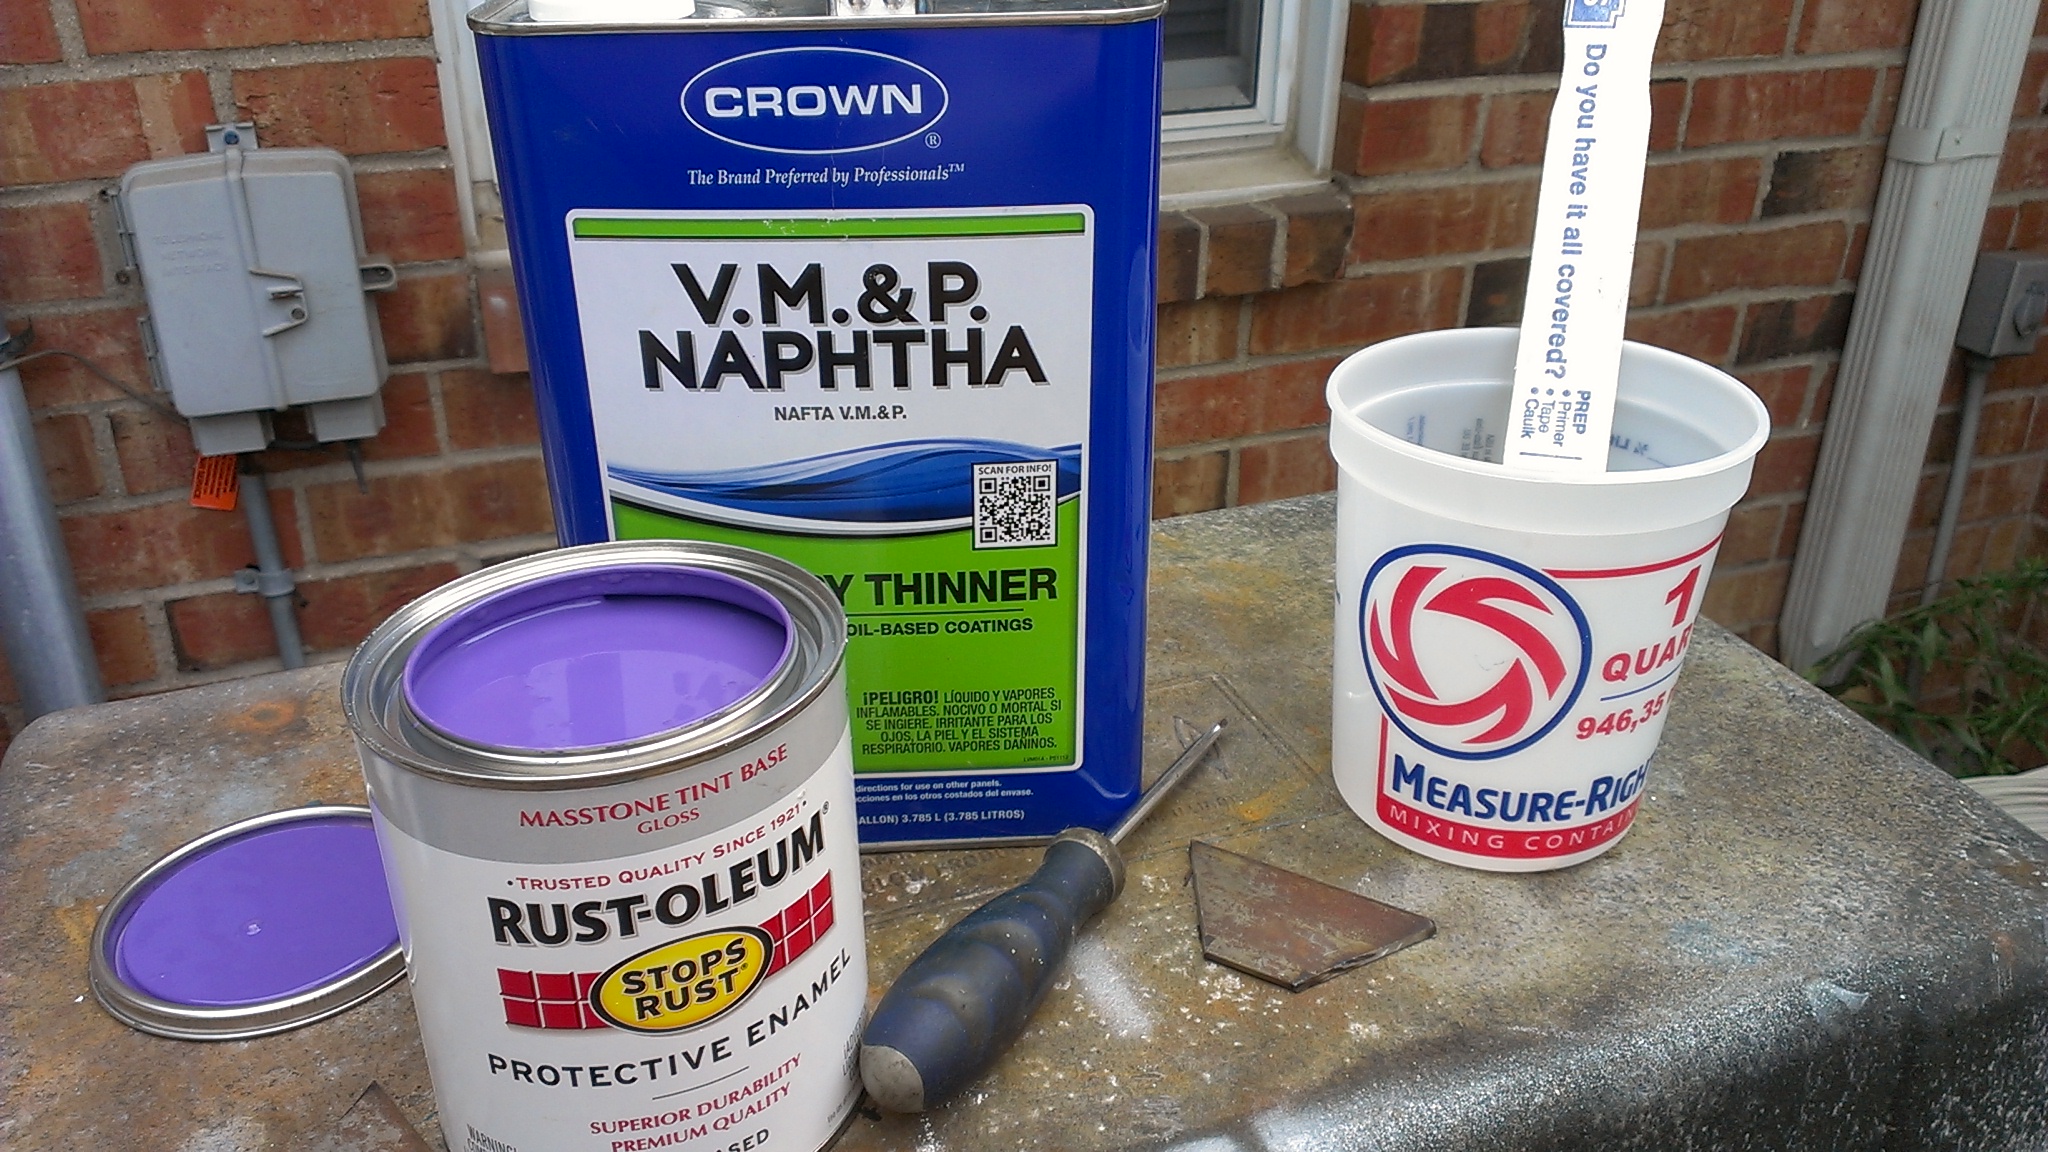
Materials and Tools: Selecting the Perfect Solvent
The single most critical step in thinning is selecting the correct solvent. Using an incompatible thinner can cause the paint to curdle, flake, or dry too quickly, ruining the entire batch. Always prioritize the manufacturer’s stated recommendations.
The Compatibility Chart: Paint Type vs. Solvent
Understanding the chemical composition of the enamel is paramount. The solvent must match the primary binder in the paint:
- Water-Based Enamels (Latex/Acrylic): These paints are designed to dry using water as the primary solvent. They must be thinned using clean, filtered water. Never use oil-based thinners, as they will react negatively.
- Oil-Based Enamels: These paints use oil or alkyd resins as their binder. They require mineral spirits (white spirit) or specific naphtha solvents. Turpentine is also effective but must be used according to its specific chemical makeup.
- Lacquer/Shellac-Based Enamels: These specialty enamels require specialized solvents like denatured alcohol or lacquer thinner, which are designed to break down the specific binding agents.
Ensure you have these supplies ready:
- Correct Paint Thinner: The specific solvent required for your paint type.
- Clean, Graduated Containers: Use containers that are clean and free of residue.
- Stirring Sticks: Non-reactive materials (like wooden paddles or metal rods) are best for mixing.
- Paint Strainer/Filter: A fine mesh strainer is essential for removing dust, debris, and solidified clumps before application.
- Personal Protective Equipment (PPE): Safety goggles, chemical-resistant gloves, and a respirator (if fumes are strong).
Step-by-Step Guide to Mixing and Applying the Thinner
The process of thinning must be methodical and gradual. Never dump a large amount of thinner into the paint all at once, as this can destabilize the formula.
For Manual Application (Brush or Roller)
- Preparation: First, strain the enamel paint into a clean, open container. Gently stir the paint to ensure all settled pigments are fully mixed.
- Initial Addition: Begin by adding a small amount of the compatible thinner—start with about 5-10% of the total volume.
- Mixing: Stir the mixture thoroughly and consistently. Do not whip the paint, as this can introduce excessive air bubbles.
- Testing and Iteration: Dip a roller or brush into the mixture and test the consistency. If the paint still feels too thick, repeat the process by adding only a small increment of thinner (e.g., 1/2 cup at a time) and mixing until the desired flow is achieved.
For Professional Spray Application (HVLP or Airless)
Spraying requires the most precise viscosity control, as the paint must pass through the fine nozzles of the spray gun without clogging, yet still adhere properly.
- Consult Specifications: Check the spray gun manufacturer’s guide and the paint manufacturer’s data sheet for the required spray viscosity range. This is often specified by a ratio or a specific cup reading.
- Filtering: Strain the paint through a fine-mesh filter. This prevents clogging and ensures consistent atomization.
- Gradual Thinning: Slowly add the appropriate thinner, mixing thoroughly. Since spray applications are high-volume, thinning must be done in controlled stages.
- Test Spray: Perform a test spray on a scrap board. Observe the spray pattern—it should be uniform, not clumpy, and should cover the surface evenly without excessive dripping.
Mistakes and Misconceptions to Avoid
Even experienced painters can fall into common traps when thinning paint. Avoiding these mistakes is key to a professional outcome:
- The Over-Thinning Trap: Adding too much thinner is irreversible. If the paint is too liquid, it will lose its “body” and its ability to stick to the surface, leading to excessive dripping and poor coverage.
- Mixing Incompatible Solvents: Never mix different thinners (e.g., water and mineral spirits) or thinners from different chemical families. This can cause unpredictable reactions that compromise the paint’s chemical structure.
- Ignoring Surface Prep: Thinning paint is never a substitute for proper surface preparation. If the surface is greasy, dusty, or covered in peeling paint, no amount of thinning will make the finish flawless. Always clean and prime first.
- Failure to Test: Skipping the test patch or test spray is the most common mistake. Always test the final mixed paint on a visible scrap area before applying it to the actual project surface.
Mistakes to Avoid
Do not skip assessment just because the project looks simple. Most paint, cleaning, repair, and tool-care problems come from poor prep, incompatible products, rushed drying time, or using a method that does not match the material.
Avoid working without ventilation, gloves, eye protection, or a cleanup plan when coatings, solvents, sanding dust, or business/studio supplies are involved. Test first, read manufacturer directions, and pause if the surface, tool, or client setting creates safety questions you cannot answer confidently.
Safety and Practical Notes When Working with Solvents
Because this process involves volatile solvents and chemicals, safety is the absolute priority. Always consult the Material Safety Data Sheet (MSDS) for both the paint and the thinner you are using.
Mandatory Safety Protocols
- Ventilation is Non-Negotiable: Always work in a well-ventilated area. Open multiple windows, use industrial fans, or, ideally, work outdoors. Solvent fumes can be toxic and hazardous.
- Personal Protective Equipment (PPE): Wear chemical-resistant gloves, safety goggles, and a proper respirator rated for solvent vapor. Never rely solely on a dust mask.
- Fire Hazard Awareness: Thinners are highly flammable. Keep all ignition sources—including smoking materials, open flames, and sparks—at least 30 feet away from the work area.
- Disposal: Never pour paint waste or thinners down the sink or drain. Check with your local municipal waste management facility for designated collection points for paint and solvent waste.
The Final Polish: Tips for Achieving Optimal Results
To ensure your thinned enamel paint performs at its absolute best, keep these expert tips in mind:
Get the Fail-Safe Paint Color Playbook (Free PDF)
36 proven colors • 8 ready palettes • trim & sheen guide • printable testing cards.
- Temperature Control: If the weather is unusually hot, allow the paint to cool slightly before thinning. Extreme heat accelerates evaporation, making the paint thicker than intended.
- Consistent Stirring: Maintain consistent, slow stirring throughout the entire thinning process. This prevents separation of pigments and binders.
- Label Everything: Immediately label the container with the original paint type, the thinner used, and the date. This critical record-keeping ensures that future touch-ups can be matched accurately.
Mastering the art of thinning enamel paint is a foundational skill for any serious DIY enthusiast or professional painter. By treating the process with scientific rigor—by properly assessing viscosity, selecting compatible solvents, and adhering strictly to safety protocols—you move beyond guesswork and into the realm of precise craftsmanship. Remember, the goal is always balance: the perfect consistency that allows the paint to flow beautifully without compromising its protective durability.
Frequently Asked Questions
Can I use thinner I have leftover from another type of paint?
No. Using an incompatible thinner is the fastest way to ruin your paint batch. Thinners are chemical solvents, and they must be chemically compatible with the binder (the main component) of your enamel paint. Always check the manufacturer’s label or the Material Safety Data Sheet (MSDS) to confirm the exact solvent required (e.g., water for latex, mineral spirits for oil-based).
What is the difference between ‘thinning’ and ‘diluting’?
While the terms are often used interchangeably, in professional painting, ‘thinning’ refers to adding a solvent (like mineral spirits) to achieve a specific viscosity for application (e.g., for spray guns). ‘Diluting’ sometimes refers to adding a water-based additive or a very small amount of a solvent to simply adjust color or flow. However, for practical purposes in this guide, if you are adding a solvent to adjust the paint’s flow for optimal application, you are thinning it. The key is always using the correct, specified solvent.
Is it safe to thin paint outside, and what precautions should I take?
Yes, working outdoors is always preferable for thinning paint because it maximizes ventilation, which is critical when dealing with volatile solvents. Safety is paramount: always wear chemical-resistant gloves, safety goggles, and an appropriate respirator rated for solvent vapor. Also, keep the area clear of any open flames, sparks, or smoking materials due to the high flammability of thinners.
How much thinner should I add at one time?
Always proceed gradually. Never dump a large amount of thinner into the paint all at once, as this can destabilize the paint’s internal chemistry. Start by adding a small percentage (5-10%) of the compatible thinner, thoroughly mix, test the consistency, and only add more if the test shows the paint is still too thick. Patience and iteration are key to achieving the perfect consistency.