
What Colors Make Silver Paint
Silver paint is a sought-after finish in home improvement, adding an instant layer of sophistication, elegance, and modern flair to everything from cabinet hardware to accent walls. Its unique metallic sheen makes it incredibly versatile, allowing it to bridge various design styles, from industrial farmhouse to classical glam. However, achieving that perfect, professional silver look requires more than just buying a can of paint; it requires understanding the chemistry, the underlying color theory, and the critical steps of preparation.
Many people assume that silver is simply a shade of gray, but the reality of professional metallic paint involves a complex mix of foundational pigments, reflective metallic additives, and precise color adjustments. This guide will take you beyond the basic color wheel, revealing how professional painters and designers mix, customize, and apply true silver metallic paint safely and effectively in your own home.
Get the Fail-Safe Paint Color Playbook (Free PDF)
36 proven colors • 8 ready palettes • trim & sheen guide • printable testing cards.
Quick answer: To What Colors Make Silver Paint, start with the safest first step for the material involved, test a small area when needed, and follow the process in thin, controlled stages. Use proper ventilation and protective gear when chemicals, sanding, spraying, or solvents are involved.
Planning and Preparation Before You Start
Before any pigment is mixed or brush touches a surface, careful planning is essential. Metallic paint projects are highly sensitive to surface quality, lighting, and even humidity. Treating the prep work with the same care you treat the color mixing will ensure a durable, flawless finish.
First, assess the surface and the surrounding environment. Is the surface metal, wood, drywall, or cabinet laminate? Each substrate requires a different type of cleaning and priming process to ensure proper adhesion. For painted wood or metal, you must use a degreaser to strip away years of grease and grime. For porous surfaces like drywall, a specialized bonding primer is critical. Finally, determine the final desired sheen—matte for a subtle, sophisticated look, or semi-gloss for maximum reflectivity and durability, especially in high-moisture areas like bathrooms or kitchens.
Understanding the Chemistry and Application of Metallic Silver Paint
The magic of silver paint lies in the distinction between standard color pigments and metallic pigments. Standard color pigments (like titanium dioxide for white, or iron oxides for black) provide the base hue. Metallic pigments, however, are fine flakes or particles (such as aluminum, mica, or actual silver flakes) that physically reflect light, giving the paint its signature shine and depth. Understanding this difference is key to predicting the final outcome.
The Foundation: Grays and Undertones
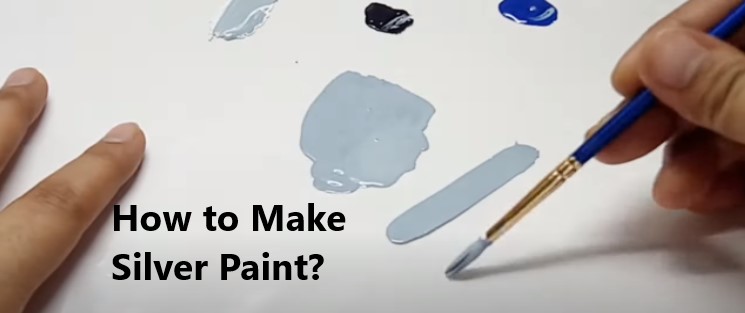
The basic silver color is achieved by mastering the ratio of black and white. By gradually mixing black and white pigments, you create the full spectrum of grays, from charcoal (high black ratio) to near-white (high white ratio). The consistency of this base gray determines the overall depth and darkness of the finished silver. However, to move beyond a flat gray, you must introduce specialized tinting agents.
The tinting agents allow you to customize the silver’s undertone:
- Blue/Cyan: Adding a touch of cool blue or cyan pigment will shift the silver toward an icy, frosty, or platinum look. This is ideal for modern, crisp, or bathroom designs.
- Yellow/Orange: Introducing subtle warm yellow or orange tones prevents the silver from looking too sterile. This shift gives the silver an antique, aged, or champagne-bronze undertone, perfect for traditional or rustic decor.
Incorporating Reflective Metallic Pigments
The primary metallic components dictate the reflectivity. Aluminum-based pigments are highly popular because they offer excellent reflectivity and are relatively stable across various paints. Silver flake pigments provide a more genuine, textured, and sometimes crystalline sparkle. When mixing, always adhere to the manufacturer’s recommended ratios for metallic pigments, as they are often highly concentrated and can quickly overwhelm the color base.
Advanced Mixing Techniques
To achieve a truly unique silver, experiment with mixing ratios in stages. Start with your base gray (black/white mix), then add the metallic pigment, and finally, introduce the tinting agent (blue or yellow). For example, to create an “Antique Silver,” start with a mid-gray base, add aluminum flakes, and then introduce a small, controlled amount of yellow pigment. Always mix your paint thoroughly in a dedicated, non-reactive container to ensure the metallic particles are evenly suspended.
Materials and Tools for Metallic Paint Projects
Because metallic paints are highly specialized and the application demands a professional finish, investing in the right tools is non-negotiable. Using inadequate tools can lead to uneven coverage, pigment clumping, or poor adhesion.
- Specialized Metallic Paint: Purchase paints specifically formulated for metallic finishes, as general wall paint may not contain the necessary reflective binders.
- Primers: Use a bonding primer appropriate for the substrate (e.g., oil-based for bare metal, specialized bonding primer for difficult surfaces).
- Degreaser/Cleaner: Acetone or mineral spirits, depending on the surface, to remove grease and oils.
- Test Surface: A piece of scrap material (wood, cardboard, or trim) that matches the final substrate to test mixtures.
- Mixing Supplies: Non-reactive mixing pots, stir sticks, and measuring cups to maintain accurate ratios.
Application Tools
- High-Quality Brushes: Use synthetic bristle brushes for smooth application and corner detailing.
- Paint Roller: Select a roller nap appropriate for the texture of the substrate (shorter nap for smooth metal, longer nap for textured drywall).
- Painter’s Tape and Drop Cloths: Essential for protecting surrounding areas and achieving crisp lines.
The sheen of the paint dramatically affects how the metallic pigments reflect light. This is one of the most critical decisions you must make, as a high-gloss silver will look vastly different from a matte silver, even if the underlying color mix is identical.
Sheen Comparison Table: Silver Finish
| Sheen Type | Appearance on Silver | Durability & Cleaning | Best Used For |
|---|---|---|---|
| Matte (Flat) | Subtle, soft, and muted reflection; depth is emphasized over shine. | Low durability; prone to scuffing. | Accent walls, artistic pieces, areas needing a sophisticated, non-reflective background. |
| Satin (Eggshell) | Moderate, diffused reflection; provides a noticeable sheen without being overly reflective. | Medium durability; easy to clean fingerprints and minor scuffs. | General interior walls, trim, and cabinetry where a touch of elegance is desired. |
| Semi-Gloss | High, visible, and durable reflectivity; the metallic flakes pop against the polished surface. | High durability; resistant to moisture and common household wear. | Kitchen cabinets, bathroom vanities, trim, and high-touch areas. |
| High-Gloss | Mirror-like, maximum reflectivity; gives a dramatic, polished, and luxurious look. | Very high durability; excellent moisture resistance. | Niche decorative elements, display cabinets, or highly polished accents. |
When working with metallic pigments, a semi-gloss or high-gloss finish is often recommended because the underlying binder (the paint medium) provides a reflective surface that enhances the metallic flakes. Conversely, a matte finish absorbs light, giving the silver a more subdued, velvety, and subtle appearance.
Mistakes to Avoid When Painting with Metallics
Because metallic paints are so sensitive to preparation and mixing, several common DIY mistakes can ruin the finish. Avoiding these pitfalls will save you time, money, and frustration.
1. Skipping Surface Prep
This is the most common mistake. If the surface is oily, dusty, or covered in previous paint residue, the metallic paint will not adhere properly. The flakes may lift or flake off shortly after application, resulting in a patchy, incomplete look. Always clean and prime first.
2. Using the Wrong Pigment Ratios
Do not simply dump metallic pigments into the base paint. Metallic pigments are highly concentrated. Too much pigment, especially if mixed improperly, can lead to pigment clumping, poor flow, and a patchy, uneven sheen. Always follow the manufacturer’s mixing guidelines and mix slowly and thoroughly.
3. Ignoring Lighting Conditions
Color and metallic appearance change drastically based on lighting. A silver that looks perfect in direct afternoon sunlight might appear dull and muddy under fluorescent kitchen lights. Always test your mixed paint sample under the actual lighting conditions of the room (natural daylight, overhead LEDs, etc.) before committing to the entire project.
Safety, Ventilation, and Professional Notes
Working with specialized pigments, solvents, and metallic additives requires strict adherence to safety protocols. Never compromise on safety gear or ventilation, regardless of how small the project seems.
Personal Protective Equipment (PPE)
- Respirator Mask: Always wear a respirator mask when mixing dry pigments or working with solvents, as inhaling fine paint dust or pigment particles can be harmful.
- Gloves and Eye Protection: Wear chemical-resistant gloves and safety glasses to protect skin and eyes from solvents and paint splatter.
Ensure the workspace is extremely well-ventilated. Open windows and use fans to move fresh air, especially when using solvents or mixing paints in an enclosed space. Always check the Material Safety Data Sheet (MSDS) for every product you use to understand proper handling, disposal, and first-aid procedures.
When to Call a Professional
While DIY is rewarding, certain projects should always be left to licensed professionals. Call a professional for:
- Structural repairs or prep work.
- Painting over lead paint (requires specialized encapsulation).
- Large-scale, high-traffic commercial areas where professional equipment is necessary.
- Any time you encounter mold or mildew, as this requires remediation, not just paint.
The Final Touch: Making Silver Paint Last
Creating beautiful silver paint is a process of careful mixing, but maintaining that beauty requires proper care after the paint has cured. Treat your metallic finish with the same care you treat any other high-end interior finish. Gentle cleaning is key; avoid harsh abrasive cleaners, as they can dull the reflective pigments and damage the finish.
When discussing silver paint in a home setting, remember that the paint contributes to the overall aesthetic, but its longevity depends heavily on the quality of the underlying preparation. A perfect mix applied to a poorly prepped surface will fail.
Get the Fail-Safe Paint Color Playbook (Free PDF)
36 proven colors • 8 ready palettes • trim & sheen guide • printable testing cards.
By understanding that silver is a symphony of grays, metallic flakes, and subtle tinting agents, and by committing to meticulous preparation, you can successfully transform your home with a stunning, bespoke silver finish. Experiment, test, and enjoy the process of creating a truly unique, personalized metallic masterpiece.
Frequently Asked Questions
What surface is best for painting with metallic paint?
While metallic paint can be used on various surfaces, the best results are achieved on smooth, non-porous, and structurally stable substrates like metal or properly primed wood. For tricky surfaces like laminate or glossy cabinets, thorough degreasing and the application of a specialized bonding primer are absolutely non-negotiable steps. Always ensure the surface is free of dust, grease, and oils for maximum adhesion.
How do I choose the right undertone (cool vs. warm) for my silver paint?
The undertone depends entirely on the desired mood of the room. To achieve an icy, crisp, or modern “platinum” look, add a cool blue or cyan pigment. If you are aiming for a softer, more aged, or traditional feel (like an antique or champagne bronze), introduce a subtle warm yellow or orange pigment. Remember that these undertones interact with the ambient light, so always test your mix in the room’s actual lighting conditions.
Is semi-gloss or high-gloss better for metallic finishes?
For most metallic finishes, semi-gloss or high-gloss is recommended. These higher sheens provide a reflective binder that helps the metallic flakes “pop,” making the depth and sparkle of the paint much more visible. While a matte finish looks sophisticated and muted, it tends to absorb light, resulting in a flatter, more subdued silver look. Choosing a glossier finish significantly increases durability and washability, especially in kitchens and bathrooms.
When should I call a professional painter instead of tackling the project myself?
You should hire a professional for large-scale projects, structural repairs, or any area requiring specialized handling. Critically, if the surface is coated with lead paint, professional encapsulation is required due to safety hazards. Additionally, if the project is in a high-traffic commercial area, a professional will have the specialized equipment and experience necessary for optimal results and adherence to building codes. Always prioritize safety over DIY convenience.