
How to Bake Paint on Metal: A Step-by-Step Guide for Durable Finishes
Achieving a truly professional, factory-grade finish on metal surfaces often requires more than just drying paint in the open air. If your project demands maximum durability, resistance to chipping, or performance in harsh environments, the process of baking paint on metal is the definitive solution. This technique uses controlled heat to chemically cross-link the paint layers, resulting in superior adhesion and exceptional hardness.
This comprehensive guide will walk you through every stage, from initial surface preparation and specialized paint selection to the precise steps of the baking process itself. By understanding the science behind curing, you can confidently elevate your metal painting projects, transforming them into long-lasting, resilient masterpieces.
Get the Fail-Safe Paint Color Playbook (Free PDF)
36 proven colors • 8 ready palettes • trim & sheen guide • printable testing cards.
Quick answer: To Bake Paint on Metal, start with the safest first step for the material involved, test a small area when needed, and follow the process in thin, controlled stages. Use proper ventilation and protective gear when chemicals, sanding, spraying, or solvents are involved.
Planning Before You Start: Assessing Your Metal Project
Before you even touch a can of paint or a wire brush, thorough planning is essential. The success of a baked paint job hinges entirely on anticipating the project’s environment, the metal’s inherent properties, and the paint’s intended lifespan. Asking the right questions early saves immense time, effort, and material cost later.
Understanding the Environment and Stressors
Consider the operational life of the painted metal. Will it be indoors, or will it be exposed to continuous outdoor elements (UV rays, rain, temperature swings)? Will it be subjected to extreme temperatures, such as an exhaust component, or merely humid air? These factors dictate the entire material selection process. For instance, a piece of art displayed indoors might only need a durable enamel, while a playground railing exposed to salt air and temperature fluctuations requires a heavy-duty, UV-stable epoxy.
Furthermore, evaluate the geometry of the piece. Are you painting simple flat panels, or are you dealing with complex curves, joints, or intricate piping? Complex geometries require specialized application techniques and careful consideration of heat distribution during baking to prevent hot spots or uneven curing.
Budgeting for Professional Grade Materials
While basic hardware store paints may seem cost-effective, they are unlikely to meet the structural demands of a baked finish. Budgeting must include industrial-grade primers, specialized high-temperature paints, and, critically, safety equipment and proper ventilation setup. When comparing costs, always weigh the initial expense against the projected lifespan and required maintenance frequency; a premium primer and paint save money in the long run by preventing premature failure.
The Step-by-Step Guide to Baking Paint on Metal
The process can be broken down into three major, non-negotiable phases: Preparation, Application, and Curing. Skipping or rushing any of these steps will compromise the final product, regardless of how expensive the paint is.
| Metal Type | Attributes | Applications |
|---|---|---|
| Steel | Durable, versatile, affordable | Automotive parts, appliances, industrial equipment |
| Aluminum | Lightweight, corrosion-resistant | Aircraft, automotive components, signage |
| Iron | High strength, excellent heat retention | Cookware, decorative items, architectural elements |
Phase 1: Preparing the Metal Surface (The Foundation)
This is arguably the most critical phase. Paint does not stick to rust, grease, or oxidized metal. You must create a clean, stable, porous substrate for the paint to bond with.
1. Rust and Oxidation Removal
Use appropriate methods—sandblasting for large industrial components, power washing with chemical rust removers for smaller items, or aggressive wire brushing for household pieces. The goal is to remove all visible rust and flaking paint down to the bare metal. If the rust is deep, chemical conversion coatings may be necessary to stabilize the iron oxide.
Advanced Tip: For the best adhesion, consider chemical etching or phosphating treatments. These processes create a microscopic surface profile that physically grips the primer, making the bond nearly unbreakable.
2. Cleaning and Degreasing
After mechanical removal, the surface must be degreased. Use industrial solvents (like acetone or specialized degreasers) and wash the piece thoroughly. Use a degreaser and then rinse with clean water. Residue from oils, fingerprints, or cleaning solvents will prevent the primer from adhering.
| High-Temperature Paint Type | Temperature Resistance | Applications |
|---|---|---|
| Heat-resistant enamel paint | Up to 600°F (315°C) | Barbecue grills, engine components |
| Ceramic-based coatings | Up to 2000°F (1093°C) | Exhaust systems, industrial machinery |
3. Sanding and Abrasion
Sand the entire surface using appropriate grits (e.g., 80-grit for heavy rust removal, followed by 180-grit for smoothing, and finishing with 220-grit for priming). Sanding not only smooths imperfections but also opens up the metal’s pores, creating a mechanical anchor point for the primer.
4. Priming
Apply a specialized metal primer designed for the specific metal (steel, aluminum, galvanized, etc.). Primers serve two functions: they act as a bonding agent, and they provide a barrier coat against further oxidation and galvanic corrosion. Follow the manufacturer’s instructions meticulously regarding drying times and coat thickness. Do not skip the primer.
Phase 2: Applying the Paint (The Coating)
Once the primer is dry, the topcoat can be applied. The technique depends on the scale of the project.
1. Selecting the Right Paint Chemistry
Always choose a paint formulated for the intended application and temperature. If the metal will be exposed to heat, the paint *must* be rated for that maximum temperature. Epoxy paints are often preferred for their incredible chemical and abrasion resistance, while specialized high-temperature enamels are used for industrial heat applications.
2. Application Techniques
Spray Painting: This is the professional standard for achieving a uniform, smooth coat over large, complex surfaces. Proper preparation involves masking off non-paint areas and ensuring adequate ventilation. Maintain consistent distance and overlap passes slightly. Multiple thin coats are always better than one thick coat, as thick coats are prone to runs and drips.
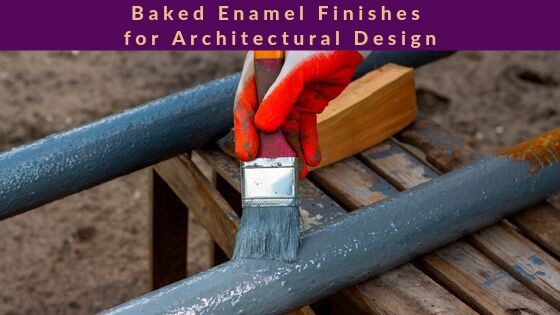
Brush Painting: Best reserved for highly detailed, small areas, or intricate joints where spray equipment cannot reach. Use high-quality synthetic brushes designed for the specific paint type. Apply paint in smooth, even strokes, ensuring you are building up layers gradually.
This is where the magic happens. Baking converts the liquid paint into a solid, cross-linked polymer film.
1. Setting Up the Controlled Environment
Use a dedicated, well-ventilated curing oven or a large, controlled space with industrial heating elements. Safety is paramount: ensure the area is clear of all flammables. Use industrial ventilation systems and proper exhaust fans to remove volatile organic compounds (VOCs) and fumes.
2. Temperature and Time Protocol
Never guess the temperature. The paint manufacturer’s technical data sheet is your only reliable source. Typically, the process involves raising the temperature gradually to the specified range (e.g., 350°F ± 25°F) and holding it for the recommended duration (e.g., 30 minutes). The gradual ramp-up prevents thermal shock, which can crack the paint film.
3. Monitoring the Cure
Monitor the temperature constantly using calibrated thermometers. Once the specified time has passed, allow the metal to cool *slowly* within the oven or in a controlled environment. Rapid cooling can cause contraction stress, leading to cracking or poor adhesion. The cooling process is just as important as the heating process.
Materials and Tools Checklist
A successful bake requires more than just paint. Here is a comprehensive list of necessary supplies and tools:
- Surface Prep: Wire brushes, sanding discs (various grits: 80 to 220), abrasive pads, degreasers (acetone/solvent), cleaning rags.
- Priming/Painting: Metal-specific primer (e.g., rust-inhibitive or epoxy primer), high-temperature topcoat paint (rated for the expected heat), masking tape, plastic sheeting/drop cloths.
- Application: Paint brushes (appropriate size/type), air compressor and spray guns (for spray application), stirring sticks.
- Curing/Safety: Industrial curing oven or heat source (e.g., large heat lamps), calibrated oven thermometer, heat-resistant gloves, safety goggles, full-face respirator, ventilation fans, and respirable masks (N95 minimum, specialized respirator recommended).
Mistakes to Avoid When Baking Metal
Even experienced DIYers can make costly mistakes. Being aware of these common pitfalls is key to success.
- Skipping Degreasing: If the surface is greasy, the primer will bond to the oil, not the metal, leading to immediate failure and flaking after the first temperature cycle.
- Using the Wrong Paint Type: Applying standard enamel paint to a component that will exceed 300°F will result in the paint burning off, blistering, or degrading into hazardous fumes. Always check the temperature rating.
- Thermal Shock: Allowing the painted piece to cool too quickly (e.g., moving it from a hot oven to a cold room) causes rapid contraction stress, which can crack the paint film.
- Poor Ventilation: Working without proper ventilation risks breathing in toxic fumes and can also compromise the paint cure by introducing uncontrolled air contaminants.
Safety and Practical Notes
Because this process involves chemicals, heat, and solvents, safety must be the absolute top priority. Treat this process with the care of a professional industrial painter.
- Personal Protective Equipment (PPE): Always wear a respirator rated for organic vapors, safety goggles, and heat-resistant gloves. Never assume that basic dust masks are sufficient.
- Ventilation Protocol: Establish a dedicated, highly ventilated workspace. Use industrial fans and exhaust systems to pull fumes away from the breathing zone.
- Handling High Heat: Never touch the metal or paint until the curing process has completed and the piece has cooled down to a safe, manageable temperature. Keep all flammable materials at least 10 feet away from the curing zone.
- Manufacturer’s Data Sheets: Always consult the Safety Data Sheet (SDS) for every primer, paint, and solvent used. These documents contain mandatory handling, disposal, and emergency information.
Frequently Asked Questions
What is the single most important step before applying paint?
The most critical step is thorough surface preparation. Paint will not bond correctly to rust, grease, or oxidized metal. You must remove all contaminants down to the bare metal. This includes aggressive mechanical cleaning (sandblasting, wire brushing) and chemical degreasing using industrial solvents (like acetone) to ensure the surface is stable, porous, and free of oils or residues.
Can I skip the priming step if I am using a specialized high-temp paint?
No. Never skip the primer. Primers serve two essential functions: they act as a dedicated bonding agent between the metal and the topcoat, and they provide a crucial barrier coat against further corrosion (galvanic or atmospheric). Even if your topcoat is rated for high heat, the primer is required to ensure the bond is structural and long-lasting.
Get the Fail-Safe Paint Color Playbook (Free PDF)
36 proven colors • 8 ready palettes • trim & sheen guide • printable testing cards.
What is “thermal shock” and how do I prevent it when baking?
Thermal shock occurs when a material (in this case, the paint film) experiences rapid and uneven temperature changes. This rapid contraction stress can cause the paint to crack, blister, or peel off the metal. To prevent this, always follow the manufacturer’s protocol for both the heating (gradual ramp-up) and the cooling (slow, controlled cooling within a dedicated, controlled environment).
How do I know if the paint is cured properly?
A properly baked paint job will exhibit maximum hardness and adhesion. While the paint will feel solid, the true test is its resistance to the environment it was designed for (e.g., heat, abrasion, chemical exposure). If you followed the manufacturer’s temperature and time protocols precisely, the chemical cross-linking process will have occurred, resulting in a durable, factory-grade polymer film.
Safety is paramount. You must wear a full-face respirator rated for organic vapors, safety goggles, and heat-resistant gloves. Always ensure the workspace is highly ventilated using industrial exhaust systems to remove volatile organic compounds (VOCs) and fumes. Never assume that basic dust masks are sufficient for chemical and heat processes.
Conclusion
Baking paint on metal is a powerful, professional technique that dramatically increases the longevity and aesthetic quality of your metalwork. By approaching the project systematically—prioritizing surface prep, selecting chemically correct materials, and strictly adhering to temperature and safety protocols—you transform a simple painting job into a durable, industrial-grade finish.
Remember that the preparation phase accounts for nearly as much of the success as the application itself. Approach your next metal painting project with careful planning, the right tools, and an unwavering commitment to safety, and you will achieve results that are truly built to last.