
How To Blend Paint On Furniture
Transforming your furniture into stunning, personalized statement pieces doesn’t always require a complete overhaul or a radical color shift. Sometimes, the most impactful transformation comes from adding depth and dimension through paint itself. This is where the art of blending paint on furniture comes into play, allowing you to achieve finishes that look custom-designed and truly one-of-a-kind.
Blending paint is a sophisticated technique that allows multiple hues to transition seamlessly across a surface, creating gradients, ombré effects, or natural-looking patinas. Whether you are aiming for the subtle elegance of aged marble or the bold drama of a color gradient, mastering this process can elevate an ordinary piece into a cherished work of art. It is a journey of patience, precision, and creative experimentation.
Get the Fail-Safe Paint Color Playbook (Free PDF)
36 proven colors • 8 ready palettes • trim & sheen guide • printable testing cards.
Quick answer: To Blend Paint On Furniture, start with the safest first step for the material involved, test a small area when needed, and follow the process in thin, controlled stages. Use proper ventilation and protective gear when chemicals, sanding, spraying, or solvents are involved.
Planning and Preparation: Assessing Your Vision
Before the first brush stroke touches the furniture, thorough planning is crucial. Blending is not just about mixing colors; it’s about understanding how those colors will interact with light, the existing decor, and the inherent character of the piece itself. Take time to treat this project like a mini-design consultation.
Assessing the Piece and the Space
Examine the furniture piece in its intended location. How does the natural light hit it? Is the piece meant to be a focal point, or should it blend quietly into the background? Consider the scale of the furniture relative to the room. A small accent table might handle a dramatic, highly blended finish, while a large, prominent cabinet might require a more subtle, cohesive gradient to avoid overwhelming the space.
Take measurements and identify existing architectural details, such as molding or wainscoting. If the blend is meant to complement the room, consider if the color transitions should echo the room’s trim color or contrast sharply with the wall color. This preliminary thinking prevents costly rework later on.
Color Theory and Undertones
When selecting your palette, don’t just pick colors you like; pick colors that work together. Understand the concept of undertones—the subtle hints of yellow, blue, or green within a color. Two shades that look similar in a sample pot might clash when viewed together on a wooden surface due to differing undertones. For blending, choose colors that share a common undertone or are related on the color wheel (analogous colors) for the smoothest transition. If you want high contrast, choose colors that are complementary, but remember that this requires a more deliberate blending effort.
The Step-by-Step Guide to Blending Paint
Achieving a flawless blend is a systematic process that moves from structure to surface. Follow these steps meticulously to build your blended masterpiece.
Step 1: Meticulous Surface Preparation
This is arguably the most critical stage. Paint adhesion is entirely dependent on the surface preparation. Do not skip any of these steps.
- Cleaning: Use a degreaser or a mild soap solution to wash the entire piece. Grease, wax, and dirt are the enemies of paint adhesion. Wipe down all surfaces, including joints and corners, until the cloth comes away clean.
- Repairing and Filling: Inspect the piece for scratches, dents, or chips. Use appropriate wood filler for deep gaps and minor cracks. Allow the filler to dry completely, then sand the repaired areas flush with the original surface.
- Sanding: Start with a medium-grit sandpaper (around 120 grit) to remove any loose paint or overly rough spots. Follow this up with a fine-grit sandpaper (220–320 grit) to create a uniform, slightly porous surface. Sanding creates “tooth,” which allows the primer and paint to grip effectively.
Step 2: Priming and Base Coating
The primer acts as a unified shield and a binding agent. It seals the wood and ensures that the paint colors you apply later will adhere evenly, preventing the wood tannins or underlying material from bleeding through the paint.
Apply a high-quality stain-blocking primer suited for the material (e.g., shellac-based for wood). Apply thin, even coats, sanding lightly with 320 grit between each coat until the surface feels perfectly smooth. The base coat color should be a neutral tone (like a light gray or warm off-white) that serves as a foundation and allows your accent colors to pop without competing with them.
Step 3: Mastering Blending Techniques
Once the base coat is fully dry and cured, you can introduce your accent colors and blending techniques. Remember that blending is about building depth through translucency, never through thick, solid layers.
Dry Brushing: Highlighting and Texture
This technique is excellent for adding subtle texture and highlighting raised areas, mimicking natural wear or patina. It requires minimal paint and maximum control.
- Preparation: Dip your brush into the accent color and immediately wipe almost all the paint off onto a paper towel or palette until the brush feels barely damp.
- Application: Use quick, light, feathery strokes, dragging the brush lightly over the surface. The goal is for the paint to catch only the highest points of the wood grain or the surface texture, allowing the base coat to show through dramatically.
- Blending: Layer multiple, similar-toned colors using this method to build dimension, simulating the way light hits aged wood.
Glazing: Achieving Seamless Color Transitions
Glazing involves applying a thin, translucent wash of color over the base. This is the most effective method for creating smooth, gradual color changes (gradients or ombré effects).
- Mixing: Mix your chosen accent color with a quality glaze or thin paint with water/medium (following product directions) until it is highly translucent—it should look like watered silk.
- Application: Apply the glaze in small, manageable sections, working in long, even strokes. Do not saturate the surface.
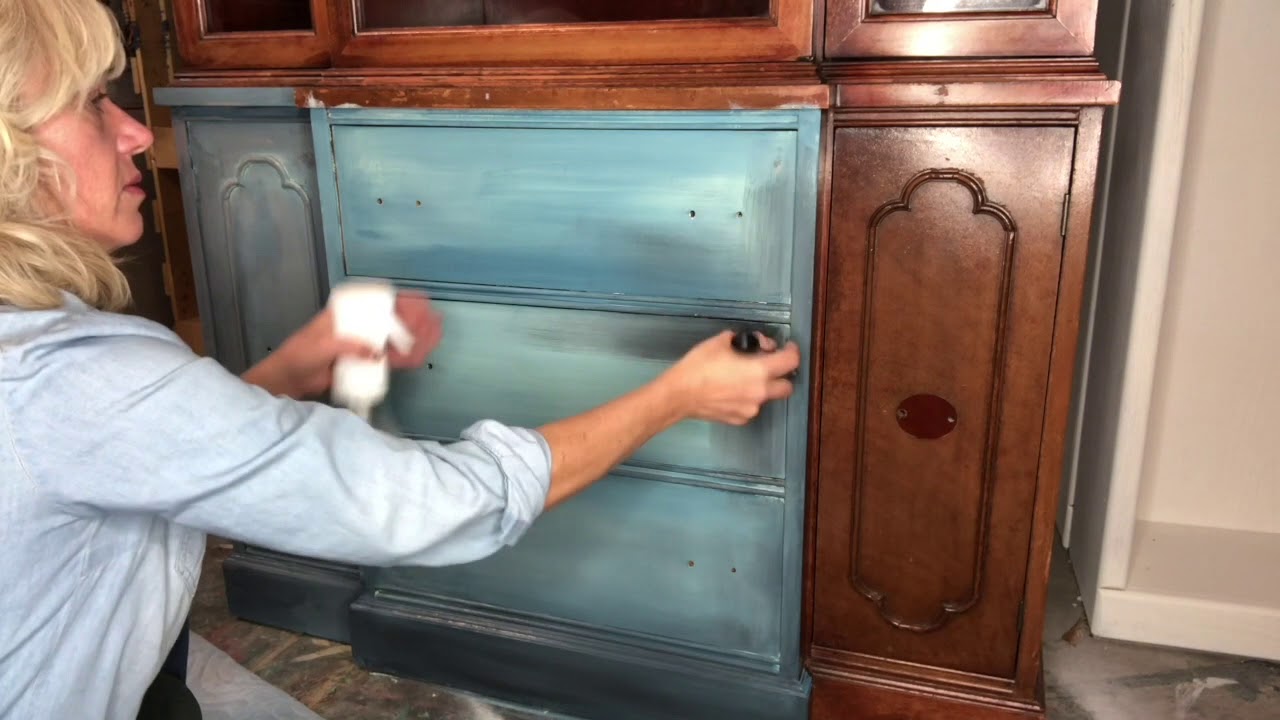
- Blending/Feathering: Immediately after applying the glaze, use a separate, clean, dry brush to gently feather the edges where the color changes. Use soft, circular motions to soften the lines, allowing the base coat to peek through and unify the tones.
Step 4: Advanced Finishes (Distressing and Antiquing)
To enhance the blended finish and make it look authentically aged, incorporate these final techniques.
- Distressing: This simulates natural wear. Once the main blend is complete, use fine-grit sandpaper or a sanding sponge to gently “wear” paint from high points, edges, and corners. This reveals the base coat or the wood underneath, creating a history-filled, rustic look.
- Antiquing: To deepen the colors and add a patina, apply a dark, thin wash or stain (like umber or sepia) over the entire piece. Immediately wipe the excess stain off with a cloth, paying special attention to letting the stain pool in the crevices, joints, and carved details. This accentuates the depth of the blend and adds immediate vintage character.
Materials and Tools Checklist
Having the right supplies is half the battle. Do not compromise on the quality of your materials, as they directly impact the finish.
- Paints and Glazes: Use high-quality, water-based acrylic or latex paints. For blending, prioritize glazes and washes, as they are inherently more translucent.
- Primers: Select a stain-blocking primer appropriate for your wood type (e.g., shellac or specialized wood primer).
- Brushes: Invest in a variety of high-quality synthetic brushes. You will need: a large flat brush for base coats, a small, soft detail brush for feathering, and a stiff, short-bristle brush for dry brushing.
- Applicators: Foam rollers are ideal for applying even base coats to large, flat areas.
- Abrasives: A comprehensive set of sandpaper (120, 220, 320 grit), sanding sponges, and sanding blocks.
- Protection: Painter’s tape, drop cloths, disposable rags, and clean, lint-free cloths for wiping and blending.
The best blends are those that feel natural and harmonious within the room’s context. Use these tips to ensure your blend complements your home’s overall aesthetic.
- Sheen Considerations: The sheen of your paint finish must match the intended use. For furniture that needs to withstand high traffic and cleaning (like a coffee table), consider a durable satin or semi-gloss finish. For decorative, less-used pieces (like display cabinets), a matte or eggshell finish is often more elegant and enhances the depth of the blended color.
- Lighting Effects: Always test your blend in the actual room lighting. Natural light, artificial overhead light, and warm lamps will all affect the perceived color. If the room has cool, blue-toned light, warm undertones in your paint blend might look better to balance the space.
- Mixing for Depth: To create the illusion of depth, always mix your accent colors so that they transition between light and dark. For example, if your base is a warm gray, blend in a pale dusty blue (the lightest) and a deep slate gray (the darkest) to give the piece dimension.
The blending process is prone to common errors. Knowing these pitfalls will save you time and frustration.
- Mistake: Applying paint too thickly. Thick coats block the ability of the colors to blend naturally and can lead to drips, uneven texture, and flaking. Solution: Always use thin, translucent layers. Build up depth slowly.
- Mistake: Skipping proper sanding or priming. If the surface is dirty or unprepared, the paint will not adhere properly, leading to chipping and peeling, especially in the blend transition points. Solution: Treat prep as if it were the most important step. Sand and prime thoroughly.
- Mistake: Rushing the drying time. Applying the next coat or blending technique before the previous one is fully dry guarantees streaks, muddy colors, and poor adhesion. Solution: Use a moisture meter or wait the full time specified by the paint manufacturer.
- Mistake: Forgetting the sealant. A beautiful blend is useless if it is exposed to the elements. The finish must be sealed. Solution: Always apply at least two coats of a quality protective sealant or varnish.
Safety and Practical Working Notes
Blending paint involves chemicals, solvents, and sanding dust. Safety must be your absolute priority.
- Ventilation is Non-Negotiable: Always work in a well-ventilated area. Open windows and use fans to ensure fresh air circulation, especially when using solvents, primers, or stains.
- Personal Protective Equipment (PPE): When sanding or applying chemicals, wear a fitted respirator mask (not just a dust mask), safety goggles, and gloves.
- Product Handling: Always read and follow the manufacturer’s instructions for every product—primer, paint, and sealant. Never mix unknown chemicals.
- Handling Pro Issues: If the piece is antique or potentially contains lead paint, do not sand or sandblast it yourself. Call a licensed professional for remediation.
Maintenance and Care for the Finished Piece
Once your blended masterpiece is cured and sealed, proper care will ensure its longevity.
- Cleaning Routine: Use only mild, pH-neutral cleaners or a mix of water and dish soap. Never use abrasive pads, scouring powders, or harsh solvents, as these will dull the sheen and damage the blend.
- Sunlight Protection: Prolonged, direct UV exposure is the number one cause of fading and discoloration. Keep the piece out of direct sunlight whenever possible.
- Spill Protocol: For spills, blot immediately and gently with a clean cloth. Never rub, as this can embed the stain into the porous finish.
Mistakes to Avoid
Do not skip assessment just because the project looks simple. Most paint, cleaning, repair, and tool-care problems come from poor prep, incompatible products, rushed drying time, or using a method that does not match the material.
Avoid working without ventilation, gloves, eye protection, or a cleanup plan when coatings, solvents, sanding dust, or business/studio supplies are involved. Test first, read manufacturer directions, and pause if the surface, tool, or client setting creates safety questions you cannot answer confidently.
Safety and Practical Notes
Work in a well-ventilated space and wear gloves, eye protection, and a respirator when needed. Keep children and pets away from wet surfaces and open containers.
Follow manufacturer drying times between coats. Dispose of rags and leftover materials according to local regulations. If the project involves heights, lead paint, or structural work, consider hiring a licensed professional.
| Materials | Tools |
|---|---|
| Paint in various colors | High-quality paintbrushes |
| Sandpaper (various grits) | Foam rollers |
| Primer | Sponge brushes |
| Sealant | Clean cloth |
| Painter’s tape | Mixing palette or plate |
Frequently Asked Questions
What is the biggest mistake I can make when blending paint?
The most common mistake is rushing the drying time or applying paint too thickly. Blending requires thin, translucent layers; if you build up depth with thick coats, the colors will block each other, leading to streaks, drips, and an uneven, muddy appearance. Always follow the drying times specified by your paint manufacturer, and build up color slowly.
Do I need to sand after every single coat?
While sanding is essential, you do not need to sand every single coat. After applying the primer and the base coat, a light sanding (using 320-grit sandpaper) is recommended to create a smooth surface for adhesion. However, once you start applying your thin glaze layers, excessive sanding can remove the build-up of color you just achieved. Focus on sanding the structural prep work (after filling and before priming) and then lightly sanding between major color sections.
Get the Fail-Safe Paint Color Playbook (Free PDF)
36 proven colors • 8 ready palettes • trim & sheen guide • printable testing cards.
Can I use paint colors that don’t match my existing furniture or room?
While you can certainly experiment, blending works best when the chosen palette is considered in relation to the space. Before committing, test your blend in the actual room lighting at different times of the day. If the room has cool natural light, warm undertones in your paint blend might look better to balance the space. For the best results, choose colors that are related on the color wheel (analogous) for the smoothest, most harmonious transition.
If the piece is antique or painted with lead, what should I do?
If you suspect the piece is antique or potentially painted with lead, do not attempt to sand, strip, or sandblast it yourself. Lead paint dust is highly toxic. Your absolute safest option is to hire a licensed professional remediation specialist. If the paint is stable and you are only applying a thin top coat or glaze, ensure you follow all safety protocols, including wearing a respirator and working in a well-ventilated area.
What kind of sealant should I use on a blended finish?
You must seal your blend to protect it. Since the finish is often translucent and complex, use a high-quality, protective sealant or varnish that matches the desired sheen (e.g., satin or matte). Always apply at least two thin, even coats. Remember that the sealant is the final step that prevents the beautiful blend from fading or being damaged by moisture and spills.
Conclusion
Blending paint on furniture is a highly rewarding blend of art and craftsmanship. By respecting the process—from the initial structural preparation to the final protective seal—you can achieve a professional, deep, and complex finish that is entirely unique to your vision. Approach the project with patience, embrace the experimentation, and let the beauty of layered color do the talking.
Remember that the blend is not merely decorative; it is a form of preservation, allowing you to revitalize and honor the inherent beauty of the furniture piece while giving it a fresh, sophisticated personality that complements your entire living space.