
How To Clean Paint Off Tile Floor: A Step-by-Step Guide
Paint spills on tile floors are a common, stressful challenge during home renovations or unexpected accidents. While the sight of colorful splatters on a clean tile surface can be daunting, it does not mean the damage is irreversible. With a systematic approach, the correct knowledge of materials, and the right cleaning agents, you can effectively lift paint stains and restore the tile floor’s original brilliance.
Cleaning paint from tile is not simply a matter of scrubbing harder; it requires a deep understanding of chemistry, surface porosity, and the age of the stain. Success hinges on accurately identifying three key variables: the type of paint, the material of the tile (and grout), and the state of the stain (wet, tacky, or completely cured). By following a careful, phased process, you can tackle even the most stubborn residue.
Get the Fail-Safe Paint Color Playbook (Free PDF)
36 proven colors • 8 ready palettes • trim & sheen guide • printable testing cards.
Quick answer: To Clean Paint Off Tile Floor, start with the safest first step for the material involved, test a small area when needed, and follow the process in thin, controlled stages. Use proper ventilation and protective gear when chemicals, sanding, spraying, or solvents are involved.
Pre-Cleaning Assessment: Knowing Your Variables
Before gathering any tools or mixing any chemicals, the most critical step is assessment. Treating a marble floor with an acid meant for porcelain will cause permanent damage, just as using a solvent meant for oil paint on latex paint will be ineffective. You must know your variables:
Identifying the Paint Type
The composition of the paint dictates the solvent needed for removal. Knowing this is paramount for safety and efficacy:
- Latex/Acrylic Paint (Water-Based): These are the most common modern paints. They dry quickly and are generally easier to remove with warm, soapy water and gentle agitation.
- Oil-Based Enamel/Alkyd Paint: These paints cure into hard, tough films and require solvents like mineral spirits or commercial paint strippers formulated for oil.
- Latex Enamel (Hybrid): These are designed to be durable and cleanable. They often respond well to specialized, commercial residue removers that are stronger than simple soapy water.
Identifying the Tile and Grout Material
Tile materials vary dramatically in their porosity and chemical resilience. Treat each type with caution:
- Porcelain: This is a dense, non-porous ceramic tile. It is highly durable and can withstand stronger cleaning agents and solvents, making it the most forgiving surface.
- Ceramic Tile: Generally durable, but slightly more porous than porcelain. It handles most standard cleaning solutions well but can be susceptible to strong acids.
- Natural Stone (Marble, Travertine, Limestone): These are calcium carbonate-based and are highly sensitive. They cannot be treated with acids (like vinegar, lemon juice, or many strong commercial cleaners) as this will etch the surface, leaving permanent dull spots. Use pH-neutral cleaners only.
- Grout: Grout is often cement-based and is usually the most porous part of the installation. It requires a different approach than the tile itself, often needing a specialized poultice to draw out deeply embedded stains.
Planning Before You Start
Measure the space and estimate how much paint or material you will need. Check the surface condition for cracks, peeling, or moisture issues that could affect adhesion.
Decide whether you need primer, specialty coatings, or extra prep steps. Review the weather forecast if working outside, and schedule the project when conditions support proper drying and curing.
Step-by-Step Guide to Paint Stain Removal
Phase 1: Removing Fresh or Wet Paint
If the paint spill happened minutes or hours ago, time is your greatest ally. The goal is removal, not dissolution. Do not attempt to soak or scrape aggressively, as this can damage the tile surface.
- Blotting: Use absorbent materials (like paper towels or old rags) to gently blot up any excess wet paint. Do not rub, as this pushes the pigment deeper into the pores.
- Gentle Scraping: Use a plastic putty knife, an old credit card, or a specialized wooden scraper. Gently lift the paint layers without digging into the tile surface or grout line.
- Residue Cleaning: Once the bulk is removed, rinse the area thoroughly with warm, soapy water. For minor, tacky residue, a very mild solvent (like mineral spirits, if the paint was oil-based) can be applied to a cloth, used only to wipe the residue, and immediately followed by a rinse.
Phase 2: Tackling Dried and Cured Paint
When the paint has cured, the bond is much stronger, requiring a multi-step chemical and mechanical approach. Always work in small, manageable sections.
- Softening (Heat/Moisture): For cured paint, applying gentle, controlled heat (like a steamer or hot water) can sometimes expand the paint slightly, loosening its grip on the tile surface. Apply steam in short bursts, allowing it to sit for several minutes.
- Poultice Application: For deep, stubborn stains in the grout or tile, a poultice is essential. A poultice is an absorbent paste (like powdered chalk, baking soda, or specialized commercial powder) mixed with a chemical solvent (e.g., paint remover, mineral spirits, or mild detergent). Apply the paste directly over the stain, cover it with plastic wrap, and seal the edges with tape. Allow it to sit for the time recommended by the product (usually 12 to 24 hours) to allow the solvent to draw out the pigment and binder.
- Chemical Stripping: For heavily stained areas, use a commercial paint stripper appropriate for the paint type. Apply it according to the manufacturer’s directions, allowing it to dwell for the specified time. Never let the stripper dry out. Once the paint lifts, carefully scrape the residue away using a plastic scraper.
Material-Specific Protocols and Cleaning Agents
The safest and most effective cleaning process is always tailored to the materials. Use the following guidelines:
For Porcelain and Ceramic Tile
These materials are resilient. After initial removal, use a strong, pH-neutral detergent and a stiff-bristle brush to scrub the surface. For embedded stains, a specialized grout cleaner or a mild acid-free phosphoric acid solution (if the manufacturer recommends it) can be used, followed immediately by a thorough rinse.
For Natural Stone (Marble, Travertine)
Extreme caution is required. Never use vinegar, lemon juice, or strong acidic cleaners. The process must be gentle:
- Cleaning: Use only pH-neutral stone cleaner and a soft brush.
- Stain Removal: If a stain persists, use a specialized, pH-neutral poultice. Avoid solvents that contain ammonia or harsh chemicals.
- Drying: Natural stone must be thoroughly dried after cleaning to prevent water marks or mineral deposits.
Cleaning the Grout
Grout needs its own deep treatment. Once the tile surface is clean, treat the grout lines separately. Use a dedicated grout brush and a poultice applied specifically to the grout. Scrub the grout lines while the poultice is setting to lift the stain, ensuring the poultice material does not bleed onto the surrounding tile surface.
Materials and Tools Checklist
Having the right gear prevents damage and ensures safety. Assemble this kit before beginning:
- Personal Protective Equipment (PPE): Chemical-resistant gloves, safety goggles, and a respirator (especially when using solvents or strippers).
- Scraping Tools: Plastic putty knife, wooden scraper, or credit card (never metal on delicate tile).
- Cleaning Agents: pH-neutral detergent, mineral spirits (for oil), specialized paint remover/stripper, and baking soda/chalk powder for poultices.
- Application Tools: Stiff-bristle nylon brush, soft-bristle brush (for stone), sponges, and buckets of warm water.
- Safety Gear: Ventilation fans, plastic sheeting, and masking tape to protect surrounding areas.
Deep Restoration and Sealing
Once the paint is removed, the floor will likely have residual stains and may be temporarily vulnerable. Restoration is key to returning the floor to its peak condition.
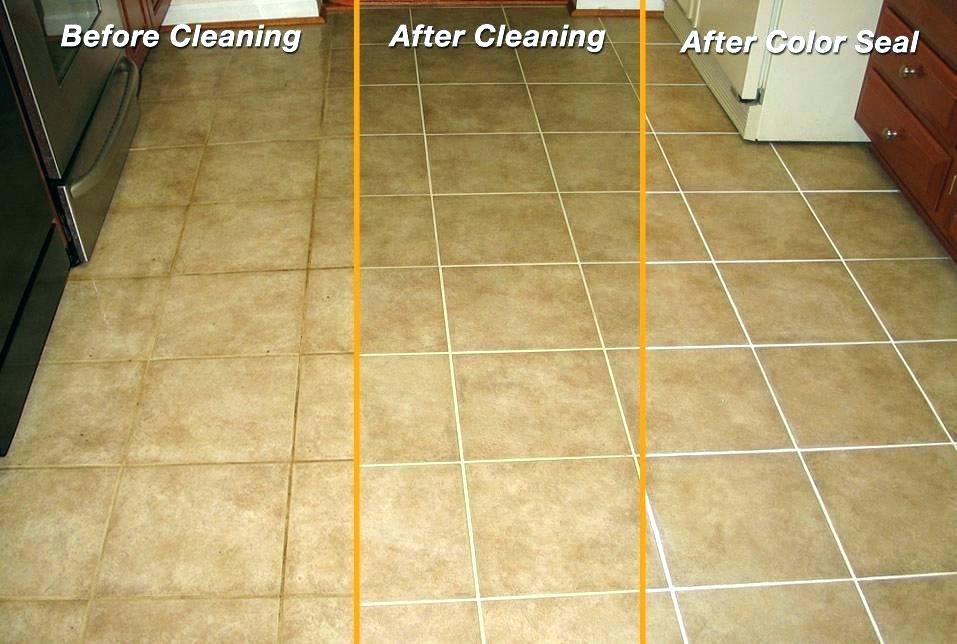
After all chemical treatments are complete, the area must be neutralized. This involves washing the entire area with a mild, pH-neutral wash (such as a diluted solution of white vinegar and water, *if* the tile is porcelain, but always check the manufacturer’s recommendation) to remove any lingering chemicals. Following the neutralization wash, allow the floor to dry completely. Finally, if the tile or grout is porous (especially natural stone or unsealed grout), applying a quality sealant or grout sealer will prevent future stains and restore the desired luster and protective barrier.
Mistakes to Avoid When Cleaning
Even experienced DIYers can make costly errors. Pay special attention to these common mistakes:
- Mixing Chemicals: Never mix different cleaning agents (e.g., bleach and ammonia). This creates toxic fumes that are dangerous to inhale.
- Using Metal Scrapers on Stone: Metal scrapers can gouge or scratch natural stone and glazed tile surfaces. Always opt for plastic or wood.
- Ignoring Porosity: Assuming all tile is equally porous. Always treat natural stone and grout as the most porous and delicate areas.
- Over-Scrubbing: Excessive scrubbing, especially with abrasive pads, can dull the finish and wear down the sealant layer of the tile.
Safety, Disposal, and When to Call a Pro
Safety is non-negotiable. Before starting any chemical work:
- Ventilation: Open all windows and use exhaust fans. Working with solvents requires maximum air circulation.
- PPE Mandate: Always wear chemical-resistant gloves, safety glasses, and a respirator when handling strong chemicals or solvents.
- Disposal: Dispose of all paint chips, strippers, and contaminated rags according to local hazardous waste guidelines.
When to Call a Professional: If the paint stain has penetrated deep into the substrate, if the tile itself appears chipped or structurally damaged, or if you are dealing with extremely large, complex areas, it is time to hire a professional restoration service. They have industrial-grade equipment and expertise that goes beyond standard DIY remedies.
Successfully removing paint stains from tile floors is a process of careful diagnosis and measured action. By approaching the problem systematically—assessing the variables, selecting the correct technique for the material, and prioritizing safety—you can achieve a clean, restored, and beautiful finish. Remember that preparation and patience are just as important as the cleaning chemicals themselves.
Frequently Asked Questions
What is the biggest mistake I can make when cleaning paint from tile?
The biggest mistake is failing to assess your materials first. Never treat a natural stone surface (like marble or travertine) with an acid meant for porcelain or ceramic. Acids will permanently etch the calcium carbonate in the stone, dulling its finish. Always use pH-neutral cleaners for natural stone and grout.
How do I remove fresh, wet paint without damaging the tile?
If the paint is still wet, time is your best tool. Do not scrub or soak the area aggressively. Instead, gently blot up excess paint using paper towels or old rags. For the bulk removal, use a plastic putty knife or an old credit card to carefully lift the paint layers. Follow up by rinsing thoroughly with warm, soapy water. Minimal mechanical effort is key at this stage.
Get the Fail-Safe Paint Color Playbook (Free PDF)
36 proven colors • 8 ready palettes • trim & sheen guide • printable testing cards.
Can I use vinegar or lemon juice on the stain?
No. While these are common household items, they are acidic and can severely damage most types of tile, especially natural stone, marble, and travertine. These acids will chemically react with the stone and grout, leaving permanent dull spots or etching the surface. For natural stone, stick strictly to pH-neutral commercial cleaners and poultices.
Do I need to call a professional restoration service?
You should call a professional if the paint stain has deeply penetrated the tile substrate, if the tile itself appears chipped or structurally damaged, or if the stain covers a very large, complex area. Professionals have specialized equipment and industrial-grade knowledge that goes beyond standard DIY remedies, ensuring both safety and comprehensive removal.
What is a poultice and how do I use it?
A poultice is an absorbent paste used to draw out deeply embedded stains and pigments from porous surfaces like grout and natural stone. You mix an absorbent powder (like powdered chalk or baking soda) with a chemical solvent (such as paint remover or mineral spirits). Apply the paste over the stain, cover it with plastic wrap, and seal the edges with tape. Allow it to sit for the time specified by the product (often 12-24 hours) to allow the solvent to work and draw the stain out.
Conclusion
How To Clean Paint Off Tile Floor works best when the plan, materials, safety steps, and finish goals all line up before work begins. Review the surface or tool condition, choose compatible products, and leave enough time for drying, cleanup, and final checks.
Use the guidance above as a practical checklist, then adjust it to the specific surface, workspace, product directions, and risk level. When the project involves fumes, damaged materials, business liability, or uncertain conditions, slow down and get qualified help before moving forward.