
How To Get Plasti Dip Off Paint
Plasti Dip has revolutionized temporary vehicle customization, offering an accessible way for enthusiasts to completely transform a surface’s appearance without the commitment of a permanent paint job. Its versatility, coupled with its ease of application, makes it a popular choice for everything from bumpers and trim pieces to entire body panels. However, when the time comes to revert to the original factory finish, the removal process can seem daunting, especially because the underlying paint must be preserved.
Removing this durable coating requires more than just scraping; it demands a strategic understanding of chemistry, paint structure, and physical tools. By following a systematic, safety-conscious approach, you can effectively lift the Plasti Dip layer while minimizing the risk of damaging the clear coat, base coat, or underlying paint integrity. This guide provides the comprehensive knowledge needed to tackle this restoration project successfully.
Get the Fail-Safe Paint Color Playbook (Free PDF)
36 proven colors • 8 ready palettes • trim & sheen guide • printable testing cards.
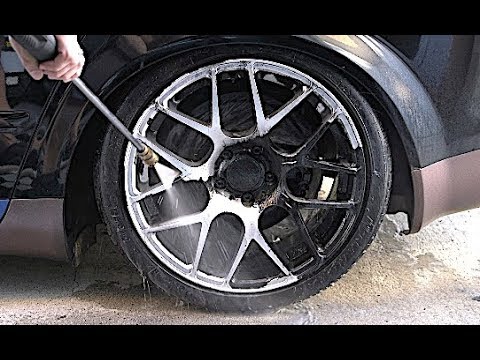
Quick answer: To Get Plasti Dip Off Paint, start with the safest first step for the material involved, test a small area when needed, and follow the process in thin, controlled stages. Use proper ventilation and protective gear when chemicals, sanding, spraying, or solvents are involved.
Phase 1: Planning and Assessment Before Removal
Before any solvent or tool touches the surface, a thorough assessment is mandatory. You must evaluate three things: the condition of the paint beneath, the thickness and adhesion of the Plasti Dip, and the specific type of paint finish (glossy, matte, metallic).
Assessing the Underlying Paint: If the paint beneath the Plasti Dip is already chipped, faded, or has visible oxidation, the removal process will expose these flaws. Be aware that solvents and scraping methods can exacerbate existing damage. If the paint is pristine, you have the most flexibility, but even then, the clear coat is susceptible to micro-abrasions. Note whether the paint is a single-stage color coat, or if it has a distinct clear coat—the clear coat is the protective layer that is most vulnerable to damage.
Evaluating the Plasti Dip Adhesion: Determine if the coating is loosely adhered, or if it has bonded aggressively to the paint. If the Plasti Dip is heavily bonded, chemical softening or heat may be necessary. If it is peeling in large sheets, mechanical removal will be easier. This initial assessment dictates whether you should start with solvents or scraping tools.
Phase 2: Materials, Tools, and Safety Protocols
Safety and proper equipment are non-negotiable. Treat this process as if you were refinishing a vehicle, as the underlying paint is valuable and easily damaged.
Essential Tools and Supplies Checklist
- Personal Protective Equipment (PPE): Safety goggles, chemical-resistant gloves (nitrile recommended), and potentially a respirator if using strong solvents.
- Scrapers: Plastic paint scrapers or old credit cards. Metal scrapers should be avoided unless absolutely necessary and under professional guidance, as they can gouge the clear coat.
- Solvents: Isopropyl Alcohol (IPA) is the mildest starting point. Dedicated automotive adhesive remover (ensure it is safe for automotive clear coats). Acetone should be used with extreme caution, as it is highly aggressive.
- Cleaning Agents: pH-neutral car wash soap, degreaser, and specialized surface cleaners.
- Cleaning Cloths: Multiple clean, lint-free microfiber cloths and absorbent towels.
- Optional: Plastic drop cloths, masking tape, and a small source of controlled heat (e.g., a hairdryer, never a high-powered heat gun).
Critical Safety Protocols
Never underestimate the power of chemical solvents. When working with any strong chemical remover, always:
- Ventilation: Work outdoors or in a well-ventilated area to prevent inhaling solvent fumes.
- Protection: Always wear gloves and eye protection.
- Testing: Never apply any solvent or tool to a large area without first testing it on a small, inconspicuous spot (like under the wheel well or inside a trim piece). Observe the test area for color change, cloudiness, or dulling.
Step-by-Step Guide to Plasti Dip Removal
The removal process is best approached in escalating stages, moving from the least aggressive method to the most aggressive, only escalating if the previous method fails.
Step 1: Gentle Mechanical Peeling and Scraping
Start by manually peeling any edges or loose sections. If the coating is intact, use a plastic scraper or a credit card. Apply light, consistent pressure, pulling the material away from the surface at a shallow angle (less than 45 degrees) to minimize the chance of scratching. Work slowly, section by section, rather than trying to remove large, unsupported pieces at once.
Step 2: Chemical Softening (The Mild Approach)
If peeling fails, apply Isopropyl Alcohol (IPA). IPA is generally safer for most automotive paints and is excellent for breaking down the surface bond of the coating. Apply the alcohol to a cloth and let it sit on the Plasti Dip for a short “dwell time” (2-5 minutes). The dwell time allows the solvent to penetrate the polymer structure. After the dwell time, try peeling or scraping again. If IPA does not work, move to a dedicated adhesive remover, always observing the test patch results first.
Understanding Solvents: Dedicated adhesive removers are formulated to target the specific polymers used in coatings like Plasti Dip. They are often more effective than generic solvents but carry a higher risk to certain paint types (especially older, delicate finishes). Acetone is extremely strong and should be considered a last resort, as it can aggressively strip away clear coats.
Step 3: Handling Stubborn Residue
Even after the main coating is removed, adhesive residue, plastic film bits, or cured chemical stains will remain. These require specialized cleaning. Do not simply wash these off; they need chemical breakdown. Use a specialized graffiti remover or the recommended adhesive remover, applying it only to the residue, not the underlying paint. Use a clean microfiber cloth to gently lift the residue. Repeat this process until the surface feels clean to the touch, not sticky.
The removal process inevitably creates micro-abrasions and dulls the paint’s natural luster. This post-removal care is critical to restoring the vehicle’s appearance.
1. Degreasing and Decontamination: First, wash the entire area thoroughly using pH-neutral soap to remove general dirt and grime. Next, use a dedicated paint surface cleaner or a diluted IPA solution to chemically degrease the paint, removing any oils or contaminants left by the solvents. If heavy mineral deposits are present, a clay bar treatment may be necessary to pull embedded contaminants out of the clear coat.
2. Polishing and Compounding: To remove the microscopic scratches and hazing caused by scraping, a light polish is recommended. This involves using a machine polisher (orbital or rotary) with a fine cutting compound and a soft pad. This step levels out the paint surface and restores depth, but it must be done carefully to avoid polishing through the clear coat.
3. Sealing and Waxing: Once the surface is polished, it must be protected. Apply a high-quality paint sealant or carnauba wax. This final layer not only restores a deep, wet-look gloss but also provides a protective barrier against environmental fallout and UV damage, effectively finishing the restoration.
Preventative Measures and Alternatives to Plasti Dip
If you enjoy the look and customization offered by Plasti Dip, but worry about the removal process, consider these alternatives for future projects.
Exploring High-Quality Vinyl Wraps: The most recommended alternative for reversible customization is professional-grade vinyl wrapping. Modern vinyl films are engineered to adhere strongly enough to look durable, yet they are designed to be removed in large sheets without leaving behind permanent adhesive residue or damaging the underlying clear coat. This method offers superior protection and is far less risky than using liquid coatings.
Proper Application of Temporary Coatings: If you must use a liquid coating, always follow the manufacturer’s guidelines precisely. Ensure the surface is perfectly clean (degreased and waxed) before application. Allowing the surface to cure fully, and avoiding excessive layers, can reduce the overall adhesion difficulty in the future.
Mistakes to Avoid During Removal
Even with the best intentions, several common mistakes can lead to paint damage. Staying vigilant about these pitfalls is key to success.
- Rushing the Process: Attempting to remove the entire coating in one session is exhausting and leads to excessive force. Work slowly, allowing solvents to penetrate fully.
- Ignoring the Test Patch: Never assume a solvent or tool will be safe. Always test on an inconspicuous area first.
- Using Excessive Heat: While some heat can soften coatings, using a high-powered heat gun too close or for too long can damage the clear coat or even warp plastic trim pieces. Use low, controlled heat from a hairdryer only if necessary.
- Over-Saturating the Surface: Using too much solvent or too many cleaning chemicals can strip away protective waxes or oils from the underlying paint, making it more susceptible to future damage.
Safety and Practical Notes
Safety protocols must be treated with the utmost seriousness. The solvents used are chemicals, not simply household cleaners.
- Ventilation is Key: Always work in a well-ventilated area. If fumes are strong, consider using a respirator rated for organic vapors.
- PPE Checklist: Always wear chemical-resistant gloves and safety goggles.
- Pro Guidance: If the paint underneath is severely damaged, or if the Plasti Dip has been applied over multiple, different types of coatings, it is highly recommended that you consult a professional auto body technician. They have specialized equipment and knowledge to assess the structural integrity of the paint.
Frequently Asked Questions
What is the safest solvent to use when removing Plasti Dip?
Always start with the least aggressive option first. Isopropyl Alcohol (IPA) is generally the mildest starting point for general softening. If IPA fails, move to a dedicated automotive adhesive remover, but proceed with extreme caution. Never use a solvent unless you have tested it on a small, inconspicuous spot first. Acetone should be considered a last resort only because its high strength can aggressively strip clear coats and underlying paint finishes.
Get the Fail-Safe Paint Color Playbook (Free PDF)
36 proven colors • 8 ready palettes • trim & sheen guide • printable testing cards.
What should I do if the paint underneath the Plasti Dip is already faded or damaged?
Be aware that the removal process will expose any existing paint flaws, including fading, chipping, or oxidation. If the underlying paint is in poor condition, the removal process will highlight these issues. If the damage is severe, the project may require professional auto body repair (such as sanding, priming, or repainting) before the area can look restored. Do not assume that a successful removal guarantees a perfect finish if the base paint is compromised.
How do I remove stubborn, sticky residue after the main coating is off?
Do not simply wash the residue off with soap and water; it needs chemical breakdown. Use a specialized adhesive remover or a graffiti remover, applying the chemical only to the residue itself, not the surrounding paint. Use clean, lint-free microfiber cloths to gently lift the softened residue. Repeat the process until the surface feels clean and not sticky to the touch.
Is professional polishing and waxing necessary after removal?
Yes, it is highly recommended. The scraping and chemical process inevitably causes microscopic scratches and hazing on the underlying paint. A light polish (using a fine cutting compound and machine polisher) is crucial to level out the surface and remove these micro-abrasions. Following the polish with a quality paint sealant or carnauba wax restores the deep gloss and provides a necessary protective barrier against environmental damage.
Conclusion: Maintaining Your Painted Surface
Successfully removing Plasti Dip is a testament to patience, careful planning, and adherence to safety protocols. By approaching the project systematically—assessing, testing, gently removing, and meticulously restoring—you can achieve a beautiful, damage-free finish.
Remember that the restoration process is as important as the removal. The final washing, decontamination, and waxing steps are what bring the paint back to its original, protected glory. With the right knowledge and cautious execution, you can safely reclaim the beauty and integrity of your painted surface.