
How to Mix Paint for a Spray Gun
Achieving a professional-grade, uniform finish when painting—especially with a spray gun—is a skill that relies heavily on preparation. While the act of spraying might seem simple, the true secret to flawless results lies in the precise process of mixing the paint itself. Properly mixing paint for a spray gun ensures the perfect viscosity, consistency, and flow, guaranteeing that the paint adheres correctly and delivers a smooth, even coat.
Mixing paint is not merely pouring components together; it is a technical process that requires understanding paint chemistry, calculating accurate ratios, and diligently preparing both your equipment and your workspace. By mastering these steps, you transform a potentially messy DIY job into a sophisticated finishing process, capable of delivering results that look professionally applied.
Get the Fail-Safe Paint Color Playbook (Free PDF)
36 proven colors • 8 ready palettes • trim & sheen guide • printable testing cards.
Best choice: The best choice depends on the surface, durability needs, finish, application method, safety requirements, maintenance, and budget. Avoid choosing by price alone; match the product to the job and check the manufacturer directions before buying.
Planning and Preparation Before Mixing
Before you even open the paint can, proper planning is essential. Assessing your project scope, the type of paint, and the environment will prevent costly mistakes and wasted materials. Consider the surface you are painting—is it bare metal, weathered wood, or clean drywall? Different substrates require different primers and paint formulations.
Timing is also critical. Allow adequate time for all preparatory steps, including sanding, cleaning, and priming. A successful paint application is 80% preparation and 20% application. Furthermore, understand your desired sheen (gloss, satin, matte), as this choice dictates the final look and how the paint interacts with light, which must be factored into your mix plan.
Materials and Tools for Spray Application
Gathering the right supplies ensures the mixing process is efficient and accurate. Do not skip the quality control items, as they are vital for a successful spray job.
- Paint: The main product. Ensure it is formulated for spray application if possible.
- Reducer/Thinner: The chemical agent used to adjust viscosity. The type (water-based, solvent-based, etc.) must match the paint type.
- Primer: Necessary for sealing bare surfaces, promoting adhesion, and ensuring uniform color absorption.
- Cleaning Solvents: Appropriate solvents (e.g., mineral spirits for oil-based, water for latex) for cleaning the spray gun.
Required Tools
- Measuring Cups/Rulers: For precise measurement of paint and reducer.
- Mixing Container: A non-reactive, clean bucket large enough to allow ample mixing space.
- Stirring Stick/Paddle: For thoroughly agitating the mixture.
- Paint Strainer/Filter: Disposable or reusable mesh filters to remove debris and clumps.
- Personal Protective Equipment (PPE): Respirator mask, chemical-resistant gloves, and safety goggles.
How to Prepare and Mix the Paint for Optimal Spray Performance
The actual mixing process is systematic, moving from understanding the components to blending, and finally, refining the viscosity.
Paint is a complex colloidal system, meaning it consists of solid pigments suspended in a liquid binder. The liquid binder (the vehicle) is what determines the paint’s flow and application properties. When painting with a spray gun, the paint must have a specific viscosity—it must be thin enough to atomize properly through the nozzle, but thick enough to hold its shape and adhere to the surface without dripping immediately.
If the paint is too thick, the spray gun will clog, or the paint will be deposited unevenly. If the paint is too thin, it will run off the surface, leading to poor adhesion and a washed-out appearance.
Calculating the Correct Mixing Ratio
The most critical rule is to always prioritize the manufacturer’s recommendations. Never guess a ratio. The manufacturer provides specific guidelines, usually in the form of a ratio (e.g., 3:1 paint to thinner) or a percentage. This ratio accounts for the specific pigment load and binder type of that particular product.
When mixing, measure the primary paint component first. Then, measure the required reducer or thinner. Combining these components ensures the paint achieves the ideal flow rate for your specific spray gun setup.
- Initial Pour: Pour the required amount of paint into the clean mixing container.
- Add Reducer: Slowly and gradually pour the specified amount of reducer or thinner into the paint.
- Stir Thoroughly: Using a dedicated stirring stick, mix the paint and reducer slowly and consistently. Stirring must be done in a circular motion, scraping the sides and bottom of the container to incorporate every part of the mixture. Do not shake the container, as this can introduce air bubbles.
Fine-Tuning the Consistency
After the initial mix, you must evaluate the consistency. Dip a clean mixing stick into the paint and observe how it flows. The paint should drip off the stick slowly and steadily, not immediately, and not like thick sludge. If the paint is too thick, add a small amount of reducer. If it appears too thin or watery, add a small amount of the original paint.
These adjustments must be made incrementally. Add a little, stir, and re-evaluate. Repeat this process until the viscosity feels perfect for the application.
Safety and Practical Notes
Work in a well-ventilated space and wear gloves, eye protection, and a respirator when needed. Keep children and pets away from wet surfaces and open containers.
Follow manufacturer drying times between coats. Dispose of rags and leftover materials according to local regulations. If the project involves heights, lead paint, or structural work, consider hiring a licensed professional.
Straining and Testing the Final Mixture
Once the paint reaches the desired consistency, the final two steps—straining and testing—are non-negotiable for professional results.
The Importance of Straining
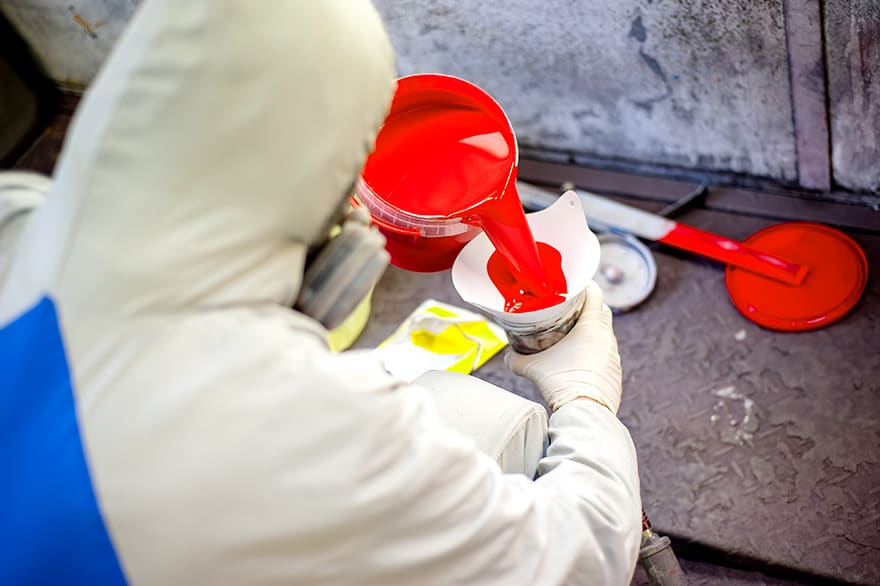
Straining the paint removes any solid impurities, clumps of pigment, or foreign debris that may have entered the container. These tiny particles can cause immediate blockages or uneven spray patterns, ruining the application. Use a high-quality mesh filter designed for the paint type and ensure it is properly seated on the spray gun cup.
Conducting the Test Spray
Never assume the mixture is perfect. Always conduct a test spray on a discarded piece of material that matches your final surface. Set up your spray gun and adjust the air pressure and fluid cap settings as per the manufacturer’s guide. Apply the paint in several passes, varying your distance and speed, mimicking the actual job. Observe the pattern: Is it consistent? Is the coverage uniform? Does it appear streak-free? If the test reveals issues, repeat the mixing and adjustment process.
Design Considerations: Sheen, Undertones, and Finish
While mixing is technical, the final look is artistic. The paint’s sheen and underlying undertones must be considered during the mixing stage, as this affects the required reducer.
- Sheen (Finish): The sheen (matte, satin, semi-gloss, high-gloss) determines how much light reflects off the surface. High-gloss finishes are extremely durable and easy to clean but are prone to showing imperfections. Matte finishes hide flaws but are less durable. If your paint is designed for a specific sheen, use reducers that maintain that sheen.
- Undertones: Be aware that certain paints, particularly those mixed heavily, can shift their undertones. Always test the color on the actual surface material, as paint colors can look drastically different under fluorescent lights versus natural sunlight.
- Environmental Impact: For interior spaces, water-based paints are often preferred due to lower odor and quicker cleanup. For exterior or highly durable surfaces (like metal gates), solvent-based paints often provide superior resistance to weather and abrasion, requiring different reducers.
Common Mistakes to Avoid During Mixing and Application
Even experienced DIYers can fall into common traps. Being aware of these pitfalls can save hours of frustration and costly paint waste.
- Skipping the Manufacturer’s Specs: Using the wrong reducer (e.g., using a thinner designed for oil paint on latex paint) will cause the paint to fail, clump, or dry improperly.
- Improper Mixing: Stirring too vigorously or shaking the container can introduce too much air, causing the paint to lose its suspension stability and settle unevenly.
- Insufficient Ventilation: Ignoring proper ventilation when using solvent-based paints can lead to respiratory issues and poor paint curing. Always work in a well-ventilated area.
- Over-Thinning: Adding too much reducer can cause the paint to lose its body and adhesion, making the final finish look patchy or unstable.
Safety, Handling, and Environmental Notes
Safety is paramount in any spray painting endeavor. Never compromise on proper gear or procedure.
Ventilation and PPE: Always wear appropriate Personal Protective Equipment (PPE), including chemical-resistant gloves, safety goggles, and a respirator rated for the specific solvents being used. Ensure the workspace has excellent ventilation to dissipate fumes.
Manufacturer Guidelines: Always read and follow the manufacturer’s safety data sheets (SDS) and application guidelines. These documents contain critical information regarding proper curing times, required ventilation, and handling risks.
Disposal: Never pour leftover paint or solvents down household drains. Check with your local waste management facility for designated paint recycling or disposal centers to ensure environmental compliance.
Get the Fail-Safe Paint Color Playbook (Free PDF)
36 proven colors • 8 ready palettes • trim & sheen guide • printable testing cards.
By approaching the task of mixing paint with methodical planning, precise measurements, and thorough testing, you move beyond simple painting and into true surface finishing. Remember that the quality of the mix directly dictates the quality of the finish. Take your time, respect the chemistry of the materials, and prioritize safety, and you will achieve professional-grade results every time.
Frequently Asked Questions
How can I tell if the paint has the correct viscosity for spraying?
The best way to check is through the “drip test.” Dip a clean mixing stick into the paint and let it drip back into the container. The paint should drip off the stick slowly and steadily, forming a smooth, consistent stream, but it should not immediately run off like water, nor should it drip in thick globs like sludge. If it is too thick, add a small amount of reducer. If it is too thin, add a small amount of original paint. Always adjust incrementally.
What happens if I use the wrong reducer or thinner?
Using the wrong thinner is a critical mistake. Paint chemistry is specific; a reducer designed for latex paint will not work on oil-based enamel, and vice versa. Using an incompatible thinner can cause the paint to fail, clump, dry improperly, or lose its ability to adhere to the surface. Always match the reducer type (water-based or solvent-based) to the manufacturer’s specifications for the paint you are using.
Do I really need to strain the paint before spraying?
Yes, straining is highly recommended for professional results. The mesh strainer removes solid impurities, clumps of pigment, and foreign debris that might have gotten into the paint. These small, unseen particles can cause immediate clogging of the spray gun nozzle or result in uneven, patchy spray patterns. Use a high-quality mesh filter designed for the paint type.
What are the most critical safety precautions I must follow?
Safety is paramount. Always wear appropriate Personal Protective Equipment (PPE), including a respirator mask rated for the specific solvents being used, chemical-resistant gloves, and safety goggles. Furthermore, ensure your workspace is exceptionally well-ventilated to dissipate fumes. Never work in an enclosed space, and always consult the Safety Data Sheet (SDS) provided by the paint manufacturer for detailed handling instructions.