
How to Paint Aluminum Garage Door: A Step-by-Step Guide for DIY Success
Is your aluminum garage door showing signs of age, corrosion, or simply lacking the curb appeal it once possessed? Painting your aluminum garage door is one of the most impactful and cost-effective ways to rejuvenate your home’s exterior. It’s a project that requires meticulous preparation, but the resulting transformation can make your entire home feel brand new.
While the aluminum material itself is inherently durable, weathering, exposure to harsh chemicals, and time can dull its finish, leading to discoloration or paint failure. By treating this project with the care of a professional, following a detailed process from initial cleaning to final coat, you can ensure the paint job is not only beautiful but also durable enough to withstand years of weather and daily use.
Get the Fail-Safe Paint Color Playbook (Free PDF)
36 proven colors • 8 ready palettes • trim & sheen guide • printable testing cards.
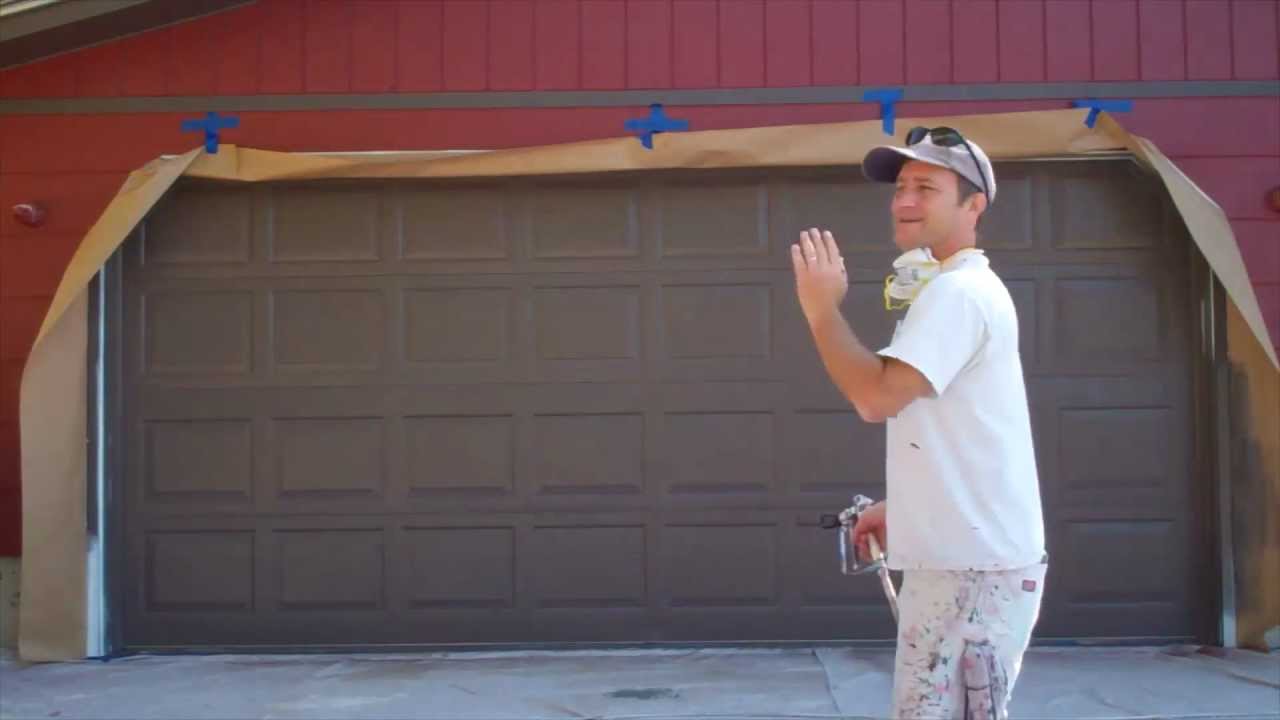
Quick answer: To Paint Aluminum Garage Door, start with the safest first step for the material involved, test a small area when needed, and follow the process in thin, controlled stages. Use proper ventilation and protective gear when chemicals, sanding, spraying, or solvents are involved.
Phase 1: Planning and Preparation Before You Start
Before a single can of paint is opened, careful planning is mandatory. The quality of your final paint job depends almost entirely on the preparation phase. This initial groundwork determines the paint’s adhesion and longevity. Assess your project scope by checking the door for any major structural damage, calculating the square footage, and gathering all necessary materials.
Assessing the Surface and Scope
Inspect the aluminum door thoroughly. Identify areas of heavy corrosion, deep scratches, or flaking paint. These spots will require targeted patching and sanding. Determine if the door’s hardware (handles, hinges) needs to be painted as well, as this requires careful masking and specific cleaning.
Timeline and Environment: Plan to work on a day with moderate temperatures and low humidity. Check the paint manufacturer’s guidelines for optimal application weather. Always ensure the working area is outdoors or in a highly ventilated garage space, away from direct sunlight or heavy rainfall.
The Step-by-Step Guide to Painting Your Aluminum Garage Door
This process is divided into three critical stages: Cleaning, Priming, and Painting. Skipping or rushing any of these steps drastically increases the risk of paint failure.
Step 1: Deep Cleaning and Degreasing
The first goal is to remove everything that is not the bare aluminum—dirt, grease, oil residue, and grime. Simply washing the door with soap and water is not enough.
- Initial Debris Removal: Use a stiff-bristled brush or scraper to remove loose debris, cobwebs, and any heavy buildup.
- Degreasing: Apply a specialized metal degreaser (ensure it is safe for aluminum) and scrub the entire surface, paying close attention to joints and seams. Let the degreaser sit for the time recommended by the manufacturer to loosen oils.
- Washing and Rinsing: Wash the door thoroughly with clean water and a mild detergent solution. Rinse the entire door surface repeatedly until all chemical residue and soap scum are completely washed away.
Step 2: Sanding, Scraping, and Repairing
Sanding is not just for smoothing; it creates a micro-profile (tooth) on the surface that allows the primer to chemically grip the metal. This is the most critical physical step.
- Removing Old Paint: Use a scraper or wire brush to remove all loose, peeling, or flaking paint.
- Sanding Sequence: Start with a medium-grit sandpaper (around 120 grit) to smooth out major imperfections and dull the surface. Next, switch to a finer grit (180 to 220 grit) to prepare the surface for primer.
- Patching and Filling: Use an appropriate metal filler or putty to fill deep scratches or dents. Apply the filler, allow it to dry completely, and then sand the patched area until it is perfectly flush with the surrounding aluminum.
- Final Wipe Down: After sanding and patching, use a vacuum cleaner or a tack cloth to remove all sanding dust and debris. The surface must be bone dry and dust-free before proceeding.
Step 3: Applying the Specialized Primer
Do NOT skip this step. Aluminum requires a specialized primer—an etching primer or a metal bonding primer—because it chemically bonds with the raw metal, preventing the paint from peeling off the surface over time. This primer is different from standard latex primer.
- Preparation: Ensure the primer is mixed or thinned exactly as per the manufacturer’s instructions.
- Application: Apply a thin, uniform coat of etching primer over the entire door surface. Use a brush or roller, ensuring you cover all corners, seams, and patched areas.
- Drying Time: Allow the primer to dry completely. Check the can for the required drying time; this can take several hours.
Step 4: Painting the Door
Once the primer is fully cured, you are ready for the paint. Remember to mask off all surrounding hardware, trim, and window sections with painter’s tape and plastic sheeting.
- First Coat: Apply the first coat of exterior paint. Use a roller for large, flat areas and a high-quality brush for detailing. Maintain thin, even coats rather than thick, heavy applications.
- Drying Interval: Allow the first coat to dry completely. The paint must be dry to the touch, but follow the manufacturer’s recommended time for recoating.
- Second and Third Coats: Apply the subsequent coats, following the same procedure. Multiple thin coats are always superior to one thick coat, as they provide maximum adhesion and color depth.
Selecting the Right Materials and Paint Colors
Choosing the right product involves matching the paint type to the climate and the door’s function. The right paint also dictates the overall aesthetic of your home.
Paint Type Comparison: Acrylic vs. Latex vs. Oil
For aluminum, the most suitable options are high-quality exterior acrylic or exterior latex paints. While oil-based paints offer toughness, they can sometimes yellow over time and require strong solvents for cleanup, making them less ideal for general DIY use. Acrylic and advanced latex paints are formulated for extreme weather and UV resistance, offering durability and excellent adhesion to metal after proper priming.
Key Selection Criteria:
- Durability: Look for paints labeled “exterior grade,” “weather-resistant,” or “metal finish.”
- Sheen (Finish): A satin or semi-gloss finish is generally recommended for garage doors. These higher sheens are more durable, easier to clean, and better able to withstand minor abrasions than a flat or matte finish.
- Adhesion: Always prioritize paint that specifies compatibility with metal surfaces (aluminum).
Color and Architectural Pairing Tips
The color of your garage door should complement, but not clash with, the primary materials of your home—such as siding, roofing, and trim. Consider the natural light exposure of the door. Colors will appear drastically different in bright midday sun versus soft evening light.
Design Considerations:
- Contrast: If your home has light trim and dark siding, a mid-tone color (like deep gray or forest green) on the door can provide a sophisticated contrast.
- Harmony: To achieve a seamless, harmonious look, choose a color that pulls from the natural undertones of your home’s brick or stone accents.
- Testing: Always purchase small sample pots and paint test swatches directly onto the door or a similar surface. Observe these samples at different times of day (morning, noon, and dusk) before committing to a large purchase.
Avoiding Common Painting Mistakes and Pitfalls
Many paint failures are not caused by poor paint quality, but by skipping crucial preparatory steps. Awareness of these common mistakes can save you time, money, and frustration.
- Mistake: Skipping Degreasing. If grease or oil remains on the surface, the paint will not adhere properly and will peel off rapidly, regardless of how good the primer is.
- Mistake: Applying Paint Directly to Bare Aluminum. Aluminum is non-porous and requires an etching primer. Painting directly will result in poor adhesion and peeling.
- Mistake: Rushing the Drying Time. Applying a second coat before the first coat is fully cured leads to paint mixing, poor adhesion, and blotchy, uneven results. Always adhere to the “recoat window” specified by the manufacturer.
- Mistake: Using the Wrong Tools. Using a roller that is too coarse or a brush that is too stiff can leave noticeable marks or streaks. Use high-quality, appropriate tools for the paint type.
Safety, Curing, and Maintenance Protocols
Safety is paramount during this project due to the chemicals involved in solvents, degreasers, and primers. Never compromise on safety gear.
Personal Protective Equipment (PPE): Always wear chemical-resistant gloves, safety glasses, and, crucially, a NIOSH-approved respirator when sanding or handling solvents and primers. These chemicals can be highly irritating or toxic if inhaled.
Ventilation: Work in a well-ventilated area. Open multiple windows and use fans to circulate air, minimizing the buildup of fumes. Never paint in an enclosed, unventilated space.
Curing vs. Drying: Understand the difference: Drying time means the surface is dry to the touch. Curing time is when the paint reaches its full, hardened strength. You can touch the door after it dries, but you must wait for it to cure before fully operating it or applying physical stress to it.
Professional Assistance: If the door is heavily damaged, or if you are unsure about handling industrial solvents or specialized primers, it is always best to call a professional painter. They have the specialized equipment and chemical knowledge to guarantee a lasting result.
Mistakes to Avoid
Do not skip assessment just because the project looks simple. Most paint, cleaning, repair, and tool-care problems come from poor prep, incompatible products, rushed drying time, or using a method that does not match the material.
Avoid working without ventilation, gloves, eye protection, or a cleanup plan when coatings, solvents, sanding dust, or business/studio supplies are involved. Test first, read manufacturer directions, and pause if the surface, tool, or client setting creates safety questions you cannot answer confidently.
Safety and Practical Notes
Work in a well-ventilated space and wear gloves, eye protection, and a respirator when needed. Keep children and pets away from wet surfaces and open containers.
Follow manufacturer drying times between coats. Dispose of rags and leftover materials according to local regulations. If the project involves heights, lead paint, or structural work, consider hiring a licensed professional.
Frequently Asked Questions
Do I absolutely need a specialized primer?
Yes, it is mandatory. Aluminum is a non-porous metal, and standard household primers or paints will not adhere correctly, leading to peeling and paint failure. You must use an etching primer or a metal bonding primer specifically designed for aluminum to create a chemical bond between the paint and the metal surface. Skipping this step is the most common cause of DIY paint failure.
Get the Fail-Safe Paint Color Playbook (Free PDF)
36 proven colors • 8 ready palettes • trim & sheen guide • printable testing cards.
What paint finish (sheen) is best for aluminum garage doors?
For maximum durability, cleaning ease, and resistance to minor abrasions, a satin or semi-gloss finish is generally recommended. While a matte finish might look aesthetically pleasing, it is more susceptible to visible dirt buildup and wear. Always choose an exterior-grade, weather-resistant paint formulated for metal substrates.
Can I just wash the door with soap and water before painting?
No. Soap and water are only adequate for superficial cleaning. For proper paint adhesion, you must deep clean and degrease the door. Grease, oil residue, and grime (which are invisible) prevent the paint from bonding properly. Use a specialized metal degreaser and ensure you thoroughly rinse all chemical residues afterward.
How long do I have to wait between coats, and between priming and painting?
You must adhere strictly to the drying and curing times specified on the paint manufacturer’s can. Do not rush this process. The paint must be dry to the touch, but the recoat window (the time limit for applying the next coat) is critical. Always allow the primer to fully cure before applying the first coat of topcoat paint.
When should I consider hiring a professional painter?
It is highly recommended to call a professional if the door has extensive structural damage, deep rust, or if you are unfamiliar with handling industrial solvents, etching primers, or safety protocols. Professionals have specialized equipment, knowledge of advanced corrosion repair, and the proper PPE to ensure a lasting, durable result.
Conclusion
Painting your aluminum garage door is a deeply rewarding DIY project that dramatically boosts your home’s curb appeal. By committing to meticulous preparation, using the correct etching primer, and applying paint in thin, successive coats, you are not just changing the color; you are providing a protective, durable layer that will last for years. Take pride in the process, take your time, and enjoy the stunning, rejuvenated look of your newly painted door.