
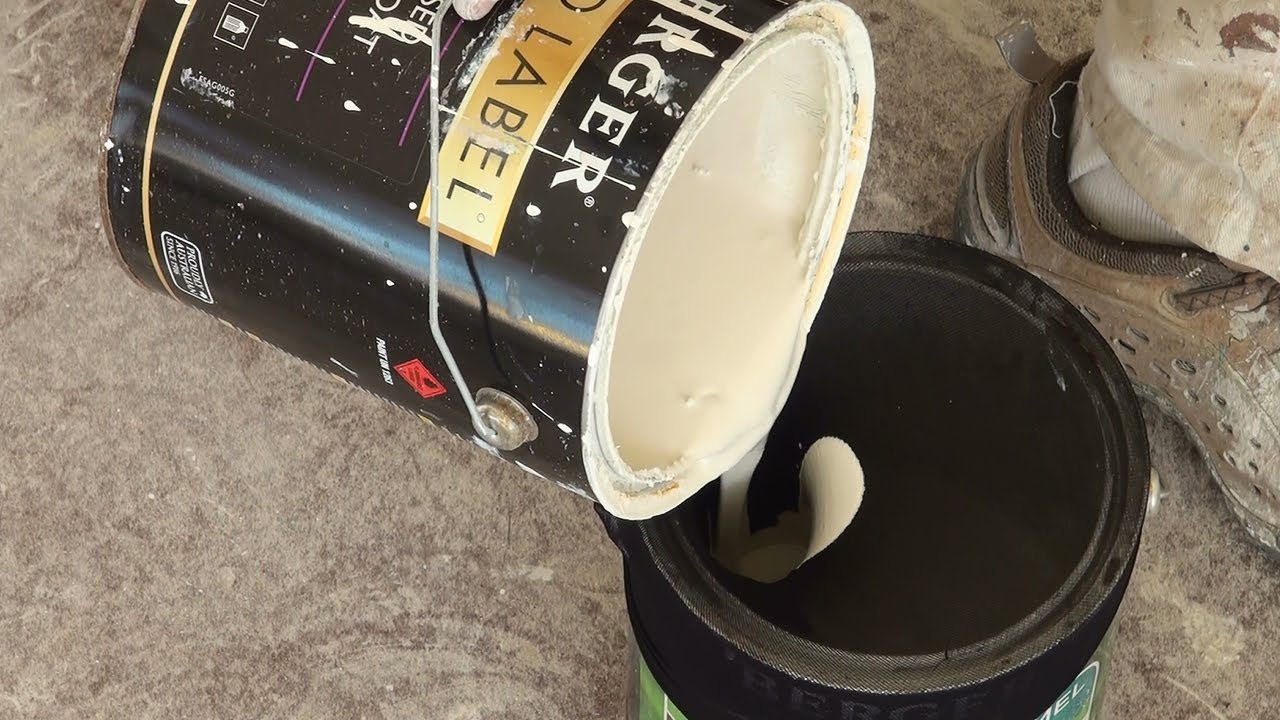
How To Strain Paint Without A Strainer
Painting a room is one of the most rewarding ways to revitalize a space, transforming old fixtures and dull walls into a vibrant canvas of color. While the selection of the perfect shade and the careful application of the paint are crucial steps, many DIY enthusiasts overlook a critical preparatory phase: straining the paint. If the paint is not properly filtered, even the most beautiful color selection can be ruined by streaks, clumps, or visible debris, resulting in a disappointing and uneven finish.
Traditionally, professional paint strainers are designed to catch these impurities, ensuring that only the smoothest, most consistent liquid reaches your roller or brush. However, when a specialized strainer isn’t available, it can feel like a roadblock to a perfect project. Fortunately, achieving a professional-grade, filtered paint is entirely possible by utilizing common, everyday household items as effective, makeshift substitutes. This guide provides a comprehensive, step-by-step approach to filtering your paint safely and efficiently.
Get the Fail-Safe Paint Color Playbook (Free PDF)
36 proven colors • 8 ready palettes • trim & sheen guide • printable testing cards.
Quick answer: You can strain paint without a dedicated strainer by using clean pantyhose, cheesecloth, a fine mesh screen, or coffee filters stretched over a clean container. Pour slowly, avoid linty materials, and discard dried chunks or debris so they do not ruin the finish or clog the brush, roller, or sprayer.
Planning for a Perfect Strain: Prep and Assessment
Before you even think about the filtering process, proper preparation is key. Straining is not just about catching debris; it’s also about ensuring the paint itself is optimally mixed and ready to be filtered. Taking a few minutes to plan and assess your paint and workspace will dramatically improve the outcome.
First, assess the paint itself. Has the paint been sitting in the can for a long time? If so, it may have settled, meaning the contaminants (dust, grit, or pigments) are heavier at the bottom. Before filtering, you must thoroughly mix the paint. Use a clean, dedicated stick and mix the paint slowly and completely—do not whip it vigorously, as this can introduce too many air bubbles that are difficult to remove. The goal is a uniform suspension.
Next, prepare your workspace. Set up a dedicated filtering station on a stable, clean surface, preferably away from potential drips or foot traffic. Have all your substitute materials, funnels, and collection containers laid out. Having everything ready minimizes disruption and keeps the process organized. Finally, remember that the degree of contamination determines the necessary filter. If the paint looks clean, a simple cheesecloth might suffice; if it looks gritty or clumpy, you need the finest mesh available.
Planning Before You Start
Measure the space and estimate how much paint or material you will need. Check the surface condition for cracks, peeling, or moisture issues that could affect adhesion.
Decide whether you need primer, specialty coatings, or extra prep steps. Review the weather forecast if working outside, and schedule the project when conditions support proper drying and curing.
Step-by-Step Guide to Filtering Paint with Household Substitutes
The effectiveness of a substitute material depends entirely on its pore size, material density, and how well it is secured. Here is a detailed guide for using the three most common household filters.
Using Pantyhose (The Durable Mesh Option)
Pantyhose are often the best substitute because they offer a fine, durable, and relatively consistent mesh structure, making them ideal for catching general debris.
- Preparation: Select a pair of nylon pantyhose that are clean and not stretched out.
- Setup: Stretch the pantyhose material over the mouth of a funnel or a clean, wide-mouthed container. Secure the gathering point (the waistband area) with a rubber band or string to create a tight, leak-proof seal.
- Filtering: Slowly and steadily pour the thoroughly mixed paint into the funnel. Allow gravity to do the work. Do not pour too quickly, as this can overwhelm the mesh and cause excess splashing.
- Monitoring: Watch the material closely. If the paint starts backing up or dripping excessively, pause and gently agitate the paint in the source container to ensure the debris is still suspended and not stuck to the sides.
Utilizing Cheesecloth (The Versatile Fabric Option)
Cheesecloth is a natural, breathable fabric that is excellent for filtering fine particulate matter and is readily available at most grocery or hardware stores. It is highly washable and reusable.
- Preparation: Cut several square pieces of cheesecloth, ensuring they are large enough to accommodate your funnel setup. Layering is key; use at least two to three layers to build filtration depth.
- Setup: Drape the folded cheesecloth over the funnel, securing it with a rubber band at the neck. The multiple layers create a more effective barrier than a single sheet.
- Filtering: Pour the paint slowly. Since cheesecloth is absorbent, it may need careful handling to prevent the paint from soaking through the sides of the funnel, which would compromise the filter.
- Cleaning: Once done, the cloth can usually be rinsed and lightly soap-washed for future use, provided the paint type allows for it.
Employing Coffee Filters (The Fine Particle Trap)
Coffee filters are surprisingly effective for capturing extremely fine dust or liquid-based impurities, especially in latex paints. However, they are the most fragile option and should not be used with thick, heavily pigmented, or oil-based paints.
- Preparation: Use standard, unfolded paper coffee filters. Folding them multiple times can compromise their structure.
- Setup: Place the filter over the funnel and secure it with tape or a rubber band, ensuring the edges are completely sealed to prevent paint from bypassing the filter material.
- Filtering: Pour the paint extremely slowly. This filter is best for the final “polish” of the paint batch, rather than the initial bulk strain.
- Caution: Be mindful of the paper’s saturation point. If the paint is too thick, the filter may tear or become overwhelmed.
Materials and Tools Checklist
To execute this process smoothly, having the right supporting tools is almost as important as having the correct filter material. Focus on quality and cleanliness for all items.
- Primary Filtering Material: Nylon pantyhose (best overall), cheesecloth (best for washable fine filtering), or quality paper coffee filters (best for delicate final filtration).
- Collection Funnel: A wide, stable funnel (plastic or metal) that can hold the filter material and sit securely over the paint receptacle.
- Mixing Sticks/Stirrers: Multiple clean, dedicated mixing sticks for thoroughly mixing the paint before straining.
- Receptacle Container: A clean, designated bucket or container to collect the filtered paint.
- Sealing Materials: Rubber bands, string, or painter’s tape to secure the filter material to the funnel.
- Cleaning Supplies: Rags, water, and appropriate soap for cleaning the funnels and filters afterward.
Achieving the Perfect Finish: Design and Color Considerations
While straining paint is a technical process, its success directly impacts the final aesthetic outcome—the very essence of good home decor. The primary goal of straining is to ensure consistency, which translates directly into professional-looking color application.
When considering the finished color, remember that impurities can create visual distractions. If your paint contains visible grit or debris, the color will appear inconsistent, giving the impression that the paint itself is flawed, regardless of how beautiful the original shade is. Straining guarantees that the color you see in the can is the color that will appear on the wall, giving you the predictable, smooth color field that defines quality interior finishes.
Furthermore, the smoothness achieved by straining allows the paint to perform optimally with the intended sheen. Whether you are aiming for a flat, matte finish that absorbs light and minimizes texture, or a semi-gloss finish that emphasizes clean lines and durability, the underlying consistency provided by the filtration process is what makes the color appear rich and uniform.
Common Mistakes to Avoid During Filtration
Even with substitutes, it is possible to make mistakes that compromise the quality of the filtered paint. Recognizing these pitfalls can save you time, effort, and paint.
- Insufficient Mixing: The single biggest mistake is failing to mix the paint thoroughly before straining. If the paint has settled, the contaminants are not uniformly suspended, and the strain will only filter the debris from the bottom layer, leaving grit in the bulk of the paint.
- Improper Sealing: Never trust a filter setup that is merely resting on the funnel. The filter must be tightly secured with rubber bands or tape at all seams to ensure the paint passes only through the filter material and not around it.
- Over-Filtering: Do not strain the paint multiple times through different materials (e.g., first through pantyhose, then through coffee filters). Each pass risks removing beneficial components or overly diluting the paint, altering the intended color or viscosity.
- Ignoring Paint Type: Using a fine, delicate filter (like a coffee filter) for heavy, thick, or highly pigmented paint is a recipe for failure. The filter material may tear or clog immediately. Always match the filter density to the paint’s viscosity and density.
Safety and Practical Handling Notes
Safety is paramount, both when handling the paint and when disposing of the waste materials. Always treat paint handling with the seriousness it deserves.
Ventilation and PPE: Always work in a well-ventilated area when handling paint, even when just straining it. Wear protective gear, including disposable gloves and eye protection, to prevent skin contact and inhalation of paint fumes. Consult the paint manufacturer’s Safety Data Sheet (SDS) for specific handling requirements.
Paint Waste Disposal: Never pour filtered paint waste down the drain or into regular trash. Paint waste must be disposed of according to local municipal guidelines. Many communities require paint to be taken to a designated Household Hazardous Waste (HHW) collection site. If the paint is mostly water-based and non-toxic, allowing it to dry out completely in a shallow container until it solidifies is often the preferred method for disposal.
When to Call a Professional: While straining is a DIY task, if you are dealing with historical paint, suspected lead-based paint, or significant mold remediation, do not attempt the preparation or disposal without consulting local experts or calling a licensed professional.
Safety and Practical Notes
Work in a well-ventilated space and wear gloves, eye protection, and a respirator when needed. Keep children and pets away from wet surfaces and open containers.
Follow manufacturer drying times between coats. Dispose of rags and leftover materials according to local regulations. If the project involves heights, lead paint, or structural work, consider hiring a licensed professional.
Frequently Asked Questions
What is the most critical step before I begin straining the paint?
The most critical step is thoroughly mixing the paint. If the paint has settled (which happens when it sits for a long time), the contaminants—dust, grit, or pigments—will be heavier at the bottom. You must mix the paint slowly and completely using a clean stick until the suspension is uniform. Failure to do this means the strainer will only catch debris from the bottom layer, leaving grit in the bulk of the paint.
Which household item is the best substitute for a professional paint strainer?
For general, durable use, pantyhose are often recommended because they offer a fine, consistent, and durable mesh structure. However, cheesecloth is highly versatile, excellent for washable filtering, and can be layered to build effective filtration depth. The choice depends on the paint and the available materials, but always ensure the substitute is secured tightly over the funnel to prevent bypass.
Get the Fail-Safe Paint Color Playbook (Free PDF)
36 proven colors • 8 ready palettes • trim & sheen guide • printable testing cards.
How should I safely dispose of the paint waste after I finish straining?
Never pour paint waste down the drain or into regular trash. Disposal must follow local municipal guidelines. If the paint is water-based and non-toxic, the safest method is usually to allow it to dry out completely in a shallow, designated container until it solidifies. For questionable or heavily pigmented waste, always check with your local government for designated Household Hazardous Waste (HHW) collection sites.
Is it safe to strain the paint more than once?
It is generally advised not to over-filter or strain the paint multiple times using different materials. Each pass risks removing beneficial components or overly diluting the paint, which can alter the intended viscosity or color. The goal of straining is to achieve the initial polish. If the paint still seems questionable after one successful strain, it is better to use a commercial strainer or call a professional rather than risking degradation of the formula.
When should I stop DIY straining and call a professional?
You should immediately stop and call a professional if you suspect the paint is historical, if you suspect it may contain lead-based pigments, or if you are dealing with significant mold remediation. These tasks require specialized knowledge, equipment, and adherence to strict safety protocols (including specific ventilation and Personal Protective Equipment or PPE) that go beyond basic DIY handling.
Conclusion
Straining paint is a simple yet profoundly important step that elevates a DIY project from merely “painted” to truly professional. By understanding the science of filtration and utilizing common substitutes like pantyhose and cheesecloth, you can achieve a perfectly smooth, consistent finish without needing specialized tools.
Remember that preparation is the most critical ingredient. Take your time, mix the paint thoroughly, secure your filter properly, and work slowly. By following these detailed steps, you gain the confidence and the knowledge to tackle any paint job, knowing that even without a professional strainer, your final result will be flawless.