
How to Paint Over Non Paintable Caulk
In the world of home renovation and detailed trim work, caulking is an indispensable component. It is the architectural adhesive that seals gaps between dissimilar materials—such as wood and stone, or drywall and tile—preventing the infiltration of moisture, drafts, and pests. However, a common challenge arises when the sealant used is not designed to be painted. This creates a dilemma: how do you achieve a seamless, professional, and durable painted finish over a caulk joint that is chemically incompatible with standard wall paint?
While it may seem daunting, tackling this project requires careful planning, specialized materials, and a methodical approach. This comprehensive guide will walk you through the entire process, from understanding the chemistry of non-paintable sealants to applying the final, durable coat of paint, ensuring your home’s aesthetic integrity is restored without compromising the joint’s essential function.
Get the Fail-Safe Paint Color Playbook (Free PDF)
36 proven colors • 8 ready palettes • trim & sheen guide • printable testing cards.
Quick guide: For most projects, the better choice depends on the surface, durability needs, finish, cleanup, drying time, and indoor or outdoor exposure. Compare the options by use case rather than assuming one is always better.
Understanding Caulk Compatibility and Failure Points
Before picking up a single tool, it is absolutely critical to understand the chemical nature of the caulk you are dealing with. Caulk is not a single product; it is a category of sealants, each designed for different materials and environmental stresses. When paint fails, it is almost always due to a chemical mismatch, not just poor application.
Non-paintable caulk typically includes high-grade silicones and certain polyurethanes. Silicone caulk, for example, is renowned for its flexibility and superior resistance to water and temperature extremes, making it ideal for bathrooms and kitchens. However, silicones are inherently non-porous and chemically inert, meaning they do not absorb paint, and paint cannot chemically bond to them. Attempting to paint directly onto cured silicone will result in flaking, blistering, and peeling within days or weeks, regardless of the paint used.
Similarly, some butyl sealants, designed for extreme joint movement, resist paint adhesion. The key takeaway is this: if the manufacturer does not explicitly label the caulk as “paintable,” assume it is not, and plan for removal and replacement.
Planning and Preparation: Assessing the Scope
Successful caulk painting is 80% preparation and 20% painting. Skipping or rushing these initial steps is the primary cause of failure. Proper planning involves assessing the joint’s health, the surrounding substrate, and the desired aesthetic outcome.
Environmental Assessment: Consider the location of the caulk. Is it in a high-humidity area (bathroom, laundry room)? Is it exposed to extreme temperature changes (exterior joints)? These factors dictate the type of caulk and primer needed. For exterior joints, the caulk must handle UV exposure and thermal expansion, requiring specialized exterior-grade materials. For interior joints, standard latex materials are usually sufficient, provided the underlying substrates (drywall, wood) are stable.
The Removal Process: If the existing caulk is failing, cracked, or peeling, it must be completely removed. Simply scraping the surface is insufficient; the old caulk must be cut out cleanly to expose bare, solid substrates (wood, drywall, etc.). This ensures that the new, paintable caulk has a clean, receptive surface to bond with.
Timing and Drying: Allow adequate time for the substrates to dry completely. If you are working in a humid bathroom, ensure the surrounding materials have reached equilibrium moisture content before proceeding. Moisture trapped beneath the new caulk or primer will cause the paint to fail prematurely.
Materials and Tools for Restoration
Having the right arsenal is crucial for efficiency and a professional finish. Do not substitute a specialized tool for a general-purpose one, as this can compromise the seal or the finish.
- Safety Gear: Always wear safety goggles, gloves, and a dust mask (especially when sanding or removing old caulk).
- Removal Tools: A sharp utility knife or specialized caulk removal tool. Do not use a metal scraper aggressively, as this can damage delicate substrates like trim wood.
- Cleaning Supplies: Mild detergent and a damp cloth, or a specialized surface cleaner recommended by the caulk manufacturer.
- New Caulk: Use a high-quality, paintable, acrylic latex caulk specifically rated for the joint type (e.g., interior trim, exterior foundation).
- Application Tools: A caulk gun, a smooth caulk tool (or a specialized joint filler tool), and a clean, damp sponge or finger (for smoothing).
- Preparation Tools: Fine-grit sandpaper (120-180 grit) or a sanding block, and a vacuum cleaner to remove all dust.
- Sealing Agents: A specialized bonding primer/sealer compatible with latex paint and the substrate.
- Paint: An acrylic latex paint formulated for trim or interior/exterior use, matching the surrounding paint color as closely as possible.
The Step-by-Step Guide to Seamless Painting
This process must be followed sequentially. Skipping steps—especially cleaning or priming—guarantees failure.
Step 1: Complete Removal and Cleaning
Using the utility knife, carefully cut out all existing caulk. Work slowly, making sure to score the old caulk fully off the substrate without gouging the surrounding wood or drywall. Once removed, vacuum the entire joint cavity thoroughly to remove dust, debris, and old caulk fragments. Wipe the area down with a damp cloth to remove any residual dust or oily grime. Allow the exposed substrate to dry for at least 24 hours.
Step 2: Re-Caulking the Joint
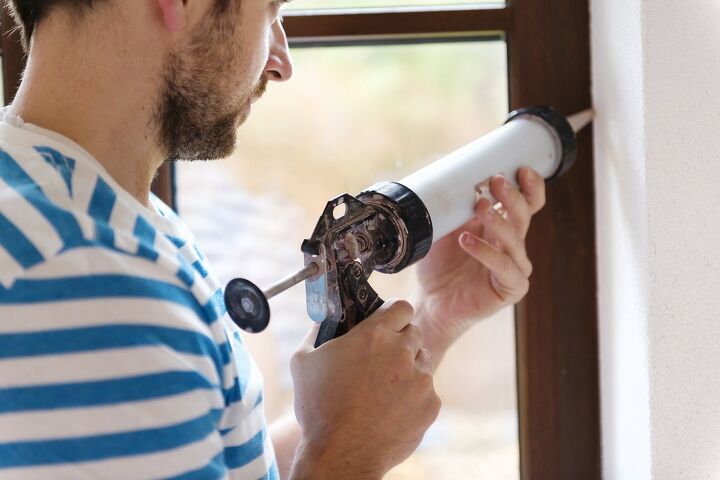
Apply the new, paintable acrylic latex caulk into the joint. Fill the gap completely, ensuring there are no air pockets. Use the caulk tool or a gloved finger to smooth the caulk, creating a clean, concave, and uniform bead. The goal is to create a smooth transition that blends perfectly with the existing trim or wall surface. Wipe away any excess caulk immediately.
Step 3: Priming the New Joint
This is the most critical step for adhesion. Do not skip the primer. Select a bonding primer or a specialized latex sealer designed for new joints. Apply the primer to the entire newly caulked joint, ensuring it extends slightly onto the surrounding substrate (e.g., onto the trim wood). Use a small brush or a trowel to apply the primer, following the manufacturer’s specific instructions regarding application time and drying time. The primer acts as a chemical bridge, allowing the paint to grip both the new caulk and the underlying materials.
Step 4: Painting the Joint
Once the primer is fully cured (check the can for exact time—this can take several hours or overnight), you can paint. Use a high-quality, fine-bristle brush designed for trim work. Apply the paint in several thin, even coats, rather than one thick coat. Start painting at one end of the joint and work methodically toward the other end. This technique helps maintain a consistent paint thickness and prevents pooling or streaking. Allow the first coat to dry completely—do not rush this process. After the first coat dries, apply the second coat, repeating the process until the desired color match and opacity are achieved. Multiple coats are essential for full coverage and durability.
Design and Color Considerations for Seamless Finishes
While the focus is technical, the final look is deeply connected to design choices. The goal is not just paintable, but *visually invisible* paintable. Consider the following factors:
- Sheen Matching: The surrounding trim and wall paint likely have a specific sheen (e.g., satin, semi-gloss). Attempting to match the sheen of the caulk joint is difficult, but using a paint with a similar sheen to the surrounding trim will provide the most cohesive look. If the surrounding trim is semi-gloss, using a semi-gloss latex paint for the joint is advisable.
- Undertones and Lighting: Test your paint color in the actual location, observing how it looks at different times of day. Natural light changes drastically affect undertones. A color that looks perfect in the morning sun might appear too warm or too cool under artificial evening lighting.
- Color Pairing: If the joint is located where it transitions between two distinct colors (e.g., white trim meeting a deep blue wall), the caulk paint should ideally match the trim color to minimize visual disruption.
Common Mistakes to Avoid
Even experienced DIYers can make mistakes. Being aware of these pitfalls can save the project and your sanity.
- Ignoring Substrate Differences: Using a single primer or caulk type for all joints (e.g., using interior caulk on exterior joints) will lead to material failure when exposed to weather. Always match the material type to the environment.
- Painting Too Soon: Applying paint before the primer and caulk have fully cured is the fastest way to failure. The paint will lift or fail to bond properly to the wet or tacky surface.
- Insufficient Cleaning: Failing to thoroughly vacuum and wipe the joint after removal leaves residual dust and oils. These microscopic particles act as release agents, preventing the primer and paint from achieving a chemical bond.
- Over-sanding: While sanding is necessary to smooth edges, sanding too aggressively or over the newly applied caulk can damage the underlying substrate, creating weak points that will fail later.
Safety and Practical Notes
Home improvement tasks carry risks. Prioritizing safety and following manufacturer guidelines are non-negotiable parts of this process.
Ventilation is Key: When using solvents, primers, or paints, always ensure proper ventilation. Open windows and use fans to circulate air. Never paint or prime in a confined, poorly ventilated space.
Protective Gear: Wear appropriate personal protective equipment (PPE), including gloves, safety goggles, and a respirator mask, especially when sanding or dealing with old, potentially hazardous materials like lead-based paint or mineral dust.
When to Call a Professional: While this guide covers DIY methods, professional help is required if the caulk is located in areas involving structural elements, or if you suspect the presence of lead paint or asbestos. For major structural or electrical concerns, always call a licensed and insured professional.
Painting over non-paintable caulk is a detailed, multi-stage project that requires patience and meticulous attention to chemical compatibility. By respecting the science of the materials, dedicating time to preparation, and following the correct sequence of re-caulking, priming, and painting, you can achieve a flawless, lasting, and professionally finished result. Remember that the longevity of your painted joint depends entirely on the quality of your preparation and the compatibility of your materials. Take your time, test in small, inconspicuous areas, and you will successfully breathe new life back into your home’s most detailed architectural features.
Frequently Asked Questions
Can I just use a special primer or paint to make silicone caulk paintable?
No. The fundamental chemical incompatibility of non-porous sealants like silicone or certain polyurethanes cannot be overcome by standard primers or paints. These materials are designed to resist bonding. The only reliable method is to remove the existing caulk and replace it with a high-quality, paintable, acrylic latex caulk specifically designed for the joint type. If the sealant is genuinely non-paintable, it must be physically replaced to ensure the paint job lasts.
Get the Fail-Safe Paint Color Playbook (Free PDF)
36 proven colors • 8 ready palettes • trim & sheen guide • printable testing cards.
How long must I wait between steps (e.g., after applying the primer and before painting)?
Timing is crucial for adhesion. You must strictly adhere to the drying and curing times listed on the primer and paint cans. Generally, this means waiting several hours, or sometimes overnight, depending on humidity and temperature. Applying paint before the primer is fully cured will result in poor adhesion, causing the paint to lift, flake, or peel off the joint surface. Always check the manufacturer’s instructions first.
What is the single biggest mistake people make when tackling this project?
The biggest mistake is skipping the thorough cleaning and preparation steps. If the joint cavity contains residual dust, oil, grease, or old caulk fragments, these particles act as release agents. They prevent the bonding primer and the subsequent paint from achieving a proper chemical bond with the substrate. Always vacuum and wipe the entire joint cavity until it is spotless and dry.
When should I hire a professional instead of doing this myself?
You should call a licensed professional if the caulk joint is related to structural elements (such as foundation or load-bearing joints), if you suspect the presence of hazardous materials (like lead paint or asbestos), or if the scale of the job is too large for one person to manage safely. Professional help is mandatory when dealing with structural integrity or hazardous materials, as improper handling could lead to serious safety risks.
Conclusion
How to Paint Over Non Paintable Caulk works best when the plan, materials, safety steps, and finish goals all line up before work begins. Review the surface or tool condition, choose compatible products, and leave enough time for drying, cleanup, and final checks.
Use the guidance above as a practical checklist, then adjust it to the specific surface, workspace, product directions, and risk level. When the project involves fumes, damaged materials, business liability, or uncertain conditions, slow down and get qualified help before moving forward.