
How to Use Milk Paint on Cabinets: A Step-by-Step Guide
Are you dreaming of giving your kitchen a fresh, character-filled look? Milk paint offers a beautiful, time-honored solution for cabinet refinishing that breathes vintage charm and rustic elegance into any space. With its unique, natural composition, it allows you to achieve finishes that look effortlessly aged, while remaining surprisingly durable when properly sealed.
Milk paint is more than just an eco-friendly option; it is a versatile medium that responds beautifully to various techniques, from smooth, uniform coats to heavily distressed, antique finishes. This comprehensive guide is your step-by-step roadmap, taking you from the initial assessment of your old cabinets through proper preparation, mixing, application, and final sealing, ensuring you can confidently transform your kitchen or bathroom.
Get the Fail-Safe Paint Color Playbook (Free PDF)
36 proven colors • 8 ready palettes • trim & sheen guide • printable testing cards.
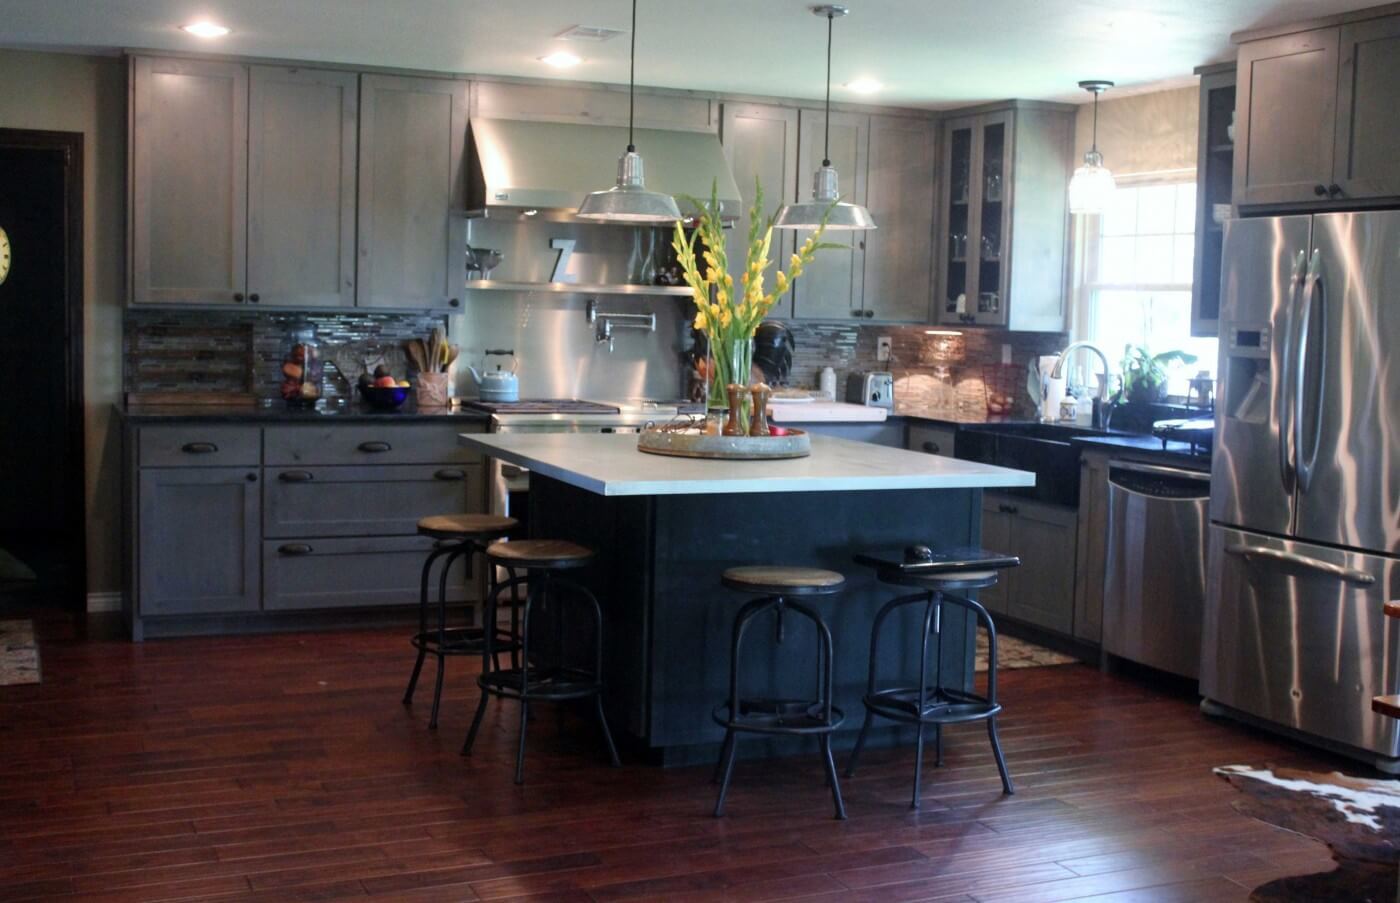
Quick answer: To Use Milk Paint On Cabinets, start with the safest first step for the material involved, test a small area when needed, and follow the process in thin, controlled stages. Use proper ventilation and protective gear when chemicals, sanding, spraying, or solvents are involved.
Understanding the Magic of Milk Paint
Milk paint is a historical and unique paint type, traditionally formulated using natural ingredients. Its core binder is casein, a protein found in milk, which gives the paint its distinctive adherence and ability to accept various topcoats. This organic composition is why it is favored by DIY enthusiasts and professional restorers alike—it’s non-toxic, low-VOC, and exceptionally charming.
What Makes Milk Paint Unique?
At its heart, milk paint is a blend of natural components: casein (the binder), lime (acting as a natural hardener), and finely ground pigments. Unlike many modern acrylic or oil paints, milk paint allows the underlying wood grain and the natural patina of the cabinet to shine through, adding depth and character that synthetic paints often mask. This inherent variability is part of its beauty.
Why Choose Milk Paint for Cabinets?
Beyond its rustic charm, milk paint offers practical advantages for cabinet refinishing. It is generally easier to work with than traditional oils, and its unique aesthetic means that even if your cabinets aren’t perfectly straight or uniform, the paint embraces the imperfections, making them look intentional and beautiful.
Planning and Preparation Before You Start
The success of a milk paint project hinges almost entirely on preparation. Never underestimate the time and effort required for stripping, cleaning, and sanding. Treat this phase as seriously as the painting itself.
Before touching any tools, perform a comprehensive structural assessment. If the cabinets are very old, check for signs of severe rot, warping, or structural compromise in the frame or sidewalls. If you suspect structural damage, stop and call a licensed carpenter or restorer. For minor issues like loose joints or minor dents, plan to use wood filler and clamps. Take time to document every cabinet door and drawer—label them clearly and take photos of their original alignment to ensure proper reassembly later.
Consider a project timeline. A full kitchen refinish with milk paint, including multiple coats, curing time, and sealing, should be budgeted for at least 5 to 7 days of work time, spread out over multiple days to allow adequate drying and curing.
Evaluating the Surface and Adhesion
Knowing the existing finish is critical. If your cabinets have glossy laminate or a heavy varnish, the paint will not adhere well without proper surface treatment. If they are bare, raw wood, the prep is slightly different. Always test your chosen primer and paint color on a single, inconspicuous cabinet panel (like the inside of a drawer) to check for color bleed, adhesion issues, and how the paint reacts to the specific wood species.
Budgeting for Supplies
Beyond the paint, budget for high-quality preparation supplies: industrial-grade degreaser, various grits of sandpaper (80, 120, 180, 220), wood filler, and several containers of primer. While the paint itself might be budget-friendly, the preparation materials are essential investments in the final look.
The Step-by-Step Guide to Milk Paint Application
This process must be followed sequentially. Rushing any step—especially cleaning or sanding—will compromise the adhesion of the paint and lead to peeling or flaking later.
1. Complete Deconstruction and Cleaning
Remove every single component: doors, drawers, hardware, and shelves. Working in a controlled environment (like a garage or workshop) is highly recommended. Start by removing all hardware. Next, clean the entire surface using a strong degreaser and a mild detergent solution. Pay special attention to grease buildup near sink areas and stove marks. Use non-abrasive scrubbing tools and rinse thoroughly with clean water. Allow the cabinets to dry completely—this may take 24 hours.
2. Comprehensive Sanding and Surface Prep
Sanding is not just about smoothness; it’s about creating a “tooth” for the paint to grip. Start with 80-grit sandpaper on any heavily damaged or glossy areas to strip the old finish. Gradually move to 120-grit for general sanding, following the direction of the wood grain to prevent visible scratching. Finish with 180-grit or 220-grit sandpaper for a smooth, uniform surface. After sanding, use a vacuum and a tack cloth to remove every particle of dust. The surface must be spotless.
3. Filling and Priming
Apply wood filler or putty to all dents, scratches, and gaps. Let the filler dry completely (check the manufacturer’s time). Once dry, sand the filled areas with fine-grit sandpaper (220-grit) until they are level with the surrounding wood. Next, apply a high-quality bonding or stain-blocking primer. This is crucial, especially if you are painting over stained or very dark wood, as the primer prevents tannins or underlying colors from bleeding through the milk paint.
4. Mixing and Applying the Milk Paint
Prepare your paint by following the manufacturer’s mixing instructions precisely. If using powder, mix it into a consistency similar to thin pancake batter—it should be pourable but not watery. Apply the paint using natural bristle brushes or low-nap rollers. Apply thin, even coats, always following the grain. Do not try to cover the entire cabinet in one thick layer; thin coats build up better and dry more evenly. Allow the first coat to dry completely (refer to drying time on the can). Lightly sand the dried coat with fine-grit sandpaper (220-grit) to smooth any brush strokes, then wipe away the dust.
5. Building Layers and Curing
Repeat the thin-coat application and sanding process until you achieve your desired color opacity. Once the final coat is applied, the paint needs to dry, and then it needs to cure. Drying means the moisture evaporates (hours); curing means the paint hardens and reaches maximum durability (weeks). Keep the area ventilated and avoid excessive humidity or direct heat sources for at least one week.
Having the right equipment makes the process smoother and safer. Do not attempt this project without the following materials:
- Paint: Milk paint (powdered or pre-mixed) and appropriate bonding/stain-blocking primer.
- Tools: Orbital sander (optional, but helpful), sanding blocks, putty knife, small mixing container, and stirring sticks.
- Sandpaper: A comprehensive set of grits: 80, 120, 180, and 220 grit.
- Fillers: Wood filler or specialized cabinet putty, color-matched to your wood.
- Protection: High-quality drop cloths, painter’s tape, and plastic sheeting.
- Safety Gear: N95 mask, safety goggles, and nitrile gloves.
- Cleaning: Mild detergent, degreaser, and clean rags/sponges.
Design and Color Pairing Tips
The color choice determines the entire mood of the room. When pairing milk paint, consider the surrounding elements—the countertop, the flooring, and the hardware finishes. For instance, pairing a soft sage green milk paint with bright white marble countertops creates a calm, coastal farmhouse feel. Conversely, a deep navy blue can anchor a room, providing high contrast with light oak floors.
Understanding Undertones and Light: Milk paint colors can interact dramatically with light. Natural daylight will reveal different undertones than artificial yellow or cool-toned lighting. Always test your chosen color in the room at different times of the day. If your room has yellow-toned light, a cool gray milk paint might appear slightly green, so factor that into your selection.
Cabinet Style Considerations: Shaker style cabinets, with their simple, clean lines, work beautifully with a uniform, smooth coat of milk paint, highlighting the geometry. Raised panel or detailed crown molding cabinets can be enhanced by using a distress technique, allowing the original wood texture to peek through the paint, emphasizing the decorative nature of the piece.
Mistakes to Avoid When Painting
Even experienced DIYers make mistakes. Knowing these common pitfalls can save you hours of sanding and repainting.
- Ignoring Degreasing: This is the most common mistake. Grease, soap scum, and cooking oils prevent paint from bonding properly, leading to premature peeling.
- Rushing the Cure Time: Assuming “dry to the touch” means “ready to use” is dangerous. Milk paint must cure for weeks to achieve maximum hardness. Using the cabinets before they are fully cured will lead to damage from moisture and wear.
- Skipping the Primer: If you are covering a heavily stained or glossy surface without a primer, the underlying color will bleed through the milk paint, resulting in muddy or patchy colors.
- Over-Sanding: While sanding is vital, sanding too aggressively or over the filler can damage the wood grain or leave visible scratches, necessitating extra filling and sanding time.
Safety and Practical Notes
Safety must be your absolute priority. Because this project involves chemicals, dust, and solvents, proper safety measures are non-negotiable.
Ventilation and PPE: Always work in a well-ventilated area. Open windows and use fans to ensure continuous airflow. Wear appropriate Personal Protective Equipment (PPE) at all times, including an N95 mask (especially when sanding old wood or using strong degreasers), safety goggles, and nitrile gloves. Never mix chemicals without reading the Safety Data Sheet (SDS) first.
Handling Chemicals: Use degreasers and primers only as directed by the manufacturer. Never mix different chemical products together unless explicitly instructed to do so. If you encounter lead paint or asbestos in very old cabinets, do not attempt to strip or sand it yourself; hire a licensed professional abatement specialist.
When to Call a Professional: While the process is DIY-friendly, a professional should be called for structural repairs, electrical wiring, or any task requiring specialized knowledge of building codes or hazardous material handling.
Sealing and Finishing Techniques
The final protective layer is what determines the longevity and durability of your milk paint finish. While the paint provides the beauty, the sealer provides the armor.
Your choice of sealer depends on the function and wear level of the cabinet. For high-use areas (like kitchen counter cabinets), a durable, water-based polyurethane or a hardwax oil is best. If the cabinets are purely decorative and rarely touched, a simple wax finish may suffice. Polyurethane offers the most resistance to moisture and daily abrasion, but it can sometimes create a noticeable sheen.
Application Tip: Always apply the topcoat in thin, even coats. Follow the curing instructions for the sealer, as it often requires a different curing time than the paint itself.
Frequently Asked Questions
How long does milk paint take to dry and cure?
Be aware of the difference between drying and curing. The paint may dry to the touch within hours, but it must cure for several weeks (often specified by the manufacturer, typically 2-4 weeks) to achieve maximum hardness and durability. Never use or expose the cabinets to moisture or heavy abrasion until the full curing time has passed. Rushing this step is the most common cause of premature peeling.
Get the Fail-Safe Paint Color Playbook (Free PDF)
36 proven colors • 8 ready palettes • trim & sheen guide • printable testing cards.
What if my cabinets are extremely old or structurally compromised?
If you notice severe warping, rot, or structural instability in the frame, do not attempt to refinish them yourself. Structural repairs require specialized knowledge. In these cases, it is critical to stop the project and hire a licensed carpenter or restorer. For minor issues like loose joints, wood filler can be used, but always assess the risk first.
Do I need to sand the paint between coats?
Yes, lightly sanding between coats is highly recommended. Use fine-grit sandpaper (220-grit) to smooth any visible brush strokes or imperfections. This process creates a slightly rough surface, helping the subsequent coats adhere better and resulting in a much more professional, uniform finish.
What is the best protective topcoat for a kitchen?
Since kitchens are high-wear, high-moisture areas, the final topcoat is crucial for durability. For maximum protection against water and abrasion, a durable, water-based polyurethane or a high-quality hardwax oil is recommended. Always follow the sealer’s manufacturer instructions regarding application and curing time.
Is milk paint safe to work with, or are there hazards?
Safety is paramount. Because this project involves sanding, degreasers, and dust, always wear appropriate Personal Protective Equipment (PPE), including an N95 mask, safety goggles, and nitrile gloves. Always work in a well-ventilated area, and never mix chemical products unless explicitly instructed by the Safety Data Sheet (SDS).
Conclusion
Refinishing cabinets with milk paint is a deeply rewarding project that transforms old furniture into unique, personalized statement pieces. By committing to thorough preparation, respecting the drying and curing times, and selecting the correct protective topcoat, you can achieve a beautiful, durable, and character-filled finish that will last for years. Take your time, enjoy the process, and watch your home transform with the timeless elegance of milk paint.