
What Paint to Use for Miniatures
The art of miniature painting is a meticulous and deeply rewarding craft, transforming small, inert figures into vibrant pieces of storytelling. It requires not only artistic talent and steady hands but also a thorough understanding of the materials at hand. Just as a room renovation requires careful consideration of paint types, surface prep, and finish, achieving professional-grade results on a miniature depends entirely on selecting the correct paints and following proper techniques.
Choosing the right paint is the most critical first step. The type of paint dictates everything from the color vibrancy and drying speed to the final texture and durability of the piece. With an overwhelming number of options—from water-based acrylics to oil-based enamels—knowing what to use can feel daunting. This comprehensive guide will walk you through the process, helping you select the perfect paint and master the techniques needed to bring your miniature visions to life.
Get the Fail-Safe Paint Color Playbook (Free PDF)
36 proven colors • 8 ready palettes • trim & sheen guide • printable testing cards.
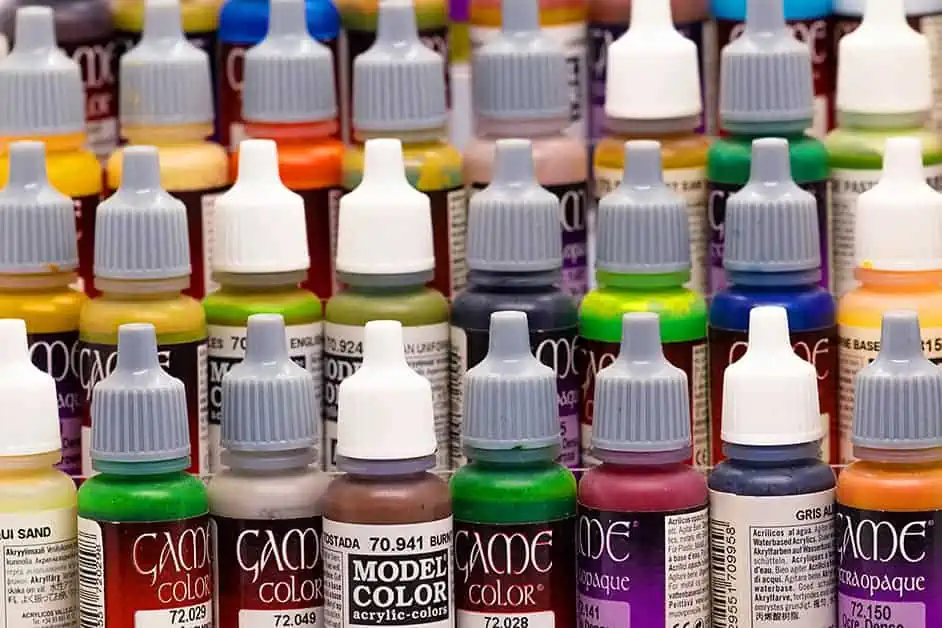
Key takeaway: The key takeaway for What Paint to Use for Miniatures depends on the exact question, context, and limits of the topic. Start with the direct definition or answer, then compare the practical factors that change what someone should do next.
Planning Your Miniature Painting Project
Before the first brushstroke touches the miniature, a successful project demands careful planning. This preparatory phase involves assessing your materials, understanding the surface, and setting realistic expectations for the finish. Think of this as assessing the room: what are the materials, what is the lighting, and what is the intended function?
First, assess the surface material. Are your miniatures made of plastic, resin, metal, or a combination? Different materials absorb and adhere to paints differently. Metal, for instance, may require specialized primers to ensure the paint grips securely and resists chipping. Resin and plastic generally respond well to standard acrylic primers, but the primer type must be compatible with the base material.
Next, consider the desired finish. Do you want a high-gloss, wet look (like polished metal or fresh blood), a subtle satin sheen (like painted wood or clothing), or a completely matte, flat finish (like stone or dry cloth)? The finish you choose will dictate the type of topcoat (varnish) you use and how the paint should be applied. A glossy finish, for example, will make the colors pop but will also show dust and scratches more easily.
Understanding the chemical composition of paints is crucial for success. The three major categories—acrylic, enamel, and oil—each behave differently when applied, offering unique benefits and challenges.
Acrylic Paints: The Versatile Workhorse
Acrylics are the most popular choice for beginners and seasoned hobbyists alike. They are water-based, meaning cleanup is simple and they dry quickly. This rapid drying time allows for fast layering and immediate adjustments, which is ideal for achieving smooth transitions and complex color schemes.
They come in an enormous color spectrum and are highly forgiving. When selecting acrylics, consider the brand’s consistency. Brands that offer specialized mediums (like thinning agents, washes, and glazing liquids) provide greater control over the paint’s viscosity and final effect. For best results, always thin your paints slightly with distilled water or a dedicated acrylic medium to ensure smooth, even coverage.
Enamel Paints: Durability and Depth
Enamel paints are oil-based and are renowned for their exceptional durability and ability to achieve a smooth, hard finish. They are often favored for models with metallic components or for historical pieces requiring a deep, robust color. Because they are oil-based, they dry slower than acrylics, which is excellent for extended blending and working on intricate details. However, this slow drying time means they require proper ventilation and a longer curing period before the piece is handled or sealed.
Oil Paints: Specialized Techniques
Oil paints are the most specialized option. They offer the longest working time, which is invaluable for advanced blending techniques, such as creating subtle gradients or deep, moody transitions. Artists use oils for their rich pigment saturation and the ability to manipulate the paint while wet. Be aware that oils are the most challenging to work with for beginners, require specialized solvents (like mineral spirits), and absolutely mandate excellent ventilation to prevent fumes from building up.
Optimizing Your Paint Selection: Factors to Consider
Beyond the primary type, several technical factors influence the quality and longevity of your painted miniature.
Pigment Quality and Opacity
High-quality pigments are key to achieving vibrant, consistent colors. Look for paints that are highly pigmented and opaque. Opacity ensures that the underlying surface color does not bleed through, allowing you to build up layers of color precisely as intended. If a paint lacks opacity, you may find yourself needing excessive coats, which can obscure fine details.
Consistency and Viscosity Control
The viscosity—or thickness—of the paint is perhaps the most important variable. You need thick paints for the initial basecoat (to block in large areas of color) and very thin paints (highly diluted washes or glazes) for adding depth and shadow. Always have a range of mediums available to adjust the paint consistency to the task at hand, whether you need a thin wash that flows into crevices or a thick paint that holds its shape.
Lightfastness and Color Stability
Lightfastness refers to a paint’s resistance to fading when exposed to light. When painting pieces intended for display, choosing paints with high lightfastness is crucial. While most modern hobby paints are reasonably stable, consulting the manufacturer’s information regarding pigment stability ensures that your work will maintain its intended vibrancy over years of display.
Essential Tools and Materials Checklist
No amount of paint skill can compensate for poor tools. A proper setup streamlines the process and improves the final quality.
Brushes
Invest in a variety of synthetic brushes. You will need a mix of sizes: a large, flat brush for basecoating large areas, a medium round brush for general detail work, and several very fine-tipped brushes (000 or smaller) for painting eyes, fine edges, and intricate patterns. Always clean your brushes thoroughly between paint types to prevent cross-contamination of solvents and pigments.
Mediums and Cleaners
A good paint kit should include various mediums: a diluting medium (for thinning general paint), a wash/ink (for shadows and grime), and a glazing medium (for translucent color shifts). Additionally, have proper solvents (water for acrylics, mineral spirits for enamels/oils) and lint-free cloths or paper towels for cleanup.
Primers and Sealers
A high-quality primer is non-negotiable. It acts as a binding layer, ensuring the paint adheres evenly and prevents the underlying material (metal, plastic, etc.) from affecting the paint’s color or adhesion. Use a primer formulated for the specific material of your miniatures.
Techniques for Achieving Depth and Realism
Mastering techniques allows you to move beyond simply coloring a figure and start building a story on its surface. These methods mimic how light interacts with real-world materials.
Basecoating and Layering
Begin by applying a thin, even basecoat—the foundational color. Once dry, subsequent layers (the “layers”) are applied. By gradually adding tones, you build depth and intensity. The key to successful layering is thin application; thick layers can look muddy and lose definition.
Washing and Drybrushing
These two techniques create immediate contrast. A wash is a highly diluted, dark paint (often brown or black) that is applied to let gravity do the work. The wash pools in the deepest recesses and crevices, naturally creating the illusion of shadow and grime. Drybrushing involves using a brush with very little paint to lightly skim over the raised edges. This catches the light and simulates highlights, making the details pop.
Glazing and Blending
Glazing involves applying extremely thin, translucent coats of color over a dried base layer. This is perfect for adding subtle, atmospheric color shifts—for example, simulating dust accumulation or a faint magical glow. Blending requires wet paint manipulation, where adjacent colors are mixed while still wet on the surface to create seamless, natural transitions, such as a gradient of skin tone or faded fabric.
Common Mistakes to Avoid
Even experienced painters make mistakes. Recognizing these pitfalls will drastically improve your results.
- Ignoring Preparation: Never paint directly onto bare, dirty, or oily surfaces. Always clean the miniature and apply a material-specific primer first.
- Over-saturating Colors: Applying paint too thickly in one coat can lead to paint pooling, dripping, and a muddy, dull appearance. Always thin your paint slightly.
- Skipping the Sealant: After the paint is dry, consider applying a protective varnish. This seals the paint job, protecting it from dust, humidity, and minor abrasion, ensuring the colors last.
- Inconsistent Thinning: Using the same paint consistency for every step is a major error. Use thick paint for blocking and extremely thin paint for washes and glazes.
Safety and Practical Notes
Because miniature painting involves various chemicals, solvents, and adhesives, safety must always be the top priority. Treat this hobby with the respect it deserves by maintaining a safe workspace.
Always work in a well-ventilated area. If you are using enamel or oil paints, or any strong solvents, proper ventilation is mandatory to dissipate fumes and prevent respiratory irritation. Wear appropriate personal protective equipment (PPE), including nitrile gloves and a dust mask, especially when sanding or handling large quantities of powder or primer.
Follow all manufacturer’s directions for drying times, mixing ratios, and curing processes. Never attempt to seal or display a piece until the paint has fully cured, which can take days, depending on the paint type and humidity.
Frequently Asked Questions
Can I mix different types of paint (like acrylic and enamel) on the same miniature?
While it is possible, it is highly discouraged for beginners and should be done with caution. Mixing chemically incompatible paints—especially water-based acrylics with oil-based enamels—can cause immediate reactions, such as paint peeling, cracking, or poor adhesion. If you must combine types, apply them to different, non-touching sections of the miniature, or use a specialized intermediary primer designed to accept multiple paint types. Always test your chosen combination on a scrap piece first.
Get the Fail-Safe Paint Color Playbook (Free PDF)
36 proven colors • 8 ready palettes • trim & sheen guide • printable testing cards.
What is the most important step in preparing a new miniature before painting?
The single most important step is applying a primer designed for the specific material of your miniature. The primer acts as a binding layer that levels the surface and ensures that the paint adheres consistently, preventing the original material (whether it’s shiny metal, porous resin, or smooth plastic) from interfering with the paint’s color or grip. Always follow the manufacturer’s instructions for primer application and curing time.
Why does my paint look muddy, or do my colors lose definition after a few coats?
This is usually a sign of one of two common mistakes: 1) Applying paint too thickly, causing the pigment to pool and mix unintentionally, or 2) Failing to adequately thin your paint. To prevent mud, always apply subsequent layers thinly and evenly. For washes and glazes, use highly diluted mediums. If the color loss persists, ensure your basecoat was fully cured and that the underlying surface was properly primed.
How long do I have to wait before I can seal or handle the miniature after painting?
It is crucial to understand the difference between “dry” and “fully cured.” “Dry” means the surface water has evaporated and the piece feels solid, but “cured” means the chemical reaction within the paint has completed. Acrylics dry relatively quickly, but enamels and oils can take days or even weeks to fully cure. Never apply a protective sealant or handle the piece roughly until the paint has reached its full curing state, otherwise, the seal will trap solvents and the paint may lift or flake off.
Final Thoughts on Your Painting Journey
Miniature painting is a journey of continuous learning and refinement. Do not be discouraged by mistakes; every chipped edge and muddy patch is merely a lesson learned. By understanding the physics of paint, respecting the preparation process, and mastering fundamental techniques, you gain control over the final outcome.
Experiment freely. Try pairing different paint types—perhaps using an acrylic basecoat followed by an enamel glaze, or an oil wash—to see how the materials interact. The best part of this art form is the personal touch; let your unique style guide your color choices and techniques. Happy painting!