
How Much Is A Quart of Paint? A Complete Guide to Painting Costs and Coverage
Planning a painting project, whether it’s a single accent wall or an entire bathroom, is an exciting step toward improving your home’s aesthetic. However, the initial cost of materials—especially the paint itself—can often feel overwhelming. Understanding the true cost of paint goes far beyond simply looking at the price tag of a quart or a gallon.
To approach this project with confidence and maintain your budget, you need a complete system for calculating paint needs, selecting the correct paint type and finish, and understanding the hidden costs associated with preparation. This comprehensive guide will demystify the process, giving you the knowledge to buy exactly what you need, when you need it.
Get the Fail-Safe Paint Color Playbook (Free PDF)
36 proven colors • 8 ready palettes • trim & sheen guide • printable testing cards.
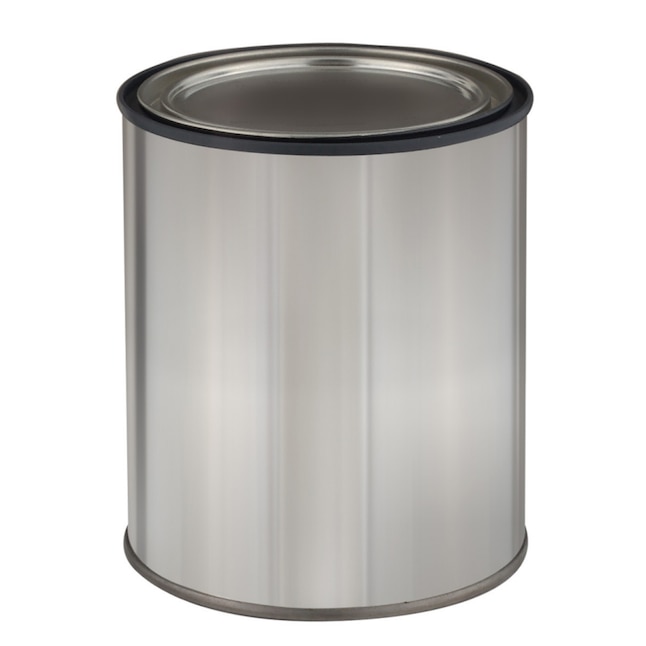
Quick answer: How Much Is A Quart Of Paint can vary widely in price depending on brand, paint type, quality level, finish, and whether it is interior, exterior, primer, or specialty coating. Check the current product listing and calculate total project cost by adding primer, supplies, extra coats, and waste allowance.
Planning Before You Start: Calculating Your True Paint Needs
The single biggest mistake in any painting project is underestimating the required amount of paint. Simply measuring the room’s width and height and multiplying them together only gives you the gross area. You must factor in the number of coats, the surface material, and the porosity of the substrate to get an accurate estimate. Treating paint coverage as a simple 100 sq. ft. per quart rule is dangerous, as it often leads to multiple trips to the hardware store and unnecessary spending.
The Math of Coverage: Beyond Simple Square Footage
Paint coverage rates are rarely constant. They are highly variable based on several factors: the texture of the wall (rough stucco absorbs more than smooth drywall), the porosity of the surface (raw, unsealed wood absorbs paint aggressively), and the type of paint used. When paint is applied over a highly porous surface, the paint penetrates deeply, leading to a significantly lower effective coverage area than stated on the can.
Actionable Tip: Always calculate for at least two coats of paint, especially when changing colors drastically (e.g., dark to light) or when painting over bare patches. If the surface is very porous, consider adding a dedicated primer coat first, as this will stabilize the surface and dramatically improve the final paint’s adherence and coverage rate.
Before budgeting, walk through the room and assess these key constraints:
- Surface Condition: Are there patches of different materials? Is the drywall cracked? Do you have peeling paint? Each issue requires specific prep work and potentially different primers.
- Lighting: How does the room naturally receive light? Is it northern (cool, low light) or south (warm, bright light)? The lighting will drastically affect how the chosen color, and its undertones, appear on the final wall.
- Ventilation and Humidity: Will the room be a high-humidity area (like a bathroom or laundry room)? This dictates the need for mildew-resistant or moisture-cured paints.
- Budget Allocation: Decide if your budget prioritizes initial cost savings (using cheaper paint) or long-term durability and low maintenance (investing in premium, high-quality paint).
When analyzing paint costs, you must shift your focus from the initial price per unit (quart/gallon) to the cost per square foot and the long-term value of the paint’s properties. The most expensive paint is not always the best investment; the best investment is the paint that performs optimally for your specific environment and surface.
The Impact of Paint Chemistry (Water vs. Oil)
The fundamental chemistry of the paint dictates its application, drying time, and final durability. Understanding this difference is crucial for selecting the right product for the job:
- Latex/Water-Based Acrylics: These are the most common modern paints. They are water-soluble, easy to clean up, dry quickly, and are generally ideal for interior walls and drywall. They are highly versatile and come in specialized versions (e.g., low-VOC).
- Oil-Based Alkyd Paints: These paints contain solvents that dry through oxidation. They are known for their exceptional hardness, durability, and excellent adhesion, making them historically popular for trim, doors, and high-wear surfaces. However, they have a strong odor, require mineral spirits for cleanup, and take significantly longer to cure.
- Specialty Formulations: Look for paints designed for specific needs: Elastomeric coatings (for exterior cracks), Stain-Blocking primers (for drywall patches or previous stains), and Mold-Resistant paints (for bathrooms). These specialized products cost more but prevent costly failures down the line.
The Role of Sheen and Finish
The sheen, or finish, is arguably the most important aesthetic and practical decision you will make. It determines how light reflects off the dried paint film, affecting both the look and the cleanability of the surface. You must match the sheen to the location’s use and humidity level.
Paint Finish Comparison Chart:
- Matte/Flat: Absorbs light and minimizes visible imperfections. It offers the softest, most sophisticated look. Best Used For: Ceilings, bedrooms, or any area where a soft, uniform look is desired. Drawback: Difficult to clean and can stain easily.
- Eggshell/Satin: Offers a subtle, soft glow and is the most popular interior finish. It balances the soft look of matte paint with improved washability. Best Used For: Living rooms, dining rooms, and general wall surfaces.
- Semi-Gloss: Provides a noticeable, durable sheen. It is highly washable and resistant to moisture and scuffs. Best Used For: Kitchen cabinets, trim, and bathrooms where high durability and frequent cleaning are expected.
- Gloss: The highest level of reflection. While extremely durable and washable, it highlights every imperfection (like roller marks or wall bumps) and can look overly stark in large areas. Best Used For: High-traffic areas like bathroom tubs, window frames, or detailed trim work where maximum washability is paramount.
Start by identifying the material, coating, tool condition, and finish goal before choosing a method. Clean loose residue first, then test the safest compatible product or technique in a small area. Work slowly, keep the surface or tool supported, and avoid jumping to harsh solvents or aggressive sanding unless the manufacturer directions and material condition support it.
Move through the project in controlled stages: assess, prepare, apply or clean, inspect, and repeat only as needed. Let coatings dry fully, let tools reshape naturally, and keep cleanup materials ready before the mess spreads. If the article topic involves fumes, specialty coatings, damaged surfaces, business settings, or uncertain product compatibility, pause and get qualified guidance before continuing.
Materials and Tools: Essential Supplies Checklist
A successful paint job is 80% preparation and 20% application. Do not skimp on tools or preparation materials, as this is where most budgets fail. Treating these supplies as an investment will save you time, effort, and frustration.
- Prep Materials: Sandpaper (various grits, especially for sanding back old paint), Patch filler (for filling nail holes and cracks), Spackle/Drywall compound (for larger holes), Painter’s tape (high-quality, paintable tape is recommended for clean lines), Drop cloths (canvas or plastic, depending on floor type).
- Primers: A general-purpose primer is often sufficient, but specialized primers are mandatory for challenging surfaces. Consider Stain-blocking primer (for tannins or water damage) and Bonding primer (for slick surfaces like glossy painted wood).
- Application Tools: Angled Brush (essential for cutting in along trim and edges), Roller Frame and Nap (the nap size must match the texture of the wall—a thicker nap for rough stucco, a shorter nap for smooth drywall), and a high-quality roller tray.
Design and Color Tips: Undertones, Pairings, and Light
Choosing a paint color is an emotional process, but it must also be a scientific one. The final color you see on a swatch in the store will rarely match the color on your wall due to interaction with light, surrounding objects, and the wall’s underlying color.
Understanding Undertones: Every color has an undertone—a subtle color that influences the overall perception. For example, a color described as “blue-gray” might have a faint green undertone or a purple undertone. When painting, you must test the color to see which undertone dominates in your specific lighting conditions. If you are painting a room with yellow-toned natural light, a cooler-toned paint might appear more gray than intended, so test samples are non-negotiable.
Color Pairing for Impact: When selecting colors for trim and walls, consider the relationship between the two. If the wall color is warm, pairing it with a cool-toned trim (or vice versa) can create visual tension that is highly desirable in design. For a cohesive, calming look, keeping the trim color very close to the wall color (e.g., a slightly lighter shade) is often the safest, most elegant choice.
Testing Technique: Never commit to a color based on a single sample. Buy sample pots and paint large swatches (at least 2 ft x 2 ft) directly onto the wall. Observe these samples throughout the day—in the morning light, at noon, and under artificial evening lighting. This process is the only way to accurately predict the final color.
Mistakes to Avoid: Common Painting Pitfalls
Beyond simply running out of paint, there are many costly mistakes related to preparation and material misuse. Avoiding these pitfalls will save you time and money.
1. Skipping or Skimping on Primer: This is the most common mistake. If you patch drywall and paint over it without a stain-blocking or bonding primer, the patch will absorb paint differently than the surrounding wall, creating a visible, noticeable ‘ghost’ patch. Always prime patches and new drywall compound.
2. Mixing Paint Types: Never mix oil-based paint with water-based paint, or vice versa. The solvents and binding agents are incompatible, and the paint job will fail, resulting in poor adhesion and flaking. Always use the specific paint type recommended by the manufacturer for the substrate.
3. Ignoring Ventilation: Using paints that contain strong solvents (especially oil-based or high-VOC paints) without adequate ventilation is dangerous. Always open windows and use fans to ensure fresh air circulation, protecting your respiratory health and ensuring proper curing.
4. Over-Applying Paint: Applying too much paint, especially in a single coat, can lead to drips, uneven coverage, and excessive waste. It is better to apply a thin, even coat and follow up with a second, thin coat than to apply one thick, sloppy coat.
Safety and Practical Notes: Professional Handling
Safety protocols must be paramount in any painting project. These measures protect your health, your property, and your crew.
- Personal Protective Equipment (PPE): Always wear appropriate PPE. This includes safety glasses, gloves (especially when handling solvents), and a respirator mask, particularly when sanding, scraping, or dealing with old paint.
- Lead and Asbestos Concerns: If you are painting in an older home (pre-1978), assume the presence of lead paint. Do not attempt to sand or scrape suspected lead paint without proper professional testing and containment procedures. Similarly, if you suspect asbestos in materials (e.g., old pipe insulation), do not disturb it—call a licensed professional immediately.
- Paint Disposal: Never pour paint, solvents, or paint cleanup residue down the drain or into the regular trash. Check with your local waste management facility for guidelines on hazardous waste disposal. Many stores accept used paint for proper recycling.
- Pro-Call Guidance: If the project involves structural changes, exterior siding over large areas, or highly specialized historical restoration, consulting a licensed professional is not a luxury—it is a necessity.
| Paint Brand | Price per Quart | Coverage Area |
|---|---|---|
| Brand A | $10 | 100 sq. ft. |
| Brand B | $12 | 120 sq. ft. |
| Brand C | $15 | 150 sq. ft. |
| Brand D | $18 | 180 sq. ft. |
Cost and Quantity Planning Guide
Start by identifying the material, coating, tool condition, and finish goal before choosing a method. Clean loose residue first, then test the safest compatible product or technique in a small area. Work slowly, keep the surface or tool supported, and avoid jumping to harsh solvents or aggressive sanding unless the manufacturer directions and material condition support it.
Move through the project in controlled stages: assess, prepare, apply or clean, inspect, and repeat only as needed. Let coatings dry fully, let tools reshape naturally, and keep cleanup materials ready before the mess spreads. If the article topic involves fumes, specialty coatings, damaged surfaces, business settings, or uncertain product compatibility, pause and get qualified guidance before continuing.
Frequently Asked Questions
How do I accurately calculate how much paint I need?
Do not simply calculate the total square footage and divide by a standard coverage rate. To get an accurate estimate, you must factor in the number of coats (always plan for two), the porosity of the substrate (highly porous surfaces absorb more), and the texture of the surface. If the surface is highly absorbent or has patches of different materials, budget for a specialized primer coat first, as this stabilizes the surface and dramatically improves the final paint’s coverage rate.
Get the Fail-Safe Paint Color Playbook (Free PDF)
36 proven colors • 8 ready palettes • trim & sheen guide • printable testing cards.
Do I always need to use a primer?
While not every single project requires a primer, it is strongly recommended whenever you are: 1) patching drywall or filling holes, 2) painting over a drastically different color, or 3) dealing with stains (like tannins or water damage). Using a stain-blocking or bonding primer ensures that patches absorb paint the same way as the surrounding wall, preventing visible ‘ghost’ patches and improving adhesion.
What is the best paint sheen for different areas of the home?
The sheen dictates both the look and the cleanability. For general living areas and bedrooms, ‘Eggshell’ or ‘Satin’ offers the best balance of soft aesthetics and washability. For high-moisture, high-traffic areas like bathrooms and kitchens (especially trim and cabinets), ‘Semi-Gloss’ is recommended because it is highly durable and easy to wipe clean. Avoid ‘Gloss’ paint on large wall areas as it highlights every imperfection.
What safety precautions must I take when painting in an older home?
Safety is paramount. If you suspect the presence of lead paint (common in homes pre-1978) or asbestos, do not attempt to scrape, sand, or disturb the material yourself. Always use appropriate Personal Protective Equipment (PPE), including safety glasses, gloves, and a respirator. For lead or asbestos concerns, professional testing and licensed containment procedures are mandatory. Always ensure adequate ventilation by opening windows and using fans.
Conclusion
Ultimately, calculating the cost of a quart of paint is only the starting point. A successful and budget-friendly painting project is achieved through meticulous planning, thorough surface preparation, and informed material selection. By understanding the difference between paint sheens, the science behind paint chemistry, and the necessity of specialized primers, you transform from a casual DIYer into a knowledgeable homeowner capable of executing a flawless, cost-effective renovation.
Remember that the initial investment in time and research—understanding the difference between a high-quality, durable paint and a cheap, temporary fix—will pay dividends in the long-term beauty and integrity of your home.