
How Much Does It Cost to Paint a Garage? A Comprehensive Guide
Painting a garage is one of the most effective and rewarding home improvement projects, capable of transforming a utilitarian space into a functional, aesthetically pleasing extension of your home. Beyond the simple appeal of a fresh coat of color, painting provides critical protection, shielding concrete and drywall from moisture, dust, and minor impacts that can otherwise cause structural degradation over time.
However, the scope of the project—from simple touch-ups to a full overhaul involving concrete sealing and structural patching—means that the final cost can vary dramatically. Understanding the financial variables, the necessary preparation, and the right materials is the key to budgeting accurately and ensuring your garage paint job is durable, professional, and stress-free.
Get the Fail-Safe Paint Color Playbook (Free PDF)
36 proven colors • 8 ready palettes • trim & sheen guide • printable testing cards.
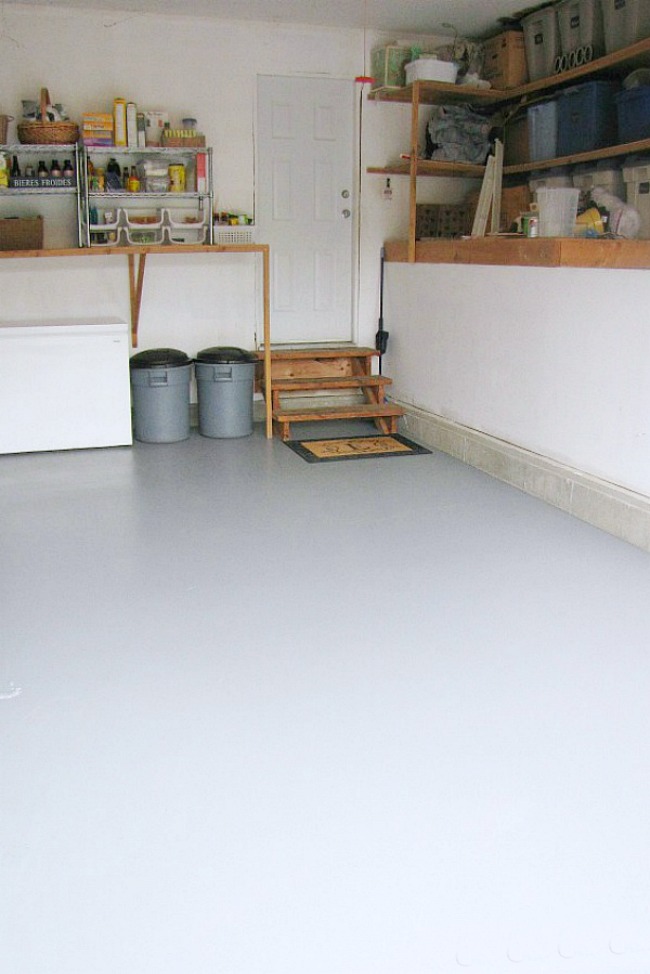
Quick answer: How Much To Paint A Garage depends on the unit being measured, the product formula, and the surface or container involved. Use the manufacturer’s coverage chart, label, or technical data sheet, then calculate with the stated gallons, square feet, coats, or weight rather than relying on a one-size estimate.
Planning and Assessing Your Garage Project Scope
Before you even look at paint samples, the most crucial step is planning. A successful budget begins with an honest assessment of the existing conditions and a realistic understanding of the effort required. Do not underestimate the preparation work; it accounts for a significant portion of both the time and the cost.
Assessing the Surface Condition
The state of the walls and floor dictates the entire project timeline and budget. Walk through the garage with a critical eye and document every issue you find. Consider these common problem areas:
- Peeling or Flaking Paint: If existing paint is lifting, chipping, or peeling, it must be scraped and sanded down to the bare substrate. This increases prep time and requires more material.
- Cracks and Spalling (Concrete): Concrete floors and lower walls often develop hairline cracks or larger spalls due to temperature shifts or moisture. These cracks must be professionally filled with hydraulic cement or specialized patching compounds before painting.
- Mold and Mildew: High humidity and moisture buildup can lead to mildew, particularly in corners and near the floor. These areas require specialized cleaning solutions and often a mold-inhibiting primer, which adds to the cost.
- Moisture Intrusion: If the walls feel damp or show signs of bowing, painting is not the solution; structural remediation is needed. Professional consultation is mandatory in this scenario.
Budgeting and Timing
Create a preliminary budget that allocates funds for at least three categories: 1) Materials (Paint, Primer, Patching Compounds); 2) Tools (Rollers, Brushes, Tape, etc.); and 3) Labor (If hiring a professional). When setting a timeline, remember that the project is not complete until the paint has fully cured, which can take several days, even if the surfaces feel dry to the touch.
Understanding the Cost Drivers: Variables That Affect Price
The final price tag is never based solely on the square footage. It is a function of three primary variables: the surface, the finish, and the labor intensity.
The Impact of Paint Selection and Coatings
The type of paint you choose is perhaps the single biggest cost determinant. Standard interior latex paint is inexpensive but may not withstand the heavy wear and tear of a garage. For superior durability, consider specialized coatings:
- Washable Acrylic Latex: These are generally better than standard paint, offering improved stain resistance and washability. They are a good balance of cost and performance for most residential garages.
- Epoxy Coatings (Concrete Floors): If you are painting the concrete floor, standard paint will fail quickly. Epoxy or polyaspartic coatings are necessary. These are chemical coatings, not paints, and are significantly more expensive, but they provide exceptional durability, chemical resistance, and stain protection.
- Industrial or Garage-Specific Paints: These paints are formulated for high humidity and temperature fluctuations. While they cost more than standard paint, they are designed specifically for the harsh environment of a garage, providing better adhesion and longevity.
DIY vs. Professional Labor Costs
When comparing labor, quantify your time and skill level. A professional charges for expertise, guaranteed results, and the time saved. A DIY approach saves money but costs time, effort, and the potential risk of mistakes. If the job involves complex structural prep, such as multiple concrete patches or extensive wood repair, hiring a professional is often the most cost-effective choice because of the specialized tools and materials they possess.
Detailed Cost Breakdown by Size (Estimated Ranges)
These ranges are highly generalized and do not include the cost of major structural repairs. Always obtain local quotes.
- Small Garage (Up to 250 sq ft): Budgeting $300 to $800. This covers basic prep, standard washable paint, and basic labor.
- Medium Garage (250 to 500 sq ft): Budgeting $600 to $1,500. Expect increased costs due to more surface area, multiple coats, and potentially more patching/priming.
- Large Garage (500+ sq ft or requiring epoxy floors): Budgeting $1,200 to $3,500+. The cost spikes significantly here due to the vast surface area and the specialized, expensive coatings required for durability and protection.
Materials and Tools Checklist for a Successful Project
A comprehensive materials list ensures you don’t stop mid-project because you realized you were out of a critical item. Never skimp on the quality of your preparation materials.
Required Supplies:
- Paint & Primer: High-quality, mildew-resistant acrylic or specialized garage paint. If sealing concrete, use appropriate epoxy/polyurethane coatings.
- Patching Compounds: Various types, including lightweight spackle for drywall and hydraulic cement or concrete patching compound for structural cracks.
- Cleaning Agents: Mild detergent, degreasers (for oil/grease), and mold/mildew remover.
- Adhesion Enhancers: Specialized primers (e.g., penetrating oil or stain-blocking primer) based on the underlying surface.
- Protective Gear: Respirator mask (N95 or higher), chemical-resistant gloves, and safety goggles.
Essential Tools:
- Surface Preparation: Heavy-duty scrapers, wire brushes, sanding blocks, orbital sander (for large areas), and a bucket system for mixing compounds.
- Application Tools: Various-sized brushes (angled and sash brushes), roller frames, and roller covers (choose nap size appropriate for the surface texture).
- Protection & Safety: Painter’s tape (high-quality, low-tack), drop cloths or plastic sheeting, ladders/scaffolding, and ventilation fans.
The finish (sheen) and color selection are critical aesthetic and functional decisions for a garage. Because garages are high-traffic, high-moisture areas, durability must dictate the choice.
Understanding Paint Sheen (Finish)
The sheen refers to how much light is reflected off the paint. This choice affects both the look and the washability of the paint.
- Flat/Matte: Absorbs light, providing a non-reflective, subtle look. Best for achieving a clean, modern aesthetic. However, it is the least washable and can show dirt marks easily.
- Satin/Eggshell: Offers a slight, soft sheen. This is a popular compromise, providing better washability than flat paint while maintaining a more subdued look than gloss. Ideal for walls.
- Semi-Gloss: Highly durable and extremely washable. It reflects more light, which can make a small garage feel brighter. While excellent for durability (ideal for trim, doors, and high-contact areas), it can sometimes accentuate imperfections in the wall surface.
Recommendation: For garage walls, a durable satin or semi-gloss acrylic paint is often recommended for the best balance of washability and appearance. For concrete floors, use an epoxy coating that provides its own durable, semi-gloss finish.
Color Theory for Maximizing Space
The goal in a garage is typically to maximize the feeling of space and light. Therefore, selecting light, neutral, or reflective colors is highly recommended.
- Light Neutrals: Whites, off-whites, light grays, and pale beige tones are excellent choices because they reflect the maximum amount of ambient light, making the space feel larger and airier.
- High Contrast Trim: If you are painting trim or doors, consider painting them a contrasting, yet complementary, color (e.g., a deep charcoal or black) against a light wall color. This adds visual structure and definition without making the room feel smaller.
The Step-by-Step Process of Painting a Garage
Follow this systematic process, whether you are tackling the project yourself or guiding a professional. Skipping any step compromises the longevity of the paint job.
Step 1: Deep Cleaning and Surface Prep
This is the most time-consuming but most vital step. Do not rush it.
- Clear the Area: Remove all items, tools, and stored goods. Use masking tape and drop cloths to protect every surface that should not be painted.
- Wash Thoroughly: Use a mix of detergent and warm water, or a specialized degreaser, to scrub all walls, floors, and trim. Pay special attention to corners and areas where oil or grease may have accumulated. Rinse completely to remove all cleaning residues.
- Inspect and Repair: Use your inspection to identify all damage. Fill all cracks, holes, and deep gouges using the appropriate patching compound. Allow the compounds to cure completely (check manufacturer times).
- Sand and Smooth: Once patches are dry, sand the entire area lightly to smooth out any rough edges or patched seams. This ensures the new paint adheres uniformly.
Step 2: Priming the Substrate
Priming is non-negotiable when starting with bare, porous, or highly stained concrete. The primer acts as a bonding agent, ensuring the topcoat adheres properly and seals the surface against moisture and stains.
- When to Prime: Always prime if the surface is bare concrete, if you are changing paint colors drastically (e.g., from dark to light), or if the surface has been patched with multiple compounds.
- Application: Apply the primer according to the manufacturer’s instructions, ensuring full, even coverage.
Step 3: Applying the Topcoats
Once the primer is dry, you can apply the topcoats. The application technique is key to a professional finish.
- Cut In: Begin by using a brush to “cut in” the edges, corners, trim, and around fixtures. This allows for precise lines and detailed coverage.
- Rolling: Use the roller to apply the main body of the wall. Load the roller evenly and use a systematic pattern (e.g., W or M pattern) to ensure uniform coverage and minimize roller marks.
- First Coat: Apply the first coat evenly. This coat establishes the base color and seals the surface.
- Drying Time: Allow the first coat to dry completely. Do not rush this. Check the paint can for the recommended drying time.
- Second Coat: Apply the second coat, which provides the final depth of color, durability, and true aesthetic finish.
Common Mistakes and Costly Errors to Avoid
Many expensive mistakes in garage painting stem from poor preparation or choosing the wrong product. Avoiding these pitfalls can save you money and frustration.
- Skipping the Deep Clean: Applying paint over grease, oil, or dust will result in immediate paint failure. Always use a degreaser and rinse thoroughly.
- Ignoring the Substrate: Assuming that a standard interior paint will work on concrete or heavily soiled surfaces is a costly error. Always use specialized, durable coatings.
- Insufficient Patching: Simply painting over a crack without filling it first will cause the paint to flake off as the crack expands. All structural flaws must be filled and sanded.
- Rushing the Cure Time: Applying multiple coats or using the garage before the paint has fully cured (often days, not hours) can lead to premature failure, blistering, or poor adhesion.
Safety, Maintenance, and Professional Guidance
The safety of the workers and the integrity of the structure must always be the top priority. Never compromise on safety gear or structural assessment.
- Ventilation is Mandatory: When working with solvents, strippers, primers, or paints, ensure the garage is extremely well-ventilated. Open all doors and use powerful fans to circulate fresh air and disperse fumes.
- Personal Protective Equipment (PPE): Always wear appropriate PPE, including chemical-resistant gloves, eye protection, and—crucially—a respirator mask suitable for the chemicals being used (especially when sanding or stripping old paint).
- Structural Concerns: If you suspect mold, lead paint, or major structural damage, do not attempt remediation yourself. These tasks require specialized knowledge and equipment, and you must call a licensed professional.
- Long-Term Maintenance: To keep the paint job looking fresh, regularly wipe down the walls to remove surface dirt and dust, and promptly address any minor scratches or scuffs with touch-up paint.
Safety and Practical Notes
Work in a well-ventilated space and wear gloves, eye protection, and a respirator when needed. Keep children and pets away from wet surfaces and open containers.
Follow manufacturer drying times between coats. Dispose of rags and leftover materials according to local regulations. If the project involves heights, lead paint, or structural work, consider hiring a licensed professional.
Frequently Asked Questions
How do I estimate the total cost before hiring a professional?
The cost is not just based on square footage. To estimate, you must account for three main cost drivers: the surface condition, the type of coating, and the labor intensity. Estimate the cost of specialized materials (like epoxy coatings or hydraulic cement) and factor in a cushion for prep work (scrapers, sanding, cleaning agents). For a rough budget, allocate a minimum of $300 for a small, basic job, but budget significantly higher if structural repairs or specialized coatings are needed. Always obtain local quotes for an accurate figure.
Get the Fail-Safe Paint Color Playbook (Free PDF)
36 proven colors • 8 ready palettes • trim & sheen guide • printable testing cards.
Do I need to use a professional for my garage paint job?
If the project involves major structural issues—such as significant concrete spalling, mold remediation, or if you suspect lead paint—you must hire a licensed professional. For cosmetic jobs (simple touch-ups, light paint over sound drywall), a skilled DIYer can manage. However, if the job requires extensive patching, multiple specialized coatings (like epoxy), or complex preparation, the professional’s expertise and tools are often the most cost-effective choice and are critical for ensuring longevity.
What is the difference between general paint and specialized garage coatings?
General interior latex paint is designed for low-wear indoor surfaces and will fail quickly in a garage environment due to temperature fluctuations, moisture, and chemical exposure (oil, gasoline). Specialized coatings—such as epoxy, polyaspartic, or industrial-grade acrylics—are chemically engineered for durability. For floors, these coatings are mandatory for protection. For walls, choose a highly washable acrylic or specialized paint designed for high-humidity areas to ensure the paint can withstand frequent cleaning without flaking or staining.
You must never rush the curing process. While the paint may feel dry to the touch within hours, true curing—the time required for the coating to fully harden and reach maximum durability—can take several days, especially for epoxy or concrete patches. Applying subsequent coats, or attempting to use the garage (e.g., storing vehicles) before the manufacturer’s recommended cure time has passed, significantly increases the risk of blistering, peeling, and premature failure. Always follow the drying and curing instructions provided by the product manufacturer.
Conclusion
Transforming your garage through paint is a manageable and highly rewarding project, provided you treat it with the planning and attention to detail it deserves. The most successful transformations are not defined by the paint color, but by the quality of the preparation.
By meticulously assessing the surface condition, choosing the right durable coatings (like epoxy or specialized acrylics), and strictly adhering to the step-by-step process—from deep cleaning and patching to proper priming and curing—you can ensure your garage not only looks beautiful but also remains protected and functional for years to come. Take your time, plan your budget thoroughly, and enjoy the process of breathing new life into your space.