
How To Apply Paint Protection Film
If you’ve invested in a new vehicle, or if your current ride is a source of immense pride, protecting its pristine paint finish is a top priority for any car enthusiast. While traditional methods like regular washing and waxing offer a degree of shine and superficial protection, they do not provide a comprehensive shield against the inevitable hazards of daily driving, such as stone chips, deep scratches, or environmental fallout.
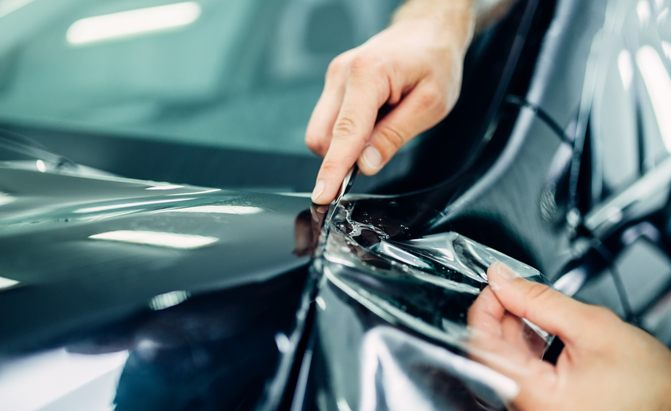
This is where Paint Protection Film (PPF) becomes an indispensable modern accessory. PPF is a transparent, durable urethane film that acts as a sacrificial layer, adhering directly to your vehicle’s paint. It is designed to absorb impact and resist chemicals, offering a level of protection that far surpasses conventional coatings, allowing you to keep your vehicle looking showroom-fresh for years to come.
Get the Fail-Safe Paint Color Playbook (Free PDF)
36 proven colors • 8 ready palettes • trim & sheen guide • printable testing cards.
Quick answer: To Apply Paint Protection Film, start with the safest first step for the material involved, test a small area when needed, and follow the process in thin, controlled stages. Use proper ventilation and protective gear when chemicals, sanding, spraying, or solvents are involved.
Planning Before You Start: Selecting the Right Film and Mapping the Scope
Before even thinking about gathering tools, the most critical step is planning. The right film choice, combined with a clear understanding of your goals, will dictate the entire success of the project. PPF is not a one-size-fits-all solution.
First, assess your needs. Are you protecting a vehicle that will see heavy city use (requiring impact resistance) or a show car (requiring maximum clarity)? The type of film you choose—be it self-healing, hydrophobic, or matte—must align with this use case. For instance, a high-impact area like the front bumper or hood requires a robust, impact-rated film, while a tailgate might only need scratch protection.
Second, consider the paint finish. Applying PPF over a heavily oxidized or poorly maintained paint job will only highlight the underlying flaws. The paint beneath the film must be sound, smooth, and free of deep scratches or swirls. If the paint is damaged, the film will protect the surface, but it won’t fix the underlying issue. A proper paint correction process (compounding and polishing) is often a necessary pre-step before the film can perform optimally.
Materials and Tools Checklist for Professional Results
Successfully applying PPF requires specialized tools and chemical supplies. Do not attempt this with basic household items; the difference between a flawless install and a visible bubble lies in the quality of your materials.
- Paint Protection Film (PPF): Select the appropriate type (e.g., self-healing urethane).
- Dedicated Cleaning Solutions: Use a pH-neutral car wash soap and a specialized prep solvent (often an IPA/water mix) for final rinsing.
- Decontamination Agents: Clay bar kit and a dedicated ceramic/iron remover spray.
- Microfiber Towels: Multiple, clean, high-quality microfiber drying towels.
- Protective Gear: Nitrile gloves and safety glasses.
Application Tools
- PPF Squeegee: Must have a clean, soft edge (often designed for detailing).
- Heat Source: A professional heat gun (adjustable temperature) or high-powered hairdryer.
- Cutting Tools: A sharp, fresh utility knife or scalpel blade.
- Applicator Solution: A spray bottle filled with the soapy application solution.
The Step-by-Step Guide to Applying PPF
This process is methodical and requires patience. Do not rush any step, especially the surface preparation, as this is the most critical phase for adhesion.
Phase 1: Deep Surface Preparation (The Foundation)
- Initial Wash: Wash the entire vehicle with pH-neutral soap to remove loose dirt and surface grime.
- Chemical Decontamination: Spray the surface with an iron remover to dissolve embedded metallic particles (brake dust, industrial fallout). Rinse thoroughly.
- Mechanical Decontamination: Use a clay bar and lubricant on a clean section of the paint. This process pulls out bonded contaminants—tiny particles of pollution and residue that look clean but prevent the film from sticking properly.
- Final Rinse and Drying: Rinse the vehicle completely and dry it using clean microfiber towels. The surface must be completely dry before applying the film.
Phase 2: Film Application and Adhesion
- Measuring and Cutting: Measure the area precisely. It is always better to cut the film slightly larger than the area, allowing for trimming, than to cut it too small.
- Solvent Application: Lightly spray the area of the paint and the sticky side of the film with the specialized application solution. This wetting process is key to allowing the film to slide and conform.
- Positioning: Carefully align the film over the prepared surface. Work slowly, peeling the film from the backing material.
- Squeegeeing: Using the squeegee, start from the center and work outwards in overlapping strokes. The goal is not just to smooth, but to physically push out all trapped air bubbles, excess solution, and moisture. Apply moderate, consistent pressure.
- Heat Activation: Once the film is positioned and the squeegeeing is complete, use the heat gun. Apply controlled heat in sections, especially over curves and edges. The heat activates the adhesive, allowing the film to stretch and mold perfectly to the underlying paint contours.
Phase 3: Trimming and Finishing
- Trimming Excess: Once the film is fully adhered and cured by heat, use the sharp utility knife to carefully trim away all excess material around edges, emblems, and trim pieces.
- Final Inspection: Inspect the entire surface under bright light for any remaining bubbles, lifting edges, or contamination. If found, gently reheat the area and use the squeegee again.
Advanced Tips: Handling Curves and Complex Areas
The true difficulty of PPF application lies in areas of high curvature, such as around headlights, mirrors, and emblems. These spots require specialized techniques.
When working on curves, do not pull the film taut. Instead, apply the film gently and use the heat gun to warm the adhesive and the plastic simultaneously. This allows the film to flow over the curve naturally. For emblems, it is often best to apply the film *around* the emblem first, and then carefully place the emblem back on the protected surface, allowing the film to seal the edges.
Remember that the paint panel gaps (the tiny spaces between panels) must be protected with film strips to prevent chips from entering the gap and damaging the paint underneath.
Finish, Compatibility, and Prevention Tips
Choose a finish that matches the repair goal and the surface conditions. Gloss and semi-gloss resist moisture and are easier to clean, while flat or matte finishes hide imperfections better but are less washable.
Check compatibility between primer, filler, paint, and the existing surface. Some repairs require specific primers or prep steps to prevent the problem from returning. Consider drying time, odor, and cleanup method before starting, and confirm that the product suits interior or exterior use as needed.
Mistakes to Avoid During DIY Installation
Even with the best intentions, common mistakes can ruin the finish. Be aware of these pitfalls:
- Skipping Decontamination: The single biggest mistake is assuming a wash is enough. If you do not use a clay bar and chemical remover, the film will adhere to contaminants, leading to bubbling, peeling, and poor long-term adhesion.
- Using Too Much Heat: While heat is necessary, excessive or uneven heat can damage the underlying paint or warp the film itself. Use controlled, steady blasts.
- Rushing the Squeegee: If you lift the squeegee too quickly or don’t maintain pressure, air pockets will be left behind. Work slowly and methodically.
- Ignoring Curing Time: Do not drive the car or wash it immediately. The film needs time to fully bond and cure, which protects it and ensures optimal durability.
Safety and Practical Notes
Because this process involves chemicals, solvents, and heat tools, safety must be your absolute priority.
Always wear chemical-resistant gloves and safety glasses. Ensure that your workspace is extremely well-ventilated, especially when using solvents, heat guns, or any chemical strippers. Never mix cleaning chemicals haphazardly; always follow manufacturer-recommended dilution ratios. If the film or paint surface requires chemical stripping or the vehicle has complex, highly integrated components (like sensor arrays or complex trim), it is advisable to call a professional installer. These areas carry high risks of damage.
Paint protection film is a significant investment, both in time and money. While the application process is complex, understanding the foundational steps—especially the meticulous preparation—empowers you to achieve results that rival professional installations. By taking the time to select the correct materials, follow the step-by-step guide, and prioritize safety, you can ensure your vehicle retains its flawless appearance for years to come.
Treat the application not as a quick chore, but as a careful, multi-stage restoration process. With proper care and maintenance, PPF will serve as an unparalleled shield, protecting the deep shine and value of your vehicle.
Frequently Asked Questions
Does PPF last forever, or is it removable?
PPF is designed to be durable and highly protective, but it is not permanent. Most modern films are engineered to be removable without damaging the underlying paint. However, removal can be challenging, especially if the paint underneath has been repeatedly stripped or exposed to harsh chemicals. Always check the manufacturer’s warranty and removal instructions before attempting to peel the film.
What is the difference between Paint Protection Film and a Ceramic Coating?
Get the Fail-Safe Paint Color Playbook (Free PDF)
36 proven colors • 8 ready palettes • trim & sheen guide • printable testing cards.
These are two different types of protection. PPF (a physical film) is a sacrificial barrier that absorbs impact, resisting chips and deep scratches. Ceramic coatings, conversely, are chemical sealants that bond to the paint and provide chemical resistance and enhanced gloss. They are excellent for shine and minor chemical protection, but they do not offer the same physical impact resistance as PPF. Many enthusiasts use both for comprehensive protection.
How do I clean and maintain the film over time?
Maintenance is crucial for longevity. Use only pH-neutral car wash soaps and dedicated PPF cleaning solutions. Never use abrasive compounds, harsh chemicals, or automatic car washes that use brushes, as these can degrade the film’s surface over time. Following the manufacturer’s guidelines for washing and waxing is recommended to keep the film looking its best.
If I encounter a bubble or lifting edge, what should I do?
Most minor bubbles can be resolved by applying a specialized application solvent and gently using the squeegee, working from the center outward. If the film lifts or wrinkles, it often indicates poor adhesion or excessive heat application. If the issue persists, applying controlled, gentle heat (not excessive heat) can reactivate the adhesive. If the damage is extensive or the bubble is trapped under a difficult contour, it is highly recommended to consult a professional installer, as aggressive attempts can cause irreversible damage.
Conclusion
How To Apply Paint Protection Film works best when the plan, materials, safety steps, and finish goals all line up before work begins. Review the surface or tool condition, choose compatible products, and leave enough time for drying, cleanup, and final checks.
Use the guidance above as a practical checklist, then adjust it to the specific surface, workspace, product directions, and risk level. When the project involves fumes, damaged materials, business liability, or uncertain conditions, slow down and get qualified help before moving forward.