
How To Paint A Glow Effect With Acrylic: Tips & Advanced Techniques
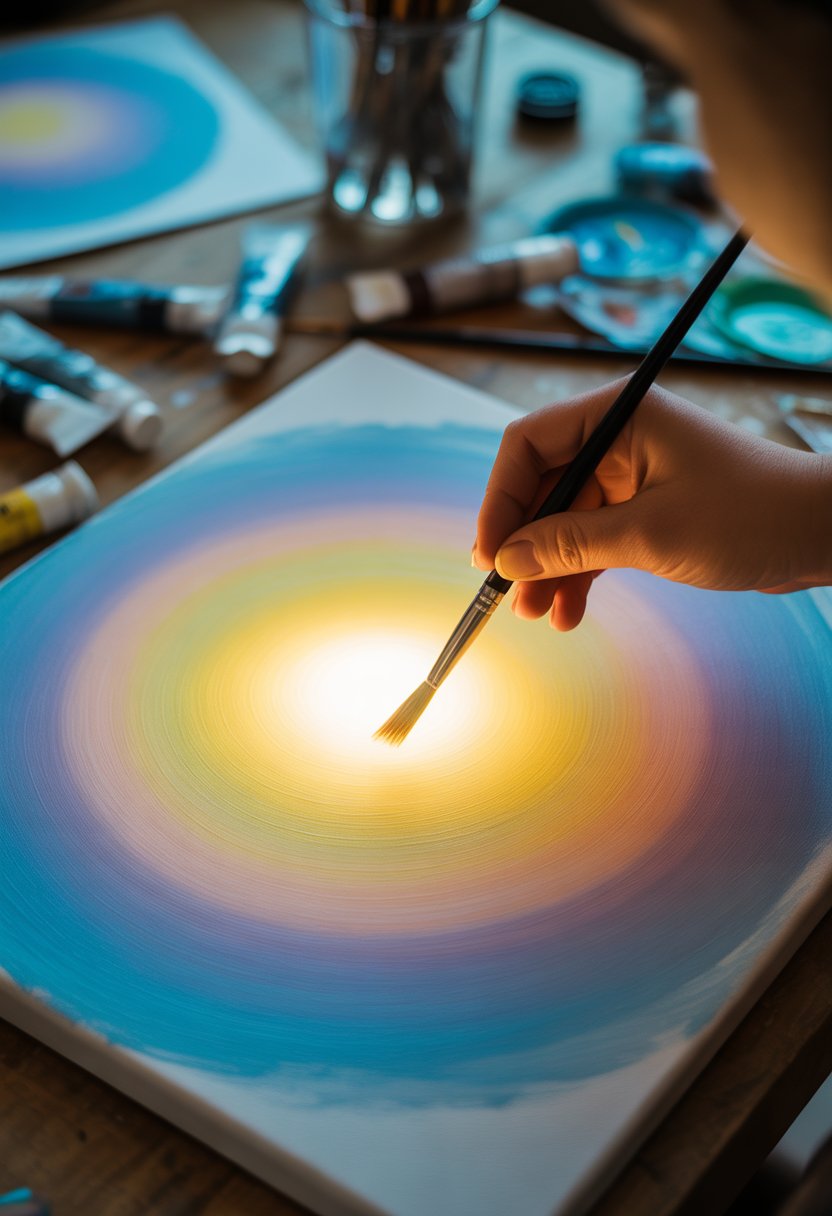
If you want to paint a glow effect with acrylics, focus on layering translucent colors and playing with contrast to mimic how light really bounces off surfaces. By stacking up thin washes and dropping in highlights with lighter shades, you can get that soft, radiant glow that makes your painting pop. You’ll need to keep your light source in mind and blend edges so they don’t look too harsh—that’s what sells the effect.
Pick warm or cool colors based on the vibe you’re after. Warm colors are cozy and bright, while cool ones feel calm or even a little magical. Details matter, too—fine brushwork and some experimenting with iridescent or metallic paints can really push the effect. Once you get the hang of these techniques, your paintings will feel like they have their own light source.
Understanding the Glow Effect
When you’re trying to paint a glow, you want parts of your work to look like they’re actually shining. Think about how light moves, how it shifts colors, and how shadows can make a glow pop. Getting these details right makes your effects feel more believable.
What Is a Glow Effect in Art?
Basically, a glow effect is all about making something in your painting look like it’s giving off its own light. It’s usually soft and radiant—almost like the object is a lamp. This draws the eye, making those spots the focus.
You do this by painting the brightest area at the center and fading out to softer colors around it. The glow should stand out from the background, so you’ll want to play with brightness and keep the edges soft. Shadows nearby help the glow look stronger, thanks to the contrast.
How Light and Color Interact
Light and color really work together here. Your light source decides where things are brightest and where shadows fall. The closer to the light, the brighter the color should be.
Colors shift depending on whether the light is warm or cool. Warm colors—yellow, orange, red—make things feel cozy. Cool colors—blue, purple—give a softer, sometimes dreamy effect. If you use complementary colors, your glow can look even sharper.
Remember, it’s not just about slapping on bright paint. It’s about how the light interacts with everything around it.
Types of Glow Effects
There are a few ways you can approach glow, depending on the look you want:
- Soft Glow: Gentle, smooth—think sunlight or candles. You’ll need subtle transitions between light and dark.
- Hard Glow: Sharper, more intense—like neon lights. The edges are clearer, the colors punchier.
- Ambient Glow: Light that kind of spills out, lighting up everything nearby. It’s subtle but sets a mood.
- Glow-in-the-Dark: Special paints that shine after you charge them up. When the lights go out, these sections stand out in a unique way.
Each type needs a slightly different approach to brightness, shadow, and blending to really work.
Essential Materials and Tools
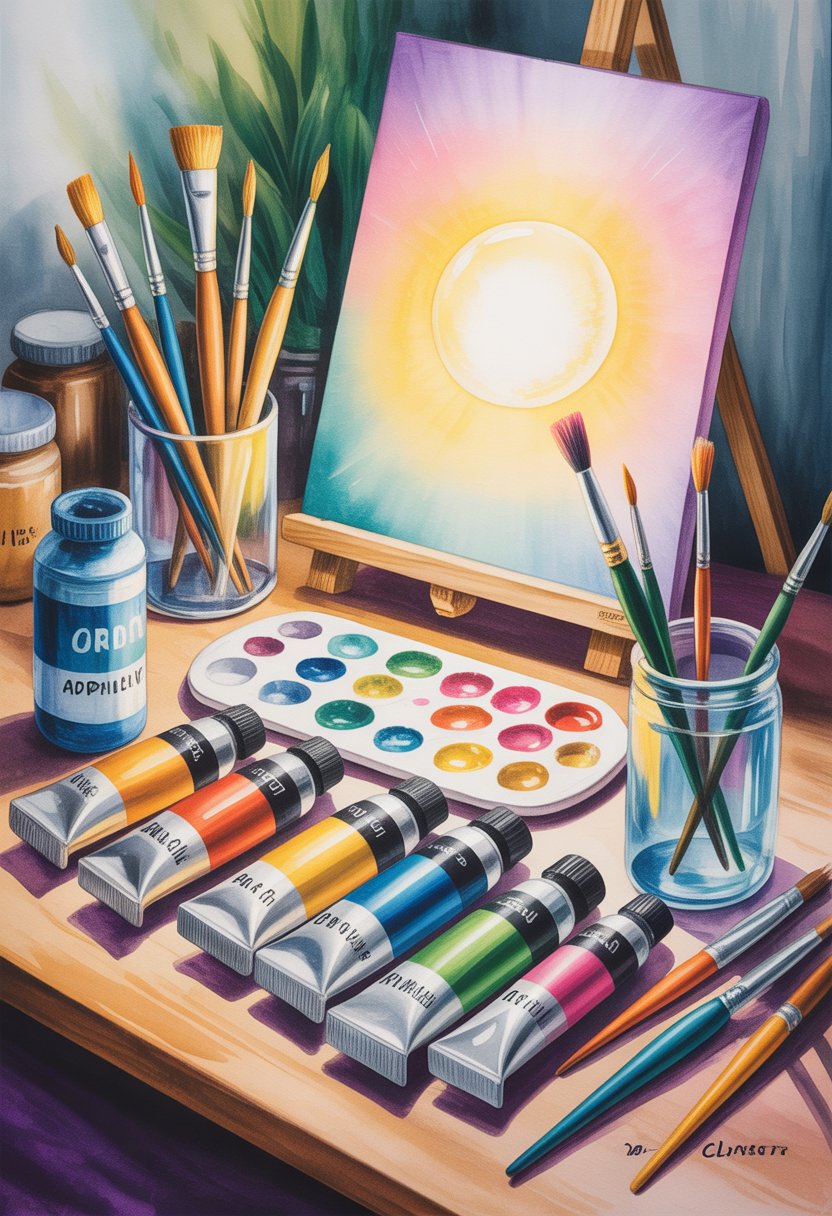
If you want your glow effect to work, you’ll need the right stuff. The paints, brushes, and any special paints you pick will totally change how bright and smooth your glow looks.
Choosing the Right Acrylic Paints
Go for decent acrylic paints—the brighter and richer, the better for glow. You’ll need white acrylic paint to lighten spots and lay down a base for the glow. Use white carefully under other colors to help them shine, not just to make things look flat.
Get paints that mix easily so you can layer up color without it looking muddy. Thin, see-through layers give you depth and a softer glow. Dilute with water or acrylic medium if you need more transparency.
A palette or mixing surface is super helpful to test colors before you commit. And, honestly, keep a cup of clean water and a rag close by for quick brush cleaning and wiping off extra paint.
Selecting Brushes for Glow Effects
You’ll want a mix of paintbrushes for this. Flat, wide brushes are great for big areas and smooth transitions.
Grab smaller, round brushes for highlights and tight details where the glow is strongest. Softer bristles help you blend out edges and avoid harsh lines.
If you like some texture, a palette knife can help with thicker highlights. Seriously, don’t forget paper towels or a rag—they’re a lifesaver for keeping things under control.
Specialty Paints for Luminous Art
If you want to go all-in, try glow-in-the-dark paint or fluorescent paint. Glow-in-the-dark stuff soaks up light and then glows when it’s dark—pretty cool, honestly.
Fluorescent and neon colors react to bright or UV light, giving a wild, punchy glow. Layer these over your regular paints for extra vibrancy.
You’ll also find metallic and iridescent paints that add shimmer. Use them sparingly—just enough to catch the eye without overpowering your glow.
Preparing Your Canvas and Workspace
Getting your canvas and space sorted out makes everything easier. Pick the right surface, sketch out your plan, and make sure your lighting lets you actually see what you’re doing.
Choosing and Prepping Your Canvas
Pick a canvas that fits your project—cotton or linen both work for acrylics. Whether you go with a stretched canvas or a board is really up to what feels right for you.
Prime the canvas with a thin coat of gesso. This seals it up and helps paint stick. Give it at least an hour or so to dry.
If you want a smooth glow, stick to a surface that isn’t too rough. It makes blending way easier and helps your glow stay soft.
Sketching and Composing Your Design
Use a pencil or charcoal to lightly sketch your design. Keep things simple, especially around the area you want to glow.
Think about where your light source will be—it’ll make adding highlights and color later much easier.
Try to set up your composition so the glowing part isn’t crowded. You might want to sketch a few different versions to see what works best. Leave some space around the glowing area so it stands out.
Setting Up Lighting for Reference
Set up an actual light near your workspace. Watching how it falls on objects will help you paint more convincing glows.
Use a lamp or even sunlight, but avoid flickering or super harsh light. You want to see colors clearly and watch how the glow fades out from the source.
Pay attention to how light shifts from bright to dark. This will help you blend your paints more naturally. If you want to check your glow effect, try dimming the lights a bit—sometimes that’s when the magic shows up.
Step-By-Step Techniques for Painting a Glow Effect
To pull off a glow effect with acrylics, you’ve got to work carefully with color, layering, and where you put your brightest spots. Here’s how you can blend colors for soft edges, build up depth, punch up highlights, and create those nice, smooth transitions.
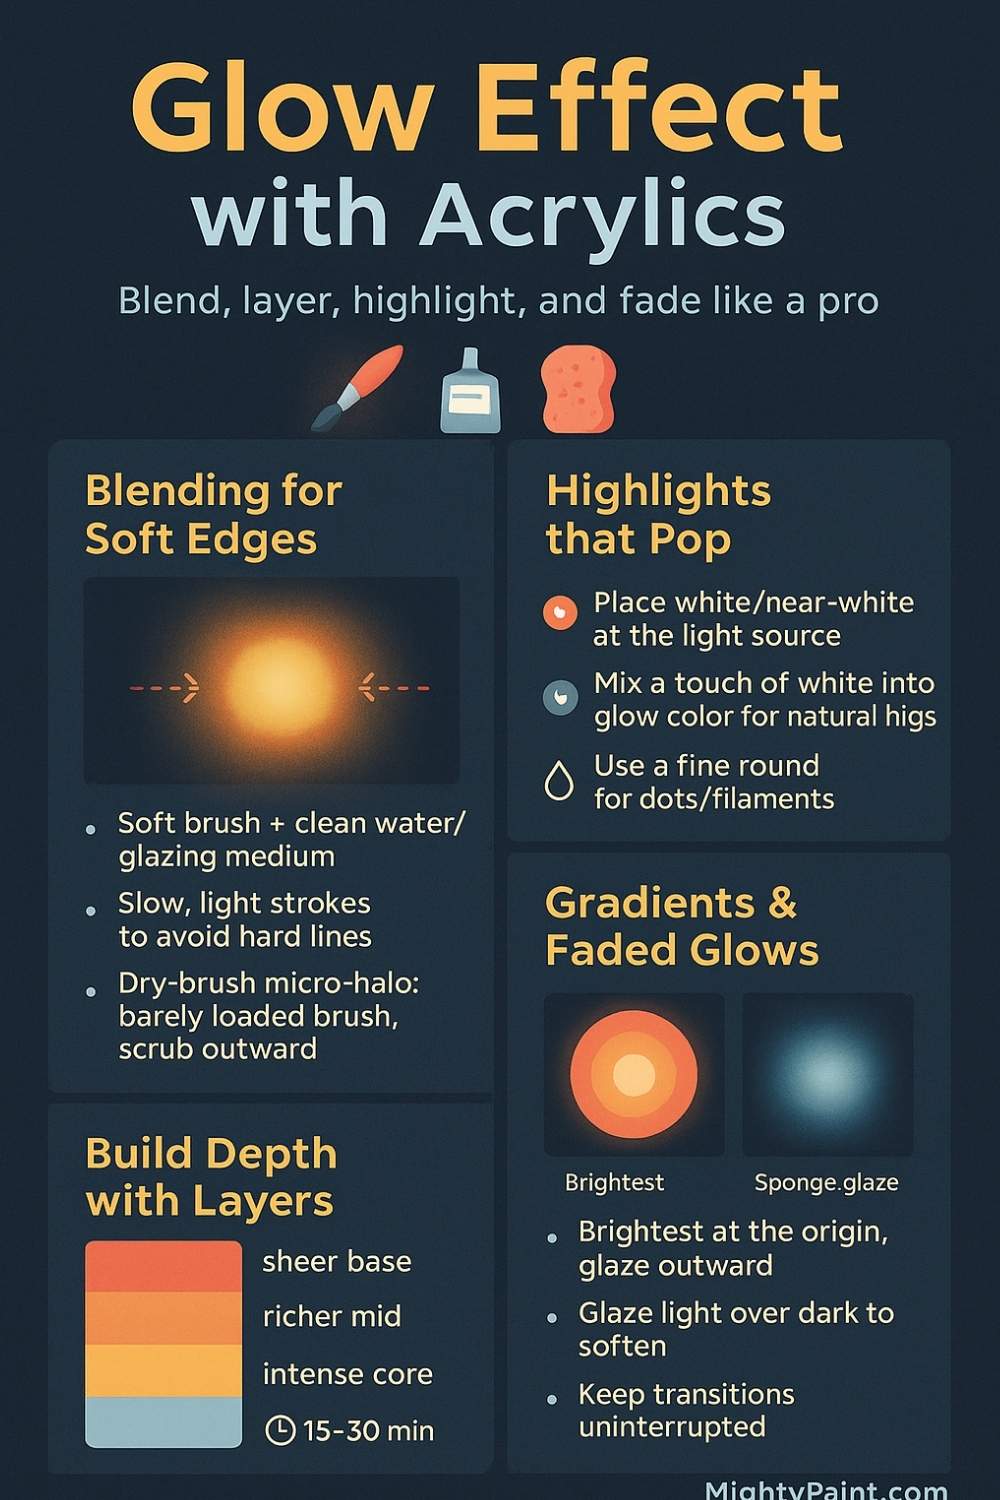
Blending for Soft Edges
Blending is everything for a believable glow. Use a soft brush with clean water or glazing medium to gently mix the edges where your glow meets the background. Don’t rush—just softly brush back and forth to avoid harsh lines.
Try dry brushing right at the edges where the light fades. Load a tiny bit of paint on your brush and gently scrub it out. This helps the glow look like it’s really fading, not just stopping all of a sudden.
Building Up Layers for Depth
Start with a base layer of lighter colors—yellows or soft blues, whatever suits your glow. Thin the paint with water or glazing medium so you can build layers gradually.
Each layer should get a little brighter or more intense. Let each one dry before adding the next—otherwise, it all turns to mush.
Highlighting with White and Bright Colors
To make the glow pop, add white or super-bright colors right where the light hits hardest. Use a fine brush for this—just little strokes or dots in the brightest spots.
Focus on the bits closest to your light source. If you mix a touch of white into your glow color, the highlights will look less stark and more natural. This is what really draws the eye to your glowing area.
Creating Gradients and Faded Glows
Gradients are your friend for a smooth glow. Start with your brightest color at the center or wherever the glow starts, then blend out to softer, darker colors.
Soft brushes or even sponges can help you get an even spread. You might want to glaze lighter colors over darker spots to keep things soft. The smoother the transition, the more believable the glow.
Using Specialty Paints for Enhanced Glow
If you want to kick things up a notch, specialty paints like glow-in-the-dark or fluorescent kinds can make your artwork stand out under different lights. They react to UV or store up energy to shine later. Knowing how to use them makes a big difference.
How to Use Glow-in-the-Dark Paint
Glow-in-the-dark paint charges by soaking up light—sun or UV works best. Paint your base layer with regular acrylics first and let it dry. Then brush on thin layers of the glow paint.
It’ll look almost clear or just faint in daylight, but once the lights go out, it glows. For best results, charge it up with sunlight or a UV flashlight for a few seconds before checking it in the dark.
Stick to thin coats—they dry faster and charge better. After a few layers, your glow will be stronger and last longer—sometimes for hours, which is honestly pretty fun to see.
Working with Fluorescent and Neon Colors
Fluorescent and neon paints really come alive under UV or black lights. Even in daylight, they’re pretty eye-catching, but hit them with UV and wow—they almost jump off the surface.
For the strongest glow, brush these paints over a light background. Lighter colors bounce the light around more, so your neon details—highlights, outlines, or whatever accents you like—end up looking extra vibrant.
Just a heads up: neon paints can tint the underlying colors a bit during the day, so it’s worth mapping out your design before you go wild. They’re fantastic for bold, in-your-face effects—think parties, clubs, or anywhere a black light might show up.
Tips for Maximizing Black Light Effects
Black light, or UV light, makes fluorescent paints shine like nothing else. If you want that wow factor, charge up your painting under a UV light for a few seconds before showing it off.
Try to keep your glow paint layers thin and even. Thick blobs just block the light and dull the effect. A 395nm UV flashlight? That’ll get your paints glowing fast.
Dim your workspace when you’re painting. It’s way easier to see where the glow pops and where it’s lacking. You can catch spots needing a little more coverage or a quick touch-up, and it’s honestly just more fun to watch the colors come to life as you work.
Steer clear of piling on dark colors near your glow areas—they’ll suck up the UV and kill the brightness. Lighter tones bounce more light around and really help the shine stand out.
Finishing Touches and Troubleshooting
Adding those last details makes the glow effect feel real and rich. You’ll tweak shadows and highlights to give it some depth. Protecting your work matters, too. And, yeah, you’ll probably need to fix a few things along the way—it happens.
Enhancing Contrast with Shadows
Shadows make your glow pop. Darken spots around the glowing areas with deeper shades of your base or a complementary color. That contrast? It’s what makes the brights look even brighter.
Soft brushes work best for blending shadows. Hard edges can mess up the whole effect. Build up the darkness with thin coats so you don’t drown out the light.
Don’t feel stuck using just black for shadows. Mixing in dark blues, purples, or browns gives you richer, more interesting results and helps keep things looking natural.
Sealing and Protecting Your Art
After you nail the glow, seal your painting with a clear acrylic varnish. Go for matte or satin if you want a natural look, or glossy if you’re after extra shine.
Brush or spray on thin layers of varnish, letting each one dry before adding another. This keeps your colors bright and helps them last.
Try to keep your finished piece away from direct sunlight and humidity. Both can fade the colors and mess with the acrylics over time.
Common Mistakes and How to Avoid Them
It’s easy to slap on too much white or bright paint, hoping for instant glow. But honestly, that just kills the effect—everything goes flat or weirdly chalky. Try building up the brightness slowly with thin glazes. It takes more time, but the results look way better.
Blending can trip people up, too. If you leave harsh lines between light and shadow, the glow just doesn’t work. I usually reach for dry brushing or glazing to soften those edges. It’s a bit fiddly, but worth it.
Pure black right next to glowing spots? Feels a bit harsh, doesn’t it? Mixing dark pigments gives you shadows that look more natural and less jarring.
And hey, don’t rush drying times. If you layer acrylic glazes before they’re dry, your colors get muddy fast. It’s annoying, but a little patience really lets that glow pop.