
How to Paint Pistol Sights: A Step-by-Step Guide for Durable Customization
Painting the sights on a pistol is a highly specialized blend of artistry and practical engineering. It moves beyond simple cosmetic enhancement; properly customized sights can drastically improve sight acquisition, especially in challenging lighting or high-stress shooting environments. For the dedicated enthusiast or competitive shooter, the perfect sight paint job is not just about aesthetics—it’s about optimizing the visual connection between the shooter and the target.
This comprehensive guide is designed to take you through every critical step, from initial surface preparation and chemical cleaning to advanced painting techniques and durable sealing. We will cover the technical nuances of paint selection, the importance of proper curing times, and, most critically, the absolute safety protocols required when modifying any firearm component. By following these detailed instructions, you can transform plain sights into highly visible, durable, and personalized aiming aids.
Get the Fail-Safe Paint Color Playbook (Free PDF)
36 proven colors • 8 ready palettes • trim & sheen guide • printable testing cards.
Quick answer: To Paint Sights On A Pistol, start with the safest first step for the material involved, test a small area when needed, and follow the process in thin, controlled stages. Use proper ventilation and protective gear when chemicals, sanding, spraying, or solvents are involved.
Planning Your Sight Customization Project
Before you even touch a solvent or a brush, thorough planning is the most critical step. You must assess not only the sight itself but the intended use of the firearm. Are these sights for competitive range use, casual sport shooting, or personal defense? Each scenario dictates the required paint durability and visibility level. For instance, a competitive shooter might prioritize maximum contrast and minimal glare, while a recreational user might focus more on aesthetic color pairing.
Consider the material of your sights. Are they steel, aluminum, or polymer? Different materials require different cleaning agents and paint primers. Understanding the existing finish—whether it is blued, parkerized, or raw metal—will guide your selection of prep materials. Furthermore, map out your color scheme. Will you use a single, highly visible color, or will you employ contrasting colors (e.g., bright orange front sight, matte black rear sight) to help your eye quickly align the aiming point?
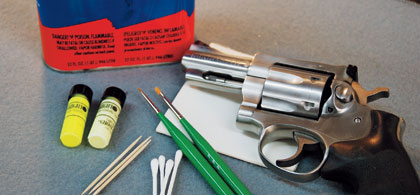
Materials and Tools Checklist
A successful paint job relies on having the right supplies, not the most expensive ones. Organization is key. Group your materials into three categories: Cleaning/Prep, Painting, and Finishing.
- Cleaning and Prep: Acetone or specialized firearm degreaser, lint-free cloths, fine steel wool or abrasive pads, various grits of sandpaper (e.g., 220 grit for initial sanding, 400-600 grit for final sanding), masking tape, and nitrile gloves.
- Painting Supplies: Specialty firearm paint (acrylic enamel or specialized touch-up paint designed for metal), appropriate primers (if recommended by the paint manufacturer), and high-quality brushes (size depends on the technique used).
- Finishing Supplies: A clear coat formulated for metal and firearms (e.g., a matte or semi-gloss protective lacquer), and a small respirator mask and eye protection (safety gear).
The Step-by-Step Guide to Painting Pistol Sights
This process must be followed chronologically to ensure maximum adhesion and longevity. Never skip the cleaning or sanding stages, as they are the foundation of the entire project.
1. Disassembly, Cleaning, and Degreasing
The firearm must be completely disassembled, and the sights removed. Before anything else, the sights must be thoroughly cleaned. Use a specialized degreaser or acetone to wipe down all surfaces, removing any residual oils, fingerprints, or gun grease. Use a lint-free cloth and rinse the parts in a clean area. This step is crucial because paint adhesion cannot occur on a greasy or oily surface.
2. Surface Preparation (Sanding and Abrading)
Even if the sights look pristine, they often have a microscopic layer of protective coating or oil residue that inhibits paint bonding. Lightly sanding the entire surface with 220-grit sandpaper is highly recommended. This action gives the paint something to grip onto. After sanding, wipe the parts down again with the degreaser to remove all sanding dust and residue. The goal is a clean, slightly matte surface.
3. Painting Techniques and Application
Choose your technique based on the desired look. For simple blocks of color, use fine-tipped brushes and mask off areas you do not want painted (like the rear sight base). If you are aiming for a tactical, non-reflective look, stippling—creating small, uniform dots—is effective. Apply the paint in thin, even coats rather than one thick coat. Allowing the first coat to dry slightly before applying the second significantly improves adhesion and reduces dripping.
4. Curing and Sealing
Once all coats are applied, the parts must cure. Do not rush this process. Allow the paint to cure for the minimum time specified by the manufacturer—this might mean 24 to 72 hours, depending on the paint type and humidity. After the cure time has passed, apply your protective clear coat. This seal layer is vital; it protects the vibrant color underneath from environmental elements, scratches, and abrasion, extending the life of your custom finish.
Design and Color Tips for Maximum Visibility
The function of the color must always outweigh the aesthetic desire. Visibility is key. When selecting colors, think about how the sight will appear in different lighting conditions. For maximum contrast, pair a high-contrast color (like bright orange or yellow) on the primary aiming element (the front sight post) and a neutral, matte black finish on the secondary element (the rear sight base). This contrast immediately guides the shooter’s eye.
Consider the environment. For low-light or night shooting, research phosphorescent paints or specialized glow-in-the-dark paints, which absorb and slowly release ambient light. If you are painting for a professional, high-speed environment, matte finishes are generally preferred as they minimize glare and reflection, which can distract during rapid target acquisition. Always test your chosen colors on scrap metal first to ensure the paint color holds up and does not react negatively with the metal surface.
Mistakes to Avoid in Sight Customization
The hobby of customizing firearms carries specific pitfalls. The most common and damaging mistake is inadequate preparation. If you skip the degreasing or sanding, the paint will flake or chip prematurely because it will not have a proper mechanical bond to the metal. Never assume a surface is clean just because it looks clean—oil and residue are invisible.
Another major error is rushing the process. Applying a clear coat or a second layer before the first layer has fully cured will result in a compromised finish that is susceptible to chipping and flaking. Always adhere strictly to the cure times listed by the paint manufacturer. Furthermore, avoid using high-gloss clear coats on tactical sights, as the intense reflection can create unwanted glare, potentially hindering your aim.
Safety and Practical Notes
Safety is paramount. Before starting any modification, the firearm must be fully disassembled, checked, and confirmed to be unloaded. This includes removing the magazine and verifying that the chamber is empty. Never paint or modify any part while the firearm is assembled or semi-assembled.
Ventilation is critical. When working with solvents, degreasers, and clear coats, always work in a well-ventilated area, preferably outdoors or under a fume hood. Wear appropriate protective gear, including chemical-resistant gloves and a respirator mask, to protect your skin and respiratory system from fumes. Finally, always check your local regulations regarding firearm modifications; some jurisdictions may have specific laws about visible markings or parts alterations.
Frequently Asked Questions
What is the single most critical step when painting pistol sights?
Thorough surface preparation. Simply cleaning the sights is not enough; you must chemically degrease them (using acetone or a specialized degreaser) and then lightly sand them (around 220 grit). This process removes invisible oils, residues, and protective coatings, creating a microscopic “key” or mechanical bond that allows the paint to adhere permanently. If you skip this step, the paint will chip or flake off prematurely, regardless of the quality of the paint used.
Get the Fail-Safe Paint Color Playbook (Free PDF)
36 proven colors • 8 ready palettes • trim & sheen guide • printable testing cards.
What type of paint should I use for maximum durability?
Do not use standard hobby paints. You must use specialty enamel or touch-up paint specifically designed for metals and firearms. After the color coats are applied, always seal the entire assembly with a high-quality protective clear coat (lacquer or polyurethane designed for metal). This clear coat is your primary defense, protecting the vibrant color from environmental abrasion, scratches, and moisture, ensuring the paint job lasts years, not months.
How long must I wait between coats, and how do I know when the paint is “ready”?
You must strictly follow the cure times listed on the paint manufacturer’s container. The paint can look dry to the touch (meaning it has ‘dried’), but it may not be structurally cured. Curing means the chemical process has completed and the paint has achieved its maximum hardness and adhesion. Never apply the clear coat or a second color coat until the minimum recommended cure time (which can be 24 to 72 hours) has passed. Rushing this step is the most common cause of a weak, compromised finish.
What safety precautions must I take when painting firearm components?
Safety is non-negotiable. Always work in a highly ventilated area (ideally outdoors or under a fume hood) to prevent inhaling solvents, degreasers, and paint fumes. Wear appropriate personal protective equipment (PPE), including chemical-resistant gloves and a respirator mask rated for organic vapors. Furthermore, ensure the firearm is completely disassembled and confirmed to be unloaded before beginning any preparation work.
Conclusion: Confidence Through Craftsmanship
Painting pistol sights is a deeply rewarding process that merges mechanical function with personal creativity. By respecting the preparation, following the proper curing protocols, and prioritizing safety above all else, you can achieve a durable, high-performing, and uniquely personalized sight system. This customized touch doesn’t just look good—it enhances your confidence and your ability to quickly and accurately acquire your target.
Remember that the goal of any customization is functional improvement. Take your time, work methodically, and always treat your firearm with the utmost respect. With the right knowledge and careful execution, your customized sights will serve as a reliable and visually striking extension of your shooting skill.