
How to Paint Trim Next to Carpet
Painting the trim next to carpet is a common home improvement task that, while seemingly straightforward, requires a high degree of precision and careful planning. The juxtaposition of the painted, solid trim and the soft, fibrous carpet demands specialized techniques to ensure clean, professional lines that last.
Because the carpet is a delicate, high-traffic surface, the primary challenge is twofold: achieving perfect paint adhesion on the trim material while simultaneously protecting the carpet fibers and preventing paint transfer. With detailed preparation, the right materials, and measured application, you can transform this area into a beautiful, polished feature of your home.
Get the Fail-Safe Paint Color Playbook (Free PDF)
36 proven colors • 8 ready palettes • trim & sheen guide • printable testing cards.
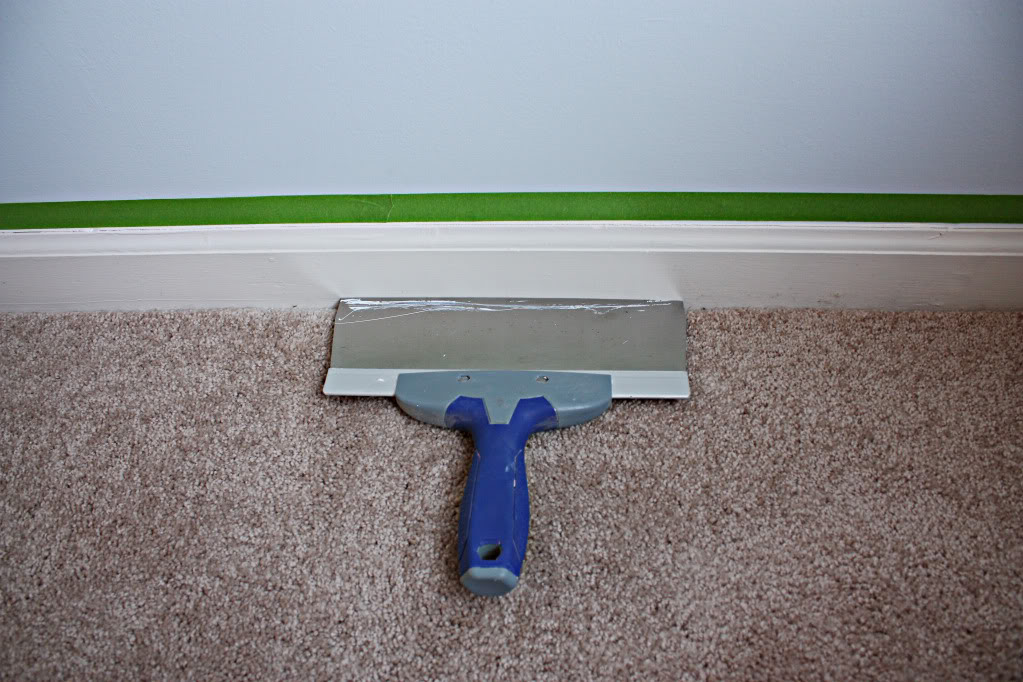
Quick answer: To Paint Trim Next to Carpet, start with the safest first step for the material involved, test a small area when needed, and follow the process in thin, controlled stages. Use proper ventilation and protective gear when chemicals, sanding, spraying, or solvents are involved.
Planning and Preparation Before You Start
A successful painting project is 90% preparation. Before you even open a can of paint, take time to assess the scope of the work, the materials involved, and the timeline. Proper planning saves time, prevents costly mistakes, and guarantees a clean finish.
Assessing the Trim and Surface
Take inventory of your trim. Is it solid wood, painted MDF, or perhaps PVC? Different materials require different types of primers and paints. For instance, highly porous, raw wood will absorb paint unevenly and needs a specialized wood conditioner or primer to seal it. MDF, being dense, generally requires a high-quality latex primer designed for smooth surfaces.
Also, inspect the existing trim for damage. Look for chipped paint, hairline cracks, or areas where the baseboard meets the wall and is separated by caulk. These imperfections must be addressed first. Use a utility knife to scrape away all loose, flaking paint until you reach a stable surface. Fill any cracks or gaps with paintable acrylic caulk before proceeding.
Understanding Paint Sheen and Color Pairing
The choice of paint sheen (the finish) is critical, especially in a visible area like baseboard trim. The sheen affects durability, cleanability, and how the trim reflects light.
- Semi-Gloss: This is the most common and often recommended choice for trim in high-traffic areas. It offers excellent durability, is easy to wipe clean, and resists scuffs better than matte finishes.
- Satin/Eggshell: These are softer, more subdued finishes. They provide a slight sheen and are excellent for walls, but in extremely high-traffic areas (like near a carpet edge), they may show dirt or scuffs more easily than semi-gloss.
- Matte/Flat: These finishes are best for achieving a velvety, non-reflective look, but they are generally the least durable and are prone to showing marks and fingerprints, making them risky for baseboards near a carpet.
When choosing a color, consider the undertones of your wall paint, the color of your carpet, and the natural light in the room. If your trim is meant to blend seamlessly with the wall, choose a shade that matches the wall’s undertone, rather than just the visible color. If you want a contrast, ensure the contrast is intentional and complements the room’s overall palette.
Materials and Tools Checklist
Gathering the right supplies is non-negotiable. Investing in quality tools and materials will drastically improve your results and protect your home.
- Primer: Use a stain-blocking, bonding, or specialized trim primer, depending on the substrate (wood, MDF, etc.).
- Paint: Select a high-quality, durable interior latex or acrylic paint formulated for trim, matching the required sheen.
- Caulk: Acrylic latex caulk for filling gaps between the trim and the wall.
- Tape: High-quality painter’s tape (e.g., blue tape) designed to adhere well but peel cleanly without damaging paint or wood finish.
- Protection: Heavy-duty drop cloths (canvas or plastic sheeting) and painter’s masking tape for protecting the carpet edges.
Tools You Will Need
- Brushes: A high-quality 2- to 2.5-inch angled sash brush is mandatory for cutting in and detailed work.
- Utility Knife/Scraper: For removing loose paint and scraping caulk joints.
- Sanding Supplies: Sandpaper (medium grit, 120-150) and a sanding block for smoothing rough edges.
- Cleaning Tools: Damp sponges, mild soap solution, and vacuum cleaner.
The Step-by-Step Guide to Painting Trim Next to Carpet
This process is broken down into distinct phases: Prep, Seal, Apply, and Finish. Do not skip any steps, especially cleaning and priming.
Phase 1: Deep Cleaning and Surface Prep
Before any paint touches the surface, the trim must be spotless. Use a mild detergent solution and a damp cloth to wash the entire baseboard and trim area. Pay special attention to the bottom edge where dirt, dust, and grit accumulate. Let the trim dry completely—this may take several hours, depending on humidity.
Once dry, lightly sand the entire trim surface. This isn’t to remove paint, but to give the primer and paint something physical to grip onto, ensuring maximum adhesion. Wipe away all sanding dust with a tack cloth or a damp sponge.
Phase 2: Sealing and Priming
Apply the selected primer coat. Use the angled brush for the bulk of the trim and a small roller if the baseboard is very wide and flat. The primer seals the surface, preventing the paint from soaking into the material unevenly, and ensures a uniform color base.
Wait for the primer to dry completely, following the manufacturer’s recommended time. If the trim was heavily chipped or porous, a second coat of primer may be beneficial.
Phase 3: Protecting the Carpet and Cutting In
This is the most delicate step. Use the painter’s tape to create a definitive barrier where the trim meets the carpet. Apply the tape smoothly and press it down firmly to prevent paint seepage. Once the tape is in place, use your angled brush to “cut in”—meaning you paint the initial edge and corners of the trim, staying within the painted boundary and giving yourself a small buffer zone before the tape. This controlled application is key to sharp lines.
Phase 4: Applying the Finish Coats
Wait until the primer is dry. Apply the first coat of paint. Work in small, manageable sections (e.g., 6 to 8 feet at a time). Use smooth, controlled strokes, maintaining a consistent angle and pressure. Do not try to paint the entire length in one go, as this leads to paint pooling and uneven drying.
Allow the first coat to dry fully. Once dry, apply the second coat. Most trim painting requires two coats to achieve full opacity and the deepest, most professional color saturation. If the color is highly contrasting, a third coat might be needed.
Phase 5: The Crucial Tape Removal
Do not wait until the paint is fully cured. Wait until the paint is dry to the touch (usually a few hours), but still slightly tacky. At this point, gently and slowly pull the painter’s tape back at a 45-degree angle, pulling away from the painted surface. This technique minimizes the chance of the paint lifting or peeling off the trim. If the paint is too wet, it may peel; if it is too dry, it may tear the tape.
Beyond basic color matching, considering the context of the room can elevate your paint job from functional to decorative.
When selecting paint, always look at the paint chip or sample under the actual lighting conditions of the room—ideally, during the time of day you want the room to look best. A color that looks perfect in the store’s artificial light might appear too yellow or too blue when exposed to natural daylight. Pay close attention to undertones; a warm undertone in the paint can counteract a cool carpet, or vice versa, creating a cohesive look.
Complementary Color Schemes
For a classic, timeless look, painting the trim the same color as the wall (or a slightly deeper shade) creates a clean, monolithic appearance that makes the room feel larger. If you want a pop of contrast, choosing a shade that is complementary to the carpet’s main color (e.g., if the carpet is blue, a warm cream or a deep charcoal gray works well) can define the space without being jarring.
Gloss Level and Durability
Remember that the sheen you choose dictates the trim’s interaction with the environment. For maximum durability against scuffs and moisture (especially where the trim meets the carpet), semi-gloss is generally the optimal choice. If you are painting a trim piece that is decorative but rarely touched, a satin finish might provide a more elegant, less industrial look.
Common Mistakes to Avoid
Even experienced painters can make mistakes. Being aware of these common pitfalls will significantly increase your chances of a perfect finish.
- Skipping the Primer: This is the most common and detrimental mistake. Without primer, the paint will absorb unevenly, resulting in a patchy, streaky, or dull finish.
- Poor Carpet Protection: Never rely only on drop cloths. Always use painter’s tape to physically seal the edge of the trim where it meets the carpet.
- Rushing the Drying Time: Trying to paint a second coat too early will result in smudges, drag marks, and a lack of adhesion. Always wait for the manufacturer’s specified drying time.
- Improper Tape Removal: Pulling the tape when the paint is either too wet or too dry will cause the paint to peel off the trim or leave residue. Always remove it when the paint is dry to the touch but still slightly flexible.
Safety and Practical Notes
Safety must be your top priority. Painting involves chemicals, dust, and physical effort. Always take precautions to ensure a safe working environment.
Personal Protective Equipment (PPE)
Always wear appropriate PPE, including safety glasses and gloves. If sanding or sanding old paint, wear a dust mask or respirator to protect your lungs from airborne particles. When working with strong solvents or paint fumes, ensure you are protected.
Always ensure adequate cross-ventilation. Open windows and use fans to draw fresh air through the room. This helps dissipate paint fumes and speeds up the drying process, reducing the risk of respiratory irritation.
When to Call a Professional
While this guide is comprehensive for DIYers, there are times when professional help is necessary. You should call a licensed contractor if:
- The trim requires extensive structural repair (e.g., rot or water damage).
- The existing paint is known to contain lead (especially in homes built before 1978).
- The job involves complex, high-elevation work (e.g., painted crown molding high above the floor).
Never attempt to remove lead paint without proper precautions and professional guidance.
Frequently Asked Questions
How do I achieve the sharpest line when painting next to the carpet?
The key to sharp lines is meticulous preparation and the proper use of painter’s tape. Before taping, ensure the trim and the floor surface are both clean and dry. Apply the painter’s tape smoothly, pressing firmly along the entire edge to seal it. When cutting in, paint slowly and deliberately, staying within the taped area, and remember to paint slightly *before* the tape is fully sealed to give yourself a small, controlled buffer zone.
Get the Fail-Safe Paint Color Playbook (Free PDF)
36 proven colors • 8 ready palettes • trim & sheen guide • printable testing cards.
What is the best paint sheen for baseboards in a high-traffic area?
For baseboards located near a carpet edge, durability and cleanability are paramount. Semi-gloss is generally the most recommended choice because it offers excellent resistance to scuffs, dirt, and moisture, making it easier to wipe clean than satin or matte finishes. While satin provides an elegant look, semi-gloss offers the necessary toughness for a high-wear area.
If the trim is heavily chipped or made of old, porous wood, what is the best first step?
Do not skip the priming process. Heavily chipped or porous surfaces will absorb paint unevenly, leading to a patchy or streaky finish. After scraping away loose paint and filling cracks with caulk, you must apply a high-quality, stain-blocking, or bonding primer designed for your specific trim material (wood, MDF, etc.). This seals the surface and ensures the subsequent paint coat adheres uniformly.
When should I call a professional instead of doing it myself?
Always call a licensed contractor if you suspect the existing paint contains lead (especially in homes built before 1978). Working with lead paint requires specialized protective equipment and removal techniques. Additionally, if the trim requires extensive structural repair, such as fixing rot or water damage, professional assistance is necessary to ensure the integrity of the baseboard before painting can begin.
Conclusion
Painting trim next to carpet is a rewarding project that, when approached methodically, yields a beautiful, custom finish. By prioritizing thorough preparation, choosing the right sheen, and mastering the techniques of priming and clean tape removal, you can achieve a professional look that enhances the entire room.
Take your time, work systematically, and remember that patience is the most crucial tool in your toolbox. With these steps, your home will look beautifully refreshed and perfectly finished.