
How to Paint Water Drops: A Guide to Capturing Transparency and Light
Mastering the art of painting water drops is one of the most technically demanding and rewarding challenges in fine art. It requires the artist to transition from simply painting visible colors to scientifically depicting how light behaves when it interacts with a curved, transparent medium. The delicate nature of these droplets—with their ephemeral beauty, complex transparency, and constantly shifting reflections—demands more than just artistic skill; it requires a deep understanding of optics and the principles of light.
This comprehensive guide is designed to serve as your technical roadmap, moving beyond simple techniques to teach you the underlying physics that make hyper-realism possible. We will explore how to accurately render the interplay of light and shadow, the subtle bending of light (refraction), and the perfect mirroring of the environment (reflection). By following these detailed steps, you will learn to capture the luminous, life-like essence of water droplets on your canvas or paper.
Get the Fail-Safe Paint Color Playbook (Free PDF)
36 proven colors • 8 ready palettes • trim & sheen guide • printable testing cards.
Quick answer: To Paint Water Drop, start with the safest first step for the material involved, test a small area when needed, and follow the process in thin, controlled stages. Use proper ventilation and protective gear when chemicals, sanding, spraying, or solvents are involved.
Phase 1: Planning, Observation, and Composition
Before any paint touches the surface, the most critical step is thorough preparation. Painting water drops is not just about applying color; it is about interpreting a physical phenomenon. Your success hinges on your ability to observe, analyze, and plan.
Selecting the Perfect Reference Material
Never attempt this subject from memory. You must use high-quality, varied reference materials. Look for images that capture water drops under different conditions: direct sunlight (for sharp highlights), diffused daylight (for soft gradients), and overcast skies (for muted, complex reflections). When analyzing your reference, do not look at the colors; look at the *light*. Identify:
- The Light Source: Is it overhead, side-lit, or back-lit? This determines the direction of shadows and the placement of specular highlights.
- The Angle of View: Is the shot taken from a macro perspective (extreme close-up) or from a distance? This dictates the scale and level of detail required.
- The Environment: What is surrounding the drops? The surrounding color and texture (leaves, glass, stone) are what the drops will reflect.
Compositional Strategy: Guiding the Viewer’s Eye
Even the most beautiful water drops need a strong composition. Treat the droplets as natural elements within a larger scene. Use classic compositional rules to guide the viewer’s focus:
- Rule of Thirds: Position the main cluster or most dramatic drop slightly off-center, along the lines or intersections of the rule of thirds grid.
- Leading Lines: Use natural elements (like stems, blades of grass, or reflected architectural lines) to guide the viewer’s eye directly toward the most detailed or dramatic droplet.
- Depth and Focus: Plan for a gradient of focus. The drops closest to the viewer should be rendered with the highest detail and contrast, while the drops in the background should transition into softer, less defined forms.
Planning Before You Start
Measure the space and estimate how much paint or material you will need. Check the surface condition for cracks, peeling, or moisture issues that could affect adhesion.
| Art Supplies |
|---|
| High-quality paint brushes |
| Acrylic or watercolor paints |
| Canvas or watercolor paper |
| Palette or mixing tray |
| Palette knife |
| Water container |
| Paper towels or a cloth |
| Pencil and eraser |
| Reference photo or object with water drops |
Decide whether you need primer, specialty coatings, or extra prep steps. Review the weather forecast if working outside, and schedule the project when conditions support proper drying and curing.
Materials and Tools for Precision Painting
The choice of medium is paramount, as it dictates how well you can achieve the necessary translucency. You must select materials that allow light to pass through the paint layer rather than simply sitting on top of it.
Medium Comparison: Watercolor vs. Acrylics
Both mediums can work, but they excel in different areas:
- Watercolor: Excellent for pure transparency and delicate washes. It is the traditional choice for achieving the lightest, most ethereal look. However, it is prone to lifting and requires careful handling of highly saturated colors.
- Acrylics (Glazing Method): Superior for controlling color saturation and building opaque elements (like the immediate background or strong reflections). To achieve transparency, you must mix acrylics heavily with a high-quality, clear glazing medium (like Liquitex Glazing Medium). This allows you to layer color effects without losing luminosity.
To achieve the necessary detail, your toolkit must be specialized:
- Brushes: Invest in a variety of pointed, synthetic detail brushes (for sharp highlights) and soft, fan-shaped blending brushes (for smooth transitions and washes).
- Glazing Medium: A clear, permanent, and non-yellowing glazing medium is essential. This acts as a solvent and binder, allowing thin, transparent color washes.
- Paints: A wide range of highly pigmented, semi-transparent colors, plus a small amount of pure white and pure black for adjusting value and contrast.
- Surface: For watercolor, use cold-press paper or specialized watercolor panels. For acrylics, use a smooth, primed panel board or paper designed for layering washes.
- Palette Knife: Useful not just for mixing, but for scraping and building up thicker, reflective areas.
The Step-by-Step Guide to Capturing Depth and Light
The painting process is a systematic build, moving from the largest forms and darkest shadows to the smallest highlights and most transparent layers. Patience and sequential application are key.
Step 1: Establishing the Base Tone (The Foundation)
Start by painting the environment *around* the water drops. This background layer sets the overall mood and dictates the colors the drops will reflect. Use thin, mid-tone washes, paying attention to the general light direction. Do not over-detail; keep the background slightly softer than the subject to make the drops pop.
Step 2: Defining the Core Form (The Water Body)
Using the lightest value tones, sketch the outline of the drops. Do not paint the drop with a single color. Instead, think of it as a curved lens. Apply a base wash of the dominant color, remembering that the water itself is mostly transparent, so the color of the background will influence the perceived hue.
Step 3: Building Depth through Glazing
This is the most technical step. Instead of painting the shadows and highlights directly, you use multiple thin, semi-transparent layers of paint (glazes). Start by applying a glaze that darkens the edges and the underside of the drop, suggesting volume. Allow this layer to dry completely. Then, apply a second glaze that shifts the color slightly, mimicking the deeper water body. This process builds depth without sacrificing the sense of transparency.
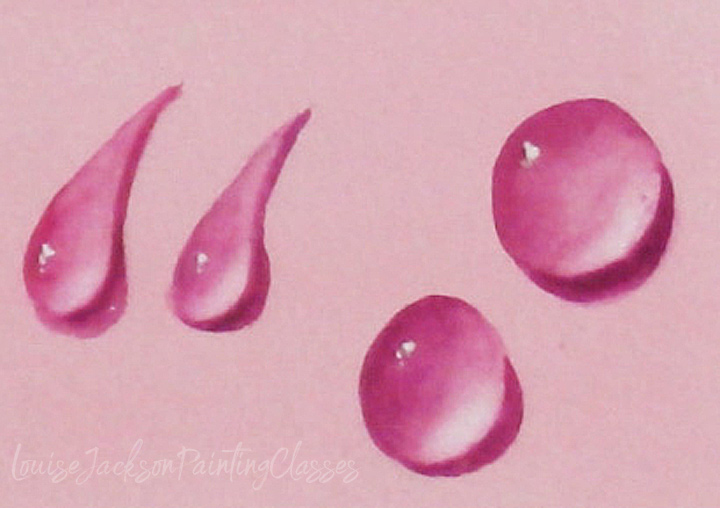
Step 4: Mastering Specular Highlights and Reflection
The highlights are the tiny, brilliant points where the light source hits the surface. These are usually the purest whites or the brightest color of the scene. Use a fine-tipped brush and the *least amount of paint* possible to place these specular highlights. They must look wet and sharp. Simultaneously, paint the reflection on the bottom curve of the drop—this is where the environment’s colors will appear slightly distorted.
The Science of Surface Interaction: Reflection and Refraction
These two elements are what separate a good painting from a masterful one. They require careful observation and specialized techniques.
Painting Reflection (The Mirror Effect)
Reflection is straightforward: the drop acts like a convex mirror, showing a slightly curved, compressed image of the world behind it. When painting the reflection, remember that the colors must be darker and slightly muted compared to the actual objects, and they will often appear slightly warped due to the droplet’s curvature. Use the color values and chroma from the background, but reduce their intensity to simulate the water’s surface layer.
Painting Refraction (The Bending Effect)
Refraction is the most challenging aspect. It is the bending of light as it passes from one medium (air) to another (water) and back out. When a drop sits on a surface (like a leaf), the object viewed through the drop will appear slightly magnified and distorted. To paint this, you must subtly warp the reflected image: if the background has sharp lines, the visible image through the drop should appear curved or stretched, mimicking the lens effect. This requires drawing the distortion pattern *before* you paint the color.
Color Theory and Water’s Palette
Water does not have a fixed color; its color is determined by the environment and the light hitting it. Understanding color pairings and undertones is crucial for realism.
Never think of the water as being “blue” or “clear.” Instead, ask: “What color is the surrounding air or environment?” If the drops are hanging near green foliage, the water will carry green undertones. If they are near stone, they will carry mineral tones. Use the environment’s undertones as your primary color guide, only using cool or warm tones to adjust the overall mood.
Achieving Luminous Contrast
Luminosity is not achieved by painting bright colors; it is achieved by maximizing the contrast between the brightest highlights (the specular points) and the deepest, most saturated shadows. The difference in value (lightness/darkness) between the highlight and the shadow defines the drop’s volume. Use complementary colors in the shadows to make the highlights appear even brighter.
Common Pitfalls and Troubleshooting
Even master painters struggle with water drops due to the subject’s inherent difficulty. Knowing these pitfalls will save hours of frustration.
Mistake 1: Treating the Water as a Solid Object
The most common error is painting the water drop as if it were a solid, opaque sphere. This instantly kills the illusion of transparency. Correction: Always treat the water drop as a window or a lens. The goal is not to paint the water, but to paint the *effect* of the water on the light and the background visible through it. Use thin washes and focus on value changes, not color saturation.
Mistake 2: Ignoring the Light Source
If the light source is inconsistent across the painting, the drops will look flat and weightless. Correction: Before starting, draw a faint guide line indicating the angle and intensity of the light source. Ensure that every drop, no matter its size, responds to that single, consistent light source by having highlights on the same side and shadows on the opposite side.
Mistake 3: Over-Blending
While blending is necessary for smooth transitions, over-blending in a water drop painting makes the form look muddy and loses the crispness required for hyper-realism. Correction: Blend the large color masses (the shadows and mid-tones), but leave the transition between the main body and the specular highlight relatively abrupt. This contrast is what sells the wet, glassy appearance.
Studio Safety and Practical Notes
Because this process involves multiple mediums, solvents, and thin washes, maintaining a safe and clean workspace is vital.
Get the Fail-Safe Paint Color Playbook (Free PDF)
36 proven colors • 8 ready palettes • trim & sheen guide • printable testing cards.
- Ventilation: Always work in a well-ventilated area, especially when mixing or thinning paint with chemical mediums or solvents.
- Curing Time: Patience is a technical requirement. Allow each layer, especially glazes, to dry completely before applying the next. Rushing can cause paint lifting, cracking, or bubbling, ruining the delicate transparency.
- Medium Handling: When using acrylic glazes, always follow the manufacturer’s directions regarding mixing ratios and curing times. Never mix untested mediums.
Frequently Asked Questions
How do I achieve the illusion of transparency in the water drops?
The key is to never use opaque paint to represent the water itself. Instead, think of the drop as a lens or a window. To achieve transparency, you must rely heavily on thin, semi-transparent washes and glazing mediums. These washes allow the color of the background (the surface or air) to show through, creating the illusion of depth and wetness. Use the glazing medium to build up value and shadow, rather than saturation.
What is the practical difference between painting reflection and refraction?
Reflection is the simplest: the drop acts like a convex mirror, showing a slightly compressed, darker image of the environment behind it. Refraction is much harder; it is the bending of light as it passes through the water. To paint refraction, you must subtly warp the background image—if the background has straight lines, the image viewed through the water should appear curved or distorted, mimicking a lens effect. Always draw the distortion pattern first.
What is the most common mistake beginners make when painting water drops?
The most common error is treating the water drop as a solid, opaque object. This immediately kills the sense of realism. Instead, always focus on the *effect* of the water. The goal is to capture how the light interacts with the curved surface, using thin layers of color to suggest volume and depth, rather than painting the water itself.
What safety precautions should I take when using various glazes and mediums?
Since this process involves thin washes, glazes, and potential solvents, working in a well-ventilated area is crucial. Always follow the manufacturer’s instructions for mixing ratios and curing times. Patience is also a safety requirement: allow every layer, especially glazes, to dry completely before applying the next layer to prevent lifting, cracking, or bubbling.
Conclusion: Displaying Your Luminous Masterpiece
The journey of painting water drops is a testament to the marriage of scientific observation and artistic skill. By mastering the principles of transparency, reflection, and refraction, you move beyond simply painting a picture; you are creating an illusion of captured light. Remember that the final polish—the framing, the varnishing, and the display location—is the final act of storytelling. Choose a setting that enhances the luminosity of your piece, allowing the viewer to appreciate the delicate, mesmerizing way you captured water’s ephemeral beauty.