
How to Paint Weathered Wood: A Step-by-Step Restoration Guide
Weathered wood carries a unique, rustic charm that adds deep character to any outdoor space. However, the passage of time and constant exposure to the elements—sun, rain, and temperature shifts—can take a severe toll, causing the wood to lose its luster, crack, and even succumb to structural damage. While the deterioration is inevitable, painting weathered wood offers a highly effective, practical solution to restore its beauty, provide aesthetic uniformity, and offer crucial protection against further decay.
This process is more than just applying a coat of color; it is a comprehensive restoration project. By following a detailed, multi-stage approach—from initial structural assessment to final sealing—you can transform faded, gray, or peeling wood into a durable, rejuvenated surface that will enhance the overall integrity and visual appeal of your home. This guide will walk you through every expert step required to achieve professional-grade results.
Get the Fail-Safe Paint Color Playbook (Free PDF)
36 proven colors • 8 ready palettes • trim & sheen guide • printable testing cards.
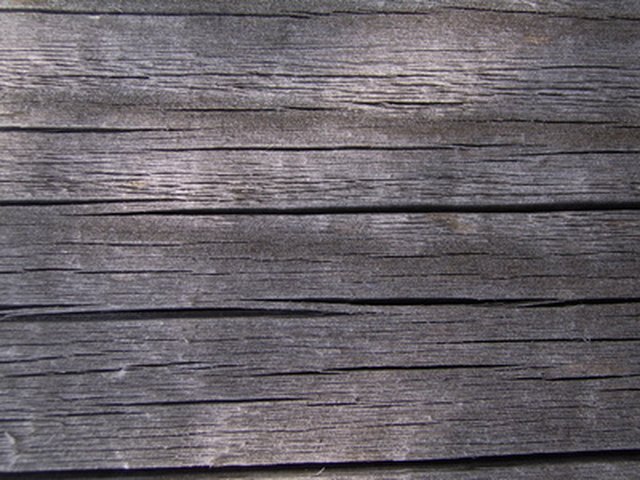
Quick answer: To Paint Weathered Wood, start with the safest first step for the material involved, test a small area when needed, and follow the process in thin, controlled stages. Use proper ventilation and protective gear when chemicals, sanding, spraying, or solvents are involved.
Planning Before You Start: Assessing the Scope and Timing
Before you purchase a single gallon of paint or unscrew the first nail, careful planning is mandatory. This phase involves assessing the scope of work, understanding your resources, and predicting the project timeline. A successful project begins on paper, not on the brush.
First, evaluate the wood itself. Consider the wood type (cedar, pine, redwood, etc.), as different species react differently to paint and stain. Note whether the wood is consistently exposed to direct sunlight, heavy rainfall, or rapid temperature swings, as this dictates the level of durability required in your paint choice. Define the boundaries of your project: are you painting a small set of Adirondack chairs, or an entire structural deck? Knowing the total square footage helps you accurately calculate material quantities.
Next, establish a realistic timeline. Weather-resistant paint and stain require significant drying and curing time. Do not plan to be finished in a single day; expect multiple days of preparation, drying, and recoating. Budgeting should account for not just the cost of paint, but also the necessary fillers, scrapers, protective coverings, and specialized cleaning agents. This upfront assessment prevents costly mid-project delays and ensures your chosen materials are appropriate for the scale of the job.
Phase 1: Assessing and Repairing the Wood Structure
The most critical step is understanding the structural health of the wood. Paint is a protective layer, but it cannot mask underlying decay. You must treat the wood like a carpenter would, addressing its bones before treating its skin.
| Tools | Materials |
|---|---|
| Sandpaper | Wood primer |
| Putty knife | Exterior paint |
| Paint scraper | Wood filler |
| Cleaning brush or cloth | Painter’s tape |
| Safety goggles | Drop cloths or plastic sheeting |
Thoroughly inspect every section of the wood for signs of deep damage. Look for soft spots, areas that crumble when pressed, or discoloration that suggests fungal growth. These are indicators of rot or significant water damage. Similarly, check for evidence of insect infestation, such as sawdust piles or exit holes. If structural damage is found, stop the painting process immediately. The wood must be stabilized—this may require cutting out and replacing rotted sections or applying specialized epoxy consolidants, which should often be done by a licensed professional.
After identifying and repairing all structural weaknesses, focus on surface debris. Remove all loose, flaky, or peeling paint. Use a sturdy paint scraper or putty knife to gently lift away any paint that is compromised. This scraped paint residue is what causes premature failure and peeling in the new coat. The goal is to expose solid, stable wood beneath the failing layers.
Materials and Tools: Gathering Your Supplies
Having the right equipment is half the battle. Do not attempt this project without specialized tools and high-quality materials. Always buy tools and paint rated for exterior use.
Essential Tools Checklist:
- Power Washer (if appropriate for the wood type) or stiff-bristle brushes
- Safety Gear: Gloves, safety goggles, and a respirator (especially if dealing with lead or mold)
- Scrapers, putty knives, and wire brushes
- Sandpaper assortment (80-grit coarse, 120-grit medium, 220-grit fine)
- Caulk gun and appropriate wood filler
- Drop cloths, painter’s tape, and masking materials
- Orb roller and various sized brushes (angled and flat)
Paint and Coating Selection Criteria:
When purchasing paint, always look for the “Exterior Grade” or “Weather-Resistant” label. For the primary coating, choose an 100% acrylic latex paint. Acrylics offer superior flexibility and UV resistance compared to traditional oil-based paints, making them ideal for the expansion and contraction cycles of outdoor wood. For stains, choose penetrating, semi-transparent stains that allow the wood’s natural grain to breathe and resist trapping moisture.
Phase 2: Surface Preparation – The Most Critical Step
This phase is non-negotiable; it determines the longevity and finish quality of your entire project. Skipping or rushing these steps is the most common mistake homeowners make.
Deep Cleaning: Begin by cleaning the surface. If the wood is heavily soiled, mildewed, or covered in grime, use a specialized, non-acidic wood cleaner or a mild bleach solution (following all safety guidelines). Use a soft brush or a low-pressure power washer (test the pressure on an inconspicuous area first). Rinse thoroughly with clean water. Allow the wood to dry completely—this can take several days, depending on the climate.
Sanding and Filling: Once dry, start the sanding process. Use coarse-grit (80-100 grit) sandpaper to smooth out deeply embedded dirt and rough patches. Then, use medium-grit (120 grit) to smooth the surface overall. Use the putty knife and wood filler to fill all visible cracks, gaps, and nail holes. Once the filler is dry, lightly sand the filled areas with fine-grit (220 grit) sandpaper to achieve a seamless, uniform transition.
Priming: Applying a quality wood primer is mandatory. The primer serves two vital functions: it seals the wood’s porous surface, preventing the tannins (natural chemicals) from bleeding through the top coat and causing streaks, and it ensures the paint adheres uniformly, regardless of whether the wood was originally painted or bare.
The choice between paint and stain, and the selection of finish, profoundly affects the final look and durability of the piece.
Paint vs. Stain: If your goal is complete color coverage, uniformity, and maximum protection (such as on a fence or trim), use a solid exterior paint. If your goal is to maintain the wood’s natural texture, grain, and weathered character while still protecting it, use a semi-transparent stain. Stains absorb into the wood, allowing the grain to show, whereas solid paint creates a uniform, opaque surface.
Understanding Sheen and Finish: The sheen (or luster) of the paint finish influences both durability and aesthetics.
- Matte/Flat: Hides imperfections well and gives a rustic, low-maintenance look. Best for distressed or heavily textured wood.
- Satin: Offers a subtle, moderate sheen. It is the most popular choice for outdoor furniture and trim, as it balances durability with appearance.
- Semi-Gloss/Gloss: Highly durable and easy to clean, but it accentuates every flaw and imperfection in the wood beneath it. Use this sparingly on highly finished pieces.
For maximum longevity in harsh climates, always choose coatings rated for UV resistance. These paints contain additives that prevent the sun’s rays from breaking down the polymer binder, keeping the finish vibrant and intact.
Phase 4: Application Techniques and Finishing
Proper application technique ensures that the paint penetrates and adheres evenly, maximizing its protective lifespan.
Preparation for Application: Before painting, mask off all adjacent surfaces (stone, metal, adjacent wood) using painter’s tape and plastic sheeting. Always work on a day with low humidity and moderate temperatures, as extreme conditions can compromise the drying process.
Applying the First Coat: Apply the paint or stain following the natural direction of the wood grain. Use a roller for large, flat areas and a brush for edges and detailed sections. Apply paint in manageable sections, ensuring even coverage and avoiding excessive pooling, which can lead to drips or runs. The first coat is primarily about establishing a uniform foundation.
Layering and Curing: Allow the first coat to dry completely according to the manufacturer’s stated time (often 4 to 24 hours). Do not rush this step. Subsequent coats should be applied with the same technique, building up the protective layer. For stain, the second coat may be necessary to achieve deep penetration. For paint, two to three coats are often recommended for optimal color depth and durability.
After the final coat has dried, consider applying a clear, weather-resistant topcoat sealant. This final layer acts as a sacrificial barrier, protecting the paint itself from immediate environmental wear and tear, thereby extending the lifespan of your painted wood.
Mistakes to Avoid: Common Painting Pitfalls
Even experienced DIYers can fall into common traps. Avoiding these pitfalls will dramatically increase the success rate of your project.
Never Skip the Primer: Assuming the wood is stable enough for paint to adhere immediately is a major error. Tannins, sap, and residual surface treatments will bleed through unprimed paint, creating unsightly streaks and blotching. The primer is your foundation of consistency.
Do Not Rush Drying Time: Paint, stain, and primer all require specific drying and curing times. Many people confuse “dry to the touch” with “ready for the next coat.” If you apply a second coat before the first has fully cured, the coatings will mix improperly, leading to poor adhesion and peeling. Always check the can for minimum recoat times.
Ignoring Surface Damage: Trying to paint over significant structural cracks, rot, or deep gouges guarantees failure. The paint will simply crack or peel along the line of the structural weakness. Before painting, all visible structural damage must be repaired, stabilized, and filled with appropriate, weather-resistant fillers.
Safety and Practical Notes
Safety must always be the top priority when working with chemicals, power tools, and old materials.
Personal Protective Equipment (PPE): When sanding, scraping, or mixing chemicals, always wear appropriate PPE, including safety goggles, chemical-resistant gloves, and a particulate respirator. Dust and fumes are hazardous.
Ventilation and Handling Lead Paint: Always ensure excellent ventilation when using solvents, stains, or latex paints. Never paint or prime in an enclosed, unventilated space. If the weathered wood is older than 1978, there is a high probability of lead-based paint. If you suspect lead paint, you must follow all local environmental agency guidelines, use proper containment, and consider calling a licensed abatement professional. Never disturb suspected lead paint without proper precautions.
When to Call a Professional: While painting is a DIY-friendly project, you should call a licensed professional if the structural damage is extensive (rot, insect infestation requiring chemical treatment), if the project involves lead paint abatement, or if the wood is part of a complex, load-bearing architectural element.
Frequently Asked Questions
What is the single most critical step in painting weathered wood?
The most critical step is preparation. Paint is only as good as the surface it adheres to. You must spend significant time on deep cleaning (removing mold, mildew, and grime), scraping away all loose, peeling paint, and thoroughly sanding to create a uniform, stable surface. Never skip the mandatory priming step, as this seals the wood and prevents tannins from bleeding through and causing streaks.
Get the Fail-Safe Paint Color Playbook (Free PDF)
36 proven colors • 8 ready palettes • trim & sheen guide • printable testing cards.
Should I use solid paint or a penetrating stain?
This depends entirely on your desired aesthetic. Use a solid exterior paint if your goal is maximum protection and complete color uniformity (e.g., on a fence). Use a semi-transparent, penetrating stain if you want the wood’s natural grain, texture, and weathered character to remain visible while still providing protection.
What should I do if I find structural rot or deep damage?
Do not attempt to paint over significant structural weaknesses. Paint is a cosmetic layer, not a structural repair. If you find soft spots, crumbling areas, or deep gouges, the wood must be stabilized first. This often requires cutting out and replacing rotted sections or applying specialized, weather-resistant epoxies. For extensive rot or insect damage, calling a licensed professional is highly recommended.
Is it safe to paint older, weathered wood?
If the wood is older than 1978, assume it contains lead paint and treat it as such. Lead paint abatement must be handled by a licensed professional who can ensure proper containment and disposal. Always wear appropriate Personal Protective Equipment (PPE), including respirators, goggles, and gloves, when sanding, scraping, or mixing chemicals, regardless of the wood’s age.
Conclusion
Painting weathered wood is a deeply rewarding project that requires diligence and patience, but the transformation is worth every step. By respecting the wood’s structural integrity, dedicating time to meticulous preparation, and selecting coatings suited for the outdoor environment, you are setting your project up for decades of beauty and protection.
Embrace the process, work systematically through the five phases, and remember that quality materials and proper technique are the keys to unlocking the wood’s full potential. Happy painting, and enjoy the revitalized beauty of your outdoor space!