
What Kind of Paint to Use on a Pop Up Camper?
Revitalizing a pop-up camper is one of the most rewarding home improvement projects, transforming a functional piece of equipment into a personalized outdoor retreat. However, painting a camper is vastly different from painting a stationary home wall. Because pop-up campers are constantly exposed to extreme environmental shifts—from harsh UV rays in the desert to corrosive saltwater spray on the coast—the paint must function not just as a color, but as a robust protective shield. Selecting the wrong paint can lead to failure, peeling, and accelerated corrosion.
To ensure your camper not only looks fantastic but remains structurally protected for years of adventure, you must approach the project with the mindset of a marine coatings specialist rather than a general decorator. This guide will walk you through the technical requirements, material compatibility, and proper application methods needed to select and apply a paint system that can withstand the rigors of the open road and the elements.
Get the Fail-Safe Paint Color Playbook (Free PDF)
36 proven colors • 8 ready palettes • trim & sheen guide • printable testing cards.
Best choice: The best choice depends on the surface, durability needs, finish, application method, safety requirements, maintenance, and budget. Avoid choosing by price alone; match the product to the job and check the manufacturer directions before buying.
Assessing Your Pop-Up Camper: Material, Condition, and Environment
Before you even look at a color swatch, you must conduct a thorough assessment of the camper itself. This preliminary evaluation dictates every subsequent decision, from the type of primer to the final coat.
Identifying the Primary Substrate Material
Pop-up campers are often composites, meaning they combine several materials. You must identify the dominant surface type, as each requires a chemically compatible paint system. Look for the following:
- Sheet Metal (Steel/Aluminum): These surfaces are prone to rust and corrosion. They require specialized primers and coatings (like epoxy) that provide a robust anti-corrosion barrier.
- Fiberglass/Composite Panels: These materials are non-porous and durable but can suffer from gelcoat degradation or stress cracks. They generally handle high-quality acrylic enamels well, provided the underlying resins are sound.
- Wood/Wood-Simulated Panels: If the camper has visible wood components (like trim or cabinetry), these require paint designed for porous substrates, often involving oil-based or specialized acrylic stains/enamels.
Evaluating the Current Surface Condition
The condition is arguably more important than the material itself. You must look for signs of degradation:
- Rust and Oxidation: Visible rust spots on metal are critical. These areas cannot simply be covered; they must be physically removed down to clean, bare metal.
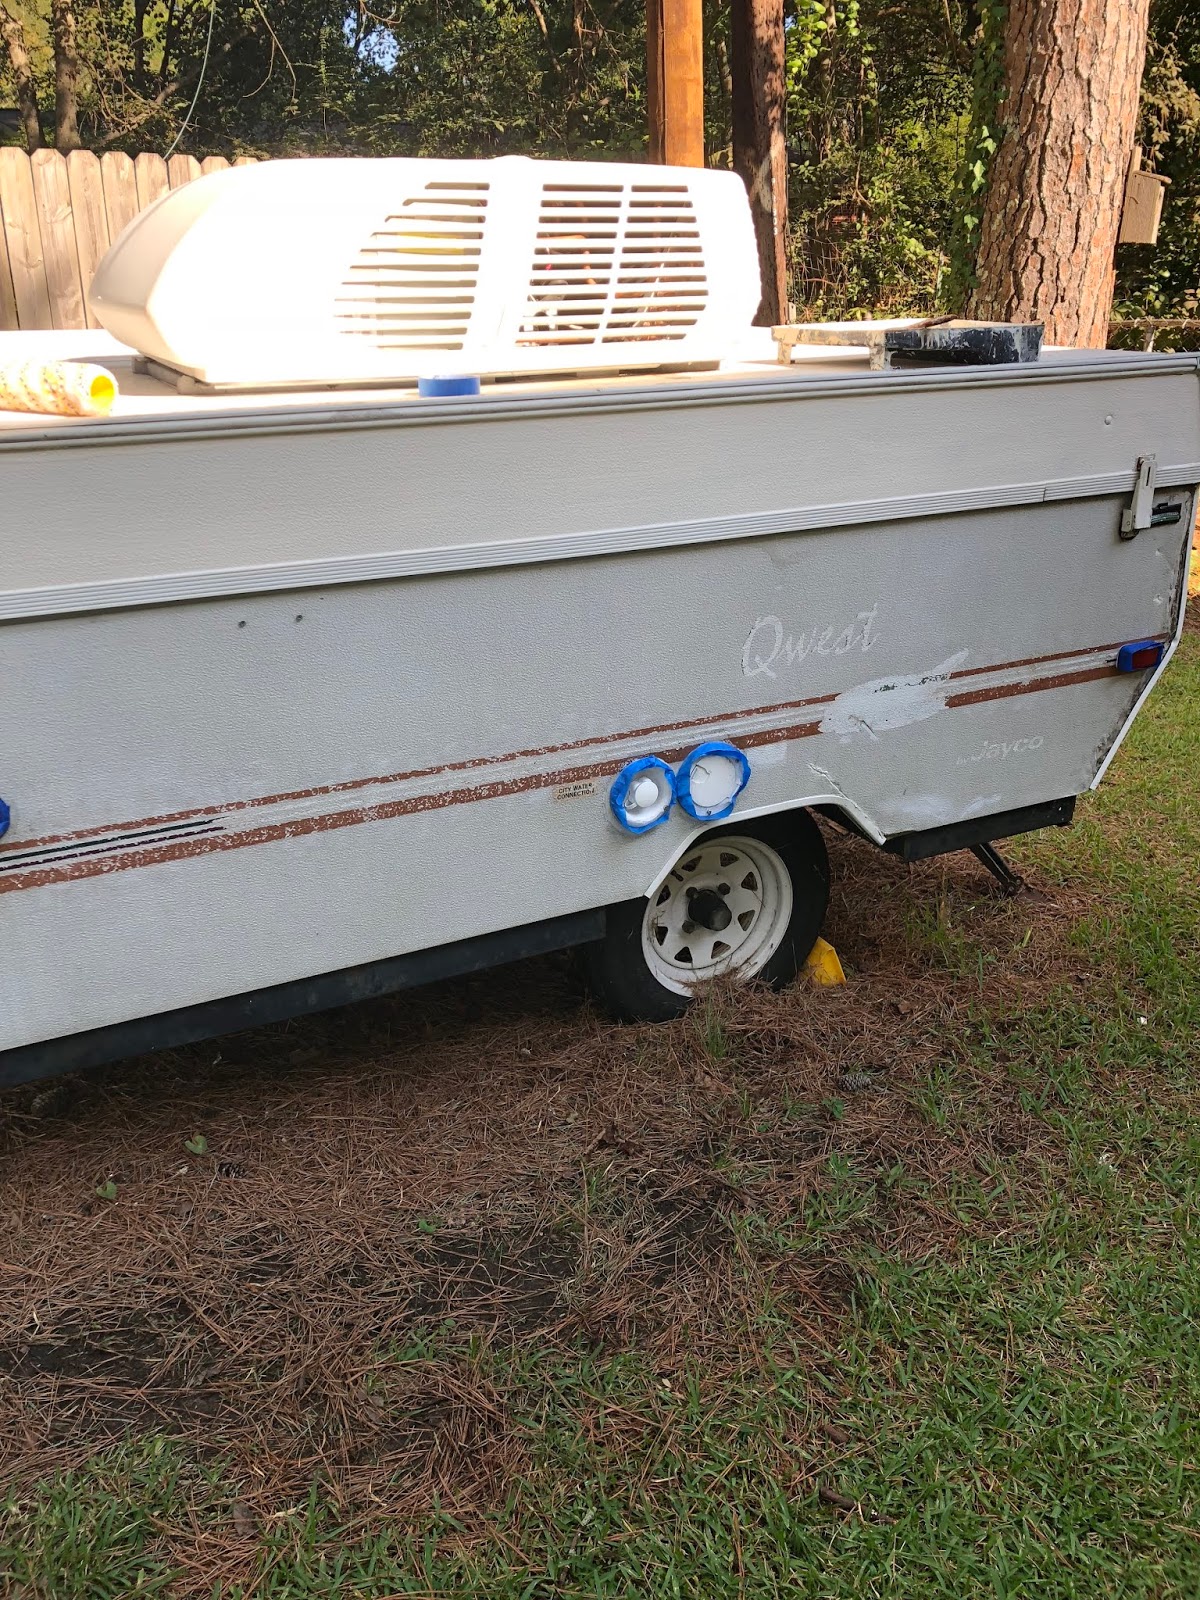
- Peeling Paint/Chipping: Any area where the old paint is lifting, flaking, or chipping must be scraped and sanded back until you reach a stable, sound substrate.
- Delamination/Cracks: On fiberglass, look for areas where the outer layer is separating or where hairline cracks are visible. These areas may require structural fillers or professional patching before any paint can be applied.
Understanding Environmental Stressors
The paint must survive the place you plan to park it. Consider these stressors:
- UV Exposure: Prolonged exposure to sunlight causes most paints to fade (UV degradation). Coatings designed for exterior use (like marine-grade) contain UV inhibitors to mitigate this.
- Humidity and Moisture: High humidity and standing water promote mold and mildew, which can penetrate paint films. Coatings must be breathable yet waterproof.
- Saltwater/Coastal Air: Salt spray is highly corrosive and accelerates oxidation. Any paint used in a coastal environment must be explicitly labeled as marine-grade to handle chloride ions.
Choosing the Right Protective Coating for Your Camper
Selecting the paint requires matching the coating’s chemistry to the surface material and the environmental demands. Here is a detailed comparison of the top four types of coatings used for RVs and campers.
Marine-Grade Paint Systems (Best for Coastal/High Moisture)
These coatings are formulated to meet the extreme demands of the marine environment, making them the safest choice for campers used near lakes, rivers, or the ocean. They are designed to resist constant exposure to salt, brackish water, and rapid temperature changes.
Strengths: Superior resistance to corrosion, oxidation, and osmotic pressure. Excellent adhesion to metal substrates. Often formulated with specialized anti-fouling or anti-corrosion additives.
Ideal Use: Any exterior surface exposed to moisture, especially metal components and undercarriage.
Preparation Needs: Requires aggressive rust removal and specialized surface preparation primers designed for saline environments.
Epoxy Paint (Best for Durability/Chemical Resistance)
Epoxy paint is known for its exceptional, nearly impermeable barrier properties and incredible adhesion. It forms a hard, durable shell that resists chemicals, abrasion, and moisture penetration. It is often used in industrial settings, making it highly durable for a high-traffic area like a camper floor or utility surface.
Strengths: Extremely strong adhesion to metal and fiberglass. Excellent chemical and abrasion resistance. Durable and long-lasting when properly prepared.
Ideal Use: Camper floors, utility surfaces, or areas needing maximum impact resistance.
Preparation Needs: The substrate must be perfectly clean, grease-free, and free of porous contaminants. Epoxy systems often require careful mixing and application within a specific timeframe.
Acrylic Enamel Paint (Best for Versatility/Weather Resistance)
Acrylic enamels are perhaps the most versatile option for general camper use. They are designed to be weather-resistant, durable, and easy to work with. They offer a good balance of cost, durability, and ease of application, making them popular for general body panels and trim.
Strengths: Excellent UV resistance and weatherproofing. Available in a wide range of sheens and colors. Generally easier to apply than two-part epoxies.
Ideal Use: General exterior body panels, trim, and non-structural decorative elements.
Preparation Needs: Requires thorough cleaning and a quality acrylic bonding primer to ensure maximum adhesion, especially on older or porous fiberglass surfaces.
Automotive Paint (Best for Professional Finish/Aesthetics)
These paints are designed to mimic the finish and durability of vehicle paint jobs. They provide a high-gloss, deep color, and excellent aesthetic quality. They are best reserved for cosmetic enhancements where a mirror-like finish is desired.
Strengths: Exceptional color depth and high shine. Very durable when applied correctly.
Ideal Use: Cosmetic paneling, tailgate, or areas where a showroom finish is desired.
Preparation Needs: Requires meticulous sanding and preparation to achieve a smooth, flawless surface for the paint to adhere to. Often requires specialized masking and spray equipment.
Materials and Tools: Your Essential Painting Kit Checklist
Proper tools are as vital as the paint itself. Organizing your supplies by function—Preparation, Repair, and Application—will streamline your workflow.
- Cleaning Agents: Mild detergent, degreaser (for grease removal), and specialized surface cleaners.
- Rust Treatment: Wire brushes, sandpaper (various grits, 80-120 grit for removal; 180-220 grit for smoothing), and commercial rust converters (e.g., phosphoric acid-based).
- Primers/Sealers: Always buy a primer specific to the substrate (e.g., metal bonding primer, fiberglass primer, or universal bonding primer).
- Masking Supplies: High-quality painter’s tape, plastic sheeting, and painter’s drop cloths.
- Patching Compounds: Flexible fillers or body filler designed for metal or fiberglass repair.
- Sanding Equipment: Orbital sanders, sanding blocks, and sanding discs appropriate for the material.
Application Tools
- Brushes: High-quality synthetic brushes for cutting in and detailed work.
- Rollers: Roller frames with nap thicknesses appropriate for the surface texture (shorter nap for smooth panels; longer nap for textured fiberglass).
- Spraying Equipment (Optional): Airless paint sprayer and necessary filters/hoses, if opting for a professional finish.
Achieving the Perfect Look: Design and Color Considerations
While the paint must first be protective, its aesthetic contribution is key to the camper’s appeal. When considering color, always remember that the color you see in the store is not the color you will see on the road.
Understanding Sheen and Finish
The sheen (or gloss level) affects durability, cleanability, and how light interacts with the paint:
- Matte/Flat: Hides imperfections and surface flaws well. However, it is the least durable finish and can be difficult to clean, often requiring specialized cleaners.
- Satin/Eggshell: Offers a subtle sheen, providing a balance between durability and aesthetics. It is easier to clean than matte paint and is excellent for general body panels.
- Semi-Gloss: Highly durable and extremely easy to clean, making it great for high-wear areas like trim, edges, and utility compartments. However, it tends to highlight imperfections.
Never choose a color based on how it looks indoors or in the paint store’s fluorescent lighting. Natural light—especially the changing light of dawn, midday, and dusk—will shift the paint’s undertones. A cool gray might look perfect in the store but appear slightly greenish in direct sunlight. Always buy sample pots and paint large test swatches on an inconspicuous area of the camper and observe them at different times of day.
Critical Mistakes to Avoid for Long-Term Longevity
Many paint failures stem not from the paint itself, but from preparation shortcuts. Avoiding these common mistakes is paramount to extending the life of your camper.
- Skipping Rust Treatment: The single biggest mistake. Never paint over active rust. Rust must be physically removed and treated with a rust converter before any primer is applied.
- Ignoring Primers: Assuming the paint will stick on its own is a recipe for failure. A bonding primer is necessary to create a chemical bridge between the raw substrate (metal/fiberglass) and the topcoat.
- Painting Over Grease or Oil: Even a thin film of oil, hand grease, or wax residue will prevent the paint from adhering properly, leading to premature flaking. Thorough degreasing is non-negotiable.
- Improper Curing Time: Rushing the drying process. Paint must cure fully—which can take days or weeks, depending on the product and climate—before the camper is exposed to heavy use or moisture.
Safety and Practical Handling Notes
Because camper painting involves solvents, chemicals, and abrasives, safety must be the absolute priority. Never compromise on protective equipment.
Personal Protective Equipment (PPE): Always wear chemical-resistant gloves, safety goggles, and a proper respirator (NIOSH-approved for organic vapors) when sanding, stripping, or applying solvents/paints. The fumes from these chemicals can be harmful.
Ventilation: Work outdoors or in a professionally ventilated area. Never paint or strip in a closed, unventilated space. Ensure adequate fresh air circulation to dissipate solvent fumes.
Professional Help: If the camper has structural damage, extensive metal corrosion, or involves hazardous materials (like suspected lead paint or asbestos), do not attempt the work yourself. Call a licensed professional who specializes in structural restoration and coatings.
Get the Fail-Safe Paint Color Playbook (Free PDF)
36 proven colors • 8 ready palettes • trim & sheen guide • printable testing cards.
Frequently Asked Questions
What is the single most critical step for paint longevity?
The most critical step is surface preparation. No amount of expensive paint can overcome poor prep work. You must thoroughly clean the surface, which involves physically removing all active rust, loose paint, grease, oil, and mildew. Always use a specialized degreaser and, if rust is present, use a commercial rust converter and sand the area down to bare, stable metal before applying any primer. Skipping these steps guarantees failure.
How do I choose the right type of paint coating?
Your choice depends on the environment and the substrate. For coastal or high-moisture areas, always opt for a marine-grade coating due to its superior resistance to salt and corrosion. If you are painting utility surfaces like floors, choose an Epoxy system for maximum durability and chemical resistance. For general body panels and trim, an Acrylic Enamel offers the best balance of UV resistance, versatility, and ease of application. Always match the primer to the substrate (metal, fiberglass, or wood).
When should I call a professional painter?
You should call a professional if the camper has significant structural damage, extensive metal corrosion that requires cutting, or if you suspect the presence of hazardous materials like lead paint or asbestos. Professionals have the specialized equipment and knowledge to handle structural repairs and chemical abatement safely. Never attempt structural or hazardous material remediation yourself.
How will the color look when installed on the camper?
Do not rely on the paint store’s color swatches or the paint can’s label. The color will be heavily influenced by the natural light (dawn, midday, and dusk) and the finish’s sheen. To accurately predict the color, purchase sample pots and paint large, inconspicuous test swatches on the camper body. Observe these swatches at different times of day and in direct sunlight before committing to the final color.
Conclusion
Transforming your pop-up camper is a multi-step process that demands patience and technical diligence. While the color and finish provide the aesthetic flair, the longevity and success of the project rest entirely on the quality of your preparation. By meticulously assessing the camper’s materials, treating every surface flaw, and selecting a coating specifically designed for its harsh environment, you can ensure your camper remains a durable, beautiful, and reliable companion for decades of outdoor adventure.