
How to Choose the Right Roller for Ceiling Paint: A Guide
Painting a ceiling is one of the most transformative, yet often intimidating, tasks in home improvement. While the surface might seem simple—a flat expanse above your head—achieving a truly flawless, professional finish requires more than just a bucket of paint and a roller. Selecting the correct application tool is arguably the most critical step toward avoiding unsightly streaks, uneven coverage, and a bumpy, amateur appearance.
The right roller acts as an extension of your hand, ensuring that the paint is applied with consistent pressure and an optimal layer thickness. Conversely, using a roller that is too coarse, too fine, or designed for the wrong paint type can leave visible marks, requiring extensive sanding or multiple coats just to achieve a uniform look. This comprehensive guide will walk you through the technical considerations, material science, and application techniques necessary to select the perfect roller for any ceiling paint project, making you feel confident and prepared from the first roll.
Get the Fail-Safe Paint Color Playbook (Free PDF)
36 proven colors • 8 ready palettes • trim & sheen guide • printable testing cards.
Quick answer: For what kind of roller for ceiling paint, start by identifying the surface condition, gathering the right supplies, and working in a well-ventilated area. Prep carefully, test a small area when possible, follow manufacturer directions, and use thin, controlled steps so the result is safer, cleaner, and easier to correct if something looks wrong.
Planning and Preparation: What to Know Before Choosing
Before you even think about roller types, you must assess the environment and the surface. The ceiling is not a blank slate; it has inherent characteristics—texture, moisture, and existing finish—that dictate your material choices. Skipping this assessment is the number one mistake DIYers make.
Assessing the Ceiling Surface
The texture is paramount. If your ceiling is smooth drywall or plaster, you need a tool that leaves minimal texture behind. If it is a popcorn ceiling, the roller must be durable enough and have a deep enough nap to handle the extreme irregularity without losing paint or leaving streaks. Always test a roller on an inconspicuous area first to gauge its interaction with the existing substrate.
Understanding the Paint Type and Sheen
Ceilings almost always require a flat, matte, or satin finish paint. These low-sheen paints are designed to hide imperfections and provide a uniform, non-reflective background. High-gloss paints are rarely used on ceilings because they exaggerate every bump, seam, and imperfection, making the surface look uneven. Furthermore, the chemical composition of the paint (latex vs. oil-based) dictates which roller material will absorb and release the paint most efficiently.
The Buying Guide: Comparing Roller Materials
Roller materials are not interchangeable; they are engineered for specific paint viscosities and surface porosities. Understanding the difference between synthetic, natural, and microfiber rollers is key to success.
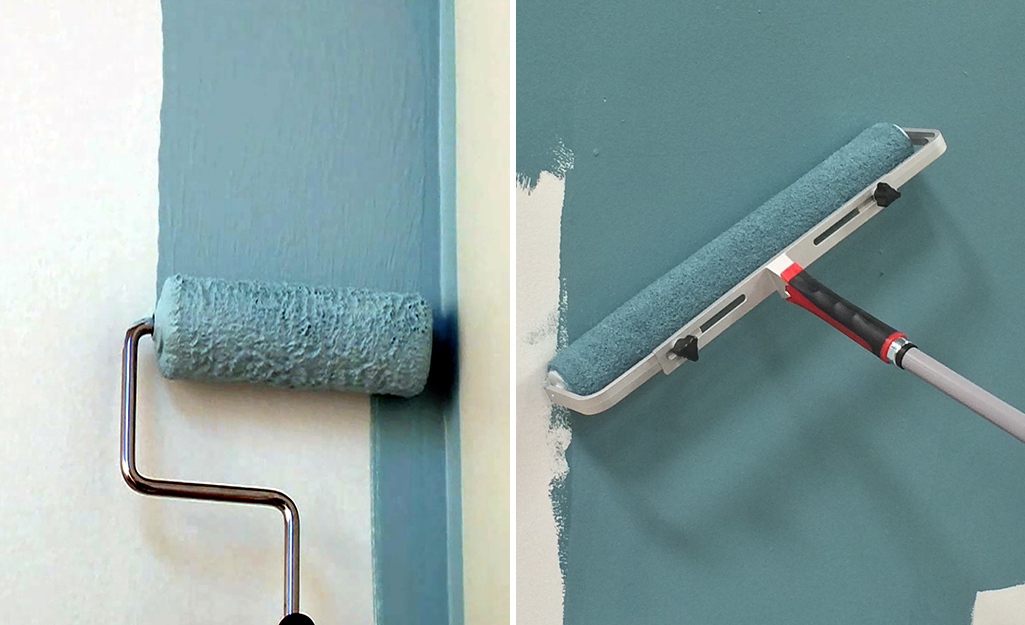
Synthetic Rollers (Nylon/Polyester)
These are the industry standard for modern interior latex paints. They are durable, easy to clean, and are designed to hold a consistent amount of paint without excessive shedding. They are particularly effective when applying water-based paints because the synthetic fibers resist swelling and maintain their structure even when saturated.
Best for: Smooth drywall, latex paint, general interior use.
Microfiber Rollers
Microfiber is often considered the premium choice for smooth, fine finishes. These rollers are made of incredibly fine, tightly woven fibers that excel at picking up and distributing paint in a highly even manner. They are excellent at minimizing roller marks and achieving a velvety finish, making them ideal for achieving that perfect, uniform ceiling look.
Best for: Very smooth surfaces, premium finishes, latex paint.
Natural Fiber Rollers (Lambswool/Mohair)
Natural fibers, such as wool, were historically used for oil-based paints. While they offer excellent loft and deep coverage, they can be problematic for modern latex paints, which are designed to dry quickly. They can also absorb paint unevenly and are more prone to shedding or developing inconsistent texture on very smooth surfaces. They are best reserved for heavily textured or rough surfaces where deep pile is needed.
Best for: Heavily textured surfaces (like rough plaster or popcorn ceilings), oil-based paints.
Foam Rollers
Foam rollers are generally designed for specific, very smooth applications and are less common for general ceiling use. They can be effective for very glossy or specialized coatings, but their applicability on standard matte ceiling paint is limited compared to microfiber or synthetic options.
The “nap length” is perhaps the most confusing, yet most critical, measurement. Nap length refers to the thickness of the roller pile. It must be matched to the surface texture, not just the paint.
- Short Nap (1/2 inch to 3/4 inch): Ideal for extremely smooth, finished surfaces like plaster or drywall. This length minimizes roller marks and ensures a tight, even coverage suitable for matte ceiling paint.
- Medium Nap (3/4 inch to 1 inch): Suitable for moderately textured surfaces, such as lightly popcorned ceilings or rougher plaster. It provides enough loft to grip the texture without being so large that it leaves obvious marks.
- Long Nap (1.5 inches+): Reserved for very rough, highly porous, or heavily textured surfaces. These rollers are bulky and should be used with caution on smooth ceilings as they will leave noticeable patterns.
Use and Application Tips for Flawless Ceilings
The tool is only half the battle; the technique is equally vital. Following these steps will dramatically improve your final result and help minimize the risk of visible roller marks.
Step 1: Preparation and Masking
Before the first drop of paint touches the ceiling, preparation is mandatory. Use painter’s tape to mask off all fixtures, crown molding, and any areas you do not want paint to touch. Clean the ceiling thoroughly, removing any cobwebs, dust, or grime. A clean surface ensures proper adhesion and uniform paint application.
Step 2: The Cutting-In Technique
Never start rolling immediately. First, use a high-quality angled brush (a “cutting-in” brush) to paint a border or edge along the perimeter of the room, especially where the ceiling meets the walls. This initial coat allows you to establish a clean line and ensures the roller starts on a semi-painted surface, preventing streaks.
Step 3: Rolling Pattern and Overlap
Use the “W” or “M” pattern, working in manageable sections. Instead of rolling in straight lines, use large, overlapping ‘W’ shapes. This technique allows the roller to overlap the previous section’s paint, blending the colors and eliminating visible seams or lines. Always roll with moderate, consistent pressure—too little pressure, and you’ll need more coats; too much, and you risk excessive paint transfer and drips.
Step 4: Managing Paint Consistency
Do not overfill your roller tray. Dip the roller into the paint and roll it gently on the tray surface until the nap is evenly coated, but not dripping. Excess paint leads to waste, drips, and a heavier, less uniform finish.
Common Mistakes to Avoid When Painting Ceilings
Even experienced DIYers can fall into common traps. Being aware of these pitfalls can save you hours of frustrating rework.
- Ignoring the Primer: If the ceiling surface is new drywall, heavily stained, or significantly different from the adjacent walls, always apply a specialized ceiling primer first. Primer seals the surface, ensuring the paint adheres evenly and prevents the surface from absorbing paint unevenly.
- Using the Wrong Roller for the Sheen: Using a coarse roller on a smooth, low-sheen surface will guarantee visible roller marks and a noticeable texture. Always match the nap length to the desired smoothness.
- Rushing the Drying Time: Paint needs adequate drying time between coats, especially in humid environments. Applying a second coat too quickly can lead to poor adhesion, streaks, and uneven drying. Always check the manufacturer’s recommended recoat time.
- Poor Ventilation: Working in a poorly ventilated area can lead to excessive fumes, paint curing issues, and general air quality problems. Always ensure proper airflow.
Safety and Practical Notes
Safety must always be the top priority during any painting project. Never compromise on safety equipment or preparation.
Ladder and Ladder Safety
Use a stable, properly rated ladder appropriate for the height of your ceiling. Never stand on the top two rungs. Ensure the ladder is placed on level, non-slip ground. If the ceiling is particularly high, consider the use of scaffolding or a professional lift system.
Always use proper ventilation. Open windows and use exhaust fans to ensure fresh air circulation. When working with paint fumes, especially oil-based or solvent-heavy paints, wear an appropriate respirator mask designed for VOCs (Volatile Organic Compounds). Eye protection and gloves are also highly recommended.
Calling in Professionals
While DIY painting is rewarding, there are times when professional help is mandatory. If you encounter potential structural issues, suspect lead paint (in older homes), or find evidence of major mold remediation needs, stop immediately. Call a licensed professional for assessment and remediation. Never attempt to sand suspected asbestos or mold without proper training and protective gear.
Frequently Asked Questions
What is the single most important factor when choosing a roller for a ceiling?
The most critical factor is matching the roller’s nap length and material to the ceiling’s underlying surface texture and the paint’s sheen. For smooth, matte drywall, always prioritize a short-nap (1/2 inch to 3/4 inch) microfiber or synthetic roller. Using a roller that is too coarse or too long-napped on a smooth surface is the quickest way to create visible roller marks and streaks, regardless of how good your painting technique is.
Get the Fail-Safe Paint Color Playbook (Free PDF)
36 proven colors • 8 ready palettes • trim & sheen guide • printable testing cards.
What should I do if my ceiling is heavily textured, like popcorn or rough plaster?
These surfaces require a different approach. You need a roller with a longer nap (medium to long, depending on the roughness) and a durable material, such as a natural fiber roller, which can handle the deep irregularities. However, if the texture is extreme, consider using a professional-grade roller designed specifically for highly irregular surfaces. Always test the roller on an inconspicuous area first to ensure the paint can adhere properly and the roller doesn’t shed excessively.
What is the difference between ‘roller material’ and ‘nap length’?
They describe two different things: The material (e.g., Microfiber, Synthetic, Natural) describes the composition of the fibers and how they interact with the paint (latex vs. oil). The nap length describes the thickness or pile of the roller—how far the fibers stick out. You must select a short nap for smooth surfaces, even if you are using a high-quality microfiber material.
When should I stop painting and call a professional instead?
Never attempt to paint if you suspect the presence of lead paint (common in pre-1978 homes), asbestos, or significant mold remediation. These materials require specialized protective equipment, containment protocols, and professional handling. If you encounter potential structural damage or hazardous materials, stop immediately and call a licensed professional for assessment and safe remediation.
Conclusion
Selecting the right roller for your ceiling paint job is a detailed process that requires understanding not just the tool, but the chemistry of the paint, the texture of the surface, and the desired finish. By prioritizing a microfiber or synthetic roller with a short nap, and by dedicating time to proper preparation, cutting in, and applying the paint in overlapping sections, you are setting yourself up for success.
Remember that painting a ceiling is a marathon, not a sprint. Take your time, work in sections, and always prioritize safety. With the right knowledge and the right tools, you can transform your ceiling into a beautiful, lasting feature that adds depth and sophistication to your entire home.