
What Paint Can I Use Over Oil-Based Paint?
When repainting surfaces previously coated with oil-based paint, knowing your options is key. Water-based paint is generally the best choice for going over oil-based paint. It allows you to achieve a beautiful finish without the hassle that oil paint can bring.
Whether you are working on interior walls or exterior furniture, it’s important to select the right type of paint. If you’re dealing with areas exposed to moisture, consider using acrylic-based paint. For durability and low odor, alkyd-based options work well, but be sure to use a primer to ensure proper adhesion.
Get the Fail-Safe Paint Color Playbook (Free PDF)
36 proven colors • 8 ready palettes • trim & sheen guide • printable testing cards.
Choosing the right paint can make your project easier and more successful. Getting the details right will save you from issues like peeling and cracking down the road, ensuring your paint job lasts.
Identifying Your Current Paint Type
To know what paint you can use over your existing surface, it’s important to identify the type of paint currently on your walls. You might have either oil-based or latex paint, and there are easy ways to tell the difference.
Method 1: Rubbing Alcohol Test
- Get Supplies: You will need denatured alcohol or a paint deglosser.
- Test Area: Pick a small, hidden area on the wall.
- Rub It: Apply the alcohol with a cloth and rub gently.
- If the paint becomes tacky or comes off, you have latex paint.
- If nothing happens, it’s likely oil-based paint.
Method 2: Burn Off Test
Cautiously test a paint chip by burning it.
- Oil-Based Paint: Will smell like petroleum when burned.
- Latex Paint: Might smell sweet and will ash quickly.
Check the Finish
Look at the sheen of the paint too:
- Glossy Finish: Often indicates oil-based paint.
- Matte or Satin Finish: May be latex paint.
By using these methods, you can easily determine if your paint is oil-based. This knowledge will help you choose the right products for your next painting project.
The Importance of Surface Preparation
Proper surface preparation is crucial for achieving a smooth finish when painting over oil-based paint. Taking the time to clean and sand your surface ensures that your new paint adheres well, preventing issues like peeling and chipping.
Cleaning the Surface
Start by cleaning the surface thoroughly. Use TSP (trisodium phosphate) mixed with water to remove dirt and grease. This deep clean helps your paint stick better.
- Mix TSP according to package directions.
- Apply the solution with a sponge or cloth, scrubbing gently.
- Rinse the surface with clean water and let it dry completely.
Cleaning helps eliminate any residues that could interfere with adhesion. After cleaning, use a tack cloth to pick up any remaining dust. A clean surface reduces the risk of paint defects.
Sanding for Better Adhesion
Sanding the oil-based paint is another essential step for good adhesion. It helps to de-gloss the surface, which is important since glossy paint doesn’t hold new paint well.
- Use fine-grit sandpaper (220-grit is a good choice).
- Lightly sand the entire surface until it’s dull.
Make sure to remove any sanding dust afterward. A clean area avoids issues where paint could lift or chip away. This preparation creates a key for the fresh paint to bond to, significantly improving durability and finish.
Choosing the Right Primer
When painting over oil-based paint, selecting the right primer is essential for a smooth finish. You’ll want to understand the types of primers available and how to apply them properly for the best results.
Understanding Primer Types
There are two main types of primers suitable for use over oil-based paint: acrylic and alkyd (oil-based) primers.
- Acrylic Primer: This type is water-based, making it easy to apply and clean up. It adheres well to most surfaces. Additionally, acrylic primers have fewer fumes, which is a plus for indoor projects.
- Alkyd Primer: Also known as oil-based primer, it enhances adhesion and is a great option for high-traffic areas. If you’re covering dark colors or stains, this primer can be more effective.
Choosing a high-quality primer tailored for your project helps with bonding and adjusts to various surfaces. Make sure you read labels carefully!
Applying the Primer
Successfully priming over oil paint involves some specific steps. First, prepare the surface by cleaning and sanding it to remove any gloss. This step is critical for proper bonding.
Next, apply the primer using a brush or roller that suits your surface type. For best results, follow the manufacturer’s instructions regarding drying times. Most recommend waiting about 24 hours before applying your topcoat.
Keep the environment in mind; if it’s too humid, primer may take longer to dry. Always ensure good ventilation, especially with oily primers, to reduce strong fumes.
Selecting the Appropriate Paint
Choosing the right paint is key to getting good results when painting over oil-based surfaces. The two main categories of paint you’ll consider are oil-based and water-based options. Each has its qualities and uses that can affect your project.
Oil vs. Water-Based Paints
When it comes to oil-based and water-based paints, understanding their differences is vital. Oil-based paints include alkyd and enamel paints. They are durable and have a smooth finish but take longer to dry and have strong odors.
On the other hand, water-based paints, such as latex and acrylic paints, are popular for their easy cleanup and faster drying time. They adhere well to oil-based surfaces if properly prepared. Using a self-priming water-based paint might also simplify your project as it combines both primer and paint in one product.
When selecting your paint, consider the specific needs of your space. If you want a glossy finish in a high-moisture area, an oil-based paint may be best. For easy cleaning and lower odors, go with a water-based option.
Specialty Paints for Different Surfaces
Certain surfaces may require specialty paints to ensure proper adhesion and finish. For example, if you’re working on wood, choose a natural oil-based paint for a rich finish. It’s great for enhancing the wood grain while providing durability.
For metal surfaces, an enamel paint can help prevent rust and ensure a tough finish. If you’re painting in a bathroom or kitchen, consider using a mildew-resistant latex paint.
Make sure to properly clean and prep surfaces before applying any paint. Sanding, cleaning with TSP, and priming can enhance adhesion and ensure you achieve the look you desire. Picking the right type of paint will make your project easier and yield better results.
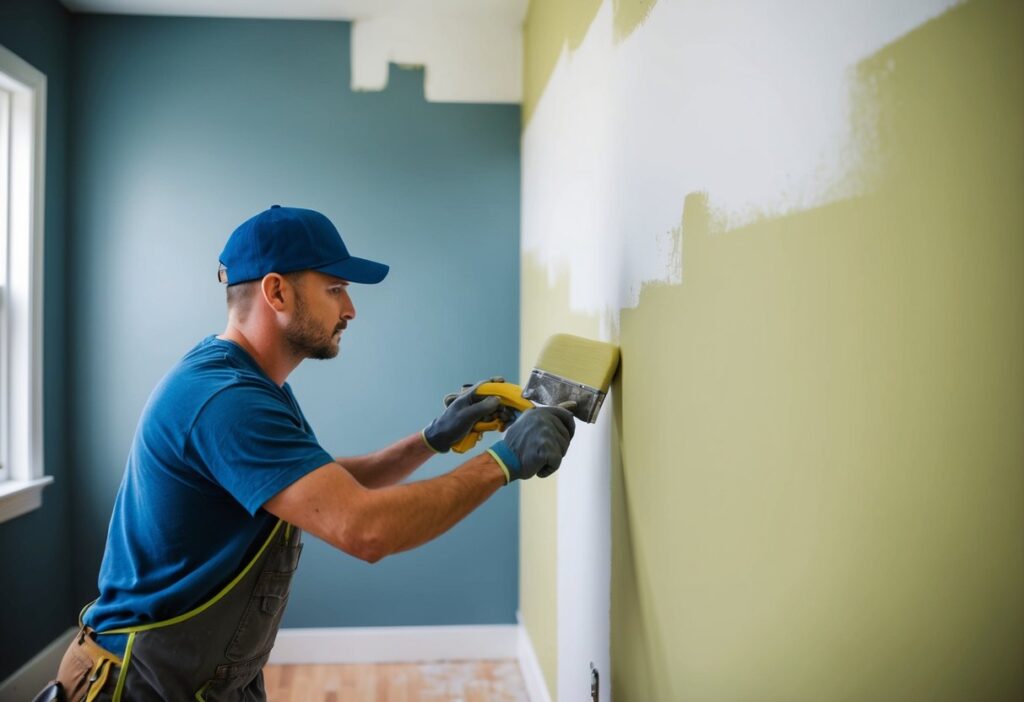
Painting Over Oil-Based Paint
When painting over oil-based paint, you must follow specific steps to ensure proper adhesion and a smooth finish. Attention to detail in applying the first coat and understanding drying times is key.
Applying the First Coat
To start, you need to prepare the surface. Use a detergent and water solution to clean the area well. This removes dust and grime that could affect adhesion.
Next, lightly sand the glossy surface using fine sandpaper (180 to 220 grit). This helps create a texture that allows the new paint to stick better.
Once the surface is prepared, choose a suitable paint, like latex or acrylic. Apply the first coat evenly with a brush or roller. Use smooth, consistent strokes.
Let the first coat dry completely. This can take anywhere from 2 to 4 hours, depending on the temperature and humidity in your space.
Drying and Reapplying
After your first coat is dry, check for any imperfections. If needed, lightly sand the area again to ensure a smooth finish before applying the second coat.
When you apply the second coat, you might notice it dries faster than the first. This is normal and usually happens within 1 to 3 hours. Ensure you apply the paint evenly again.
Remember, painting over oil-based paint can require time to fully cure. Although the surface may feel dry, curing can take longer. Follow the manufacturer’s instructions for the best results.
Dealing with Possible Complications
When painting over oil-based paint, you may face issues like peeling and chipping. Understanding how to prepare your surface can help you avoid these problems. You also need to consider the impact of volatile organic compounds (VOCs) when choosing your new paint.
Preventing Peeling and Chipping
To prevent peeling and chipping, preparation is key. Start by cleaning the paint surface thoroughly. Use a mild detergent and water to remove dirt and grease.
Next, sand the surface lightly. This roughness helps the new paint adhere better. After sanding, apply a primer designed for oil-based surfaces. A good primer creates a solid foundation and enhances paint adhesion.
Choose a quality latex or water-based paint for the topcoat. These paints typically have better flexibility, reducing the risk of chipping over time. If you’ve applied multiple layers or the oil-based paint is old, check for any signs of lifting before proceeding.
Managing VOC Emissions
Managing VOC emissions is important for your health and the environment. VOCs are harmful chemicals found in many oil-based paints. They can contribute to air pollution and cause health issues.
When repainting, opt for low-VOC or VOC-free latex paints. These options emit fewer harmful gases, making your space safer. Ensure your workspace is well-ventilated. Open windows and use fans to circulate air while painting.
By paying attention to VOC levels, you can enjoy a beautiful finish without compromising your well-being.
Finishing Touches
After completing your painting project, it’s important to add those final touches. This ensures a professional look and long-lasting results. You’ll want to inspect the coat for any imperfections and tidy up your workspace.
Inspecting the Final Coat
Once the final coat is dry, inspect the paint surface carefully. Look for any spots that may need touch-ups, especially in high-impact areas like corners and edges. These spots can easily get missed, so take your time.
If you see glossy surfaces or uneven areas, don’t worry. You can lightly sand them down with fine sandpaper. Next, apply a bit of matching paint for even coverage. This prep work helps create a smooth and consistent finish.
Make sure to check your work in different lighting to spot any glaring issues. This step helps ensure a beautiful outcome.
Cleaning Up
A tidy workspace is just as important as the painting itself. Start by collecting all your tools like brushes, rollers, and trays. Use a proper cleaning solution based on the paint you used—latex or oil-based.
Dispose of any used materials like drop cloths or paint cans responsibly. Wipe down surfaces with a damp cloth to remove any dust or paint splatters. This not only keeps your area neat but also protects your newly painted surfaces.
Finally, store leftover paint in a cool, dry place. Label the cans with the date and room where they were used, so you can easily find them for future touch-ups. Cleaning up well ensures a pleasant painting experience from start to finish.
Specific Considerations for Different Areas
When you plan to paint over oil-based paint, the area you are working on affects how you should proceed. Different surfaces, like doors and cabinets, may need special attention. Also, knowing the difference between interior and exterior applications is essential for success.
Painting Doors and Cabinets
Doors and cabinets often get a lot of use, so they need a durable finish. If you’re painting over oil-based paint, start by cleaning the surface with a detergent solution. This step removes dirt and grease.
Next, lightly sand the surface using fine sandpaper. This helps the new paint stick better. After sanding, wipe off any dust with a damp cloth.
For best results, use a quality primer before applying latex or acrylic paint. A good primer will create a solid bond and enhance the paint’s durability. Don’t forget to allow enough drying time between coats for a great finish!
Exterior vs. Interior Applications
When dealing with exterior surfaces, the challenges increase because of weather conditions. You need paints that can withstand moisture and sunlight.
Start by cleaning the surface thoroughly to prevent peeling. Use TSP (tri-sodium phosphate) for deep cleaning, which prepares the surface well. After cleaning, sand and prime as you would for interior surfaces.
For exterior work, it’s crucial to choose high-quality exterior latex paint. It’s made to last against rain and UV rays. For interior applications, you can use either latex or acrylic paint after proper prep. Just remember that a good primer helps with adhesion and long-lasting results in both cases!
Tools and Materials Checklist
When you plan to paint over oil-based paint, having the right tools and materials is key. Here’s a handy checklist to get you started.
Essential Tools
- Fine-Grit Sandpaper: Use this to lightly scuff the surface. It helps the new paint stick better.
- Medium-Grit Sandpaper: This can be used first for roughing up glossy areas.
- Paint Brush and Roller: Choose brushes and rollers based on the type of paint you are using.
Cleaning Supplies
- TSP Solution: Trisodium phosphate helps you clean the surface effectively. Mix it with water before scrubbing.
- Denatured Alcohol: Great for cleaning surfaces and removing residue before painting.
Filling Materials
- Wood Putty or Wood Filler: Use these to repair any dents or holes in the surface before painting.
Thinners and Cleaners
- Mineral Spirits: Effective for cleaning brushes and tools after using oil-based paints.
- Paint Thinner: Use it to thin paint if needed, especially for oil-based varieties.
Undercoat
- Primer: Select an appropriate primer designed for oil-based paint. This will improve adhesion for your top coat.
Having these tools and materials ready will make your painting project smoother and more successful. Happy painting!
Frequently Asked Questions
There are common questions people have when considering painting over oil-based paint. Knowing the right techniques and materials can help ensure great results.
How can I paint over oil-based paint on wood?
To paint over oil-based paint on wood, start by cleaning the surface thoroughly. Lightly sand the area to ensure better adhesion. Wipe off any dust, then apply a primer if you choose. Finally, you can use water-based or latex paint for the topcoat.
Is it possible to paint over oil-based paint without sanding first?
While it’s possible to skip sanding, it’s not recommended. Sanding provides a rough surface for better paint adhesion. If you decide not to sand, at least use a good primer suited for oil-based surfaces to help the new paint stick.
Get the Fail-Safe Paint Color Playbook (Free PDF)
36 proven colors • 8 ready palettes • trim & sheen guide • printable testing cards.
Can I use water-based paint over oil-based paint?
Yes, you can use water-based paint over oil-based paint. Just make sure to prepare the surface properly. This often includes cleaning and possibly sanding before applying a primer for better adhesion.
What type of primer should I use before painting latex over oil-based paint?
Using a high-quality shellac or water-based primer is ideal. This type of primer helps seal the oil-based surface and promotes adhesion for the latex paint. Make sure it is specifically labeled for use with oil-based paints.
What are the steps to painting over oil-based paint with acrylic?
Start by cleaning the surface and lightly sanding it. Next, apply a suitable primer. Once the primer dries, you can paint with acrylic paint. Allow each layer to dry completely before adding more paint.
What could happen if I apply water-based paint directly over oil-based paint?
Applying water-based paint directly over oil-based paint can cause issues like peeling or bubbling. The water can react with the oil-based paint, weakening the bond and ruining your paint job. Always prepare the surface properly to avoid these problems.