How To Paint Over Oil Stains On Walls
Oil stains on walls can be a frustrating problem to deal with, especially if you’re planning to repaint the wall. Not only can they be unsightly, but they can also interfere with the adhesion of new paint. Fortunately, there are ways to effectively remove oil stains and prep the surface for a fresh coat of paint.
In this article, we’ll cover everything you need to know about painting over oil stains on walls, including the tools and materials you’ll need, the steps to take to properly prep the surface, and tips for ensuring a smooth and even finish. We’ll also discuss common causes of oil stains on walls, so you can take preventative measures to avoid future stains.
Whether you’re a DIY enthusiast or a professional painter, this guide will provide you with the knowledge and skills necessary to tackle oil stains and achieve a beautiful, long-lasting paint finish. So, let’s get started!

Understanding Oil Stains
Before you can properly address oil stains on your walls, it’s important to understand what they are and how they form. Oil stains are typically caused by a variety of substances, including cooking oil, grease, makeup, and even skin oils. When these substances come into contact with walls, they can leave behind unsightly stains that are difficult to remove.
Preparing Your Walls
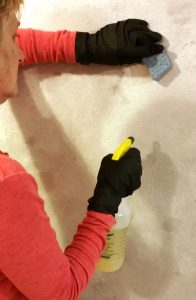
Before you begin painting over oil stains, you’ll need to properly prepare your walls. This involves cleaning the walls thoroughly to remove any dirt, debris, or oil residue that may be present. Start by wiping down the walls with a clean, damp cloth to remove any surface-level debris. Next, mix a solution of warm water and mild detergent and use a clean sponge to gently scrub the walls. Rinse the walls with clean water and allow them to dry completely before proceeding.
Choosing The Right Paint
When it comes to painting over oil stains on walls, not all paint is created equal. It’s important to choose a paint that is specifically designed to cover oil stains and prevent them from bleeding through. Look for paints labeled as stain-blocking or oil-resistant, and be sure to choose a color that matches your existing walls.
Applying Primer
To ensure that your new coat of paint adheres properly to your walls and covers up any remaining oil stains, it’s important to apply a layer of primer. Look for a primer that is specifically designed for use on walls with oil stains, and follow the manufacturer’s instructions for application. Be sure to allow the primer to dry completely before applying your new coat of paint.
Painting Your Walls
Once your walls are properly cleaned, primed, and ready to go, it’s time to paint. Use a high-quality brush or roller to apply a thin, even coat of paint to your walls, being sure to cover the entire surface evenly. If needed, you may need to apply a second coat of paint to achieve the desired level of coverage.
Conclusion
Oil stains on walls can be a real eyesore, but with the right tools and techniques, you can easily paint over them and enjoy a fresh, clean-looking space. Remember to properly prepare your walls, choose the right paint and primer, and take your time when painting to ensure the best possible results. With a little patience and elbow grease, you’ll be amazed at how easily you can transform your walls from drab to fab.
