
How to Paint Buffalo Plaid: A Step-by-Step Guide for Beginners
Painting buffalo plaid can add a touch of charm to your home decor, making it feel cozy and inviting. To achieve this classic look, you will need just a few supplies and a little patience. The buffalo plaid pattern, usually seen in black and red, can be adapted to fit any color scheme you like. Imagine how amazing a rustic piece will look with this pattern!
You might wonder where to start. The key steps involve creating straight lines with painters tape and layering your paint for depth. By mixing colors and carefully planning your strokes, you’ll create a beautiful plaid design that could enhance your living room or bedroom.
Get the Fail-Safe Paint Color Playbook (Free PDF)
36 proven colors • 8 ready palettes • trim & sheen guide • printable testing cards.
Whether you’re a DIY newbie or a seasoned pro, painting buffalo plaid can be a fun project. You’ll not only enjoy the process but also the satisfaction of transforming your space with your own hands. Get ready to dive in and make your decor pop!
Getting Started with Buffalo Plaid
Painting the buffalo plaid pattern can seem tricky at first, but with the right approach, you’ll feel confident and ready to create. The key lies in understanding the pattern itself and knowing what supplies you need to achieve your vision.
Understanding Buffalo Plaid Pattern
Buffalo plaid features bold squares in alternating colors, typically black and red, but it can come in various color combinations. This pattern has a cozy, rustic charm that fits perfectly in many settings.
To create a classic buffalo plaid design, follow these easy steps:
- Grid Layout: Start by making a grid on your surface. You can use painter’s tape to outline where each color will go.
- Color Selection: Choose two contrasting colors. Remember, the pattern traditionally uses dark and light colors for contrast.
- Square Measurements: Decide on the size of the squares. Common sizes are 1×1 inch or 2×2 inch squares.
Understanding these basics will help you create neat, even blocks when you start painting.
Choosing Your Paints and Materials
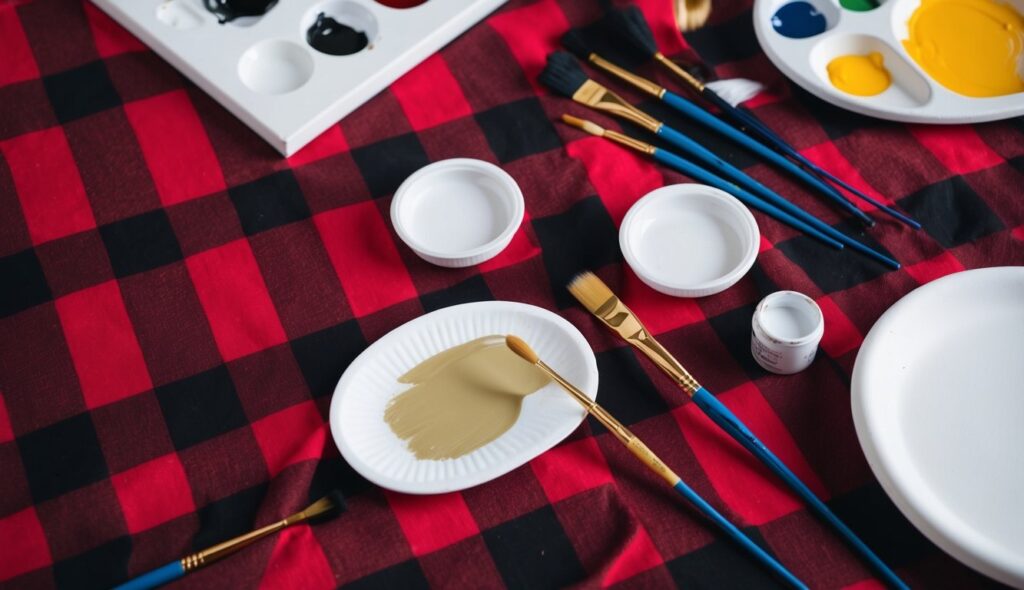
Now that you know the buffalo plaid pattern, let’s gather what you need. Good materials make a huge difference in your final product.
Here’s a list of essential supplies:
- Paint: Use acrylic paint or craft paint; both adhere well to various surfaces.
- Painter’s Tape: This keeps lines straight and neat.
- Paint Brushes: A variety of sizes is best. Use a flat brush for filling in large squares, and a small detail brush for edges.
Tip: Always test your paint on a small area before starting. You want to make sure it looks just right!
Preparing the Painting Surface

Getting your surface ready is an important step for painting buffalo plaid. A well-prepared surface ensures that your paint adheres well and looks great. Let’s dive into the details.
Selecting the Right Surface
Choosing the right surface to paint on is key. Wood, canvas, or even walls are great choices. Make sure the surface is clean and free of dust or grease. For wood, sanding it lightly can help create a smoother finish. If you’re painting on a wall, wash it with soap and water. Avoid surfaces that are too shiny; they may not hold the paint well. If you want a nice, rustic look, consider using a distressed surface. A well-prepared surface will help your plaid design stand out boldly.
Applying the Base Coat
The base coat is crucial because it serves as the background for your buffalo plaid. Start with a color that complements the plaid pattern you’ll be creating. Use a paintbrush or roller to apply an even layer across the entire surface. Ensure the coat is smooth with no brush marks or streaks. Let it dry completely as per the paint manufacturer’s instructions. A good base coat sets the tone for your plaid and makes the layers of color pop. If you need an extra layer, go ahead and add one but ensure it’s dry before proceeding.
Securing Painter’s Tape
Using painter’s tape is a game changer for crisp lines. Start by applying the tape along the edges of your design where you want to create the plaid pattern. Press down firmly to avoid paint bleeding. Use a level or ruler for straight lines, ensuring everything is even. If you’re creating a more complex design, you might want to use additional sections of tape to mark off different areas. After the base coat is dry, make sure the tape is secure before layering on your plaid colors. Once painted, wait for the paint to dry before removing the tape for clean edges.
Painting the Buffalo Plaid
Creating the buffalo plaid pattern can be fun and rewarding. It involves a series of careful steps to ensure clean lines and a balanced design. Let’s dive into how to achieve those bold, striking stripes!
Creating Vertical Stripes
Start by choosing a base color for your buffalo plaid. This will typically be a light shade, like white or beige.
- Measure and Mark: Use a measuring tape to mark where your vertical stripes will go. Common widths for stripes are between 1 to 2 inches.
- Tape It Off: Apply painter’s tape along the marks to create clean edges. Ensure the tape is pressed down firmly to prevent any paint from seeping underneath.
- Painting: Use a flat brush to paint the areas between the tape. Choose a contrasting color, such as black or red, for boldness.
- Drying Time: Allow the paint to dry completely. This usually takes about 1 hour.
Taking your time on the vertical stripes sets a strong foundation for your plaid pattern!
Adding Horizontal Stripes
Now it’s time for the horizontal stripes, which bring your painting to life.
- Measure Again: Measure the width of your horizontal stripes, keeping it consistent with your vertical stripes.
- Tape Placement: Use the same painter’s tape to mark off this section. Remember, the tape should align perfectly with your vertical stripes.
- Apply Paint: Fill in the areas between the tape with your chosen color. A foam roller can help cover larger areas quickly.
- Second Coat: If the paint isn’t opaque enough, don’t skip the second coat. Let the first coat dry completely before applying more paint.
This careful method will make your buffalo plaid look professional!

Taping Techniques for Crisp Lines
Good taping can make or break your plaid pattern. Follow these techniques for neat results.
- Quality Tape: Use high-quality painter’s tape that sticks well but removes easily. This helps in avoiding peeling paint.
- Press Down Firmly: Ensure the edges of the tape are pressed down firmly. This prevents paint leaks.
- Remove Tape Wisely: Pull off the tape while the paint is still slightly wet or wait until it’s fully dry. If you rush, you might lift off some paint.
- Touch-ups: Keep a small brush handy for touching up any areas where paint may have bled.
Adding Finishing Touches
Once you have painted your buffalo plaid design, adding a few finishing touches can really make it shine. This includes sealing the paint to protect your work and considering how to best integrate your buffalo plaid into your decor.
Sealing the Paint
To protect your buffalo plaid from wear and tear, sealing it is essential. A good sealant will help keep your paint colors vibrant and prevent chipping.
Here’s how to do it:
- Choose the Right Sealant: Look for a clear acrylic sealant. It’s easy to apply and dries clear.
- Apply the Sealant: Use a clean brush to apply a thin layer over the painted areas. Be gentle to avoid disturbing your design.
- Drying Time: Allow it to dry according to the manufacturer’s instructions. This usually takes 2-4 hours.
- Finish with a Second Coat: For extra protection, consider adding a second coat once the first is dry.
This step ensures your design lasts, especially if you’re using it for fall decor or buffalo check pumpkins. It’s worth the effort!
Buffalo Plaid for Different Decor Items
Buffalo plaid can enhance all kinds of decor. Consider where you’d like to use it to make your space feel cozy and inviting.
- Furniture: Accentuate chairs or tables with buffalo plaid paint for a rustic look.
- Seasonal Decor: Paint pumpkins with buffalo plaid for fall. Use traditional colors like red and black for a classic feel or experiment with muted tones for a modern twist.
- Accessories: Think about vases or picture frames. A simple buffalo plaid pattern can make even small items pop.
Tip: Always choose paint colors that match your existing decor. This will help create a cohesive look throughout your space.

Alternative Methods and Styles
There are many ways to add your own twist to buffalo plaid. By using different types of paint and incorporating patterns, you can create unique designs. Let’s explore some fun and creative approaches.
Experimenting with Fabric Paint
Fabric paint is a fantastic choice if you’re looking to add buffalo plaid to clothing or home textiles. This type of paint is made for flexibility and durability, so your design won’t crack or fade.
Steps to use fabric paint:
- Choose Your Colors: Decide on a classic red and black or go for a fresh twist with blues or greens.
- Prepare Your Fabric: Wash and dry your fabric to remove any chemicals. Iron it to smooth out wrinkles.
- Draw Your Grid: Lightly sketch your plaid pattern with a pencil or chalk. This will help keep your lines straight.
- Apply Paint: Start with the lighter colors first. Use a brush or sponge to fill in the squares.
Let it dry completely before you wash it. This will make sure your beautiful buffalo plaid stays intact!
Trying Out Chalk Paint
Chalk paint is perfect if you want a rustic feel in your buffalo plaid designs. This type of paint gives a matte finish and is easy to distress, which adds character.
Here’s how to paint with chalk paint:
- Choose a Base Color: Start with a light base like white or cream.
- Create a Layered Effect: Paint your wider stripes first and let them dry. Then, add your checkered design using a contrasting color.
- Distress for Style: Once everything is dry, lightly sand areas for a worn look. You can also seal with a wax finish for protection.
Chalk paint is particularly nice for furniture, giving it a farmhouse charm.
Incorporating Gingham and Geometric Patterns
Gingham and geometric patterns can enhance your buffalo plaid designs. Mixing patterns can create interest and depth.
Ways to incorporate these styles:
- Layer Different Patterns: Use checkered fabric or paint alongside buffalo plaid. The two complement each other well.
- Mix Sizes: Play with varying sizes in gingham. A large gingham design can balance the boldness of buffalo plaid.
- Color Contrast: Use high-contrast colors to really make the patterns pop.
Frequently Asked Questions
You might have some questions about painting buffalo plaid. Let’s break down your curiosities with some straightforward answers.
What are the steps to create a plaid effect with acrylic paints?
To create a plaid effect, start with a base color. Once it’s dry, use painter’s tape to create vertical stripes. Paint the stripes in a contrasting color. After that dries, tape over those stripes to add horizontal lines. Paint these lines and remove the tape for a clean look.
Can I achieve a buffalo plaid pattern without using tape, and if so, how?
Yes, you can paint buffalo plaid without tape! First, outline the plaid pattern lightly in pencil. Then, use a small brush to fill in the checkered areas. Go slowly to keep your lines clean. This method takes more time but allows for a more freehand approach.
Get the Fail-Safe Paint Color Playbook (Free PDF)
36 proven colors • 8 ready palettes • trim & sheen guide • printable testing cards.
When painting a plaid pattern, how can I effectively use three colors?
Using three colors is simple. Choose a light, medium, and dark color. Start with the light color for the background, then add medium-colored stripes. Finally, use the dark color for the outlines. This creates depth and makes the pattern pop.
Is it possible to paint a buffalo plaid pattern using four colors, and what’s the best approach?
Absolutely! With four colors, choose two for the background and two for the stripes. Start by painting the base with your lighter colors. Next, add horizontal and vertical stripes with the darker colors. This technique adds richness and detail.
How can I paint a buffalo plaid design in white for a crisp, modern look?
For a white buffalo plaid, use a white base on your surface. To create contrast, use a light gray or soft beige for the plaid pattern. This creates a modern, clean look. Painting on a colored background can also enhance the white design.
What are some complementary colors or designs that work well with buffalo plaid patterns?
Complementary colors like solid reds, greens, or blues work well with buffalo plaid. You can also blend in designs like stripes or florals. This adds visual interest and can brighten your space while keeping the buffalo plaid as the main feature.