
How to Set Grease Face Paint: A Guide for Professional, Long-Lasting Designs
Are you ready to take your face painting skills to the next level? Setting grease face paint is the professional secret ingredient to achieving stunning, vibrant, and truly long-lasting designs that withstand hours of wear. Whether you are preparing for a theatrical performance, a complex cosplay, or simply exploring your artistic side at a major event, mastering the setting process is non-negotiable for a flawless, durable finish.
In this comprehensive guide, we will delve into the world of high-pigment, oil-based face paints, uncovering the precise techniques, preparatory steps, and setting methods that will elevate your artistry. From understanding the unique adhesion properties of grease paints to mastering the art of locking in color for extended wear, we provide a master class approach to ensure your creations last all day, no matter the climate or activity.
Get the Fail-Safe Paint Color Playbook (Free PDF)
36 proven colors • 8 ready palettes • trim & sheen guide • printable testing cards.
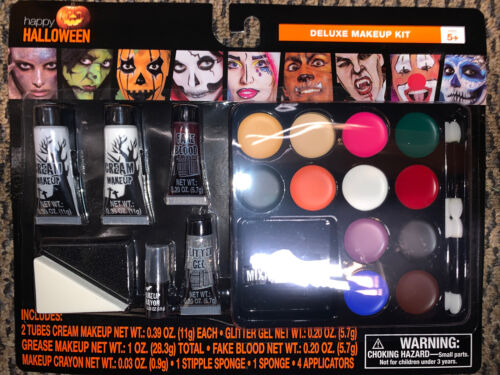
Quick answer: To Set Grease Face Paint, start with the safest first step for the material involved, test a small area when needed, and follow the process in thin, controlled stages. Use proper ventilation and protective gear when chemicals, sanding, spraying, or solvents are involved.
Planning for Success: Preparing the Canvas and Workspace
Before the first brushstroke touches your skin, proper planning is essential. Treating the skin like a canvas requires the same attention you give to the paint itself. The goal of the prep phase is to create a surface that is clean, oil-free, and highly receptive to the face paint, ensuring maximum adhesion and minimal chance of smudging.
The Crucial Skin Preparation Routine
Never apply grease paint directly onto bare skin. The natural oils, sweat, and sebum on the skin will act as a barrier, causing the paint to lift, smudge, and fade rapidly. Follow this detailed three-step cleansing and priming process:
- Cleansing: Start by cleansing the face thoroughly with a mild, non-oily facial cleanser. This removes dirt, sweat, and any residual oils from the day. Pat the skin dry completely with a clean, disposable towel.
- Hydration (Optional): If the skin is extremely dry, apply a very light, oil-free moisturizer. Crucially, allow this moisturizer to absorb fully—wait at least five minutes—before moving to the primer.
- Priming: Apply a dedicated makeup or theatrical primer. This product is designed specifically to create a barrier that enhances adhesion and fills in minor imperfections. Use a thin, even layer over the entire area where the face paint will be applied. Let the primer cure according to the manufacturer’s instructions.
Pre-Application Checks and Testing
Safety and planning are paramount. If you are using theatrical or cosmetic-grade paints, always perform a patch test. Select a small, inconspicuous area, such as the inner elbow or behind the ear. Apply a small amount of the paint and wait 24 hours. If you experience any redness, itching, or irritation, do not use the product. Furthermore, dedicate a clean, well-lit workspace and ensure you have disposable palettes and paper towels to maintain perfect hygiene throughout the process.
Planning Before You Start
Measure the space and estimate how much paint or material you will need. Check the surface condition for cracks, peeling, or moisture issues that could affect adhesion.
Decide whether you need primer, specialty coatings, or extra prep steps. Review the weather forecast if working outside, and schedule the project when conditions support proper drying and curing.
Step-by-Step Application Techniques: Building the Look
Once the canvas is primed and ready, the application process involves building the design in layers. This technique, known as ‘layering,’ is what gives professional face paint its depth and dimension, preventing the look from appearing flat or solid.
Selecting and Using Tools
The right tools are crucial for precision. Do not rely on general makeup brushes; specialized cosmetic and theatrical brushes work best. Consider:
- Flat Brushes: Ideal for applying large base areas and covering broad color fields (e.g., a mask shape or a large wing).
- Round Detail Brushes: Essential for fine lines, intricate details, and sharp outlines (e.g., tribal markings or eyeliner work).
- Blending Sponges/Stippling Brushes: Used to soften edges, create gradients, and blend multiple colors seamlessly.
The Art of Layering and Blending
Start with the lightest, most base color on the design. Use a clean, dry brush to apply this base layer. Allow this first layer to dry completely—this is a key step often overlooked. Once dry, apply the second color, focusing on areas that need to appear darker or more saturated. To create depth, always work in a gradient, transitioning from a light base color to a darker, more concentrated shade. Use your blending sponge to gently feather the edges where colors meet, eliminating harsh lines and achieving a professional, natural transition.
Setting is the final, most critical step. Setting does not mean simply letting the paint dry; it means chemically or physically locking the pigment to the skin and creating a protective, durable seal. You must choose between powder setting and sealer setting based on the required level of durability and the desired finish.
Method 1: Setting with Translucent Powder (Matte Finish)
This method is excellent for absorbing excess oil and preventing pigment transfer. It provides a matte, dust-like finish that is reliable for general wear.
- Preparation: Ensure the face paint is fully dry to the touch.
- Application: Dip a clean, fluffy brush into the translucent powder, tapping off any excess product.
- Setting Technique: Do not sweep the powder. Instead, gently and evenly press the brush onto the painted areas. Work in small sections, ensuring you cover the pigment thoroughly.
- Finishing: Allow the powder to set for several minutes. You can then lightly brush away any visible excess powder with a clean, soft brush.
Method 2: Setting with Specialized Cosmetic Sealer (High Durability)
For theatrical, water-based, or highly active events, a professional-grade cosmetic sealer is recommended. These sealers create a robust, protective film over the paint, offering superior resistance to moisture, sweat, and friction. These sealers are formulated to lock the pigment without changing the color.
- Preparation: The paint must be completely dry.
- Application: Shake the sealer bottle well to mix the ingredients. Using a clean, damp, or dry sponge (depending on the sealer instructions), apply a very thin, even layer over the entire design.
- Layering for Strength: For maximum durability (e.g., a costume requiring hours of wear), apply a second, equally thin coat of the sealer.
- Drying Time: Crucially, allow the sealer to air dry completely between coats. Do not touch the area until it is fully cured, as oils from your fingers will compromise the seal.
Pro Tip: For the most robust, all-weather longevity, professional artists often use a combination approach: setting with powder first to absorb oils, and then applying a thin, final coat of sealer over the powdered surface.
Advanced Design and Color Theory Tips
To elevate your face painting from good to breathtaking, understanding color theory is key. Color selection and blending techniques can make your designs appear more dimensional and natural, even when using bold, theatrical shades.
When selecting colors, think about undertones. Instead of simply using “red,” consider a deep crimson, a vibrant scarlet, or a muted terracotta. Using colors that are slightly shifted (e.g., moving from a cool blue to a warm teal) creates a visual depth that simple, flat colors cannot achieve. When building a shadow, use a color that is darker and slightly desaturated from the base color.
Achieving Seamless Blends and Transitions
The goal of blending is to make the color changes look natural, like natural skin variations or shadows. To achieve this, always use a blending brush (a stippling brush works well) and use circular, feathering motions. Never use a single, aggressive swipe. When moving from Color A to Color B, lightly smudge the intersection point repeatedly, gradually weakening the pigment until the transition is seamless. Remember, less is often more when blending—build up the color gradually.
Materials and Tools Checklist
A well-stocked kit is half the battle. Here is a detailed list of essential supplies to ensure a professional outcome:
- Prep Products: Mild facial cleanser, oil-free moisturizer, dedicated makeup/theatrical primer.
- Painting Tools: Grease face paints (in various shades), clean disposable palettes, blending sponges, and various sized brushes (flat, round, stippling).
- Setting Products: Translucent setting powder (setting the base), specialized cosmetic sealer/setting spray (for locking in the pigment), and a clean, fluffy powder brush.
- Hygiene: Disposable wipes, alcohol wipes, and single-use tools for maximum sanitation.
Mistakes to Avoid When Setting Face Paint
Even experienced artists can make common mistakes. Avoiding these pitfalls will significantly improve the longevity and appearance of your final piece.
- Skipping the Primer: This is the single biggest mistake. Never paint directly onto bare, oily skin.
- Rushing the Drying Time: Attempting to layer paint or set the paint before the previous layer is fully dry will result in muddy colors and poor adhesion. Give each layer adequate time to set.
- Using Non-Cosmetic Products: Never use household powders (like baking soda or flour) or regular setting powders that are not formulated for cosmetic use, as they can irritate the skin or contain unsuitable ingredients.
- Cross-Contamination: Never double-dip a brush or sponge into a paint container, especially when working on multiple people. This introduces bacteria and compromises the paint’s quality.
Safety and Practical Care Notes
Because you are working with cosmetic products on sensitive skin, safety and hygiene must be the highest priority. Always prioritize these steps:
Skin Safety and Allergies
Always perform the 24-hour patch test. Furthermore, when working near the eyes, nose, or mouth, use barrier creams or petroleum jelly to create a protective physical barrier. Never apply paint directly into the nasal passages or eyes.
Proper Removal Protocol
Do not attempt to wipe off the paint with harsh solvents like rubbing alcohol, as this can strip the skin’s natural oils and cause irritation. Instead, use a dedicated, gentle makeup remover or an oil-based cleanser designed for heavy makeup removal. Use warm, soapy water for the final rinse, and always follow up with a soothing, non-comedogenic moisturizer to restore the skin’s natural barrier.
Ventilation and Ventilation
If using strong setting sprays or chemical sealers, always work in a well-ventilated area. Wear a simple dust mask or respirator if the product instructions recommend it, and keep the area free of strong chemical fumes.
Achieving the Perfect, Long-Lasting Masterpiece
Setting grease face paint is a skilled process that combines artistic vision with technical precision. By treating skin preparation, layering, and setting as distinct, crucial stages, you can ensure your designs are not only visually stunning but also incredibly durable. Remember that the key to longevity lies in the synergy between the primer, the pigment, and the final protective sealer.
Practice these professional techniques, prioritize hygiene, and always prioritize skin safety. With proper planning and execution, your face painting can withstand hours of celebration, performance, or adventure, allowing your creativity to shine without fading or smudging.
Frequently Asked Questions
What is the difference between setting with powder and using a cosmetic sealer?
The choice depends on the desired finish and durability. Translucent powder setting provides a matte, oil-absorbing finish and is best for general wear. A specialized cosmetic sealer, however, creates a robust, protective film over the paint, offering superior resistance to sweat, water, and friction, making it ideal for theatrical or active events.
Get the Fail-Safe Paint Color Playbook (Free PDF)
36 proven colors • 8 ready palettes • trim & sheen guide • printable testing cards.
How long must I wait between applying different colors of paint?
Patience is key. You must allow each layer of paint to dry completely to the touch before applying the next color or setting the design. If you rush this process, the colors will mix unevenly, leading to muddy patches and poor adhesion, which compromises the entire look.
Can I use regular household powders (like baking soda) to set the paint?
No. You must only use powders specifically formulated for cosmetic or theatrical use. Household powders, such as baking soda, flour, or talcum powder, are not designed for skin application and can contain ingredients that are irritating, unsuitable, or cause adverse reactions on sensitive skin.
What is the safest way to remove grease face paint?
Never use harsh solvents like rubbing alcohol or paint stripper, as these can strip the skin’s natural oils and cause irritation. Use a dedicated, gentle makeup remover or an oil-based cleanser designed for heavy makeup removal. Follow up the removal process by rinsing the area with warm, soapy water and applying a soothing, non-comedogenic moisturizer to restore the skin’s natural barrier.
Conclusion
How To Set Grease Face Paint? works best when the plan, materials, safety steps, and finish goals all line up before work begins. Review the surface or tool condition, choose compatible products, and leave enough time for drying, cleanup, and final checks.
Use the guidance above as a practical checklist, then adjust it to the specific surface, workspace, product directions, and risk level. When the project involves fumes, damaged materials, business liability, or uncertain conditions, slow down and get qualified help before moving forward.