
How to Thin Water Based Paint for Spray Gun: Complete Guide
Using a spray gun with water based paint can give you a smooth, even finish, but that paint usually needs a little tweaking before it sprays just right. You thin water based paint by mixing in small amounts of clean water until it reaches the right consistency for spraying. This step helps you avoid clogs and uneven spraying—trust me, it’s worth the extra couple of minutes.
You don’t need fancy chemicals or complicated gadgets for this. With just water, a bucket, and something to stir with, you can get your paint ready in no time. The trick is figuring out how much water to add, how to check the thickness, and how to tweak it until it sprays without giving you grief.
Get the Fail-Safe Paint Color Playbook (Free PDF)
36 proven colors • 8 ready palettes • trim & sheen guide • printable testing cards.
If you learn the right ratios, mixing techniques, and a few troubleshooting tricks, you’ll save yourself a lot of headaches and keep your spray gun happy. Whether you’re working on walls, furniture, or trim, getting the paint to the right viscosity just makes everything easier and your finish more even.
Understanding Water Based Paints
Water-based paints use water as the main solvent, which makes them much easier to clean up and safer for indoor use. They’re also a lot less harsh on the environment compared to oil-based paints. You’ll find them in various forms, each with their own perks, and they’re used for all sorts of projects—from home touch-ups to bigger professional jobs.
Types of Water Based Paints
The two you’ll see most often are acrylic paint and latex paint. Both are water-based, but they’re not quite the same.
- Acrylic paint has acrylic resins, so it’s tougher and doesn’t fade as easily. People like it for outdoor stuff or surfaces that get knocked around.
- Latex paint is made with synthetic polymers and is a breeze to clean up. It’s the go-to for indoor walls, ceilings, and trim.
When you thin latex paint for spraying, you just add water to make it less thick. Acrylic paint can be thinned too, but it tends to stick better and flex more even after you add water. Knowing which to use makes a difference, depending on your project.
Properties and Benefits
Water-based paints dry fast, so you can knock out several coats without waiting forever. They barely smell, which is a huge plus if you’re painting indoors.
They’re also low in volatile organic compounds (VOCs), so you don’t have to worry as much about fumes. Cleanup is a breeze—soap and water, no nasty chemicals needed.
And honestly, they just look smooth. If you thin water-based paint right, it glides through a spray gun and you’re less likely to deal with clogs. It’s a solid choice for both DIYers and pros.
Common Uses
You can use water-based paints on all sorts of surfaces: wood, drywall, metal, vinyl, masonry—the list goes on. Latex paint is a favorite for interior walls and ceilings because it’s easy to use and clean up. Acrylic paint is better for outdoor furniture, siding, or trim since it stands up well to sun and weather.
Spray guns work great with water-based paints when you want a really even finish on cabinets, furniture, or big wall spaces. Thinning latex or acrylic paint to the right consistency helps you get a smoother look and fewer headaches.
Why Thinning Water Based Paint Is Important
Thinning water based paint lets it flow smoothly through your spray gun and land evenly on whatever you’re painting. If you skip this step, you’ll probably run into clogs, weird spray patterns, or patchy coverage.
Effects on Paint Flow and Spray Gun Performance
When you thin paint, you make it easier for the spray gun to push it out. Thick paint makes the gun work harder and you might get splatters or uneven coverage.
With a thinner mix, the sprayer creates a finer mist. That helps the paint spread better and you waste less.
For example, if you try spraying latex paint straight from the can, you’ll probably end up with heavy spots and streaks. Thinning with water gives you more consistent paint flow and a smoother spray.
Lots of spray guns, especially HVLP models, are built to work best with thinned paint. Getting the consistency right means the paint atomizes well and covers evenly with fewer passes.
Preventing Clogs and Achieving Smooth Coverage
Thick paint can clog your spray gun’s nozzle. When that happens, you have to stop, clean everything out, and waste paint and time.
Thinned paint is less likely to clog because it passes through the nozzle easily. You’ll get a steady spray instead of random bursts or blockages.
Thin coats also look better. You avoid brush marks, streaks, or blotchy spots.
When you spray latex paint, thinning helps it settle evenly on things like wood, drywall, or cabinets. It’s just easier to build up nice, thin layers for a pro-looking finish.
Essential Tools and Materials for Thinning
Having the right tools makes thinning water-based paint for a spray gun way easier. The right stuff helps you measure, strain, and mix so your paint sprays smoothly and doesn’t clog.
Viscosity Cup and Paint Strainer
A viscosity cup helps you check how thick your paint is before you spray. Just fill the cup, time how long it takes to drain, and you’ll know if you need more water or not.
Most spray gun manuals give you a target runout time, so you can compare your results and adjust as needed.
A paint strainer is just as handy. Even after mixing, little lumps or dried bits can sneak in and clog things up. Strain your paint before spraying to keep the spray pattern even and avoid annoying clogs.
Strainers don’t cost much, and having a few around will save you a lot of trouble.
Mixing Containers and Stir Sticks
You’ll want a sturdy mixing container—something with measurements marked on it is best. Plastic buckets work well since you can see exactly how much water you’re adding, like 10% water to 90% paint. That way, you can repeat your mix if you run out.
A paint stir stick is a must for blending. Stir slowly and scrape the bottom and sides so you don’t end up with thick patches.
Wooden stir sticks are common, but reusable plastic ones work too. Just make sure whatever you use is clean—no one wants dirt or dried paint chunks in their mix.
Mixing well keeps your color even and helps your spray gun do its job.
Step-by-Step Process: How to Thin Water Based Paint for Spray Gun
When you thin water-based paint, you want it to flow easily through your spray gun—no clogs, no mess, but still enough coverage. The process is pretty straightforward: prep the paint, add water gradually, mix, and check the thickness before you start spraying.
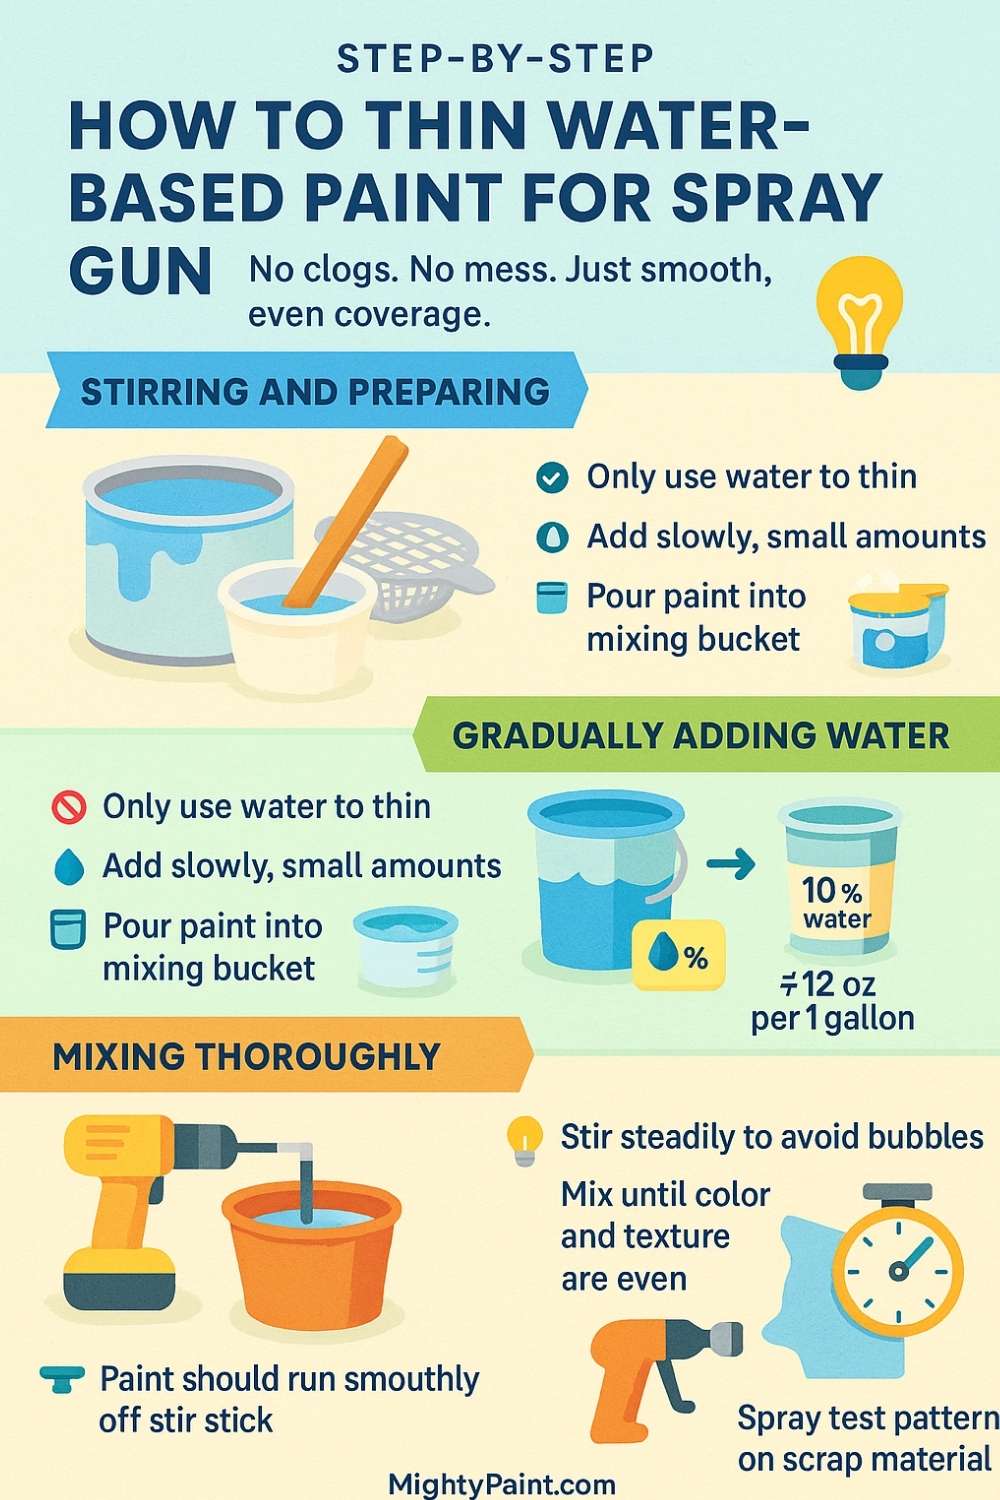
Stirring and Preparing the Paint
Open up the paint can and give it a good stir. Paint tends to separate while sitting, with the heavy stuff sinking to the bottom. Use a clean stir stick and mix until everything looks smooth.
Strain the paint to get rid of lumps or debris. A mesh paint strainer works great for this and helps you avoid annoying spray problems later.
Check the paint can label. Some brands are almost ready to spray, while others need thinning. The manufacturer’s instructions are a solid starting point.
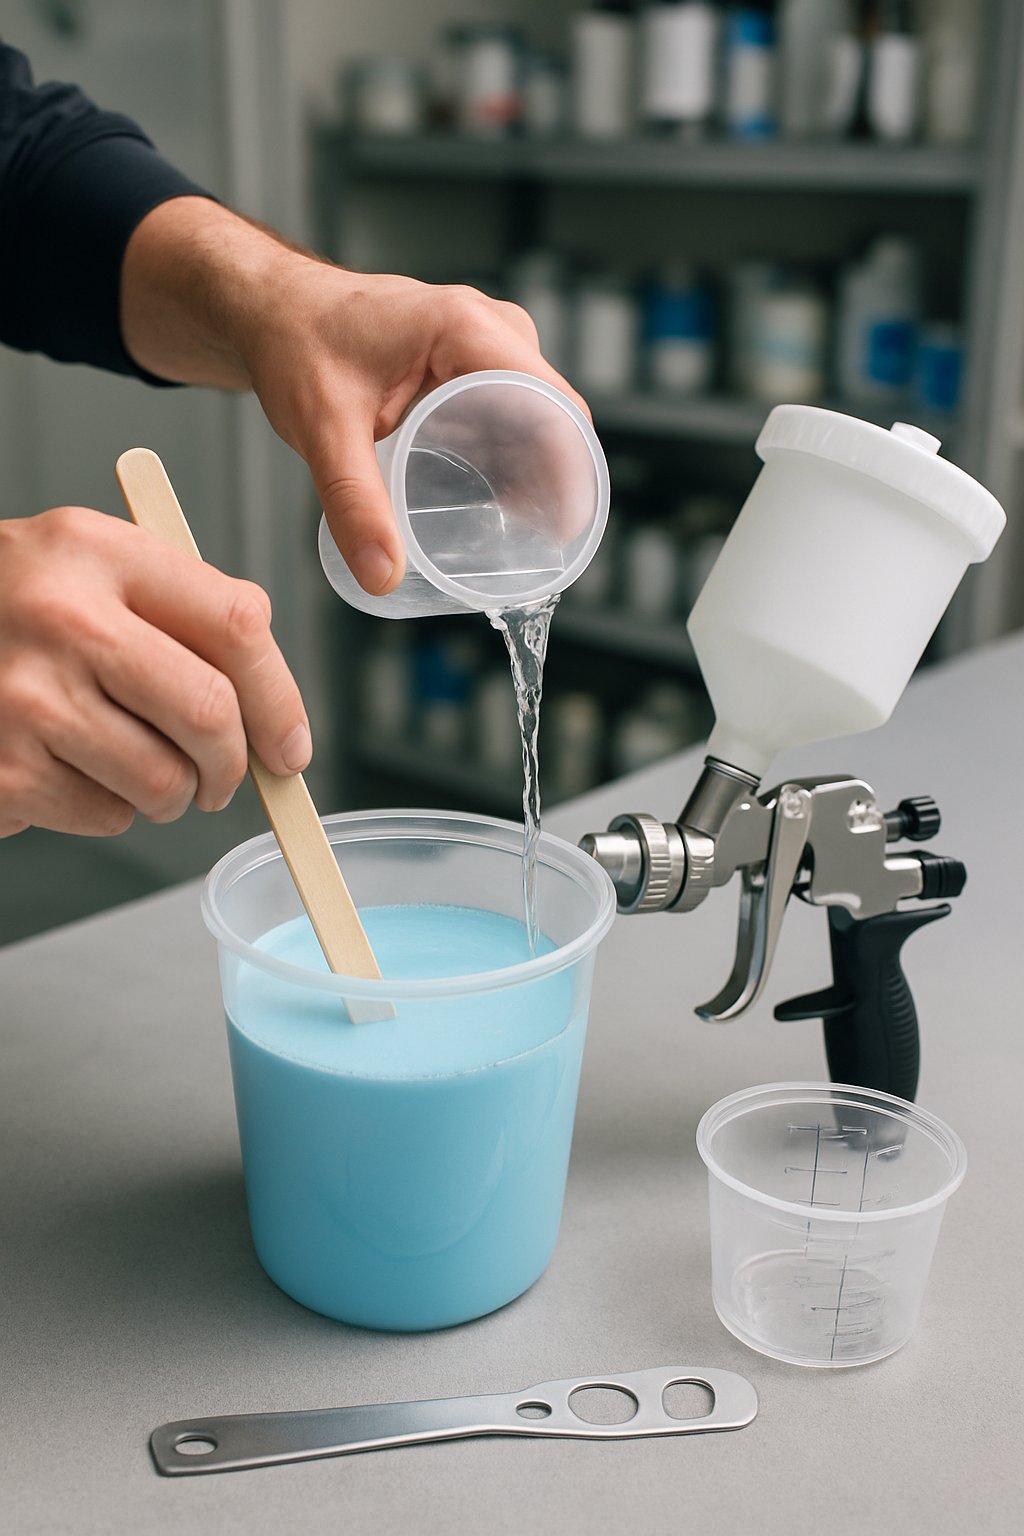
Gradually Adding Water
Only use water to thin water-based paint—no solvents or mineral spirits. They just don’t mix right.
Start slow, adding a little water at a time. A good rule is about 10% water per gallon of paint (around 12–13 ounces for a full gallon). If you’re working with less, just scale it down.
Pour the paint into a clean mixing bucket before adding water. That gives you more control and helps prevent over-thinning. Always add water bit by bit so you can stop when the paint feels right.
Mixing Thoroughly
After you add water, stir the paint well. Use a mixing stick or a drill attachment if you’ve got one. Go steady and gentle—too much speed makes bubbles, and those can mess up your finish.
Keep mixing until the color and texture are even. If you see streaks or thick spots, keep at it until everything looks uniform.
For bigger batches, stir longer to make sure the water is really blended in. If you don’t, your spray gun might sputter or clog later.
Testing Consistency and Adjusting
Once mixed, check the paint’s thickness. Dip a stir stick in and lift it out—the paint should run off in a steady stream, not thick globs.
If you want to be precise, use a viscosity cup. Fill it with paint and time how long it takes to empty. Most spray guns like paint that drains in about 20–30 seconds.
If it’s too thick, add a bit more water and stir. If it’s too thin, add a little more paint. Make small changes—you don’t want to waste a whole batch by overdoing it.
Before you start the real job, spray a test patch on cardboard or scrap. That way you’ll know if the paint sprays evenly and covers well, or if you need to tweak it again.
Thinning Ratios and Mixing Guidelines
When you thin water-based paint for a spray gun, you’re aiming for the right mix of paint and water. Get the balance right and the paint flows smoothly, doesn’t clog, and covers evenly. Little tweaks can make a big difference in how your paint sprays—and how long your finish lasts.
Recommended Paint to Water Ratios
Most water-based paints, like latex, need a bit of thinning before you try spraying them. A typical starting point? Add 10–20% water to the paint. So if you’ve got a gallon, toss in about 1–2 cups of water—don’t just dump it all in, though.
Add water in small splashes, stirring well each time. That way, you keep the mix even and steer clear of making it too thin by accident.
If you’ve got a viscosity cup, use it. It’ll show how quickly the paint flows, so you know if it’s spray-ready. If it dribbles out too slowly, add a touch more water. If it gushes out like colored water, you’ve gone too far.
Adjusting for Different Paint Types
Different water-based paints behave differently. Latex paint is usually thicker than acrylic, so it often takes closer to 20% water to get it flowing. Acrylic might only need 10% or even less for a smooth spray.
Check the label—some brands spell out thinning instructions, and a few formulas are made to spray straight from the can. If you skip this, you could mess up how the paint sticks or looks.
For HVLP spray guns, thinner mixes tend to work better since these guns run at lower pressure. Airless sprayers can handle thicker paint, so you might not need as much water. Adjust based on your sprayer—there’s no one-size-fits-all here.
Tips for Achieving the Right Viscosity
Stir the paint really well before you start thinning. That breaks up settled pigment and gives you a good base.
Add water bit by bit and test as you go. Dip a stir stick—if the paint runs off in a steady stream, you’re probably there. If it drops off in globs, add more water.
Spray a small test patch on cardboard. You want even coverage, not spitting or streaks. If it’s patchy, thin it a bit more. Always use clean water—dirty water can mess up your finish.
Techniques for Different Spray Gun Types
Your spray gun makes a big difference in how much you need to thin water-based paint and how you dial in the settings. Each one handles paint flow its own way, so using the right approach can save you a lot of hassle.
HVLP Spray Gun Adjustments
An HVLP spray gun (High Volume, Low Pressure) likes thinner paint because it uses low air pressure to break up the paint. Too thick, and you’ll get sputtering or a weird spray pattern.
Try starting with 10–20% water per gallon. Test with a viscosity cup before you fill the gun—the paint should flow in a steady stream, not glop out.
Adjust your fluid and air controls. Use the fluid knob to control paint flow, and the air cap to tweak your spray pattern. A fan width of 6–8 inches usually works for walls or furniture.
Keep the gun 6–8 inches from your surface and move with a steady hand. Overlap each pass about halfway so you don’t end up with stripes or missed spots.
Airless Sprayer Considerations
An airless paint sprayer pushes paint out at high pressure, no air mixed in. It can handle thicker water-based paints, so you might not need to thin much—maybe just 5–10% water if the paint seems sluggish.
Pick the right tip size for your job. For latex or acrylic, a 0.015–0.017 inch tip usually does the trick. Too small, and it’ll clog; too big, and you’ll waste paint with overspray.
Hold the sprayer about a foot from the surface. Keep your wrist straight and move your whole arm for even coverage. If you see heavy edges or “tails,” try thinning a bit more or go up a tip size.
Compressed Air Sprayer Tips
A compressed air sprayer uses a regular compressor and spray gun. These often need more thinning than airless sprayers because the compressed air atomizes paint at higher pressure. Shoot for 15–30% water in most water-based paints.
Mix the paint well and run it through a mesh filter before you fill the gun. This cuts down on clogs and helps you get a smooth finish. Set your compressor to about 40–50 PSI for most water-based paints.
Keep the gun 8–10 inches from what you’re painting and use light, even coats. Multiple thin layers beat one heavy coat every time—less risk of drips. Always test on scrap first to see how your spray pattern looks.
Troubleshooting and Expert Tips
When you’re spraying water-based paint, most headaches come from bad thinning, tricky weather, or not taking care of your gear. If you keep an eye on paint consistency, airflow, and clean your sprayer, you’ll dodge uneven finishes and your equipment will last longer.
Common Mistakes When Thinning Paint
People often grab the wrong thinning agent. Only use clean water or a paint conditioner like Floetrol for water-based paint. Stuff like mineral spirits or acetone? That’s for oil-based paints, and it’ll wreck water-based formulas.
It’s also easy to go overboard with water. Too much weakens the paint and can cause runs. Start with about 10% water per gallon, but always check the label first.
Skipping a paint strainer is another big one. Bits of dried paint or debris can clog your nozzle. Strain before thinning to keep things flowing.
And don’t forget to test before you commit to a surface. Spray a test pattern on cardboard or scrap—much better than finding out too late you’ve got uneven results.
Environmental Factors and Paint Application
Temperature and humidity can trip you up. If it’s too hot, paint might dry in mid-air and leave a rough finish. Too cold, and it won’t level out. Try to work between 50–85°F for best results.
High humidity slows everything down and can leave streaks or dull patches. If you can, paint on a dry day or use fans to keep air moving.
Get the Fail-Safe Paint Color Playbook (Free PDF)
36 proven colors • 8 ready palettes • trim & sheen guide • printable testing cards.
Airflow matters indoors, too. Good ventilation cuts down on overspray and helps the paint cure right. Open windows or use exhaust fans to keep fresh air moving through the room.
Cleaning and Maintenance of Equipment
Cleaning your spray gun right after use really helps keep it working well. Pour leftover paint back into the can, and then flush the gun with warm water until it comes out clear.
Take apart any removable pieces, like the nozzle and needle. Scrub off dried paint with a brush. Skip harsh solvents like mineral spirits or acetone—they’re just not necessary for water-based paints.
If you’ve used a paint conditioner like Floetrol, make sure to clean extra carefully since it can leave a film inside the gun. Dry everything fully before you put it back together, or you’ll risk rust and annoying clogs down the line.