
How To Paint A Skyline
Painting a skyline is a deeply rewarding artistic pursuit that allows the artist to capture the immense scale, complex geometry, and captivating energy of modern urban life. It is more than just rendering buildings; it is about translating the fleeting interplay of light, atmosphere, and human history into a permanent, vivid work of art. Whether you are recreating an iconic metropolis like Manhattan or capturing the unique silhouette of a smaller coastal city, the process demands careful observation, technical skill, and a deep appreciation for light.
This comprehensive guide is designed to take you through every stage of creating a stunning skyline painting. We will move far beyond simply applying paint; we will delve into the critical planning stages, mastering the composition, understanding the nuances of color theory, and executing sophisticated atmospheric techniques. By the time you finish, you will not only have a masterful painting but also a profound understanding of how light interacts with architecture, turning a mere sketch into a breathtaking visual narrative.
Get the Fail-Safe Paint Color Playbook (Free PDF)
36 proven colors • 8 ready palettes • trim & sheen guide • printable testing cards.
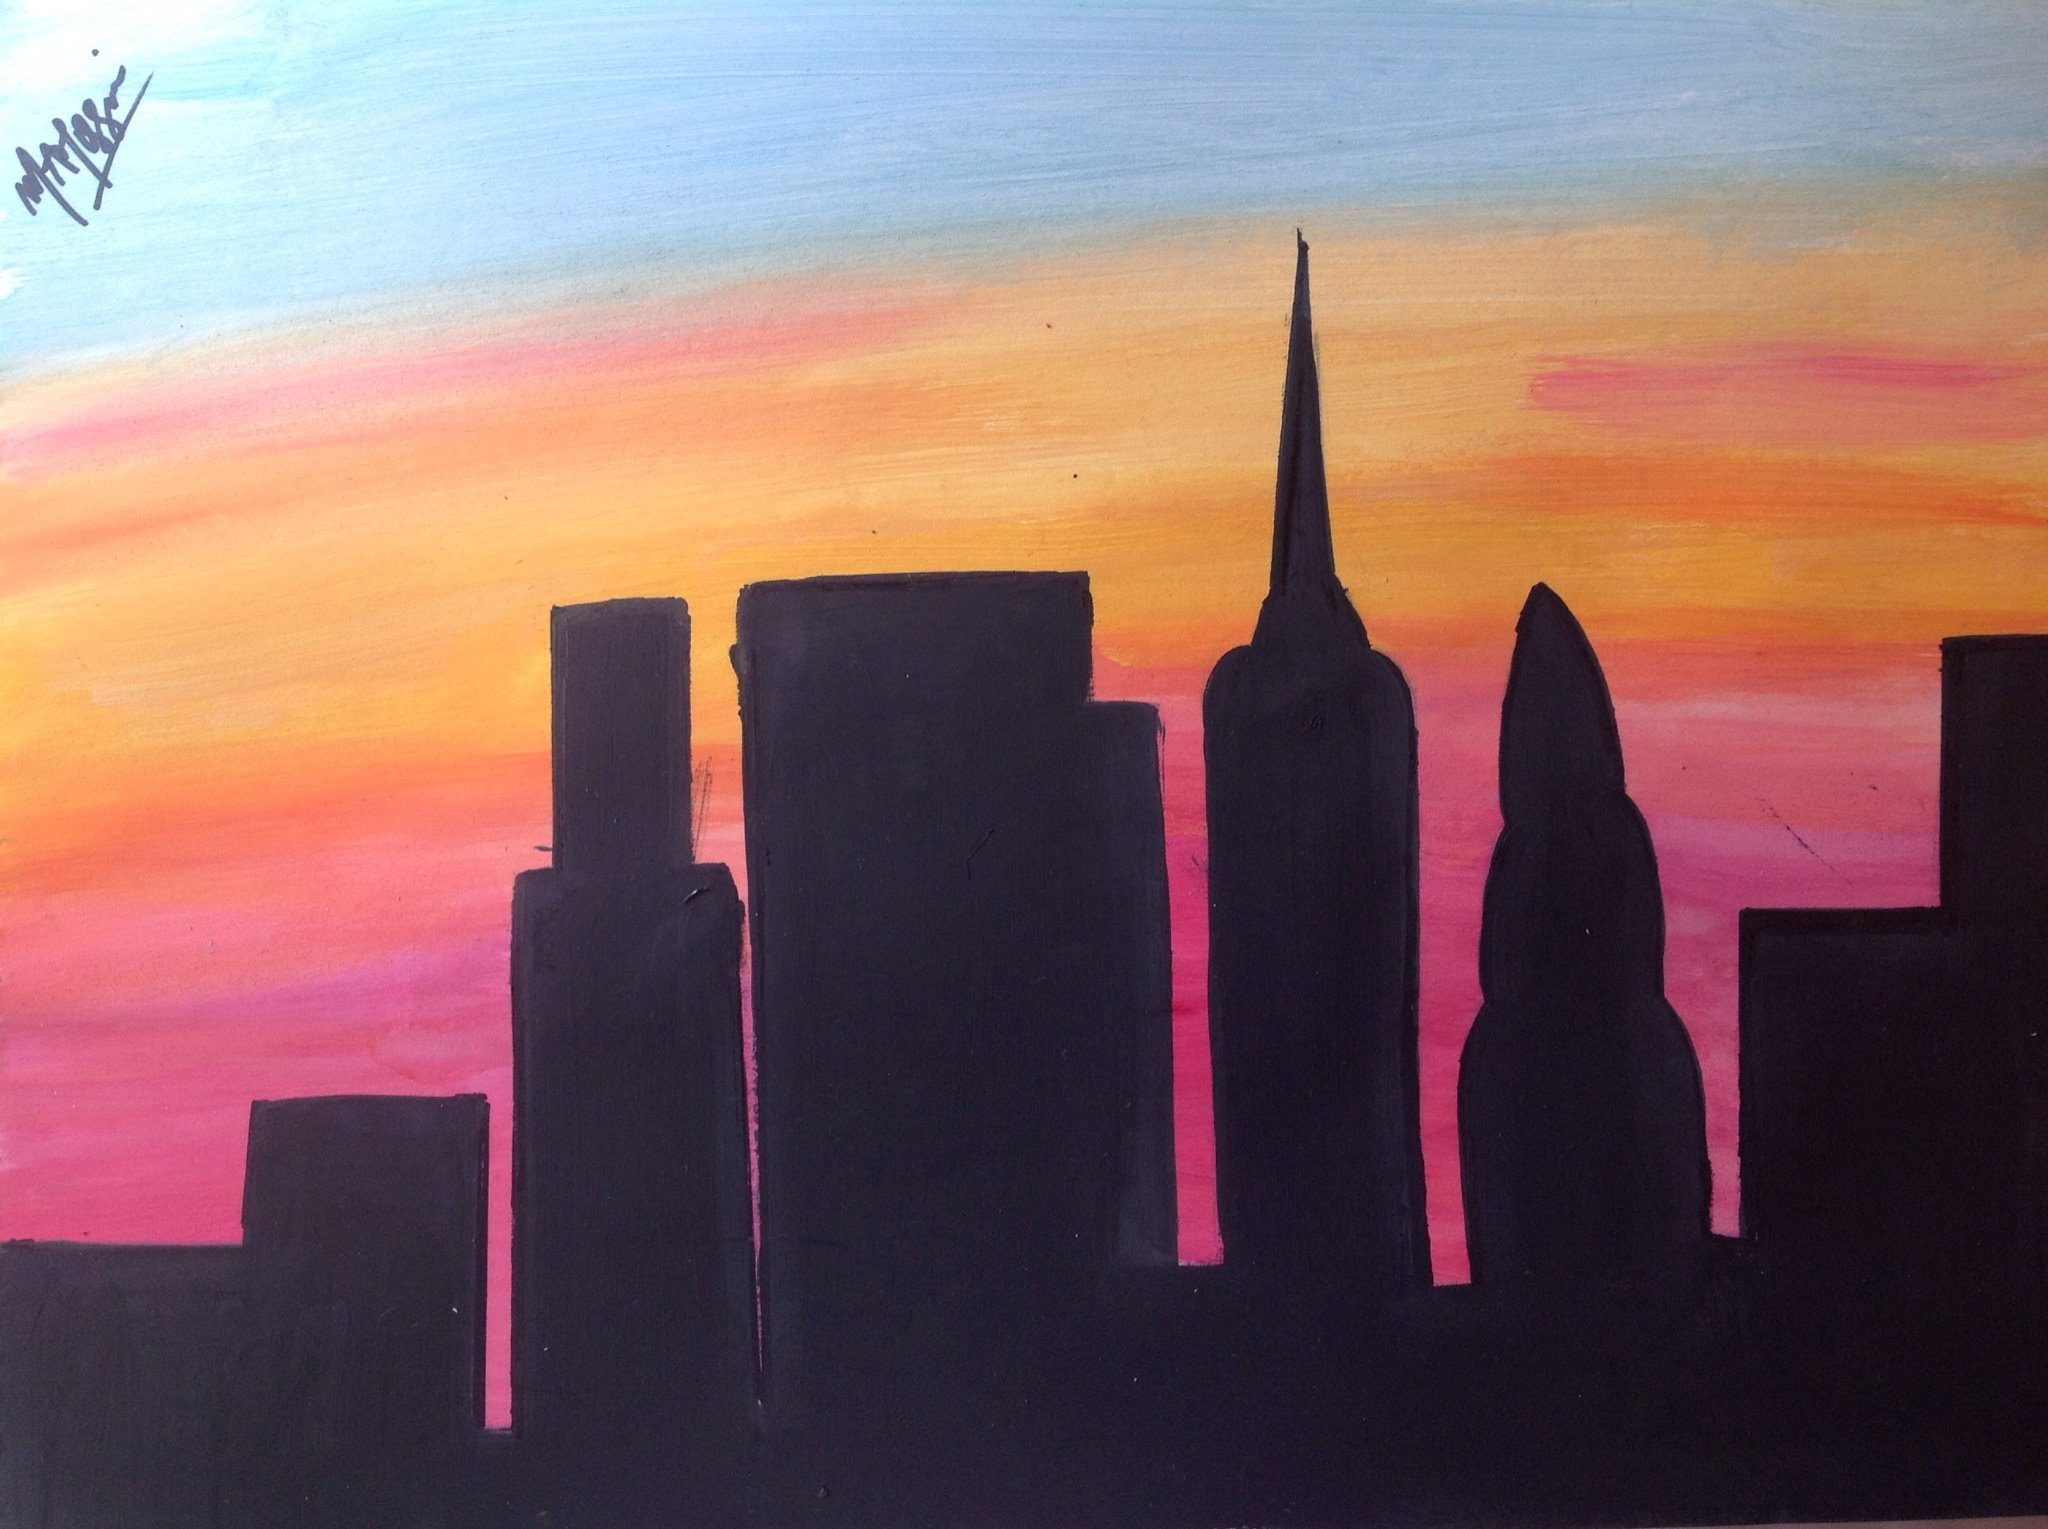
Quick answer: To Paint A Skyline, start with the safest first step for the material involved, test a small area when needed, and follow the process in thin, controlled stages. Use proper ventilation and protective gear when chemicals, sanding, spraying, or solvents are involved.
Preparing Your Canvas and Planning the View
Before a single brushstroke touches the canvas, thorough planning is paramount. Just as a structural engineer must plan before pouring concrete, a painter must plan the composition to ensure visual balance and narrative flow. This preparatory phase involves intense research, sketching, and conceptualizing the mood of the final piece.
The foundational element of any skyline painting is the choice of subject and viewpoint. Spending time researching multiple angles of your chosen city will provide you with a wealth of visual information. Consider how the city changes with the tide, the time of day, and the weather. This research will dictate your color palette and your sense of scale. When sketching, remember that you are not just drawing buildings; you are drawing the *relationship* between the buildings, the sky, and the foreground elements.
Analyzing the Ideal Viewpoint and Perspective
The viewpoint—or vantage point—is the single most critical decision. It dictates the perspective, the scale, and the emotional impact of the piece. Should your viewer feel they are standing at sea level looking up (a dramatic, imposing view), or are they viewing the scene from a distance on a hilltop (a sweeping, balanced view)? Experimenting with these perspectives will reveal which composition best serves the narrative you wish to tell.
- Low Angle (Looking Up): This perspective exaggerates the height and scale of buildings, making them appear more imposing and dramatic. Use strong vertical lines and minimize the visible ground space.
- Eye Level (Street View): This is the most common, balanced view. It allows you to incorporate foreground details, street life, and mid-ground activity, grounding the artwork in reality.
- High Angle (Aerial View): This view emphasizes the overall pattern and density of the city, making the composition more abstract and geometric. It requires careful attention to the recession of depth.
Once the viewpoint is chosen, use the Rule of Thirds—dividing your canvas into nine equal parts—to plot the horizon line and place major focal points (like a famous tower or bridge) along these lines or at their intersections. This instantly creates a sense of natural balance, guiding the viewer’s eye through the scene in a deliberate, satisfying manner.
The Step-by-Step Process of Painting the Skyline
The actual painting process should be approached in distinct, sequential phases. You cannot jump straight to the fine details; you must build the painting from the background to the foreground, and from the lightest elements (the sky) to the darkest (the shadows). This systematic approach ensures depth, coherence, and a professional finish.
| Paint Supplies | Description |
|---|---|
| Acrylic or Oil Paints | Choose acrylics for a quick-drying, versatile medium or oils for their smooth blending capabilities. |
| Brushes of Different Sizes and Shapes | Collect a variety of brushes to cater to different strokes and details. Flat, round, and filbert brushes are commonly used. |
| Palette or Mixing Surface | Use a palette or a dedicated mixing surface to blend colors and create custom hues. |
| Canvas or Painting Surface | Select a canvas or painting surface that suits your preferred size and material. Stretched canvas or canvas boards are commonly used. |
| Palette Knife (Optional) | A palette knife can be handy for creating texture and adding depth to buildings or structures. |
Phase 1: Blocking in the Atmosphere and Sky
The sky is not merely the backdrop; it is an active participant in the composition, defining the light source, the mood, and the color temperature of the entire painting. Begin here. Use large, soft brushes and broad washes of color to establish the basic sky gradient. If you are painting a sunset, this involves blending warm tones—soft yellows transitioning into oranges, and finally to deep violets near the horizon. If it is a foggy day, use muted, cool grays and blues, focusing on soft transitions and low contrast.
Next, lightly sketch in the overall silhouette of the skyline structures onto the wet or semi-dry background. These initial shapes should be vague and simple—mere suggestions of where the buildings will rise—allowing you to focus purely on the light and shadow play, rather than architectural accuracy, at this stage.
Phase 2: Establishing Depth with Background Structures
Shift focus to the furthest buildings. To create depth, remember the principle of atmospheric perspective: objects far away appear lighter, cooler, and less detailed than objects closer to the viewer. Therefore, use pale, desaturated versions of blues and grays for the background structures. Keep these buildings simplified, almost like suggestions of mass. Do not worry about individual windows or materials yet; focus only on their basic height and placement relative to the horizon line.
The contrast between the vibrant, detailed foreground and the muted, pale background is what will give your painting its incredible sense of depth. Treat the background buildings as a supporting curtain that frames the main action.
| Additional Materials | Description |
|---|---|
| Water or Solvent for Cleaning Brushes | Keep a container of water for acrylic paints or an appropriate solvent for oil paints to clean your brushes. |
| Easel or Painting Surface Support | An easel or painting surface support provides a stable and comfortable platform for your painting process. |
| Sketching Materials | Pencil, eraser, and paper are useful for sketching the basic outline of the skyline before starting to paint. |
Phase 3: Detailing the Mid-ground and Foreground
This is where the painting gains its identity and focus. Start with the mid-ground—the buildings that appear closest to the viewer but are still dwarfed by the foreground. Here, you can begin to introduce more specific architectural details, such as distinct window patterns, rooflines, and visible materials. The colors should be richer and more saturated than the background, but still slightly muted compared to the immediate foreground.
The foreground buildings are your anchors. They require the most precision. Use smaller, more pointed brushes and focus intensely on capturing the unique character of these structures. Pay close attention to how the light hits them—where are the sharpest shadows? Where are the brightest highlights? These small details, when executed with care, transform a mere outline into a palpable, three-dimensional reality.
Phase 4: Adding Atmospheric Effects and Finishing Touches
The final phase involves adding the “magic” that makes the skyline feel alive. This includes effects like fog, rain, or the glowing reflections of city lights. To simulate fog, use extremely diluted, translucent layers of white or pale gray paint, allowing the underlying colors to show through, which naturally blurs edges and suggests distance. To depict lights, use the smallest, brightest paint available (often yellow or pale blue) and apply them as small dabs of pure, intense color. These small points of light—the windows, the streetlamps—will draw the viewer’s eye and give the scene its ultimate sense of life and energy. Review the piece critically, adjusting values and contrasting edges until the entire composition feels cohesive and illuminated by a single, imagined light source.
Materials and Essential Tools for the Artist
The tools required for painting a skyline vary depending on your chosen medium (acrylics, oils, or watercolors), but certain core supplies are always necessary for achieving professional results.
Paints and Pigments: Always select a broad spectrum of colors, including deep blacks, rich whites, and a variety of grays and blues. Crucially, acquire several tubes of highly saturated, pure color (like cadmium yellow or ultramarine blue) that you can use for highlights and lights. Having a good selection of neutral grays and washes is essential for blending and achieving atmospheric haze.
Brushes and Applicators: You need a variety of sizes and shapes. Start with large, soft wash brushes for the sky and background washes. Use medium-sized round brushes for blocking in the main structures. Finally, invest in a set of small, fine-tipped detail brushes (like size 0 or 1) for windows, reflections, and architectural trim. A palette knife is invaluable for impasto textures and mixing thick paint.
Support and Preparation: Use high-quality canvas or panel appropriate for your paint type. Always have masking tape and rags on hand for preparatory work. If using acrylics, a gesso primer is mandatory to ensure the paint adheres properly and provides a consistent surface texture.
Mastering Color, Light, and Atmosphere
Color is the language of the skyline. It is not enough simply to paint the colors you see; you must paint the *feeling* of those colors. This requires an understanding of how light and atmosphere manipulate visible hues.
The Power of Undertones: Never think of a color as just “blue” or “brown.” Every color has an undertone—a subtle bias toward green, yellow, or violet. For example, a concrete building might appear grayish-yellow under harsh afternoon sunlight, even if its true color is gray. When painting, observe the ambient light to determine the dominant undertone of your entire scene. If the light is warm (sunset), every cool element should be given a slight yellow or orange undertone to unify the piece. If the light is cold (overcast day), everything should lean toward blue-gray.
Contrasting Values: Contrast is key to making the skyline “pop.” This means contrasting not just color, but *value* (how light or dark a color is). To make a building look solid and real, the shadows must be deep, and the highlights must be crisp. Never be afraid to use deep, dark values in the shadows, even if the real city doesn’t look that dark, because the contrast will make the illuminated areas appear brighter and more vivid.
Simulating Light Sources: When painting artificial light (streetlights, car headlights, interior windows), these sources should be the brightest, most saturated points of color in the entire piece. They act as visual magnets. Furthermore, light sources create *spill* or *reflection*. A streetlight won’t just illuminate the building; it will cast a visible, colored glow onto the adjacent structures and the street below, adding realism.
Common Mistakes to Avoid in Skyline Painting
The complexity of the subject matter means that numerous pitfalls can derail the painting. Avoiding these common errors is the difference between a competent attempt and a masterful piece.
- Ignoring Atmospheric Perspective: The most frequent error is making the background buildings as detailed as the foreground ones. This destroys the illusion of depth. Always remember: far = pale, light, simple.
- Lack of Cohesive Light Source: If your shadows seem to come from multiple, contradictory directions, the painting will look flat and fake. Before starting, decide exactly where the sun (or primary light source) is positioned and ensure all shadows and highlights follow that single source consistently.
- Over-Detailing in the Background: While detail is crucial for the foreground, attempting to render every window or architectural feature in the distance leads to a cluttered, muddy look. Keep the background suggestive and simplified to enhance the sense of vastness.
- Forgetting the Sky’s Role: Treating the sky as a simple blue wash is a mistake. The sky must participate in the mood. If the city is bustling at night, the sky should reflect the deep, cool glow of the city lights, rather than being a blank canvas.
Safety and Practical Handling Tips
While painting is generally a low-risk activity, certain materials and techniques require proper safety awareness. Always prioritize your personal safety and the longevity of your artwork.
Ventilation and Ventilation: When working with oils, solvents, or strong acrylic mediums, ensure the workspace is exceptionally well-ventilated. Open windows and use fans to dissipate fumes. Never paint in a confined space. Always consult the Safety Data Sheets (SDS) provided by your paint manufacturers for specific handling instructions.
Protective Gear: Wear appropriate protective gear, including gloves and an apron, to protect your skin and clothing from paint splatter and chemicals. If working with historical pigments or unusual mediums, ensure proper respiratory protection is used. Always clean brushes thoroughly and follow manufacturer directions for paint thinning and mixing.
Structural Integrity: If your artwork involves building a physical diorama or structure to support the painting, ensure all supporting materials are stable and safe. Never use structural elements that could pose a risk of collapse or injury. When in doubt about structural stability, call a licensed professional.
Painting a skyline is a deeply personal and technically challenging journey that demands patience, acute observation, and a willingness to experiment. By breaking the process down into manageable, sequential steps—from planning the perfect viewpoint to mastering the illusion of atmospheric depth—you can elevate your art from a simple copy to a truly evocative piece. Remember that the goal is not simply to replicate a city, but to capture the magnificent spirit, the light, and the endless energy of urban life itself. Enjoy the process, trust your instincts, and let your artistic vision soar.
Safety and Practical Notes
Work in a well-ventilated space and wear gloves, eye protection, and a respirator when needed. Keep children and pets away from wet surfaces and open containers.
Follow manufacturer drying times between coats. Dispose of rags and leftover materials according to local regulations. If the project involves heights, lead paint, or structural work, consider hiring a licensed professional.
Frequently Asked Questions
How do I create a convincing sense of depth (atmospheric perspective)?
The key is to make the background progressively lighter, cooler, and less detailed than the foreground. Use pale, desaturated blues and grays for the most distant structures, as atmospheric haze naturally washes out color and contrast over great distances. The contrast between the sharp, saturated details of your immediate foreground and the muted, hazy background is what creates the illusion of vast depth.
Get the Fail-Safe Paint Color Playbook (Free PDF)
36 proven colors • 8 ready palettes • trim & sheen guide • printable testing cards.
How do I maintain a consistent light source across the entire painting?
Before mixing any paint, decide exactly where your primary light source is located (e.g., setting sun to the left, or overcast sky). Every shadow and highlight must follow this single source. If the light is coming from the left, the right side of every building must contain the deepest shadow, and the left side must be the brightest highlight. This consistency is vital for realism and cohesion.
What is the most manageable viewpoint for a beginner?
For your first attempt, an “Eye Level” (street view) perspective is highly recommended. This view is balanced, allowing you to incorporate recognizable foreground elements, mid-ground activity, and background structures without being overwhelmed by extreme verticality (like a low-angle shot) or abstract geometry (like a high-angle shot). It grounds the piece in a relatable reality.
What safety precautions should I take when using painting materials?
Always prioritize ventilation. When using oils, solvents, or strong acrylic mediums, ensure your workspace is open and well-ventilated to dissipate fumes. Wear appropriate protective gear, including gloves and an apron. Never mix or thin paints without consulting the Safety Data Sheets (SDS) provided by your paint manufacturers.
Conclusion
How To Paint A Skyline works best when the plan, materials, safety steps, and finish goals all line up before work begins. Review the surface or tool condition, choose compatible products, and leave enough time for drying, cleanup, and final checks.
Use the guidance above as a practical checklist, then adjust it to the specific surface, workspace, product directions, and risk level. When the project involves fumes, damaged materials, business liability, or uncertain conditions, slow down and get qualified help before moving forward.