
How Do You Remove Paint From Tile
Accidental paint spills or persistent, stubborn paint stains on tile surfaces are common frustrations for homeowners and DIY enthusiasts alike. Whether you are dealing with a fresh splatter or an old, decades-deep stain, knowing the right process to remove paint from tile is a valuable skill that can save you significant time, money, and effort. This comprehensive guide is designed to equip you with professional-grade knowledge and practical, step-by-step techniques.
Paint removal from tile is not a one-size-fits-all task; it requires a thoughtful, systematic approach that considers multiple variables: the chemical composition of the paint (water-based vs. oil-based), the material and porosity of the tile, and the age of the stain. By understanding these factors, you can select the most appropriate removal method, ensuring you restore the tile’s natural beauty without causing underlying damage.
Get the Fail-Safe Paint Color Playbook (Free PDF)
36 proven colors • 8 ready palettes • trim & sheen guide • printable testing cards.
Quick answer: If How Do You Remove Paint From Tile happens, first identify whether the cause is surface prep, moisture, incompatible products, heavy coats, drying conditions, or application technique. Fix the cause before repainting or repeating the repair, or the problem may return.
Planning and Preparation Before You Begin
Before you touch a single stain, proper planning is crucial for safety and success. Treating paint removal like a complex restoration project, rather than a simple spill clean-up, will yield the best results. Start by gathering all necessary supplies and protecting your environment.
Assess the Surface and Stain: First, identify the tile material (ceramic, porcelain, natural stone, etc.) and the grout type. Natural stone is highly porous and reacts differently to chemicals than glazed porcelain. Next, assess the paint. Is it still wet, flaking, or completely dry and bonded to the tile? This assessment dictates whether you need solvents, mechanical removal, or simply gentle cleaning.
Safety Check: Since you will be working with chemicals, always ensure adequate ventilation. Open all windows and use fans. Gather your Personal Protective Equipment (PPE) before proceeding. Never assume a stain is harmless; always test your chosen solution on an inconspicuous area first to check for discoloration or etching.
The Step-by-Step Guide to Removing Paint From Tile
The removal process must be systematic, moving from the mildest methods to the most aggressive only if necessary. Never jump straight to harsh solvents.
1. Initial Gentle Cleaning (The Mildest Approach)
For fresh, lightly adhered, or surface-level paint stains, simple physical methods are often sufficient. Use a soft-bristle brush (like a nylon grout brush) and a mild detergent solution (such as dish soap and warm water). Scrub gently in circular motions. For stains that are slightly dried, a poultice—a paste made of absorbent material (like powdered chalk or baking soda) mixed with a mild solvent (like distilled white vinegar)—can help draw out the pigment without damaging the surface. Allow the poultice to sit for the time recommended by the cleaner manufacturer.
2. Addressing Water-Based Paint
Water-based paints (latex, acrylic) are generally easier to remove than oil-based paints, especially if they haven’t fully cured. If mild scrubbing fails, a mild solvent like mineral spirits or a specialized paint remover designed for latex is often effective. Apply the solvent to a rag or cloth, not directly to the tile, to prevent over-saturating the grout. Gently wipe the stain, allowing the solvent to break down the paint film. Follow up with clean water and detergent to neutralize the solvent residue.
3. Tackling Oil-Based Paint
Oil-based paints are the most challenging because their binders are petroleum-based and require strong solvents. Here, products like acetone or specific commercial paint strippers formulated for oil are necessary. Always wear appropriate respiratory protection when using these chemicals. Apply the stripper according to the manufacturer’s directions—it usually involves letting it sit for a specific period to chemically lift the paint. Once the paint bubbles or softens, use a plastic scraper or a stiff brush to gently lift the material. Do not use metal scrapers, as they can gouge the tile or damage the grout lines.
4. Removing Dried or Stubborn Stains (Advanced Techniques)
When paint has cured deeply or soaked into the porous grout, more intensive techniques are required:
- Heat Application: For thick, dried layers, a handheld heat gun (used on a low setting and kept moving) can soften the paint, making it easier to scrape off. Extreme caution is required to avoid cracking the tile or damaging natural stone.
- Abrasives: If the tile and grout are extremely durable (like porcelain), gentle abrasion using a specialized tile cleaner brush or a low-grit sanding disc (used by a professional) may be needed. This should only be done as a last resort, as it removes the protective sealant and can damage the surface finish.
- Chemical Strippers: Commercial strippers are chemically engineered to break down specific paint types. Select a stripper that matches the paint you are removing and always follow the safety and mixing instructions precisely.
Essential Materials and Tools Checklist
Having the right gear ensures efficiency and safety. Here is a detailed list of what you should gather:
Cleaning Agents and Chemicals:
- Mild Detergent (dish soap) and warm water.
- Mineral spirits (for water-based paints).
- Commercial paint stripper (select based on paint type).
- Poultice materials (baking soda, chalk powder).
- Distilled white vinegar (as a neutralizer/mild cleaner).
Tools and Application Items:
- Nylon grout brushes and soft-bristle brushes.
- Plastic putty knives or scrapers (never metal).
- Stiff scrub pads (non-abrasive side recommended).
- Safety gear: Chemical-resistant gloves, safety goggles, and a respirator/mask.
- Clean rags and cloths (cotton or synthetic).
- A bucket for mixing solutions and rinsing.
Common Mistakes to Avoid When Removing Paint
Even with a detailed plan, common errors can derail your efforts. Be mindful of these pitfalls to ensure a successful restoration.
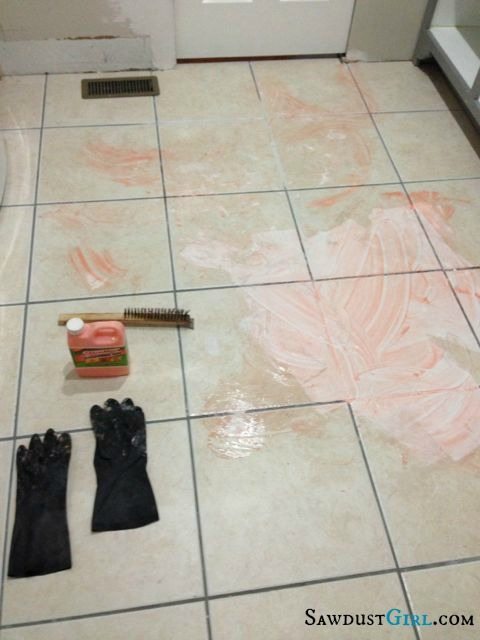
1. Using Metal Tools on Grout: Metal scrapers or wire brushes can easily scratch, chip, or etch the tile surface and permanently damage the grout lines. Always opt for plastic or wooden tools.
2. Mixing Chemicals Recklessly: Never mix different solvents, especially never mix bleach with ammonia or acids. This can create toxic fumes. Always use chemicals as directed by the manufacturer and neutralize the area thoroughly afterward.
3. Ignoring Porosity: Assuming all tile behaves the same way is a mistake. Highly porous natural stone will absorb solvents and stain more easily than glazed porcelain. Adjust your technique accordingly and work in small, controlled sections.
4. Skipping the Rinse: After using any solvent or stripper, it is vital to thoroughly rinse the area with clean water and wipe it down with a mild detergent solution. Residual chemicals can continue to react with the tile or stain the area further.
Safety and Practical Notes: Your Health First
Working with paint strippers and solvents requires strict adherence to safety protocols. Your personal safety must be the top priority.
Personal Protective Equipment (PPE): Always wear chemical-resistant gloves, safety goggles, and a respirator/mask when handling solvents or strippers. These chemicals can irritate skin and respiratory passages.
Ventilation: Ensure excellent cross-ventilation. Open multiple windows and use exhaust fans to dissipate fumes. Never use these chemicals in an enclosed, unventilated space.
Manufacturer Directions: Always read and follow the safety data sheet (SDS) and usage instructions provided by the chemical manufacturer. These products are not standardized, and safety procedures vary wildly.
When to Call a Professional: If the stain is on a large, structural area (like a whole bathroom floor) or if the tile is delicate (like antique or natural stone), consider calling a professional. They have specialized equipment, experience with complex materials, and can assess potential underlying structural or staining issues you might miss.
Restoring and Sealing the Tile
Once the paint is removed, the tile and grout are likely exposed to raw, untreated porosity. Simply cleaning the stain is not enough; you must restore the surface integrity.
Final Cleaning: After the paint residue is gone, scrub the area one last time with a neutral pH cleaner to remove any chemical or detergent film. Rinse thoroughly.
Sealing: If the tile or grout is porous (especially natural stone or unglazed ceramic), it must be sealed. Applying a penetrating sealant will prevent future stains, water damage, and help restore the tile’s original luster and durability. This step is crucial for long-term maintenance and stain prevention.
Frequently Asked Questions
What should I do if the paint is on the grout lines, not the tile surface?
Grout is typically porous and much softer than the tile body, making it highly susceptible to damage. Never use metal scrapers on grout. For grout stains, start with the mildest methods: a poultice or a specialized grout cleaner. If the paint is deeply set, consider using a dedicated grout brush and a mild solvent like mineral spirits, followed by a thorough rinse. If the grout is natural or porous, it is strongly recommended that you consult a professional, as aggressive chemicals can permanently discolor or etch the grout.
Get the Fail-Safe Paint Color Playbook (Free PDF)
36 proven colors • 8 ready palettes • trim & sheen guide • printable testing cards.
Can I use bleach or vinegar to remove paint?
Do not use bleach or vinegar as a primary paint remover. While vinegar can be part of a mild poultice, bleach is generally ineffective against cured paint and can damage certain types of tile or grout. Furthermore, mixing household chemicals can create toxic fumes (never mix bleach with ammonia or acids). Always prioritize commercial paint strippers designed for the specific paint type (latex vs. oil) and follow the Safety Data Sheet (SDS) for handling instructions.
How do I know if I should call a professional?
You should call a professional if any of the following apply: 1) The paint stain covers a large, structural area (e.g., an entire bathroom floor). 2) The tile is delicate, antique, or made of highly reactive natural stone. 3) You are dealing with a paint type that is unidentified, or if you are unsure about the chemical compatibility of your chosen stripper. Professionals have specialized equipment and the expertise to handle complex restoration scenarios while minimizing damage.
What is the safest final step after the paint is removed?
The final step is crucial for long-term protection. After the paint residue is removed and the area is thoroughly rinsed, you must apply a neutralizing cleaner and then seal the surface. If your tile or grout is porous (like natural stone or unglazed porcelain), sealing it with a penetrating sealant will prevent future staining, water damage, and restore the material’s integrity. Simply cleaning the stain is not enough; sealing protects the underlying material.
Conclusion
Removing paint from tile is a manageable DIY project, provided you approach it systematically and with extreme caution. By following the process—from careful assessment to the use of appropriate, low-to-high-aggressivity methods—you can restore your tiles to a clean, pristine state.
Remember that patience is your best tool. Take your time, prioritize safety at every stage, and always finish by sealing the surface. With these detailed guidelines, you are well-equipped to tackle any paint stain and say goodbye to unwanted residue, revealing the true beauty of your tile surface.