
How to Paint Bumper: A Simple Guide for DIY Enthusiasts
Painting a car bumper might seem daunting, but it’s a great way to breathe new life into your vehicle. Imagine your car rolling down the street with a freshly painted bumper that gleams in the sunlight. With the right tools and techniques, you can achieve a professional-looking finish that both restores appearance and adds a layer of protection.

Before diving into this project, you’ll need to gather some patience and a few essential materials. With careful steps, such as prepping the surface and applying multiple light coats, you can avoid the pitfalls that lead to uneven paint jobs. Just think of this process as a rewarding weekend project that transforms your ride.
Get the Fail-Safe Paint Color Playbook (Free PDF)
36 proven colors • 8 ready palettes • trim & sheen guide • printable testing cards.
Excited to get started? Whether you’re fixing up scratches or simply want a new color, learning how to paint a bumper can turn your vision into reality. You don’t need to be a pro to get it right—with guidance and a steady hand, you’ll have that bumper looking top-notch in no time.
Preparing the Bumper
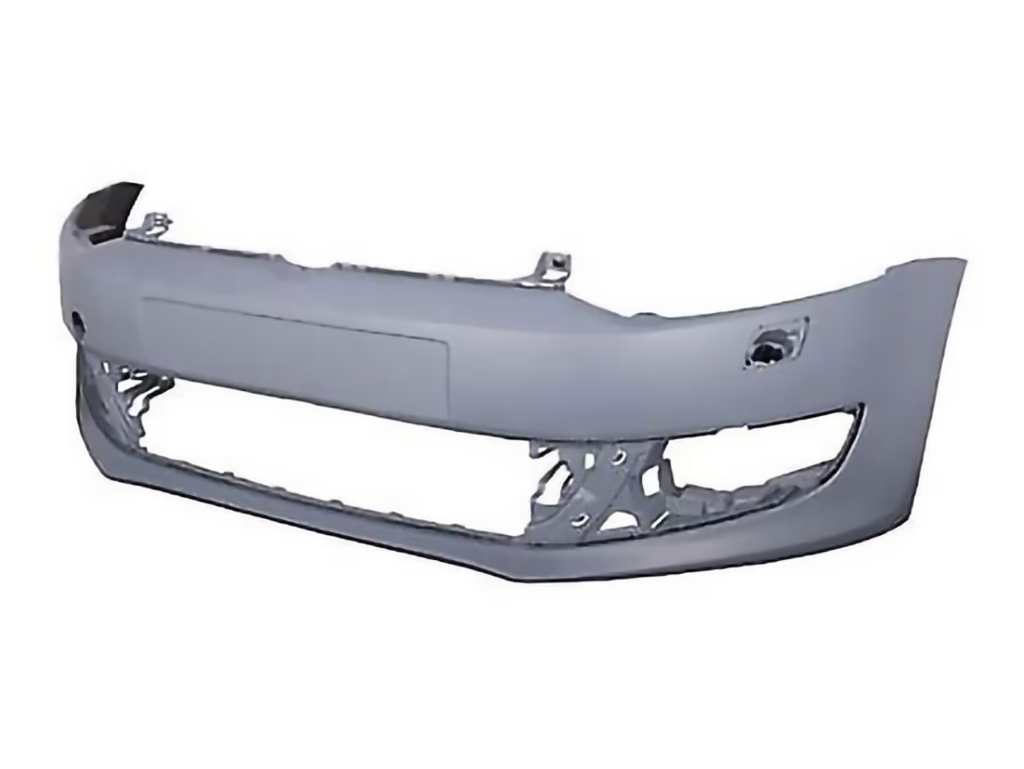
Getting the car bumper ready for paint involves several important steps. You’ll need to clean thoroughly, mask off the areas you don’t want to paint, and apply a primer to ensure the paint adheres well.
Cleaning and Sanding
First, grab a degreaser or wax and grease remover. These products help remove any grime, oil, or wax build-up on the bumper. Apply the product with a cloth, covering every bit of the surface.
Next, you should sand the bumper. Use sandpaper with a grit of 400 to 600 to smooth the surface. Sanding removes any old paint flaking off and provides a nice texture for the primer to hold on to. Remember, sanding too much might damage the bumper and create uneven spots. Take your time and do it right!
After sanding, don’t forget to wipe down the surface. A tack cloth is a handy tool here. It picks up any remaining dust and gives you a clean surface to work with. Sounds simple enough, right?
Masking Off Areas
You definitely don’t want paint where it doesn’t belong. Masking off is a crucial step, and automotive masking tape is your best bet.
Before you start, check twice. Make sure you cover all the areas around the bumper, like headlights and grills. Some folks even use plastic sheeting for larger sections.
The tape should be applied snugly, with no gaps. If it slips, you might end up with a messy line of paint. Take your time here. Precision pays off. It’s worth double-checking, trust me.
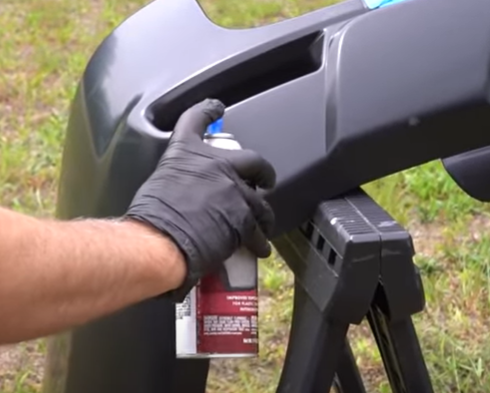
Applying the Primer
When it comes to applying primer to the car bumper, precision is key. You are going to need automotive primer for a consistent base.
First, apply a thin prime coat. Hold the spray can about 8-10 inches from the surface and move in a steady, sweeping motion. No need to rush!
After the prime coat dries—you’ll usually wait around 20-30 minutes—it’s time for a second coat. Some folks like to sand lightly in between coats with finer sandpaper for an ultra-smooth finish.
In no time, you’ll have a perfectly primed car bumper, ready for vibrant color.
Painting the Bumper
Getting your car’s bumper looking fresh and fabulous isn’t as tricky as it seems. It’s all about picking the right paint, laying down a smooth base, and finishing with finesse. Once you know these tricks, you’ll see the magic happen!
Choosing Automotive Paint
Picking the perfect paint is like choosing the right outfit for an event. Your bumper needs automotive paint designed specifically for cars. It’s different from regular paint because it can withstand weather changes and road debris. Picture this: you wouldn’t wear a raincoat to a beach party, right?
Color matching is another key step. You can find the exact shade of your car’s color code in places like the driver’s door frame or near the engine bay. Got your color picked out? Make sure you also have a clear coat to give that shiny finish and protect your new paint job.
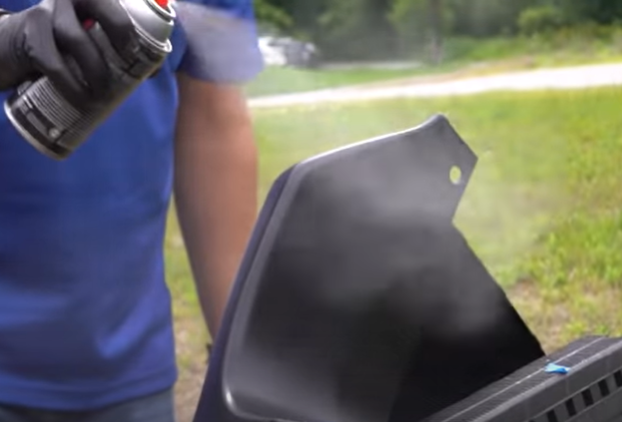
Applying the Base Coat
Time to get to the fun part—putting on the base coat! Before you start, make sure your bumper is super clean and dry. Dust and dirt can ruin your hard work. The goal is to have an even and smooth surface.
Grab your spray paint or paint gun and hold it about 12 inches from the bumper. Start spraying from one side to the other in a slow, sweeping motion. This method prevents paint runs and ensures a nice, even coat. A couple of thin layers are always better than one heavy coat. Trust me, patience here pays off.
Achieving a Smooth Finish
Ready to achieve that smooth, professional look? You’ll need fine-grit sandpaper for this task. After the base coat dries, lightly sand any rough spots using the sandpaper. Wipe clean with a tack cloth before moving on to the next layer.
Once satisfied, apply your clear coat using the same sweeping motion. Usually, two coats of clear coat will seal the paint and provide protection against chips and scratches. Stand back and admire your handiwork! Isn’t it impressive how a bit of patience and precision can transform your bumper?
Applying the Clear Coat
Are you ready to give your bumper that sleek, shiny look? The clear coat is your best friend for this job. Let’s explore its key roles and how to ensure a stunning finish.
The Role of Clear Coat
The clear coat is like a superhero for your paint job. It’s transparent, but it packs a powerful punch. Think of it as your protective shield.
Its main job is to guard the paint from the harsh effects of UV rays, weather, and dirt. This invisible layer helps maintain the color and makes the paint last longer. Without it, your paint could fade or peel, leaving your car looking pretty sad.
The clear coat also adds depth to the color underneath, making it look more vibrant. When you apply clear coat correctly, it enhances paint adhesion. This is crucial because it keeps the paint attached firmly to the bumper, reducing the risk of chipping or cracking.
Ensuring a Glossy Finish
Now, let’s talk about getting that glossy finish. Start by making sure the painted surface is clean and smooth. You don’t want any dust or dirt messing up your shine, right?
Use a good quality paint spray gun for this task. Apply the clear coat in thin, even layers using a sweeping side-to-side motion. It’s tempting to rush, but be patient. Let each coat dry for about 10-15 minutes before adding the next. Typically, you’ll need 2-3 coats.
To achieve a smooth finish, ensure each layer is well-dried before moving on. This patience will pay off with a bumper that looks like it just stepped out of a showroom!
Final Work
After painting your car bumper, the final work makes sure everything looks perfect and lasts for a long time. Key steps involve buffing and polishing the bumper, as well as inspecting and touching up any areas that need attention.
Buffing and Polishing
First, let’s talk about buffing and polishing. Once the paint is dry, it’s time to make it shine. You’ll want to use an automotive polish to give the paint a glossy finish. Before starting, make sure the surface is clean and dry.
Use a buffing pad or a soft clean cloth in circular motions. This step smoothens any imperfections and enhances the paint’s look. Don’t apply too much pressure; let the polish do the work. Depending on your car, this process might take around 20-30 minutes.
After buffing, give the area a final wipe. Your bumper should now look smooth and shiny, almost like it’s brand new. Remember, this step not only improves appearance but also protects the paint.
Inspection and Touch-Ups
Next, perform a careful inspection. Stand back and look for any spots that might have been missed. Move in close and inspect every part. This is where touch-up paint comes in handy.
If you spot any uneven areas or small scratches, grab a fine brush or a small applicator. Apply the paint gently to blend it with the surrounding area. Don’t rush this part; patience will give the best results.
Regular maintenance is crucial after finishing touches. Frequently check the bumper for any damage and reapply polish if necessary. Keeping the bumper clean helps maintain that brilliant finish for longer periods. Routine care means a lasting, great-looking bumper.
Maintenance and Care
Taking care of your newly painted bumper is key to keeping it looking fresh. By focusing on protection and regular checks, you can ensure long-lasting results.
Protecting Your Bumper’s Finish
Maintaining your bumper’s shiny finish is simpler than you might think. Use car wax or a sealant to provide an extra layer of protection against dirt and scratches. Apply it every few months for best results.
Get the Fail-Safe Paint Color Playbook (Free PDF)
36 proven colors • 8 ready palettes • trim & sheen guide • printable testing cards.
Park your car in the shade whenever possible to protect the paint from the sun’s harmful rays. Using a car cover is also a good idea if you don’t have a garage. Clear coats can provide added protection against chips and fading. If you notice any damage, try to address it quickly to prevent further issues.
Regular Maintenance Tips
Regular maintenance is your bumper’s best friend. Start by washing your bumper weekly with mild soap and water. This removes dirt and grime that could damage the paint. During the wash, check for any tiny chips or scratches.
If you find any, use touch-up paint to fix them. This prevents moisture from getting in and causing rust. Inspect the bumper for stubborn stains or bird droppings. Remove these quickly to prevent damage to the finish.
Remember that weather conditions impact the paint. Cold temperatures and excessive heat can strain your bumper’s paint. Maintaining regular care routines helps you spot problems early and keeps your bumper looking new.