
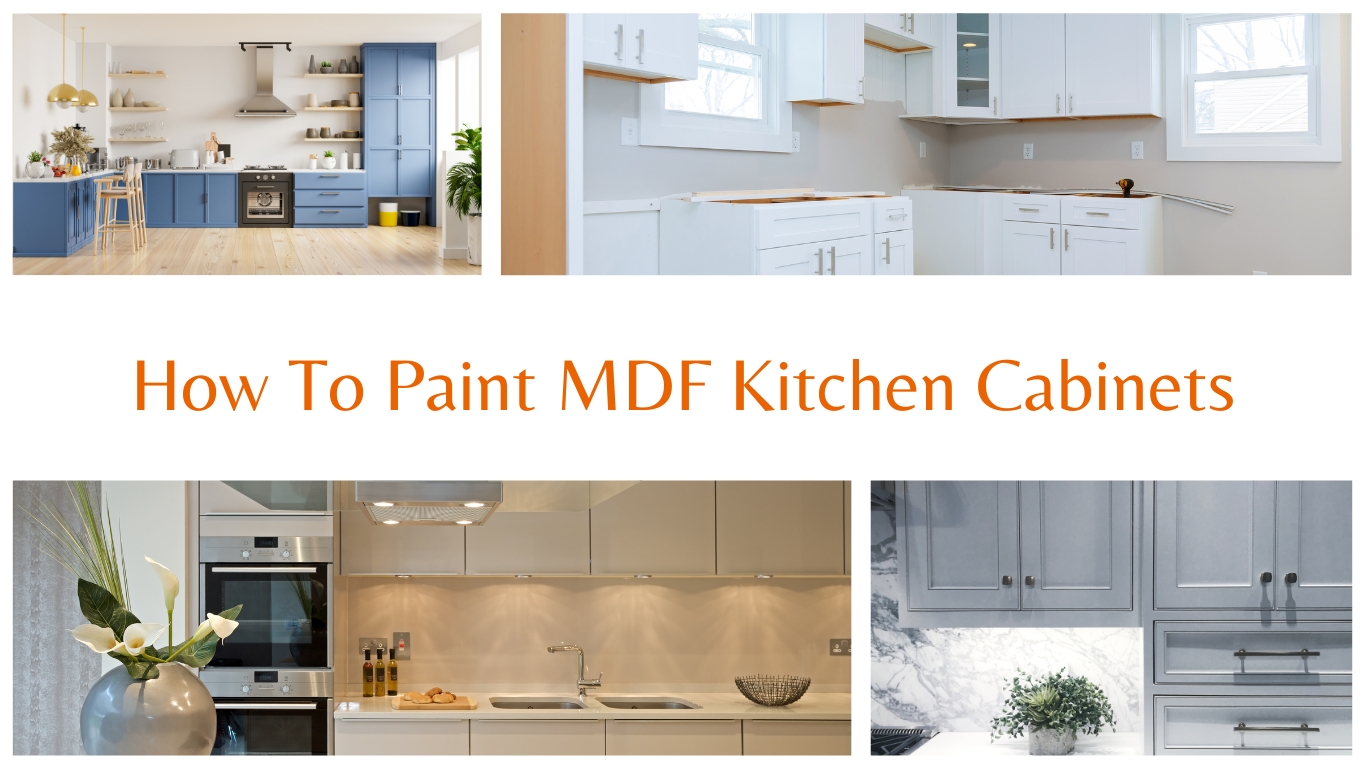
How To Paint MDF Kitchen Cabinets: Easy Steps for a Stunning Finish
Painting MDF kitchen cabinets can transform your kitchen, giving it a fresh look without the cost of replacing cabinets. To get a smooth, durable finish, you need to start with thorough cleaning and sealing.
Begin by wiping the cabinets with a damp cloth to remove dust and grime. This step ensures that the sealant and paint will adhere properly, preventing peeling or chipping.
Get the Fail-Safe Paint Color Playbook (Free PDF)
36 proven colors • 8 ready palettes • trim & sheen guide • printable testing cards.
Don’t skip filling any scratches or dents with drywall compound, as these imperfections will stand out once painted. After filling, sand the entire piece with 220-grit sandpaper for a smooth surface. Wiping off the dust afterwards is crucial to avoid texture in your paint job.
Applying a high-quality primer is another key step. Brush primer onto the cabinets, starting at the top and working your way down, always following the direction of the wood grain. This helps the paint stick better and creates a flawless finish.
Ready to give your kitchen a new makeover? Let’s dive into the detailed steps!
Understanding the Basics of MDF
MDF, or Medium-Density Fiberboard, is a popular material for kitchen cabinets due to its affordability and smooth surface. Let’s break down what MDF is and why it’s a great choice for your kitchen cabinets.
What Is MDF?
Medium-Density Fiberboard, commonly known as MDF, is made from wood fibers combined with resin and wax. These fibers are compressed together under high pressure to form dense, flat panels. Unlike natural wood, MDF does not have a grain, making it perfect for smooth finishes.
MDF is usually 120-grit smooth from the factory, making it ready to paint on the surface. Its edges are more porous which might need some extra attention during preparation. The lack of grain also means it won’t warp or crack due to moisture, unlike regular wood.
Advantages of MDF for Kitchen Cabinets
MDF is cost-effective. It provides a sleek look without breaking the bank. This type of board takes paint exceptionally well, offering a smooth and even finish with fewer coats compared to natural wood.
It’s also stable and durable. MDF doesn’t expand or contract with temperature and humidity changes, providing a long-lasting surface for your cabinets. Additionally, the density of MDF means it can be shaped into intricate designs, offering flexibility in styles.
While the edges might need sealing due to their porous nature, the overall maintenance is low. Simply sand, prime, and paint for a fresh look that lasts.
Preparation Is Key
To get the best results when painting MDF kitchen cabinets, you need to make sure every step is done right. Doing good preparation work ensures the paint sticks well and looks great for a long time.
Gathering Your Materials
First, you need the right tools and materials. Get paint that works well on MDF and primer. Also, have sandpaper (120-grit for the first round and 220-grit for the second), tack cloths, and drywall compound if you need to fill any scratches. To keep safe, don’t forget protective gear like masks and gloves.
Keep everything listed handy:
- Primer and paint
- 120-grit and 220-grit sandpaper
- Tack cloths
- Drywall compound
- Protective gear
Setting Up Your Workspace
To avoid getting dust and paint all over your kitchen, set up a good workspace. Lay down drop cloths or plastic sheeting to protect your floor. Make sure the area is well-ventilated by opening windows or using fans. Set up a table or workbench where you can place the cabinets and doors for easy access and stability.
Before you start, check the lighting. Good light helps you see what you are doing. Use portable lamps if needed.
Removing Cabinet Doors and Hardware
Take off all the cabinet doors and remove the hinges, knobs, and pulls. Label each door and its hardware to make reassembly easier. Use a drill or screwdriver to take out screws.
Store all the small parts in labeled bags or containers so you don’t lose them. This way, putting everything back together will be a breeze.
Cleaning and Sanding the Surfaces
Clean the cabinet surfaces well. Use a mild detergent mixed with water to remove any grease and grime. Dry the surfaces completely before you start sanding.
Next, use 120-grit sandpaper to lightly sand the surfaces. This roughs up the surface so the primer sticks better. After sanding, use a tack cloth to wipe away the dust.
For a smooth finish, fill any scratches or dents with drywall compound, then sand those areas again with 220-grit sandpaper once dry. Repeat cleaning with a tack cloth to ensure no dust is left before moving on to priming and painting.
Primer: The First Coat
Getting the primer right is the foundation of a great paint job on MDF kitchen cabinets. First, you’ll need to pick the best primer for your needs. After that, the application process ensures the primer sets properly.
Choosing the Right Primer
Selecting the right primer is crucial. MDF is smooth and can be tricky to paint, so you’ll want a primer that adheres well to this type of surface.
Look for a high-quality, oil-based or shellac primer. These are the best for sealing MDF and preventing swelling from moisture.
Consider brands like KILZ or Zinsser, both known for their strong adhesion and coverage.
Oil-based primers are good for durability, though they can have a strong smell. Shellac primers dry quickly and also block stains. For ease, you might use a primer in a spray can for hard-to-reach areas.
Pro Tip: Always check the label for drying times and recommendations for topcoats.
Applying the Primer
Start by sanding your MDF cabinets with 120-grit sandpaper. This scuffs up the surface to help the primer stick. Ensure you clean off all dust with a damp cloth before you begin priming.
Use both a paintbrush and a small roller designed for doors and cabinets.
Begin at the top of the cabinet, brushing across the grain, then “tip off” by lightly stroking the wet primer in the direction of the grain. This helps achieve a smooth finish.
Let the first coat dry completely. This usually takes about 3-4 hours, but check your primer’s label for specific drying times.
After the first coat dries, lightly sand again with 220-grit sandpaper to smooth out any imperfections, then wipe clean.
Ensure the entire surface is covered evenly. Applying primer in thin, even coats is more effective than a thick coat, which can lead to drips and uneven coverage.
Painting Techniques and Tips
Painting MDF kitchen cabinets can feel like a big job, but don’t worry! With the right techniques and tips, you’ll get a smooth, professional finish.
Step by Step
- Prep the Cabinets
- Remove doors and hardware.
- Clean all surfaces to get rid of dirt and grease.
- Priming
- Use a good quality primer suitable for MDF.
- Tip: Brush the primer from one end to the other in a single stroke to avoid marks.
- Sanding
- Sand the surfaces lightly after priming.
- Use 220-grit sandpaper for a smooth finish.
Painting
- First Coat: Apply thin coats of paint with a brush or roller. Thin coats dry faster and give a smoother finish.
- Second Coat: Check if the first coat is patchy. If yes, apply another thin coat.
- Brushing Technique: Always brush in the direction of the grain for a smooth finish.
- Tipping Off: Lightly pass the brush over the wet paint to smooth out any brush strokes.
Tools You’ll Need
- Brushes: Use high-quality brushes for better results.
- Rollers: Ideal for larger flat surfaces.
- Sandpaper: Essential for a smooth finish.
- Primer and Paint: Make sure to select paints and primers suitable for MDF.
Pro Tips
- Temperature: Paint in a well-ventilated area with a temperature between 50°F to 85°F.
- Drying Time: Allow each coat to dry completely before moving on to the next step.
- Sealing: Finish with a clear sealant to protect the paint and make cleaning easier.
Adding the Finishing Touches
Now that you’ve applied the paint, your MDF kitchen cabinets are almost ready! It’s time to add those last details to ensure they look perfect and last long.
Applying a Sealant
Applying a sealant is crucial to protect your freshly painted cabinets. Allow the paint to dry completely before starting this step. Use a clear polyurethane sealant or water-based polycrylic. Polyurethane provides a durable finish, ideal for kitchen cabinets.
- Preparation: Stir the sealant gently to avoid air bubbles.
- Application: Use a high-quality brush or foam roller. Apply thin, even coats.
- Drying Time: Let each coat dry for at least 4 hours. Lightly sand between coats with 220-grit sandpaper to ensure smoothness.
Sealants not only protect your paint job but also add a subtle sheen that enhances the finish.
Reattaching Hardware
Once your cabinets are sealed and dry, it’s time to reattach the hardware. This step adds functionality and style to your cabinets. Make sure all the hardware—hinges, handles, and knobs—are clean and in good condition.
- Checking Alignment: Use a level to ensure hinges are straight. Misaligned hinges can cause the doors to hang improperly.
- Tools Needed: Keep a screwdriver or drill handy for this task.
- Order of Reattachment: Start with hinges, then move to handles or knobs.
If you’re considering updating your hardware, this is the perfect moment to do so. New handles or knobs can give a fresh look to your cabinets.
Cabinet Reinstallation
Finally, reinstall your cabinets. This task requires precision to ensure everything looks and functions as it should.
- Preparation: Check that all the screw holes are pre-drilled. This makes the installation easier and prevents splitting the wood.
- Mounting: Make sure the cabinets are level. Start with the upper cabinets before moving to the lower ones.
- Securing: Use strong, appropriate screws for your wall type. Secure the cabinets tightly, but avoid overtightening as this can damage the material.
Maintenance and Care
Regular maintenance keeps your MDF kitchen cabinets looking great and lasting longer. Following these simple steps will help you maintain the beauty and functionality of your cupboards.
Routine Cleaning Tips
Keeping your painted MDF cabinets clean is essential. Use a soft, damp cloth to wipe down the surfaces at least once a week. Avoid harsh chemicals; instead, opt for mild soap and water.
- Mix a few drops of mild dish soap with warm water.
- Dip the cloth in the soapy water and wring it out.
- Gently wipe the cabinet surfaces.
Make sure to dry the cabinets with a clean towel right after cleaning to prevent moisture damage. Avoid abrasive sponges and brushes as they can scratch the paint finish.
Touch-Up Tricks
For minor scratches or chips, having a quick touch-up kit handy can be a lifesaver. Here’s how you can deal with small damages:
- Identify the paint color: Keep a small container of your cabinet’s original paint.
- Clean the area: Make sure the spot is clean and dry.
- Apply paint: Use a fine brush to cover the scratch or chip.
Let the paint dry completely. For deeper gouges, use a bit of wood filler before applying the paint. Always follow up with a clear sealer to match the finish.
Long-Term Care for Painted Cabinets
Long-term care involves protecting and maintaining the cabinet surface. Avoid direct sunlight on the cabinets, as it can fade the paint over time. Use window treatments to shield from UV rays.
Periodically inspect hinges and handles. Tighten any loose screws and apply lubrication if needed. Also, check the cabinet insides for signs of moisture or mold.
Changing your air filter regularly can reduce dust buildup, keeping your cabinets cleaner longer. Additionally, consider applying a fresh coat of sealer every few years to keep the surfaces protected and looking new.
Design Ideas and Inspiration
When painting MDF kitchen cabinets, it’s key to think about color trends, hardware, and styling to create a cohesive and stylish design. Let’s explore some popular ideas to spark your creativity.
Color Trends and Combinations
Choosing the right color can make a big impact. Navy blue and forest green are trendy options that add sophistication. Soft pastels like mint green or blush pink can create a lighter, more relaxed feel.
Two-tone cabinets are another popular choice. Painting the upper cabinets a lighter color and the lower cabinets a darker shade can add depth to your space. For instance, white on top and gray on the bottom is a classic combination.
Consider also using bold colors on an accent cabinet or an island to create a focal point.
Incorporating Hardware and Accessories
Hardware can change the whole look of your kitchen. Matte black handles and knobs are modern and sleek, while brass or gold can add a touch of luxury. Don’t be afraid to mix metals – it can add visual interest.
Think about the style of the hardware too. Simple, clean lines give a contemporary feel, while more ornate pieces can lend a vintage or farmhouse vibe.
Accessories like hooks and pot racks add both style and function. For a cohesive look, match these with your cabinet hardware.
Styling Your Renovated Space
After painting and updating hardware, it’s time to style your kitchen. Open shelving with neatly stacked dishes or cookbooks can make the space feel more open.
Incorporate decor like framed artwork, potted plants, or colorful dish towels. These small touches can make your kitchen feel inviting and personalized.
Consider adding a stylish backsplash. Subway tiles are classic, while geometric patterns can be more modern.
Frequently Asked Questions
Discover the best ways to paint your MDF kitchen cabinets to achieve a professional finish. Here are some common questions and clear answers to help you through the process.
What type of paint ensures the best finish on MDF kitchen cabinets?
For the best finish, use an acrylic latex paint or enamel. These types of paint provide a smooth and durable surface. Eggshell and satin finish paints are also popular choices for their easy-to-clean properties and subtle sheen.
Can you achieve a professional look by painting MDF kitchen cabinets yourself?
Absolutely, you can achieve a professional look. By following the right preparation steps and using appropriate tools like high-quality brushes or sprayers, you can get a smooth and even finish. Taking your time with each step is key.
What preparation steps are necessary before painting MDF cabinets?
First, clean the cabinets to remove dust and grease. Then, sand the surface with 120-grit sandpaper. After that, apply a primer to ensure the paint adheres well. These steps create a perfect base for a smooth application of paint.
Get the Fail-Safe Paint Color Playbook (Free PDF)
36 proven colors • 8 ready palettes • trim & sheen guide • printable testing cards.
Is it necessary to prime MDF before painting, and what primer should be used?
Yes, priming is essential. Use a high-quality, oil-based primer or a shellac-based primer. These primers seal the MDF and prevent moisture absorption, thus ensuring a smooth and durable paint finish.
What’s the best way to prevent brush marks when painting MDF cabinets?
To prevent brush marks, use a high-quality synthetic brush or a foam roller. Apply multiple thin coats rather than one thick one. Sand lightly between coats with fine-grit sandpaper (220-grit) to maintain a smooth surface.
How can you achieve a high-gloss finish on MDF kitchen cabinetry?
For a high-gloss finish, use a high-gloss enamel paint. Apply multiple thin coats. Then, sand between each with 220-grit sandpaper.
Finally, use a clear gloss polyurethane to seal and protect the finish. This will give it a reflective sheen.