
How To Fix Spray Paint Drips: Restore a Smooth, Flawless Finish
Spray paint drips can really mess up a project, but honestly, they’re not that tough to fix. You can wipe drips off while the paint’s still wet, or if it’s already dried, you’ll need to sand and repaint that area.
If you catch a drip early, just use a soft brush or cloth to smooth it out. But if the paint’s hardened, you’ll have to scrape off the drip, sand it flat, and repaint to blend it with the rest.
Spotting and fixing drips saves you a lot of hassle and helps your project look sharp. Here’s a straightforward guide to getting a smooth, drip-free finish every time.
Understanding Spray Paint Drips
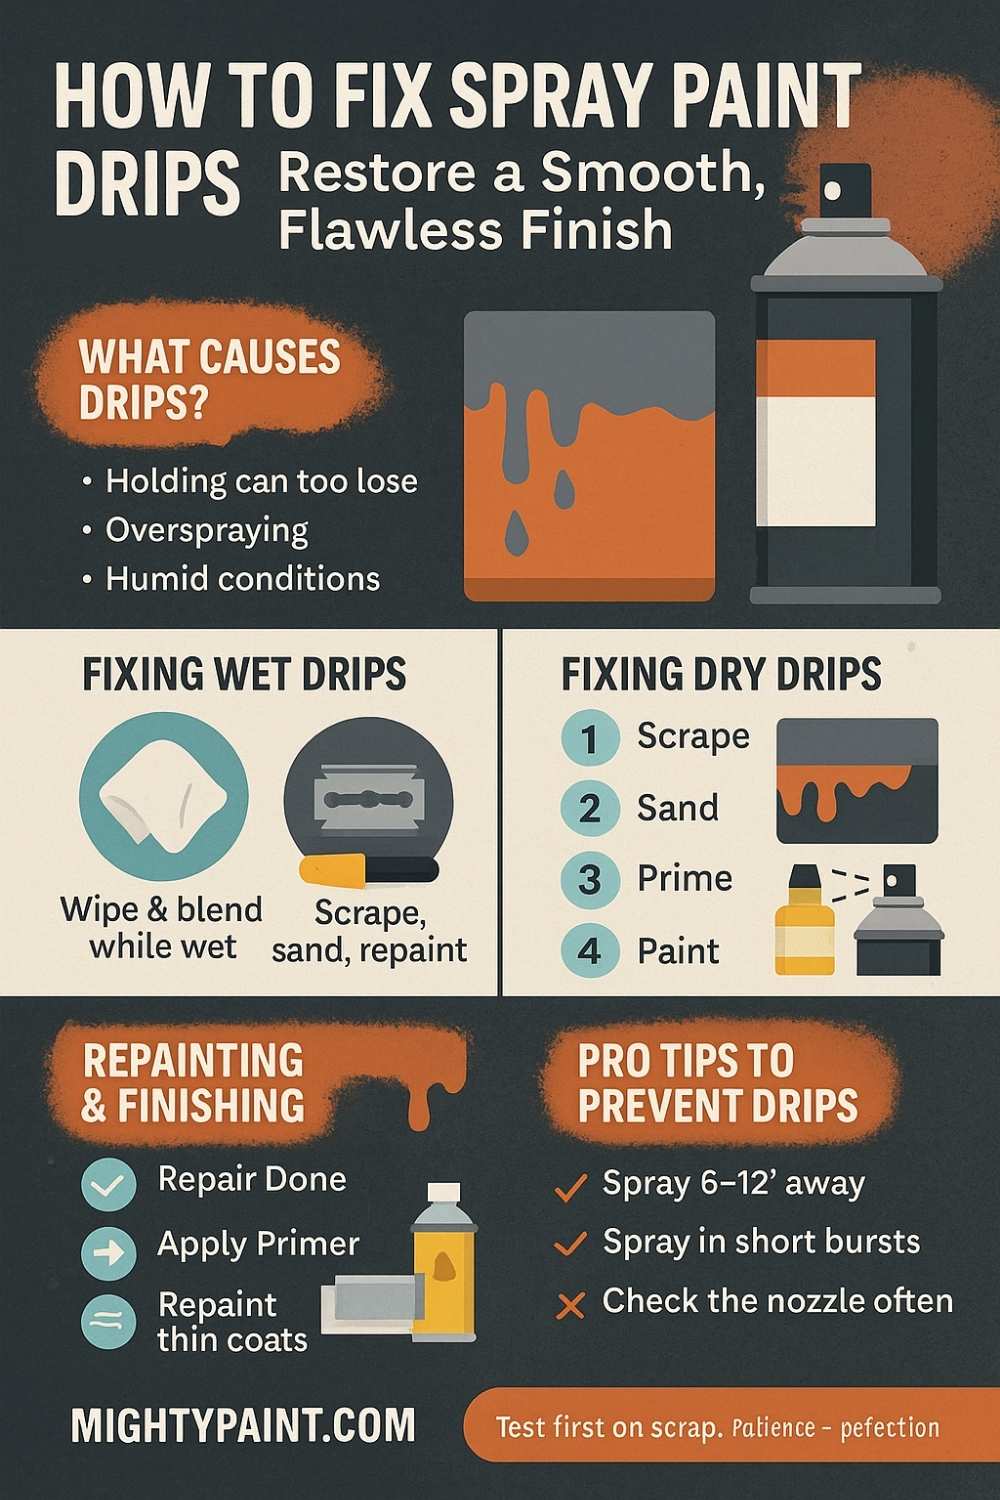
Drips happen when you spray too much paint and it starts running down the surface. They can show up in a few different ways, and each type messes with your finish a bit differently. If you know what causes them, you can catch problems faster.
Common Causes of Drips and Runs
Most of the time, drips show up because you’ve sprayed too much paint in one spot. Maybe you held the can too close or stayed in one spot too long. That extra paint just can’t stay put—it runs.
Weather matters too. If it’s humid or chilly, paint dries slower, and drips are more likely.
Stopping the spray in the middle of a pass, spraying at weird angles, or using cheap, watery paint can make things worse. All those little mistakes add up.
Try to keep your spray can about 6 to 12 inches away and move in a steady, even motion. Don’t let the paint pile up in one place.
Types of Spray Paint Drips
There’s wet drips—those fat paint drops that hang there before they dry. You can usually wipe these away if you’re quick.
Then there are dry drips. These have already hardened and look like bumps or little ridges. Fixing those takes more work: scraping and sanding.
Paint runs are a special kind of drip—long streaks where the paint just kept sliding down. Usually, that’s from too much paint collecting at the top and gravity doing its thing.
Figuring out if a drip is wet or dry helps you fix it faster and with less hassle.
Impact on Surface Finish
Drips make your finish look lumpy and kind of amateur. They catch the light and cast shadows, so you can’t really hide them.
Thick drips can make paint peel later, since those layers don’t bond well. That just makes things worse over time.
Drips and runs also grab dust and dirt, roughing up the surface. That can make the color look uneven or blotchy.
Preparing the Area for Repair
Before you fix drips, you’ve got to find them all, clean the surface, and take some safety steps. This sets you up for a smoother repair.
Identifying and Marking Drip Locations
Check your painted surface in good light. Drips usually look like bumps or thick spots. Run your hand over the area—you’ll feel them if you missed any.
Mark the spots with painter’s tape or a pencil dot. If you’re working on a big area, go in sections so you don’t lose track.
Don’t rush this. Finding every drip now saves you work later and helps your repair blend in better.
Cleaning and Surface Preparation
Wipe the area with a damp cloth to get rid of dust, dirt, or grease. If the paint is still tacky, let it dry before cleaning.
Once it’s clean, gently scrape off raised drip edges with a razor blade or paint scraper. Try not to scratch the good paint. Then use fine-grit sandpaper (about 220 grit) and sand just the dripped parts.
After sanding, wipe away dust with a clean cloth. This helps the new paint stick and look even.
Safety and Ventilation Precautions
Work in a spot with good airflow—open a window or use a fan. You don’t want to breathe in dust or paint fumes.
Wear a dust mask or respirator, especially if you’re sanding indoors. Goggles help keep dust and splatters out of your eyes.
Gloves and long sleeves are a good idea, especially when you’re spraying or priming. Better safe than sorry, right?
How to Fix Wet Spray Paint Drips
It’s way easier to fix drips while the paint’s still wet. You just need to be gentle so you don’t mess up the area around the drip. The right tools and a light touch can help smooth things out fast.
Wiping and Blending Techniques
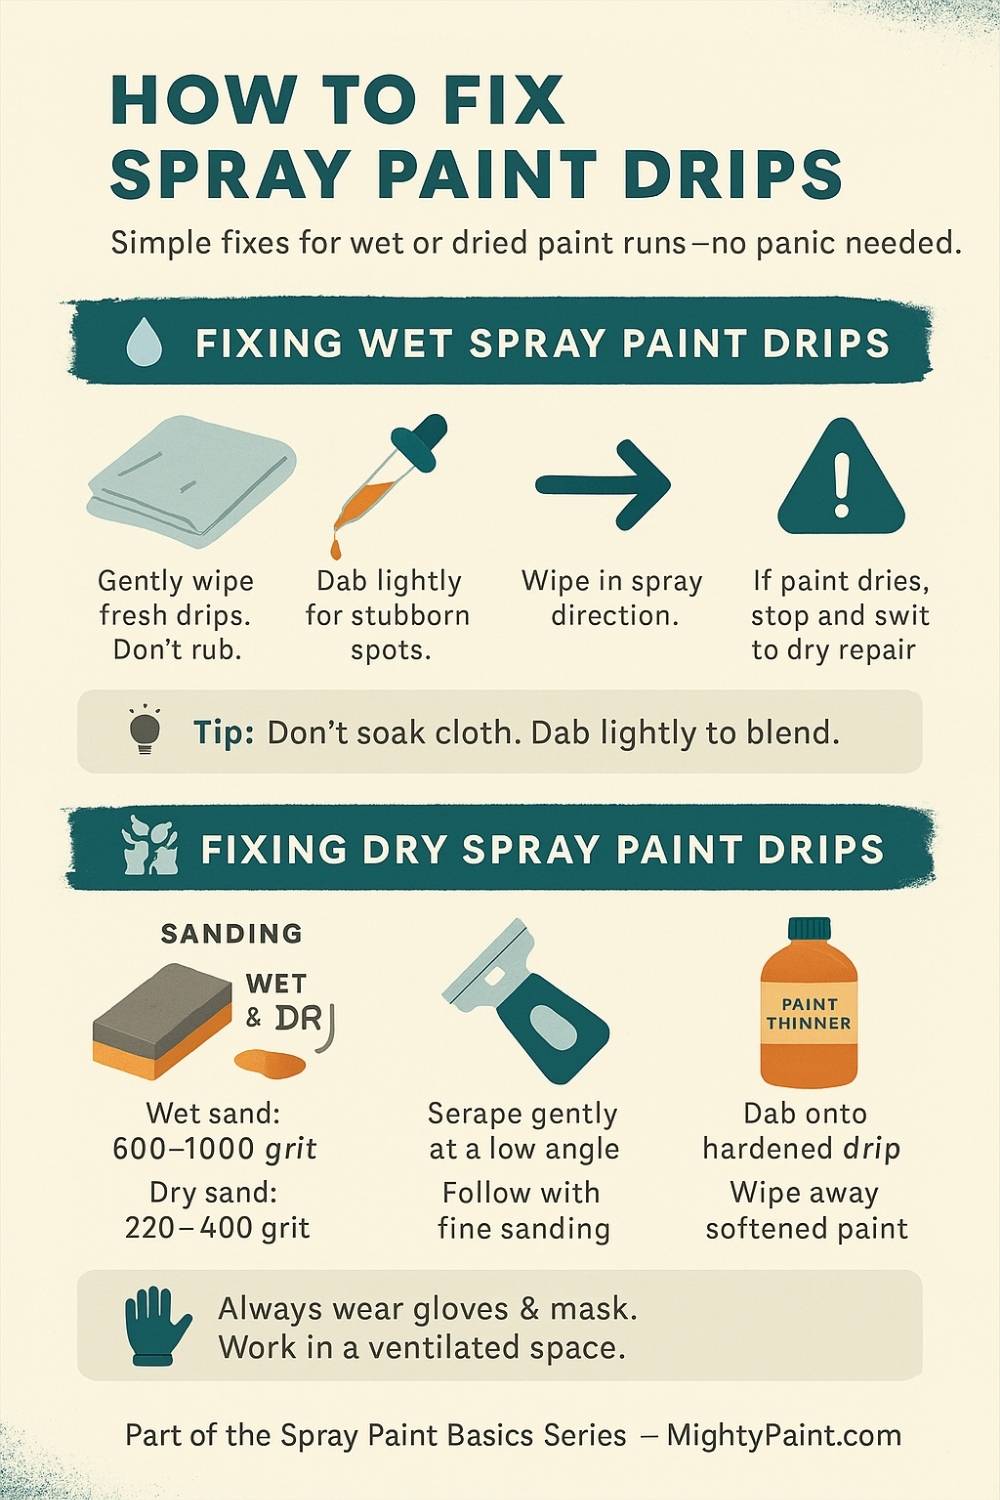
If you spot a fresh drip, grab a clean, soft cloth or paper towel. Gently wipe off the extra paint—don’t rub hard or you’ll just smear it everywhere.
A little paint thinner on the cloth can help with stubborn spots. Just dip lightly and dab, don’t soak. This thins the paint and helps blend the drip into the rest.
Try wiping in the same direction as the spray went down. Keep an eye on your work and stop before you wipe off too much paint.
Using a Brush or Rag for Fresh Drips
If wiping isn’t cutting it, grab a soft brush or lint-free rag. You can dampen it a bit with paint thinner for more control.
Lightly drag the brush or rag over the drip, following the direction of the spray. This spreads out the thick paint and evens the area.
Go slow and don’t rush. If the paint starts drying or getting sticky, just stop and wait for it to dry before you try sanding or repainting.
How to Fix Dry Spray Paint Drips
Fixing dried drips takes a little patience. You need to smooth out the raised paint without messing up the surface underneath. Sandpaper, razor blades, and paint thinner are your best friends here.
Wet Sanding or Dry Sanding Methods
You can use either wet or dry sanding. Wet sanding keeps dust down and helps avoid scratches—just soak some fine-grit sandpaper (600–1000 grit) in water for a few minutes first.
Sand gently in one direction, using light pressure. Check your progress often. Dry sanding (220–400 grit) works for rougher drips, but it’s dustier. Always clean up dust before you repaint.
Using a Razor Blade or Paint Scraper
Carefully scrape the raised drip with a razor blade or paint scraper. Hold it at a low angle and work slowly, aiming just for the drip.
Don’t press too hard. After scraping, smooth things out with fine-grit sandpaper. Always scrape away from yourself and wear gloves.
Applying Paint Thinner Safely
Paint thinner can soften hard drips, making them easier to remove. Dab a little on a cloth and gently touch the drip—try not to get it on the surrounding paint.
Work somewhere with good airflow and wear gloves. Let the thinner sit for a few minutes, then carefully wipe or scrape off the softened drip. Always test thinner on a hidden spot first to make sure it won’t mess up the paint underneath.
Repainting and Finishing Touches
Fixing drips isn’t just about sanding. You’ve got to prep the surface, repaint with care, and add a top layer for a finish that’ll last.
Applying Primer After Repair
Once you’ve sanded out the drips, primer is your next step. It fills in tiny scratches and helps your new paint stick. Definitely prime if you sanded down to bare surface or skipped primer before.
Use a light, even coat—don’t go heavy or you’ll just get more drips. Let it dry all the way before painting over it. That keeps the color from soaking in weird and stops blotches.
Reapplying Spray Paint for a Smooth Finish
When you repaint, hold the can 8 to 12 inches from the surface. Move smoothly, don’t let the paint pile up.
Go for several light coats instead of one thick one. Let each coat dry before the next. This keeps runs away and gives you a nice, even finish.
Spray a little past the edges of your repair to blend it in. Try not to pause or focus on one spot too long—overspray will build up fast.
Using Clear Coats for Protection
Once your spray paint dries, you might want to add a clear coat. It helps shield your paint from scratches, fading, and weather.
Spray the clear coat in thin, even layers—just like the paint. Hold the can at a steady distance and spray with a smooth motion. Drips and patchy spots? Those happen if you rush or spray too close.
Clear coats bump up the shine, too. If your project lives outside, look for a UV-resistant option so the colors don’t fade fast.
Wait for the paint to fully cure before adding clear coat, or you risk trapping moisture or creating bubbles. Patience pays off here.
Preventing Future Spray Paint Drips
If you want to stop spray paint drips before they show up, focus on your technique, tweak the spray nozzle, and watch your distance. How much paint you spray at once matters—a lot. These steps can save you from headaches like overspray or patchy spots that just look off.
Proper Spray Painting Techniques
Keep the spray can steady and glide it smoothly across the surface. Start spraying just before you hit the object, then stop right after you pass it. That way, you don’t get heavy edges.
Use light, even coats. If you pile on too much paint in one area, you’ll get runs. Several thin layers work way better, and letting each one dry before the next keeps things tidy.
Try not to pause or hover over one spot. Paint pools up fast and then drips. Watch for heavy areas, and catch any trouble early if you can.
Adjusting the Spray Nozzle and Distance
Check your spray nozzle—make sure it’s clean and spraying right. A clogged nozzle spits out weird patterns or dumps too much paint at once.
Hold the can about 6 to 12 inches from whatever you’re painting. Get too close and you’ll flood the surface, which just begs for drips.
Test the spray on a scrap piece or cardboard first. You get a feel for the pattern and flow before you go for the real thing. It’s worth the extra minute.
Controlling Paint Flow and Layer Thickness
Spray in short bursts—not a constant stream—to keep overspray in check and control how much paint you’re putting down.
Move the spray evenly and don’t linger in one spot. Hanging out too long in one area just piles up the paint and, well, nobody likes drips.
If you can, go for good paint. Thicker stuff tends to cover better and doesn’t run as much as those watery brands.
Give each layer time to dry before you hit it again. If you rush and stack wet layers, you’re just asking for a mess.